Introduzione
This manual provides detailed instructions for the installation, operation, and maintenance of your Topvision Top808 8-Camera 1080P Lite DVR Security System. Please read this manual thoroughly before using the product to ensure proper setup and functionality. Keep this manual for future reference.
The Topvision Top808 system includes an 8-channel 1080P Lite DVR and eight 2MP 1080P bullet cameras, designed for both indoor and outdoor surveillance with night vision capabilities.
Contenuto della confezione
Verifica che tutti gli articoli siano presenti nel tuo pacco:
- 1x Topvision XDVR-1008 8-Channel 1080P Lite DVR
- 8x Topvision TCB200 2MP 1080P Bullet Cameras (Indoor/Outdoor)
- 8x 18-meter BNC Video/Power Cables
- 1x adattatore di alimentazione per DVR
- 1x Power Adapter for Cameras
- 1x 8-way Power Splitter for Cameras
- 1x mouse USB
- Manuale dell'utente (questo documento)
- Viti e tasselli di montaggio per telecamere

Immagine: Oltreview of the Topvision Top808 security system kit, showing the DVR, eight cameras, cables, power adapters, and a mouse. Icons indicate 2MP resolution, indoor/outdoor use, mobile app compatibility, and night vision.
Configurazione e installazione
1. Hard Drive Installation (Optional, Not Included)
The DVR requires a 3.5-inch SATA hard drive (up to 8TB, WD Purple recommended) for recording. If you plan to record video, install a hard drive before powering on the DVR.
- Svitare e rimuovere il coperchio superiore del DVR.
- Collegare il cavo dati SATA e il cavo di alimentazione dal DVR al disco rigido.
- Fissare il disco rigido allo chassis del DVR utilizzando le viti fornite.
- Riposizionare il coperchio superiore e fissarlo con le viti.
2. Collegamento del DVR

Immagine: anteriore e posteriore views of the Topvision DVR, highlighting BNC video inputs, audio inputs/outputs, HDMI, VGA, LAN, and USB ports.
- Collega le telecamere: Attach one end of each 18-meter BNC cable to a camera and the other end to a BNC video input port on the back of the DVR.
- Collegare l'alimentazione alle telecamere: Connect the camera power cables to the 8-way power splitter, then connect the power splitter to the camera power adapter. Plug the adapter into a power outlet.
- Connetti il monitor: Connect a monitor to the DVR using either an HDMI or VGA cable (cables not included).
- Connetti il mouse: Collegare il mouse USB a una delle porte USB del DVR.
- Connetti rete (facoltativo): Per telecomando viewPer farlo, collega un cavo Ethernet dalla porta LAN del DVR al router.
- Accensione del DVR: Connect the DVR power adapter to the DVR and then to a power outlet. The system will boot up.
3. Posizionamento della telecamera

Immagine: Primo piano view of multiple Topvision 1080P bullet cameras, emphasizing their 2MP resolution and night vision capabilities for indoor/outdoor use.
- Mount cameras in desired locations, ensuring a clear field of view.
- The cameras are designed for both indoor and outdoor use.
- Adjust the camera angle and focus as needed after installation.
Istruzioni per l'uso
1. Installazione guidata iniziale
Al primo avvio, il DVR ti guiderà attraverso una procedura guidata di configurazione iniziale. Segui le istruzioni sullo schermo per:
- Set language, date, and time.
- Crea una password amministratore.
- Configurare le impostazioni di rete (DHCP consigliato per semplicità d'uso).
- Format the hard drive (if installed).
2. Vivere View
Dopo l'installazione, il DVR visualizzerà il live view da tutte le telecamere collegate sul monitor. È possibile passare dalla visualizzazione a una singola telecamera view, multi-camera view, and sequence display using the on-screen menu or mouse controls.
3. registrazione
The DVR supports continuous recording, scheduled recording, and motion-detection recording. Configure recording settings via the DVR's main menu:
- Vai a Menu principale > Registra > Programma di registrazione to set up recording times.
- Vai a Menu principale > Allarme > Rilevamento movimento to enable and configure motion detection for specific cameras.
4. Riproduzione
per riview registrato footage:
- Vai a Menu principale > Riproduzione.
- Select the date and time range, and the cameras you wish to view.
- Utilizzare i controlli di riproduzione (riproduzione, pausa, avanzamento rapido, riavvolgimento) per navigare attraverso il footage.
5. Remoto Viewing (App mobile)
To access your security system remotely via a smartphone or tablet:
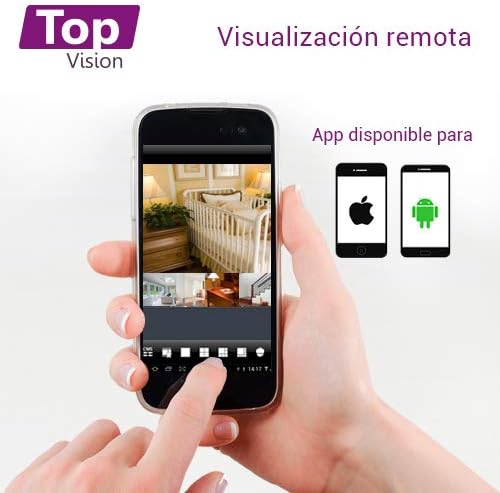
Image: A smartphone screen displaying live camera feeds, illustrating the remote viewing capability of the Topvision security system via a mobile application available for both Android and iOS.
- Assicurati che il DVR sia collegato alla rete tramite un cavo Ethernet.
- Download a compatible third-party surveillance app (e.g., XMEye, Danale, or similar apps recommended by Topvision support) from your device's app store (Android or iOS).
- Registra un account all'interno dell'app.
- Add your DVR device to the app using its serial number or QR code (found in the DVR's network settings).
- Una volta aggiunto, puoi view live feeds, playback recordings, and receive alerts remotely.
Manutenzione
- Pulizia: Gently wipe cameras and DVR with a soft, dry cloth. Avoid harsh chemicals.
- Aggiornamenti del firmware: Periodically check the Topvision websito o contattare l'assistenza per gli aggiornamenti firmware disponibili, per garantire prestazioni e sicurezza ottimali.
- Stato del disco rigido: Monitor the hard drive status through the DVR's menu. Replace if errors are detected.
- Connessioni via cavo: Periodically inspect all cable connections for secure fit and signs of wear or damage.
Risoluzione dei problemi
- Nessun segnale video:
- Controllare tutti i collegamenti dei cavi BNC tra le telecamere e il DVR.
- Ensure cameras are receiving power from the power adapter and splitter.
- Verify the monitor is correctly connected to the DVR via HDMI/VGA and is set to the correct input.
- Il DVR non registra:
- Confirm a hard drive is installed and properly connected.
- Check if the hard drive has been formatted (Main Menu > HDD > HDD Manage).
- Verify recording schedules are configured correctly (Menu principale > Registra > Programma di registrazione).
- Controllare lo stato del disco rigido per eventuali errori o capacità massima.
- Remoto Viewing non funziona:
- Assicurarsi che il DVR sia connesso a Internet tramite un cavo Ethernet.
- Check network settings on the DVR (Menu principale > Rete) to ensure it has an IP address.
- Verify the mobile app is correctly configured with the DVR's device ID.
- Check your router's firewall settings if connection issues persist.
- Scarsa qualità dell'immagine:
- Clean camera lenses if dirty.
- Assicurare un'illuminazione sufficiente per una visione ottimale durante il giorno.
- For night vision, ensure no obstructions are blocking the infrared LEDs.
Specifiche
| Componente | Specificazione |
|---|---|
| DVR Model | XDVR-1008 |
| Ingresso video | 8 Channels (BNC) + 1 IP Channel |
| Risoluzione video | 1080P Lite |
| Modello di fotocamera | TCB200 |
| Risoluzione della fotocamera | 2MP (1080P) |
| Lente | 2.8 millimetri |
| Visione notturna | LED a infrarossi |
| Magazzinaggio | Supports 1x SATA HDD up to 8TB (not included) |
| Uscita video | HDMI, VGA (simultaneous) |
| Connettività | Wired (Ethernet for network) |
| Dimensioni (DVR) | Dimensioni: 30 x 25 x 7 cm |
| Weight (System) | 5.85 kg |
Informazioni sulla garanzia
Topvision products are covered by a limited warranty. Please refer to the warranty card included with your product or visit the official Topvision websito per termini e condizioni dettagliati. Conservare la prova d'acquisto per eventuali reclami in garanzia.
Assistenza clienti
For technical assistance, troubleshooting, or product inquiries, please contact Topvision customer support. Refer to the contact information provided in your product packaging or on the official Topvision websito.
Online resources such as FAQs and video tutorials may also be available on the Topvision support page.