
1. Introduzione
1.1 Prodotto finitoview
The JUNG HOME BTLS1791WW is a durable and robust room thermostat designed for precise temperature control in your living space. It features a clear digital display and intuitive controls for easy operation, helping you maintain a comfortable environment efficiently.
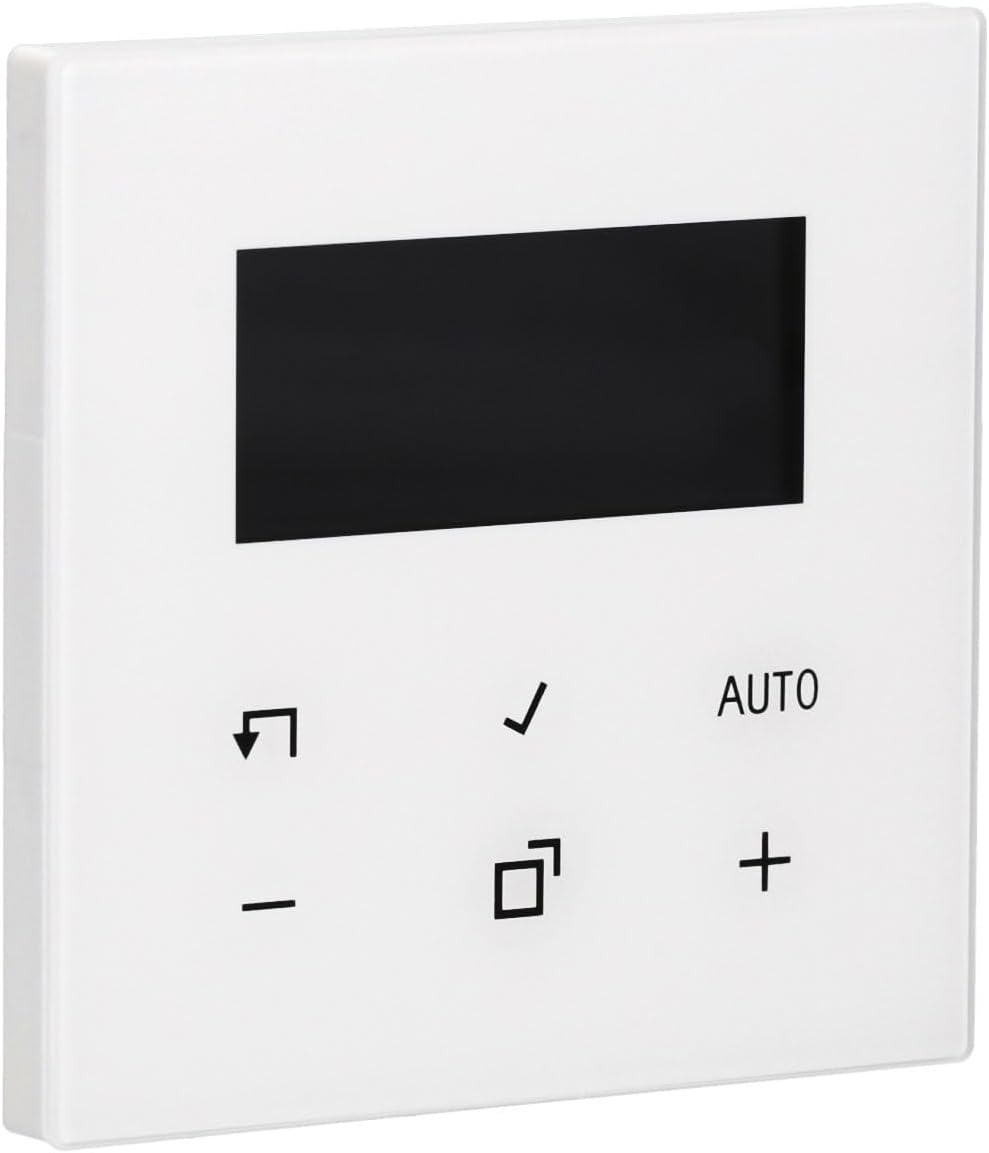
Immagine 1.1: anteriore view of the JUNG HOME BTLS1791WW Room Thermostat. The device is white with a black rectangular display at the top and several control icons and text below it.
1.2 Contenuto della confezione
- JUNG HOME BTLS1791WW Room Thermostat
- Hardware di installazione
- Manuale dell'utente (questo documento)
2. Informazioni sulla sicurezza
Please read all safety instructions carefully before installing or operating the device. Failure to follow these instructions may result in property damage, personal injury, or death.
- Sicurezza elettrica: Always disconnect power to the circuit at the main breaker before performing any installation, wiring, or maintenance.
- Installazione professionale: L'installazione deve essere eseguita da un elettricista qualificato, nel rispetto di tutti i codici e le normative elettriche locali.
- Ambiente: Do not expose the device to moisture, water, or extreme temperatures. Ensure the installation location is dry and within the specified operating temperature range.
- Cablaggio: Ensure all wiring connections are secure and correctly polarized. Incorrect wiring can damage the device or pose a fire hazard.
3. Configurazione e installazione
Follow these general steps for installing your JUNG HOME BTLS1791WW Room Thermostat. For detailed wiring diagrams, refer to the separate installation guide provided with the product or consult a qualified electrician.
3.1 Montaggio
- Scollegare l'alimentazione: Turn off the power to the thermostat's circuit at the main electrical panel.
- Rimuovere il vecchio termostato (se applicabile): Carefully remove your existing thermostat, noting the wiring connections.
- Posizionamento: Secure the JUNG HOME BTLS1791WW thermostat to a standard flush-mounted electrical box using the provided installation hardware. Ensure it is level.

Immagine 3.1: Lato view of the JUNG HOME BTLS1791WW Room Thermostat, illustrating its depth and the mounting tabs on the side for secure installation.
3.2 Cablaggio
- Collegare i fili: Connect the electrical wires from your heating/cooling system to the appropriate terminals on the back of the thermostat. Refer to the wiring diagram in your specific installation guide.
- Connessioni sicure: Assicurarsi che tutti i collegamenti dei cavi siano ben saldi e sicuri per evitare contatti allentati.

Immagine 3.2: Indietro view of the JUNG HOME BTLS1791WW Room Thermostat, displaying the wiring terminals, model number (BTLS1791WW), and manufacturer details.
3.3 Accensione
- Ripristina alimentazione: Once the thermostat is securely mounted and wired, restore power to the circuit at the main electrical panel.
- Configurazione iniziale: The thermostat display should illuminate. Follow any on-screen prompts for initial setup, such as language selection or time setting.
4. Istruzioni per l'uso
The JUNG HOME BTLS1791WW thermostat is designed for user-friendly operation. Familiarize yourself with the display and control buttons.

Immagine 4.1: anteriore view of the JUNG HOME BTLS1791WW Room Thermostat with its display showing a temperature of 21.5°C and indicating 'AUTO' mode, along with other control icons.
4.1 Fine displayview
The central digital display shows key information:
- Temperatura attuale: The actual room temperature.
- Temperatura obiettivo: Impostazione della temperatura desiderata.
- Modalità operativa: Indicates the current mode (e.g., AUTO, Manual).
- Icone di stato: Additional icons may indicate heating/cooling activity, battery status, or other functions.
4.2 pulsanti di controllo
The thermostat features several buttons for control:
- + E - Pulsanti: Utilizzato per aumentare o diminuire la temperatura target.
- AUTO Pulsante: Toggles or selects the automatic operating mode.
- Segno di spunta Pulsante: Conferma le selezioni o accede alle opzioni del menu.
- Arrow/Return Pulsante: Used for navigation within menus or to go back.
- Icona quadrata Pulsante: Typically used for mode selection, programming, or accessing advanced settings.
4.3 Impostazione della temperatura
- Premere il tasto + or - pulsante per regolare la temperatura desiderata.
- The display will show the new target temperature.
- Premere il tasto Segno di spunta pulsante per confermare la selezione.
4.4 Selezione delle modalità operative
The thermostat may offer various operating modes:
- Modalità automatica: The thermostat automatically maintains the programmed temperature schedule.
- Modalità manuale: Il termostato mantiene costante la temperatura impostata dall'utente finché non viene modificata.
- Modalità programma: Allows you to set specific temperature schedules for different times of the day or week.
Utilizzare il AUTO pulsante o il Icona quadrata button to cycle through available modes or access programming options. Refer to the detailed programming section in your full manual for advanced scheduling.
5. Manutenzione
Una manutenzione regolare garantisce prestazioni ottimali e longevità del termostato.
- Pulizia: Clean the thermostat's surface with a soft, dry, lint-free cloth. Do not use abrasive cleaners, solvents, or chemical sprays, as these can damage the finish or internal components.
- Ventilazione: Ensure that any ventilation openings on the device are free from dust and debris to prevent overheating.
- Sostituzione della batteria (se applicabile): Se il modello in uso utilizza batterie, sostituirle una volta all'anno o quando sul display compare l'indicatore di batteria scarica.
6. Risoluzione Dei Problemi
Se riscontri problemi con il termostato, prova a seguire i seguenti passaggi per la risoluzione dei problemi:
- Nessun display / Nessuna alimentazione:
- Check the circuit breaker for the thermostat's circuit and reset if tripped.
- Verify that all wiring connections are secure and correct.
- Ensure the main power supply to the heating/cooling system is on.
- Lettura errata della temperatura:
- Assicurarsi che il termostato non sia esposto alla luce solare diretta, a correnti d'aria o a fonti di calore (ad esempio, lamps, elettrodomestici) che potrebbero influire sul suo sensore.
- Verify the thermostat is mounted at an appropriate height (typically 1.5 meters from the floor) in a central location.
- Il termostato non risponde:
- Try power cycling the device by turning off the circuit breaker for a few minutes and then turning it back on.
- If applicable, check and replace batteries.
- Riscaldamento/raffreddamento non attivati:
- Verify that the thermostat is set to the correct operating mode (e.g., Heat, Cool, Auto).
- Ensure the target temperature is set appropriately (e.g., higher than room temperature for heating, lower for cooling).
- Check if there are any error codes displayed on the screen and consult the full manual for their meaning.
- Confirm that your external heating/cooling system is functional.
If these steps do not resolve the issue, please contact JUNG customer support or a qualified technician.
7. Specifiche
| Caratteristica | Dettaglio |
|---|---|
| Marca | Giovane |
| Numero di modello | BTLS1791WW |
| Colore | Bianco |
| Dimensioni approssimative (L x P x A) | 43 x 13 x 13 cm (Note: These dimensions may refer to packaging) |
| Materiale | Costruzione in plastica durevole |
| Caratteristica speciale | Design robusto |
| Componenti inclusi | Hardware di installazione |
8. Garanzia e supporto
For detailed warranty information, terms, and conditions, please refer to the official JUNG website or the warranty card included with your product. For technical support, troubleshooting assistance beyond this manual, or to inquire about spare parts, please contact JUNG customer service directly.
In genere è possibile trovare le informazioni di contatto sul sito web del produttore websito o sulla confezione del prodotto.