
SanA 3 Switches in 1 Gang
SANA Smart Light Switch User Manual
Model: 3 Switches in 1 Gang
WiFi Wall Light Switch with APP Control, Compatible with Alexa and Google Home
1. Introduzione
The SanA Smart Light Switch is designed to provide wireless control of your home lighting using your existing Wi-Fi network. This device allows for remote control via a mobile application, voice commands through compatible smart assistants, and traditional manual operation. It integrates seamlessly into modern smart home ecosystems without requiring a separate hub.
Le funzionalità principali includono:
- Control lights from any location with internet access.
- Set schedules for lights to turn on or off automatically.
- Compatibilità con il controllo vocale con Amazon Alexa e Google Home.
- LED indicators for night navigation and status.
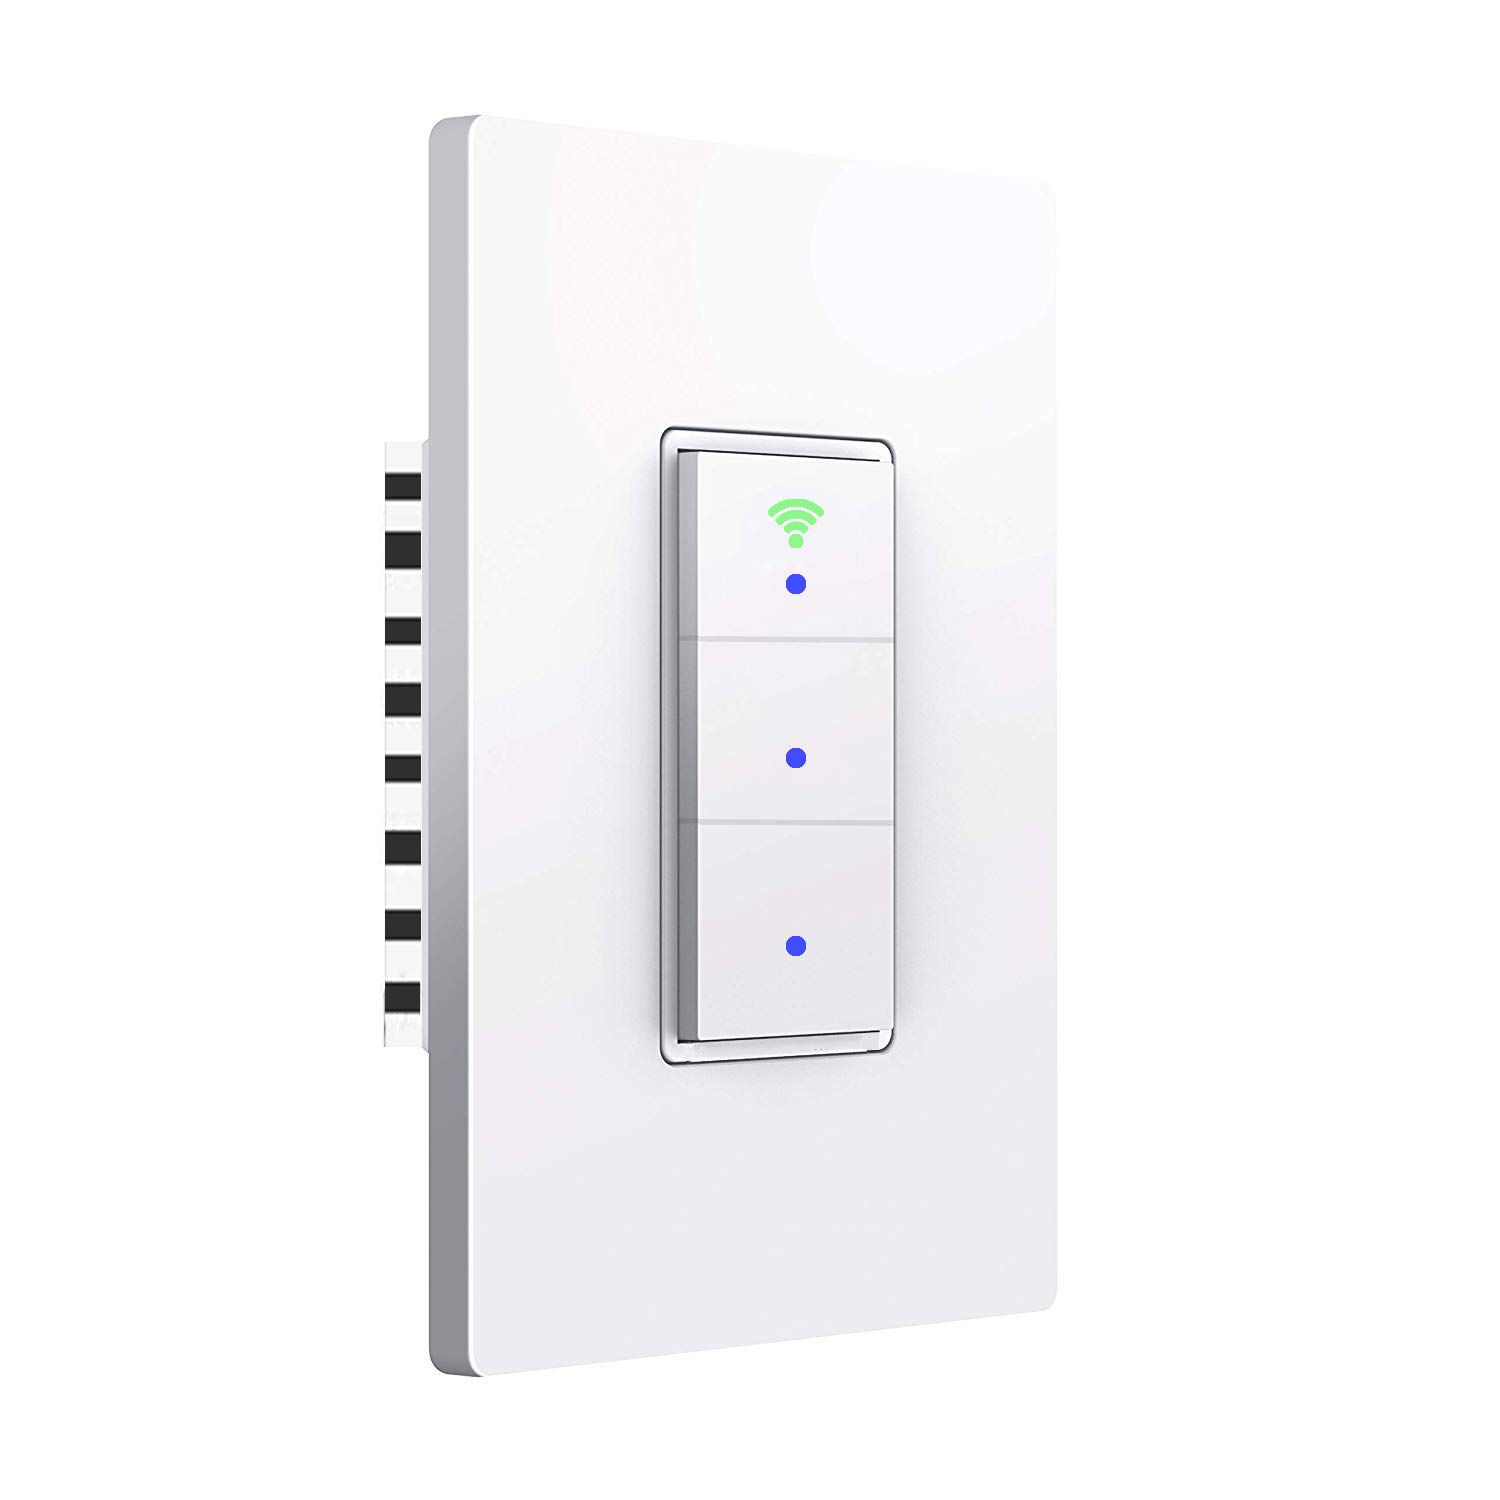
Immagine: Frontale view of the SanA Smart Light Switch, showing its three buttons and Wi-Fi indicator.
2. Informazioni importanti sulla sicurezza
ATTENZIONE: RISCHIO DI SCOSSE ELETTRICHE.
- Installation must be performed by a qualified electrician or a person with thorough knowledge of electrical wiring.
- Prima di installare o effettuare la manutenzione dell'interruttore, disattivare sempre l'alimentazione elettrica tramite l'interruttore automatico.
- Assicurarsi che l'interruttore sia dimensionato per il carico che dovrà controllare.
- This device requires a neutral wire for proper operation. If your existing wiring does not include a neutral wire, consult a professional electrician.
- Non installare con le mani bagnate o stando in piedi su superfici bagnate o bagnate.amp superfici.
- Utilizzare solo in ambienti chiusi.
3. Contenuto della confezione
Verificare che tutti i componenti siano presenti nella confezione:
- 1x SanA Smart Wall Light Switch (3 Switches in 1 Gang)
- 1x Manuale utente (questo documento)
- 2 viti per l'installazione
4. Specifiche del prodotto
| Caratteristica | Dettaglio |
|---|---|
| Tipo | Interruttore luce da parete intelligente |
| Materiale | PC flame retardant polymer, Copper, Brass |
| Volume di eserciziotage | CA 100 V-240 V/50 Hz~60 Hz |
| Max Power (Resistance Load) | 1100W / banda |
| Max Power (Capacitive Load) | 400W / banda |
| Corrente di lavoro | Massimo 10A |
| Umidità di lavoro | <80% |
| Protocollo radio | WiFi 2.4GHz (5GHz not supported) |
| Consumo energetico in standby | <0.1mA |
| Temperatura ambiente di funzionamento | -20 ~ 45 ° C (-4 ~ 113 ° F) |
| Life Long | >100,000 volte |
| Cambia dimensione | 5.04 x 3.31 x 0.91 pollici (12.8 x 8.4 x 2.3 cm) |
| Tipo di circuito | 3-way (Note: This switch is not a 3-way switch replacement, it controls 3 separate loads from one location) |
| Tipo di connettore | Senza fili |
| Tipo di attuatore | Premere il pulsante |

Image: Diagram showing the dimensions of the SanA Smart Light Switch: 5.04 inches height, 3.31 inches width, and 0.91 inches depth.
5. Guida all'installazione
5.1 Lista di controllo pre-installazione
- Cavo neutro richiesto: This smart switch requires a neutral wire for operation. Confirm your electrical box has a neutral wire (usually white). If not, consult a qualified electrician.
- Spegni: Before starting, turn off the power to the switch location at the circuit breaker. Verify power is off using a voltagetester.
- Rete Wi-Fi da 2.4 GHz: Ensure your home Wi-Fi network is 2.4GHz. This switch does not support 5GHz Wi-Fi.
5.2 Istruzioni per il cablaggio
- Disattivare la corrente elettrica tramite l'interruttore automatico.
- Rimuovere la piastra a muro esistente e l'interruttore dalla scatola a muro.
- Identificare i fili:
- Cavo sotto tensione (L): Solitamente nero, trasporta l'alimentazione dall'interruttore.
- Filo neutro (N): Usually white, required for the smart switch.
- Load Wires (Load1, Load2, Load3): Wires going to the light fixtures.
- Ground Wire (Optional): Solitamente rame verde o nudo.
- Connect the wires from the wall box to the corresponding terminals on the SanA Smart Light Switch using wire nuts (not included, but recommended for secure connections):
- Connect the Live wire to the 'L' terminal.
- Connect the Neutral wire to the 'N' terminal.
- Connect Load1 to the 'Load1' terminal, Load2 to 'Load2', and Load3 to 'Load3'.
- Connect the Ground wire (if present) to the 'Ground' terminal.
- Inserire con cautela l'interruttore cablato nella scatola a muro.
- Fissare l'interruttore alla scatola a muro con le viti fornite.
- Attach the new wall plate.
- Accendere l'alimentazione tramite l'interruttore.

Image: Detailed wiring diagram showing connections for Live, Neutral, Ground (optional), and three Load wires to the smart switch terminals.
5.3 Download e associazione dell'app
- Scarica l'App: Cercare "Smart Life" in the Apple App Store (for iOS) or Google Play Store (for Android) and download the application.
- Registrati/Accedi: Apri l'app Smart Life e registrati per un nuovo account oppure accedi se ne hai già uno.
- Aggiungi dispositivo:
- Tocca l'icona "+" nell'angolo in alto a destra dell'app per aggiungere un dispositivo.
- Select "Electrical" then "Switch (Wi-Fi)" or "Wall Switch".
- Follow the on-screen instructions to put the switch into pairing mode. This usually involves pressing and holding one of the switch buttons until the Wi-Fi indicator light blinks rapidly.
- Quando richiesto, inserisci il nome e la password della tua rete Wi-Fi a 2.4 GHz.
- The app will then search for and connect to the switch. Once connected, you can rename the switch and individual gangs within the app.

Image: Icons representing key features: Timing Function, Voice Control, Sharing, Remote Control, and 2.4GHz WiFi compatibility.
6. Istruzioni per l'uso
6.1 Controllo manuale
Each button on the switch functions as a traditional light switch. Press a button to toggle the connected light on or off.
The Wi-Fi indicator light on the switch will show its status:
- Luce blu: Indicates the switch is working and powered on.
- Luce verde: Indicates the switch is successfully connected to your Wi-Fi network.

Image: Illustration showing the smart switch with blue dots indicating power on, and a green Wi-Fi icon indicating network connection.
6.2 Controllo dell'app
Once paired, you can control your lights from the "Smart Life" app:
- Apri l'app Vita intelligente.
- Select your SanA Smart Light Switch from the device list.
- Tap on the individual switch icons within the app to turn lights on or off.
- You can also set up scenes, groups, and automations within the app for more advanced control.
6.3 Controllo vocale (Alexa e Google Home)
To enable voice control, link your Smart Life account to your Amazon Alexa or Google Home app:
- Apri l'app Alexa o Google Home.
- Vai alla sezione "Skill" (Alexa) o "Funziona con Google" (Google Home).
- Cercare "Smart Life" e abilita la competenza/servizio.
- Log in with your Smart Life account credentials.
- Once linked, discover devices (Alexa) or sync devices (Google Home).
- Ora puoi usare comandi vocali come:
- "Alexa, accendi la luce del soggiorno."
- "Hey Google, turn off kitchen light."
- "Alexa, set bedroom light to 50%." (If dimmable bulbs are used and supported by the switch/app)
6.4 Timer and Schedule Settings
The Smart Life app allows you to set schedules and timers for your lights:
- Pianificazione: Set specific times for lights to turn on or off daily or on selected days of the week.
- Conto alla rovescia: Set a countdown for a light to turn off after a certain duration.

Image: Screenshot of the Smart Life app interface showing the timer function, allowing users to set schedules for lights to work automatically.
6.5 Condivisione del dispositivo
You can share control of your smart switch with family members or other users through the Smart Life app. This allows multiple users to control the lights from their own devices.
7. Manutenzione
- Pulizia: To clean the switch, wipe it with a soft, dry cloth. Do not use abrasive cleaners or solvents. Ensure power is off before cleaning.
- Aggiornamenti del firmware: Periodically check the Smart Life app for firmware updates for your switch. Updates can improve performance and add new features.
- Stabilità della rete: Per prestazioni ottimali, assicurati che la rete Wi-Fi sia stabile e potente nella zona in cui è installato lo switch.
8. Risoluzione Dei Problemi
| Problema | Possibile causa/soluzione |
|---|---|
| Switch not turning on/off manually. |
|
| Cannot connect to Wi-Fi / App control not working. |
|
| Il controllo vocale non risponde. |
|
| Le luci tremolano o non si spengono completamente. |
|
| Switch feels warm. |
|
9. Garanzia e supporto
For any questions regarding installation, operation, or troubleshooting, please contact SanA customer support. Refer to the contact information provided on the product packaging or the seller's information on the purchase platform.
Questo prodotto è coperto dalla garanzia standard del produttore. Si prega di conservare la prova d'acquisto per eventuali reclami in garanzia.
For further assistance, you may visit the SanA official websito o contattare direttamente il loro team di supporto.
Ask a question about this manual
Ask about setup, troubleshooting, compatibility, parts, safety, or missing instructions. Manuals+ will review the question and use this page’s manual context to help answer it.