
DEKO DX-980N
DEKOPRO Deep Sea Solar Powered Welding Helmet User Manual
Model: DX-980N | Brand: DEKO
1. Introduzione
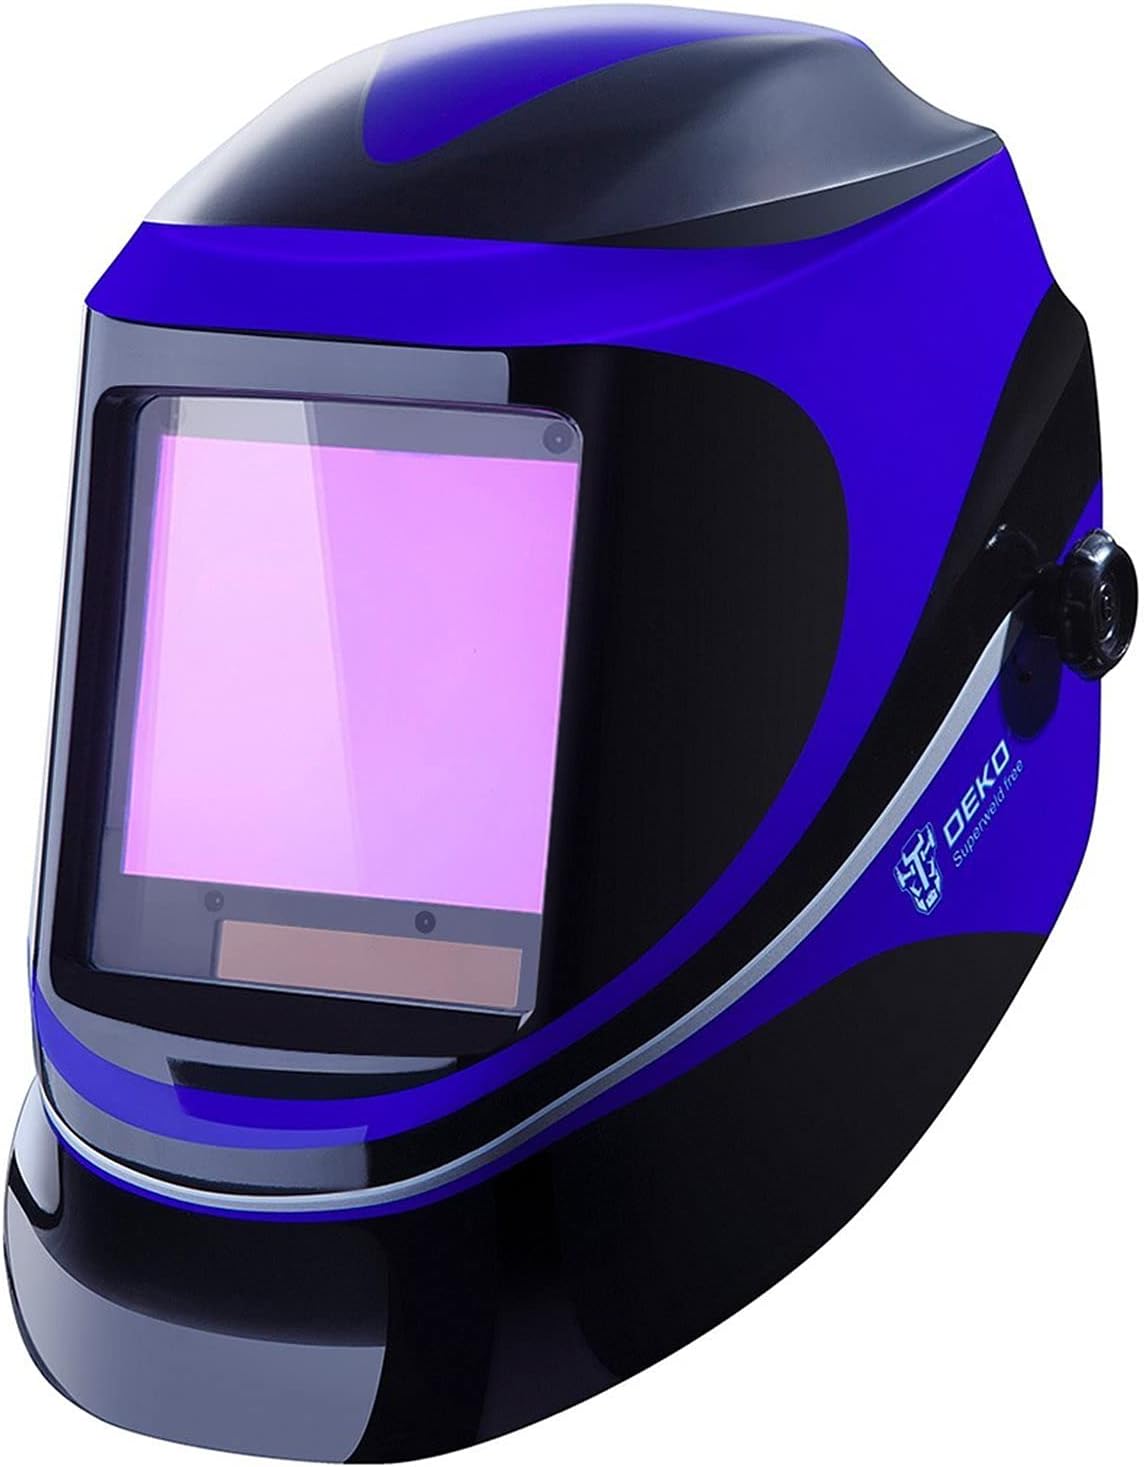
Figure 1.1: The DEKOPRO Deep Sea Solar Powered Welding Helmet.
This user manual provides essential information for the safe and effective operation, maintenance, and troubleshooting of your DEKOPRO Deep Sea Solar Powered Welding Helmet. Please read this manual thoroughly before use to ensure proper functionality and to prevent injury.
The DEKOPRO welding helmet is designed for professional and DIY household use, offering optimal eye protection with an auto-darkening filter that switches from light to dark in 1/25000 seconds. It meets ANSI Z87.1-2010 and EN379 4/9-13 safety standards, providing protection against UV and IR radiation even in case of electric failure.
Avvertenze di sicurezza
- Oltre al casco da saldatura, indossare sempre i dispositivi di protezione individuale (DPI) adeguati.
- Ensure the helmet is properly adjusted and fits securely before beginning any welding or grinding operation.
- Non utilizzare il casco se una qualsiasi parte è danneggiata o sembra non funzionare correttamente.
- The helmet is designed for eye and face protection against sparks, spatter, and harmful radiation under normal welding conditions. It is not suitable for laser welding or overhead welding applications.
- Proteggere il filtro auto-oscurante dal contatto con liquidi e da urti violenti.
2. Componenti finitiview
Familiarize yourself with the various components of your welding helmet for proper use and adjustment.

Figure 2.1: Labeled diagram of the DEKOPRO Welding Helmet and its Auto-Darkening Filter (ADF).
- Mask Shell: The main body of the helmet providing physical protection.
- Headgear Knob: Used to adjust the fit of the headgear for comfort and stability.
- Pannello solare: Powers the auto-darkening filter and extends battery life.
- 4 Sensors: Detect the welding arc to trigger the auto-darkening function.
- Filtro auto-oscurante (ADF): The electronic lens assembly that automatically darkens upon arc ignition.
- Pulsante di prova: Allows you to test the darkening function of the ADF without striking an arc.
- Indicatore di batteria scarica: Si illumina quando è necessario sostituire la batteria.
- Regolazione della sensibilità: Controls how sensitive the sensors are to light, allowing adjustment for different ambient lighting conditions.
- Regolazione del ritardo: Controls the time it takes for the lens to return to its light state after welding stops (0.1s to 1.0s).
- Shade 9-13 Adjustment: Rotary knob to select the desired shade level for welding.
- Weld/Grind Switch: Toggles between welding mode (auto-darkening) and grind mode (fixed light shade for grinding).
- Battery Exchange Compartment: Location for replacing the CR2450 battery.
3. Configurazione e utilizzo iniziale
3.1 Regolazione del copricapo
The helmet's headgear is fully adjustable to ensure a comfortable and secure fit. Adjust the top strap and the rear knob until the helmet sits firmly and comfortably on your head, allowing for easy flipping up and down without excessive movement.
3.2 Installazione/controllo della batteria
The helmet is powered by a combination of solar cells and a CR2450 lithium battery. The battery is typically pre-installed. Before first use, ensure the battery is properly seated in its compartment. The solar panel continuously charges the battery during use, extending its lifespan up to 5000 hours.
3.3 Protective Film Removal
Before using the helmet, locate and carefully remove any protective films from both sides of the auto-darkening filter lens. These films are present to prevent scratches during shipping and manufacturing.
3.4 Prova funzionale
Press the "Test" button on the auto-darkening filter. The lens should momentarily darken to a dark shade and then return to its light state. This confirms the ADF is functioning correctly. If it does not darken, check the battery and ensure all protective films are removed.
4. Istruzioni per l'uso
The DEKOPRO welding helmet offers various adjustments to optimize your welding experience across different applications.

Figure 4.1: Comparison of the lens in its inactive (light) and active (dark) states during welding.
4.1 Selecting Welding Mode or Grind Mode
Locate the "Weld/Grind" switch on the auto-darkening filter.
- Impostato su "Weld" for all welding processes. The lens will automatically darken when an arc is struck.
- Impostato su "Grind" for grinding operations. The lens will remain in a fixed light shade (DIN 4) to protect against sparks and debris while providing clear visibility.
4.2 Shade Level Adjustment (DIN 9-13)
The shade level can be adjusted using the rotary knob on the side of the ADF. Select a shade level appropriate for your welding process and amperage. Refer to standard welding shade charts for guidance. The helmet offers a variable shade range from DIN 9 to DIN 13.
4.3 Regolazione della sensibilità
The sensitivity knob controls how easily the sensors detect the welding arc and trigger the darkening function.
- Alta sensibilità: Use in low-light conditions or for low-amperage welding (e.g., TIG welding at 5A AC/DC).
- Bassa sensibilità: Use in bright ambient light or when other welders are working nearby to prevent false triggering.
4.4 Delay Adjustment
The delay knob controls the time it takes for the lens to return to its light state after the welding arc extinguishes.
- Ritardo breve (0.1 s): Suitable for tack welding or short welds to speed up work.
- Ritardo lungo (1.0 s): Recommended for high-amperage welding or when working with hot materials to protect eyes from residual glow.
4.5 Supported Welding Processes
This helmet is suitable for a wide range of welding processes, including:
- Manual Metal Arc (MMA) welding
- Metal Inert Gas (MIG) welding
- Metal Active Gas (MAG/CO2) welding
- Tungsten Inert Gas (TIG) welding (down to 5A AC/DC)
- Saldatura al plasma
- Sgorbia ad arco Arc
- Taglio al plasma

Figure 4.2: A welder utilizing the DEKOPRO helmet during a welding task, demonstrating its use in a practical setting.
5. Manutenzione
5.1 Pulizia del casco
- Clean the helmet shell with a mild soap and water solution. Avoid harsh abrasives or solvents.
- Wipe the auto-darkening filter and cover lenses with a soft, clean, lint-free cloth. Do not use abrasive cleaners or paper towels, as they can scratch the surfaces.
- Regularly inspect the front and inner cover lenses for scratches or damage. Replace them if visibility is impaired.
- Keep the solar panel clean and free of obstructions to ensure optimal charging.
5.2 Sostituzione della batteria
When the low battery indicator illuminates, it is time to replace the CR2450 lithium battery.
- Individuare il vano batteria sul filtro auto-oscurante.
- Aprire con cautela il coperchio del vano.
- Rimuovere la vecchia batteria CR2450.
- Inserire una nuova batteria al litio CR2450 da 3 V, assicurandosi della corretta polarità (+/-).
- Chiudere saldamente il coperchio del vano batterie.
- Perform a function test (Section 3.4) to confirm the new battery is working.
6. Risoluzione Dei Problemi
| Problema | Possibile causa | Soluzione |
|---|---|---|
| La lente non si scurisce quando si accende l'arco. |
|
|
| L'obiettivo sfarfalla o si oscura a intermittenza. |
|
|
| Scarsa visibilità attraverso l'obiettivo. |
|
|
7. Specifiche
| Nome del prodotto | DEKOPRO Deep Sea Solar Powered Welding Helmet |
| Modello | DX-980N |
| Gamma di tonalità | DIN 4 (Light State), Variable 9-13 (Dark State) |
| Viewing Area (H x W) | 3.9'' × 3.2'' (7 square inches) |
| Reaction Time (Light to Dark) | 0.00004 secondi (1/25000 sec) |
| Turn Time (Dark to Bright) | Adjustable: 0.1s ~ 1.0s |
| Protezione UV/IR | DIN 16 (Permanente) |
| Alimentazione elettrica | Lithium Battery (CR2450, 3V) + Solar Cells |
| Durata della batteria | Fino a 5000 ore |
| Materiale | Polipropilene (PP) |
| Temperatura di esercizio | Da -5°C a 55°C (da 23°F a 131°F) |
| Temperatura di conservazione | -4°F - 158°F (-20°C - 70°C) |
| Peso | 900 g (circa 1.98 libbre) |
| Certificazioni | ANSI Z87.1-2010, EN379 |
8. Garanzia e supporto
For detailed warranty information and customer support, please refer to the warranty card included with your product packaging or visit the official DEKO websito. Conservare la ricevuta d'acquisto come prova d'acquisto per eventuali reclami in garanzia.
If you encounter issues not covered in the troubleshooting section, please contact DEKO customer service for assistance.
Documenti correlati - DX-980N
 |
Manuale utente della saldatrice semiautomatica DEKO DKWM200NG Manuale utente completo per la saldatrice semiautomatica DEKO DKWM200NG, che copre specifiche tecniche, funzionamento, sicurezza, manutenzione e risoluzione dei problemi. Scopri come utilizzare le modalità di saldatura MIG, MAG e LIFT TIG in modo efficace e sicuro. |
 |
Manuale di istruzioni per la saldatrice DEKO MMA135AT Manuale di istruzioni completo per la saldatrice DEKO MMA135AT, che comprende precauzioni di sicurezza, installazione, funzionamento, specifiche tecniche, manutenzione e risoluzione dei problemi. |
 |
Modulo di alimentazione DEKO DKRT135ST1 / DKRT170ST2 Modulo di alimentazione per DEKO DKRT135ST1 e DKRT170ST2, per favore, vedi, συντήρησης, προδιαγραφές και πληροφορίες μπαταρίας. |
 |
DEKO 3-in-1 Palm Sander Instruction Manual (Model DKPAISX030C1) Official instruction manual for the DEKO 3-in-1 Palm Sander, model DKPAISX030C1. Learn about safe operation, maintenance, parts, specifications, and intended use for sanding various materials. |
 |
AWELCO COMPACT 163 IN 1 Welding Machine - User Manual and Technical Data Comprehensive guide for the AWELCO COMPACT 163 IN 1 welding machine. Includes technical specifications, spare parts, assembly instructions, EU Declaration of Conformity, and multilingual support. Ideal for users seeking detailed information on this versatile welding equipment. |
 |
ADF DX-500S Auto-Darkening Welding Helmet - Specifications and Features Technical specifications and features for the ADF DX-500S auto-darkening welding helmet, model 7HH802991. Includes details on eye protection, adjustable settings, and usage guidelines. |
Ask a question about this manual
Ask about setup, troubleshooting, compatibility, parts, safety, or missing instructions. Manuals+ will review the question and use this page’s manual context to help answer it.