
Introduzione
Thank you for choosing the ORSKEY Dash Cam S680. This manual provides detailed instructions for the installation, operation, and maintenance of your dash camera. Please read this manual thoroughly before use to ensure proper functionality and to maximize your experience with the product.
Contenuto della confezione
Si prega di controllare la confezione per verificare la presenza dei seguenti elementi:
- ORSKEY Dash Cam S680 Unit
- Caricabatterie per auto
- Supporto di aspirazione
- Manuale dell'utente (questo documento)

The package contents of the ORSKEY Dash Cam S680, including the main camera unit, a suction cup mount for windshield attachment, and a car charger for power.
Prodotto finitoview
The ORSKEY Dash Cam S680 features a 3.0-inch LCD display, a 170-degree wide-angle lens, and records in 1080P Full HD. It is equipped with a Sony Exmor IMX 323 sensor and 6 glass lens elements for superior image quality, especially in low-light conditions with its WDR technology.
This image shows the advanced lens system of the ORSKEY Dash Cam, featuring a Sony Exmor IMX 323 sensor and 6 glass elements for clear 1080P video capture.
Impostare
1. Inserimento della scheda Micro SD
Before using the dash cam, a Micro SD card (Class 10 or higher, up to 32GB) must be inserted. The Micro SD card is non incluso nel pacchetto.
- Assicurarsi che la dash cam sia spenta.
- Individuare lo slot per la scheda Micro SD sul lato della dash cam.
- Inserire la scheda Micro SD con i contatti dorati rivolti verso il retro della fotocamera finché non scatta in posizione.
- Per rimuoverla, spingere delicatamente la scheda finché non scatta, quindi rilasciarla e la scheda uscirà.
Note: It is recommended to format the Micro SD card within the dash cam settings before first use and periodically thereafter to ensure optimal performance.
2. Montaggio della Dash Cam
- Pulisci la zona del parabrezza in cui intendi montare la dash cam.
- Fissare il supporto a ventosa alla dash cam.
- Premere saldamente la ventosa contro il parabrezza e ruotare la leva per fissarla. Posizionare la telecamera in modo da garantire una visione chiara view della strada senza ostacolare la visibilità durante la guida.

A visual guide demonstrating how to properly install the dash cam onto your car's windshield using the suction mount and connect the power cable.
3. Collegamento dell'alimentazione
- Collegare il caricabatteria per auto alla porta di ingresso dell'alimentazione della dash cam.
- Collegare l'altra estremità del caricabatteria per auto alla presa accendisigari del veicolo.
- Route the power cable neatly along the edge of the windshield and dashboard to avoid obstructing your view o interferire con i comandi di guida.
Istruzioni per l'uso
1. Accensione/spegnimento
- The dash cam will automatically power on and begin recording when your vehicle's engine starts (and the cigarette lighter provides power).
- Si spegnerà automaticamente quando il motore verrà spento.
- Per accendere/spegnere manualmente, tenere premuto il pulsante di accensione.
2. Modalità di registrazione
The dash cam offers several recording features to ensure comprehensive coverage:
- Registrazione in loop: This feature allows continuous recording. When the Micro SD card reaches its storage limit, the camera automatically overwrites the oldest unlocked footage with new recordings. This ensures that recording never stops due to a full card.

An illustration detailing the loop recording feature, where the camera continuously records and overwrites the oldest footage when the memory card is full, ensuring uninterrupted recording.
- Sensore G (registrazione di emergenza): The built-in G-sensor detects sudden impacts or collisions. When triggered, it automatically locks the current video segment, preventing it from being overwritten by loop recording. This footage is saved in a separate folder to protect critical evidence.
- Rilevamento del movimento: When enabled, the dash cam will automatically start recording if it detects movement in front of the vehicle while parked. This feature requires continuous power supply (e.g., hardwiring kit, not included) to function when the car is off.
- Monitoraggio del parcheggio: Similar to motion detection, this mode activates recording if an impact is detected while the vehicle is parked and the engine is off.

This image highlights the 24-hour monitoring capabilities, including motion detection and parking monitoring, which activate the camera when movement or impact is detected while parked.
3. Wide Dynamic Range (WDR) and Night Vision
The dash cam incorporates WDR technology and 6 unique infrared LED fill lights to enhance video quality in various lighting conditions, providing clear recordings both day and night.

A side-by-side comparison demonstrating the dash cam's clear video quality during the day and its enhanced night vision performance in low-light conditions.
4. Navigazione nel menu e impostazioni
Use the buttons on the side of the dash cam to navigate through the menu options displayed on the 3-inch LCD screen. Common settings include video resolution, loop recording duration, G-sensor sensitivity, motion detection on/off, date/time stamp, and Micro SD card formatting.

Un dettagliato view of the dash cam's 3-inch LCD screen displaying the menu options for configuration and settings.
5. Riproduzione
per riview registrato footage:
- Interrompere la registrazione premendo il pulsante OK (se è in corso la registrazione).
- Enter playback mode via the menu.
- Browse through video fileutilizzando i pulsanti di navigazione.
- Seleziona un file e premere OK per riprodurre.
- Alternatively, remove the Micro SD card and view pippotage on a computer using a card reader.
Manutenzione
1. Gestione della scheda Micro SD
- Regularly format your Micro SD card (at least once a month) to prevent data corruption and ensure smooth operation.
- Use a high-quality Class 10 or higher Micro SD card from a reputable brand.
- Replace the Micro SD card if you experience frequent errors or recording issues.
2. Pulizia della Dash Cam
- Use a soft, dry cloth to clean the camera lens and screen. Avoid abrasive materials or chemical cleaners.
- Ensure the suction cup is clean for optimal adhesion to the windshield.
Risoluzione dei problemi
- La fotocamera non si accende: Check if the car charger is properly connected to both the dash cam and the vehicle's cigarette lighter. Ensure the vehicle's ignition is on.
- Camera stops recording or does not record:
- Assicurarsi che la scheda Micro SD sia inserita e formattata correttamente.
- The Micro SD card may be full; enable loop recording or format the card.
- The Micro SD card may be faulty or not Class 10 or higher. Try a different card.
- Check power connection; intermittent power can cause recording interruptions.
- Scarsa qualità video:
- Clean the camera lens and your car's windshield.
- Assicurarsi che la pellicola protettiva sia stata rimossa dalla lente.
- Controllare le impostazioni della risoluzione video nel menu.
- Motion Detection/Parking Monitoring not working effectively:
- These features require continuous power when the vehicle is off, typically via a hardwiring kit (not included).
- The 32GB Micro SD card capacity may limit the duration of parking mode recordings.
- Adjust sensitivity settings in the menu.
- Menu navigation is confusing: Refer to the detailed instructions in the 'Operating Instructions' section for specific button functions and menu layouts.
Specifiche
| Numero di modello | S680 |
| Risoluzione di acquisizione video | 1080p (1920x1080) a 30 fps |
| Dimensioni dello schermo | 3 pollici |
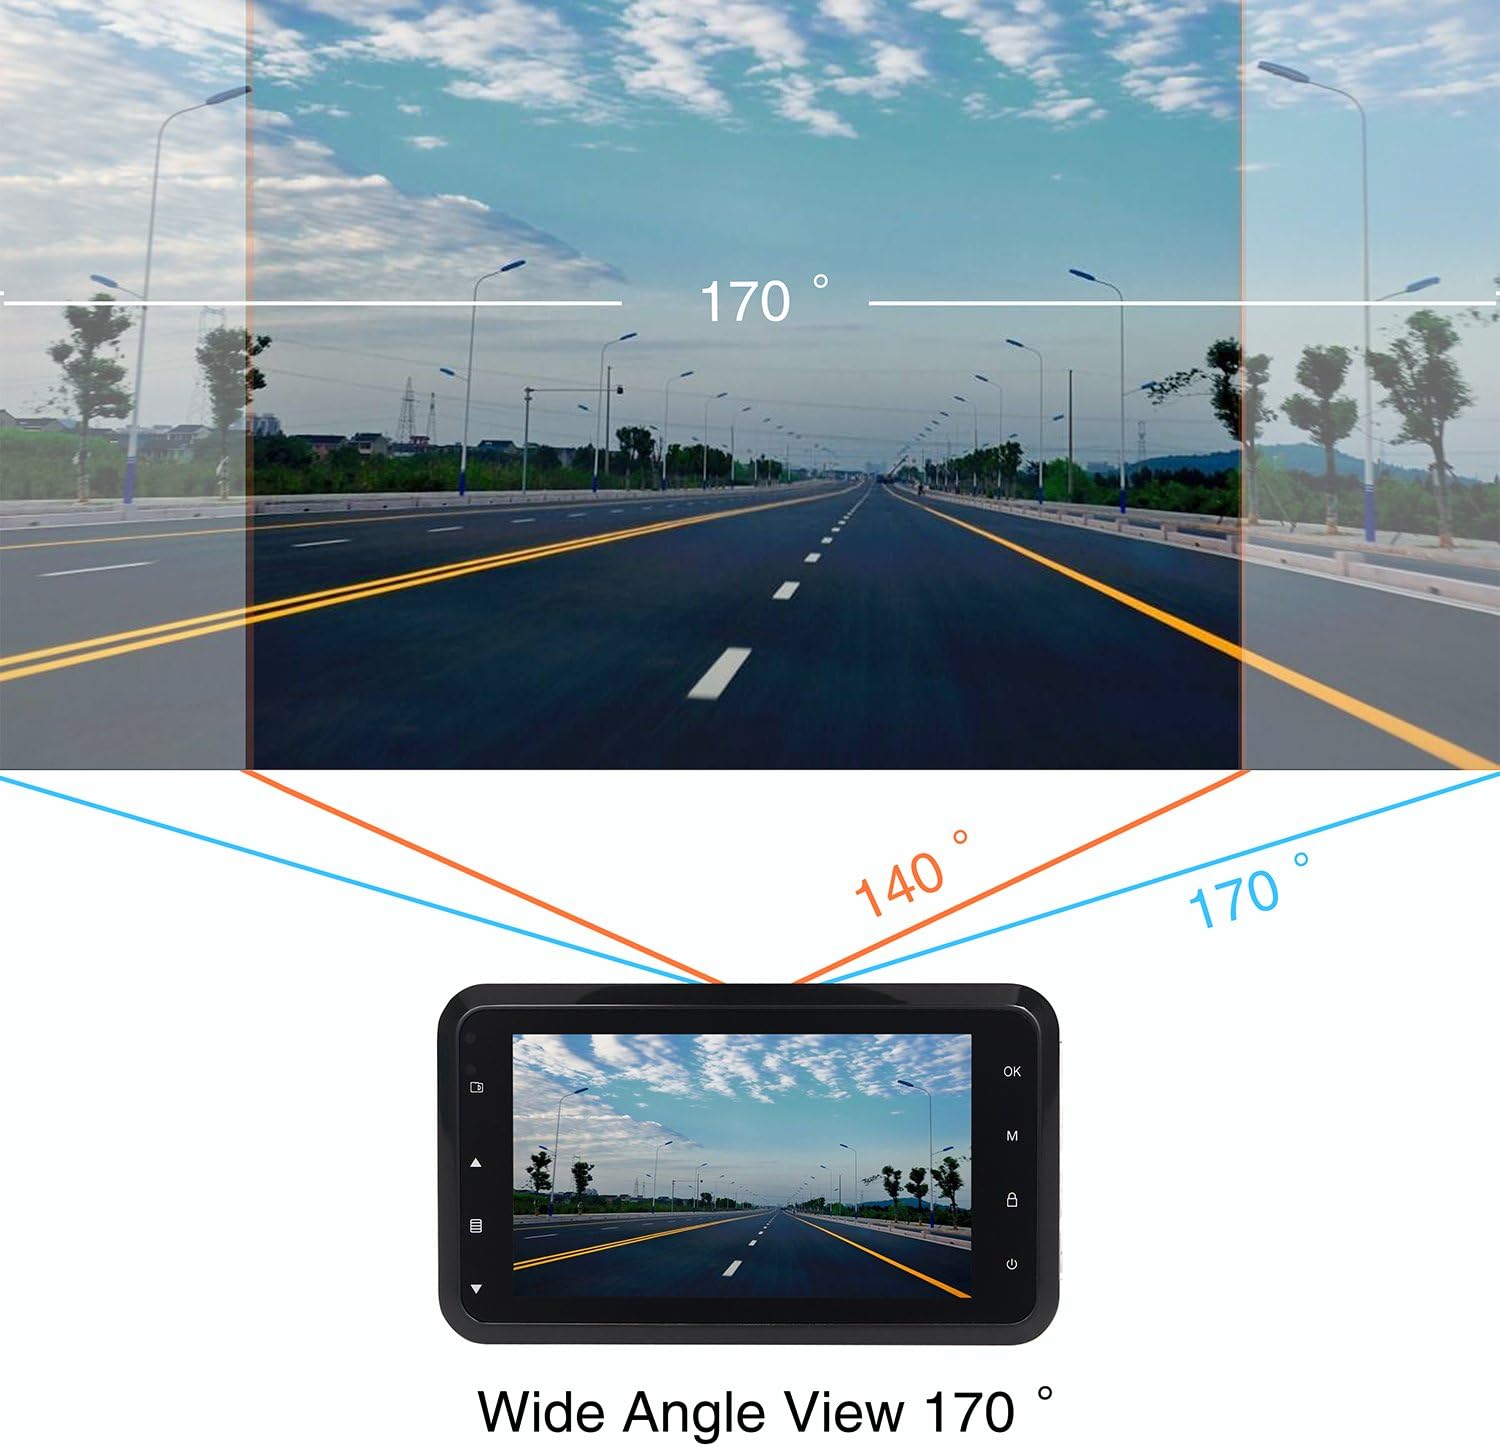
| Angolo reale di View | 170 gradi |
| Tecnologia dei sensori ottici | CMOS (Sony Sensor) |
| Tipo di memoria flash | MicroSD (up to 32GB, Class 10 or higher) |
| Tecnologia di connettività | HDMI, USB |
| Tipo di montaggio | Supporto di aspirazione |
| Tipo di cella della batteria | Polimero di litio |
| Componenti inclusi | Car Charger, Suction Mount, User Manual |

This diagram shows the expansive 170-degree wide-angle field of view captured by the dash cam, providing comprehensive road coverage.
Garanzia e supporto
The ORSKEY Dash Cam S680 comes with a 12 mesi di garanzia dalla data di acquisto. La presente garanzia copre i difetti di fabbricazione e assicura il corretto funzionamento del prodotto in condizioni di utilizzo normali.
For technical support, warranty claims, or any questions regarding your dash cam, please contact ORSKEY customer service. Details for contacting support are typically found on the product packaging or the official ORSKEY websito.
ORSKEY provides a qualified after-sale service team, available 7 days a week, 24 hours a day, to assist you.