1. Prodotto finitoview
The ANENG Q1 is a 9999 counts True RMS digital multimeter designed for accurate measurement of various electrical parameters. It features an EBTN black screen with a large, backlit LCD for clear readability in diverse lighting conditions. This device supports both automatic and manual ranging, offering flexibility for different measurement needs. It includes an analog bar graph display for quick visual indication of readings.
Caratteristiche principali:
- Misurazione del vero RMS: Fornisce letture accurate per forme d'onda non sinusoidali.
- NCV (Volume senza contattotage) Rilevamento: For safe identification of live wires without direct contact.
- Regolazione automatica/manuale: User-selectable measurement range for convenience and precision.
- Grafico a barre analogico: Rappresentazione visiva delle tendenze di misurazione.
- Ampio display LCD retroilluminato: Visibilità migliorata in ambienti scarsamente illuminati.
- Protezione da sovraccarico: Garantisce la sicurezza in tutti gli intervalli di misurazione.
- Indicazione di batteria scarica: Avvisa quando è necessario sostituire la batteria.
- Funzione di conservazione dei dati: Blocca la lettura visualizzata per facilitarne la registrazione.
- Spegnimento automatico: Conserva la durata della batteria.
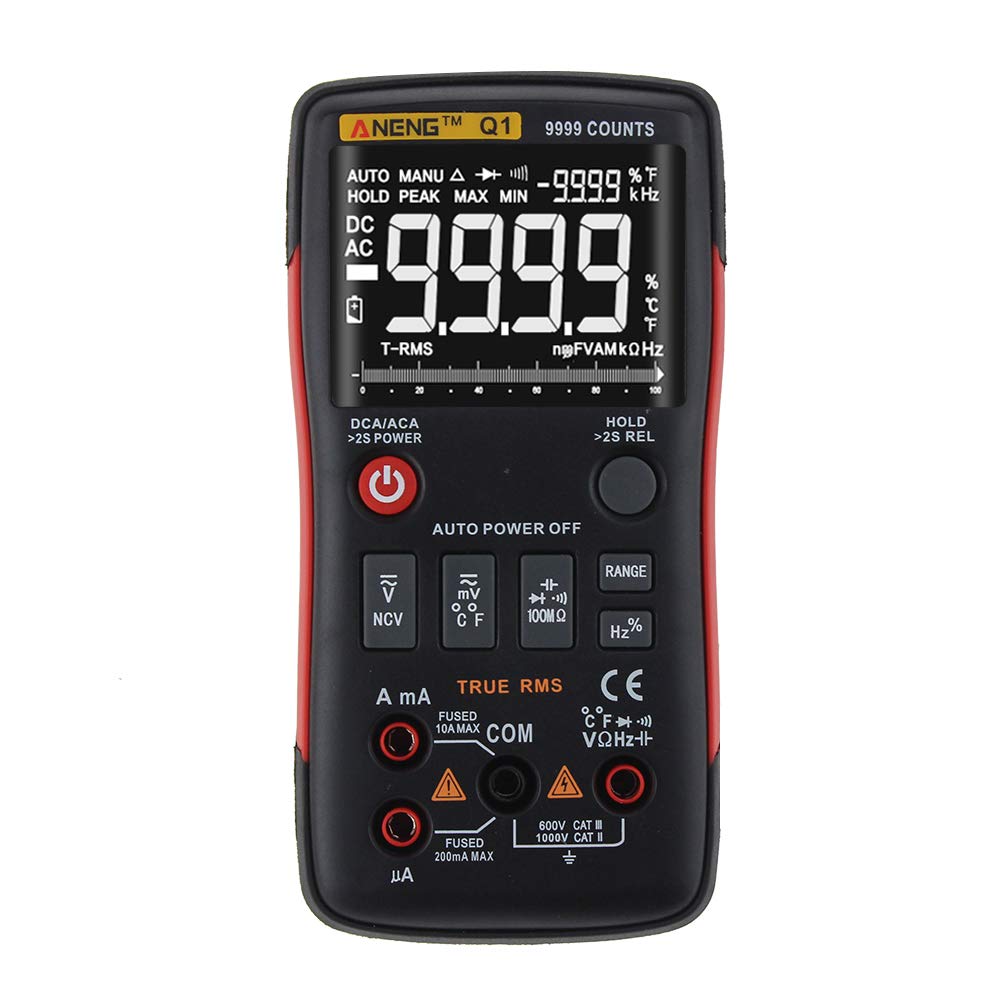
Figure 1: ANENG Q1 Digital Multimeter with its display and function buttons.
2. Informazioni sulla sicurezza
Always observe basic safety precautions when using this multimeter to prevent personal injury or damage to the device. Read and understand all safety information before operation.
- Non superare i valori massimi di input per nessuna funzione.
- Prestare attenzione quando si lavora con voltagsuperiori a 30 V CA RMS, 42 V di picco o 60 V CC. Questi voltagrappresentano un rischio di scossa elettrica.
- Before measuring current, ensure the circuit is de-energized and the multimeter is connected in series.
- Prima di modificare le funzioni, scollegare sempre i puntali di prova dal circuito.
- Prima dell'uso, ispezionare i puntali per verificare che non vi siano danni all'isolamento o parti metalliche esposte. Sostituirli se danneggiati.
- Non utilizzare il multimetro se il coperchio della batteria non è chiuso correttamente.
- Per garantire letture accurate, sostituire immediatamente le batterie quando compare l'indicatore di batteria scarica.
- Rispettare i codici di sicurezza locali e nazionali.
3. Impostazione
3.1 Installazione della batteria
- Assicurarsi che il multimetro sia spento.
- Individuare il vano batteria sul retro del dispositivo.
- Svitare il coperchio del vano batteria e rimuoverlo.
- Insert two 1.5V AA batteries, observing the correct polarity (+/-).
- Riposizionare il coperchio della batteria e fissarlo con la vite.
3.2 Collegamento dei puntali di prova
The multimeter comes with a set of test leads. Always connect the black lead to the 'COM' (Common) jack. Connect the red lead to the appropriate input jack based on the measurement function:
- VΩHz+ jack per Voltage, misure di resistenza, frequenza, capacità, diodo e continuità.
- mA jack for current measurements up to 999.9mA.
- 10A jack for current measurements up to 10A.

Figure 2: Included test leads and probes.

Figure 3: Complete ANENG Q1 Multimeter kit with accessories.
4. Istruzioni per l'uso
The ANENG Q1 multimeter offers both automatic and manual ranging. Press the 'RANGE' button to switch between auto and manual modes. In manual mode, press 'RANGE' repeatedly to cycle through available ranges.
4.1 Accensione/spegnimento
Press the red power button to turn the multimeter on or off. The device features an auto power-off function to conserve battery life after a period of inactivity.
4.2 Misurazione del volume AC/DCtage(V)
- Connect the black test lead to the 'COM' jack and the red test lead to the 'VΩHz+' jack.
- Seleziona il volumetage measurement function (AC V or DC V) using the function button.
- Collegare le sonde di prova in parallelo sul circuito o sul componente da misurare.
- Leggi il vol.tage valore sul display.
4.3 Measuring AC/DC Current (A/mA/µA)
- Importante: Ensure the circuit is de-energized before connecting the multimeter for current measurement.
- Connect the black test lead to the 'COM' jack. Connect the red test lead to the 'mA' jack for currents up to 999.9mA, or to the '10A' jack for currents up to 10A.
- Select the current measurement function (AC A or DC A).
- Aprire il circuito e collegare il multimetro in serie al carico.
- Riattivare il circuito e leggere il valore corrente sul display.
4.4 Misurazione della resistenza (Ω)
- Connect the black test lead to 'COM' and the red test lead to 'VΩHz+'.
- Select the resistance measurement function.
- Prima di misurare la resistenza, assicurarsi che il circuito o il componente siano disattivati.
- Collegare le sonde di prova al componente.
- Leggere il valore di resistenza sul display.
4.5 Misurazione della capacità (F)
- Connect the black test lead to 'COM' and the red test lead to 'VΩHz+'.
- Select the capacitance measurement function.
- Prima di effettuare la misurazione, assicurarsi che il condensatore sia completamente scarico per evitare danni al multimetro.
- Collegare le sonde di prova ai terminali del condensatore.
- Leggere il valore della capacità sul display.
4.6 Misurazione della frequenza (Hz) e del ciclo di lavoro (%)
- Connect the black test lead to 'COM' and the red test lead to 'VΩHz+'.
- Select the frequency/duty cycle measurement function.
- Collegare le sonde di prova alla sorgente del segnale.
- Leggere il valore della frequenza o del ciclo di lavoro sul display.
4.7 Misurazione della temperatura (°C/°F)
- Connect the temperature probe to the appropriate input jacks (usually 'COM' and 'VΩHz+' or dedicated temperature jacks if available).
- Select the temperature measurement function.
- Posizionare la punta della sonda di temperatura sull'oggetto di cui si desidera misurare la temperatura o nelle sue vicinanze.
- Leggere il valore della temperatura sul display.
4.8 Test diodi
- Connect the black test lead to 'COM' and the red test lead to 'VΩHz+'.
- Select the diode test function.
- Collegare la sonda rossa all'anodo e la sonda nera al catodo del diodo.
- Il display mostrerà il volume in avantitage goccia. Invertire le sonde; un circuito aperto (OL) indica un diodo funzionante.
4.9 Prova di continuità
- Connect the black test lead to 'COM' and the red test lead to 'VΩHz+'.
- Selezionare la funzione di test di continuità.
- Collegare le sonde di prova al circuito o al componente.
- Un segnale acustico continuo indica un percorso a bassa resistenza (continuità).
4.10 NCV (Volume senza contattotage) Rilevamento
- Selezionare la funzione NCV.
- Bring the top of the multimeter close to the conductor or outlet.
- Il dispositivo indicherà la presenza di AC voltage tramite un allarme acustico e/o un indicatore visivo.
5. Manutenzione
5.1 Pulizia
Pulisci la custodia con l'adamp panno e detergente delicato. Non utilizzare abrasivi o solventi. Assicurarsi che il dispositivo sia completamente asciutto prima dell'uso.
5.2 Conservazione
When not in use for extended periods, remove the batteries to prevent leakage. Store the multimeter in a cool, dry place, away from direct sunlight and extreme temperatures. The recommended storage conditions are -20°C to 60°C (-4°F to 140°F) with humidity less than 80% RH.
6. Risoluzione Dei Problemi
- Nessuna visualizzazione: Controllare l'installazione delle batterie e assicurarsi che non siano scariche. Sostituirle se necessario.
- Letture errate: Verify that the correct function and range are selected. Ensure test leads are properly connected and not damaged. Check battery level.
- Visualizzazione 'OL' (sovraccarico): The measured value exceeds the selected range or the maximum input limit. Switch to a higher range or ensure the input is within the device's specifications.
- Nessun segnale acustico di continuità: Check if the circuit is truly continuous and has very low resistance. Ensure test leads are making good contact.
7. Specifiche
7.1 Specifiche elettriche

Figure 4: Electrical Specifications - DC and AC Voltage.

Figure 5: Electrical Specifications - DC and AC Current, and Resistance.

Figure 6: Electrical Specifications - Capacitance, Frequency, and Duty Cycle.

Figure 7: Electrical Specifications - Temperature, Diode, Continuity, and NCV.
7.2 General, Mechanical, and Environmental Specifications

Figure 8: General, Mechanical, and Environmental Specifications.
| Parametro | Valore |
|---|---|
| Display | LCD da 9999 conteggi |
| Distanza | Automatico/Manuale |
| Materiale | ABS+TPE |
| Frequenza di aggiornamento | 3 volte / secondo |
| Vero RMS | SÌ |
| Conservazione dei dati | SÌ |
| Retroilluminazione | SÌ |
| Indicazione di batteria scarica | SÌ |
| Spegnimento automatico | SÌ |
| Parametro | Valore |
|---|---|
| Dimensione | 146*74*34mm |
| Peso | 125g |
| Tipo di batteria | 2 batteria AA da 1.5 V (non inclusa) |
| Parametro | Valore |
|---|---|
| Temperatura di esercizio | Temperatura da 0 a 40°C |
| Umidità di esercizio | <75% UR |
| Temperatura di conservazione | -20~60°C |
| Umidità di stoccaggio | <80% UR |
8. Garanzia e supporto
8.1 Garanzia
This ANENG Q1 Digital Multimeter comes with a garanzia di un anno from the date of purchase, covering manufacturing defects. This warranty does not cover damage caused by misuse, accident, unauthorized modification, or normal wear and tear. Please retain your proof of purchase for warranty claims.
8.2 Assistenza clienti
For technical assistance, troubleshooting, or warranty inquiries, please contact the retailer or manufacturer's customer service. Refer to your purchase documentation for specific contact details.