Introduzione
This manual provides essential instructions for the safe and effective installation, operation, and maintenance of your Technical Precision replacement lamp and housing for the HITACHI CP-X417 projector. Please read this manual thoroughly before attempting any installation or operation to ensure proper function and to prevent damage to the product or your projector.
Informazioni sulla sicurezza
WARNING: Risk of electric shock and burns. Always disconnect power to the projector before attempting to replace the lamp. Allow the projector and old lamp raffreddare completamente prima di maneggiarlo.
- Ensure the projector is unplugged from the power outlet and has been off for at least 30 minutes to allow the lamp raffreddare.
- Do not touch the glass part of the new lamp directly with bare hands. Oils from your skin can reduce lamp vita. Utilizzare guanti o un panno pulito.
- Smaltire il vecchio lamps according to local regulations. They may contain mercury.
- Do not operate the projector with the lamp coperchio rimosso.
Configurazione e installazione
Follow these steps carefully to replace the projector lamp.
- Preparare il proiettore: Ensure the projector is turned off and unplugged from the power source. Allow it to cool down for at least 30 minutes.
- Individuare la Lamp Copertina: Refer to your HITACHI CP-X417 projector's original manual to locate the lamp cover. It is typically secured by one or more screws.
- Rimuovi la Lamp Copertina: Using an appropriate screwdriver, carefully loosen and remove the screws securing the lamp cover. Set the screws and cover aside in a safe place.
- Rimuovi la vecchia Lamp: Il vecchio lamp module will have a handle or a set of screws holding it in place. Loosen these screws and gently pull the old lamp module straight out of the projector. Avoid forcing it.
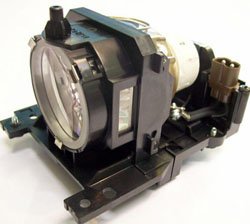
Figure 1: Technical Precision Replacement Lamp and Housing. This image shows the complete lamp module, ready for installation into the projector.
- Installa la nuova Lamp: Carefully insert the new Technical Precision lamp module into the projector slot. Ensure it slides in smoothly and is seated firmly. Do not force it.
- Secure the New Lamp: Tighten the screws that hold the new lamp module in place.
- Sostituisci Lamp Copertina: Riattacca il lamp cover and secure it with the screws removed earlier. Ensure it is properly closed to prevent dust entry and ensure safe operation.
- Reimposta Lamp Timer: Dopo aver sostituito la lamp, è fondamentale reimpostare lamp timer in your projector's menu. Consult your HITACHI CP-X417 projector's manual for specific instructions on how to access and reset the lamp timer. This ensures accurate tracking of new lamp vita.
Istruzioni per l'uso
Una volta che il nuovo lamp è installato e il lamp timer is reset, you can resume normal operation of your projector.
- Primo utilizzo: Il nuovo lamp may appear slightly brighter or have a different color temperature during its initial hours of use. This is normal as the lamp stabilizza.
- Prestazioni ottimali: Per massimizzare lamp life and maintain optimal performance, avoid frequent on/off cycles. Allow the projector to run for at least 15-20 minutes before turning it off.
- Periodo di raffreddamento: Always allow the projector to complete its cool-down cycle after turning it off. Do not unplug the projector until the cooling fans have stopped.
Manutenzione
Proper maintenance helps extend the life of your projector and the replacement lamp.
- Pulizia: Periodically clean the projector's air filters according to your projector's manual. Clogged filters can lead to overheating, which shortens lamp vita.
- Lamp Alloggiamento: Non tentare di aprire la lamp housing or replace the bare bulb inside the module. This replacement unit is designed as a complete module.
- Magazzinaggio: If the projector will not be used for an extended period, store it in a cool, dry, dust-free environment.
Risoluzione dei problemi
Se riscontri problemi dopo l'installazione del nuovo lamp, fare riferimento ai seguenti problemi comuni e alle relative soluzioni:
| Problema | Possibile causa | Soluzione |
|---|---|---|
| Lamp non si accende. |
|
|
| Image is dim or poor quality. |
|
|
| Il proiettore visualizza tuttoamp messaggio di errore. |
|
|
Specifiche
Key specifications for the Technical Precision Replacement Lamp and Housing for HITACHI CP-X417:
- Marca: Precisione tecnica
- Nome modello: CP-X417 LAMP & HOUSING
- Numero parte: CP-X417 LAMP & HOUSING
- Materiale: Bicchiere
- Quantità confezione articolo: 1
- Tipo di sorgente luminosa: proiettore lamps
- ASIN: B07RXR3FD2
Garanzia e supporto
For warranty information or technical support regarding your Technical Precision replacement lamp, please refer to the documentation provided with your purchase or contact Technical Precision customer service directly. Contact details are typically available on the manufacturer's websito o tramite il tuo rivenditore.
For general projector operation or issues unrelated to the lamp, please consult your original HITACHI CP-X417 projector manual or contact HITACHI support.