1. Introduzione
The MASTECH MS8260E is a versatile 2000-count digital multimeter designed for a wide range of electrical and electronic measurements. It features a large LCD display, non-contact voltage rilevamento (NCV) e capacità di misurazione della tensione AC/DCtage, AC/DC current, resistance, capacitance, and inductance. This manual provides essential information for the safe and effective operation, maintenance, and troubleshooting of your device.
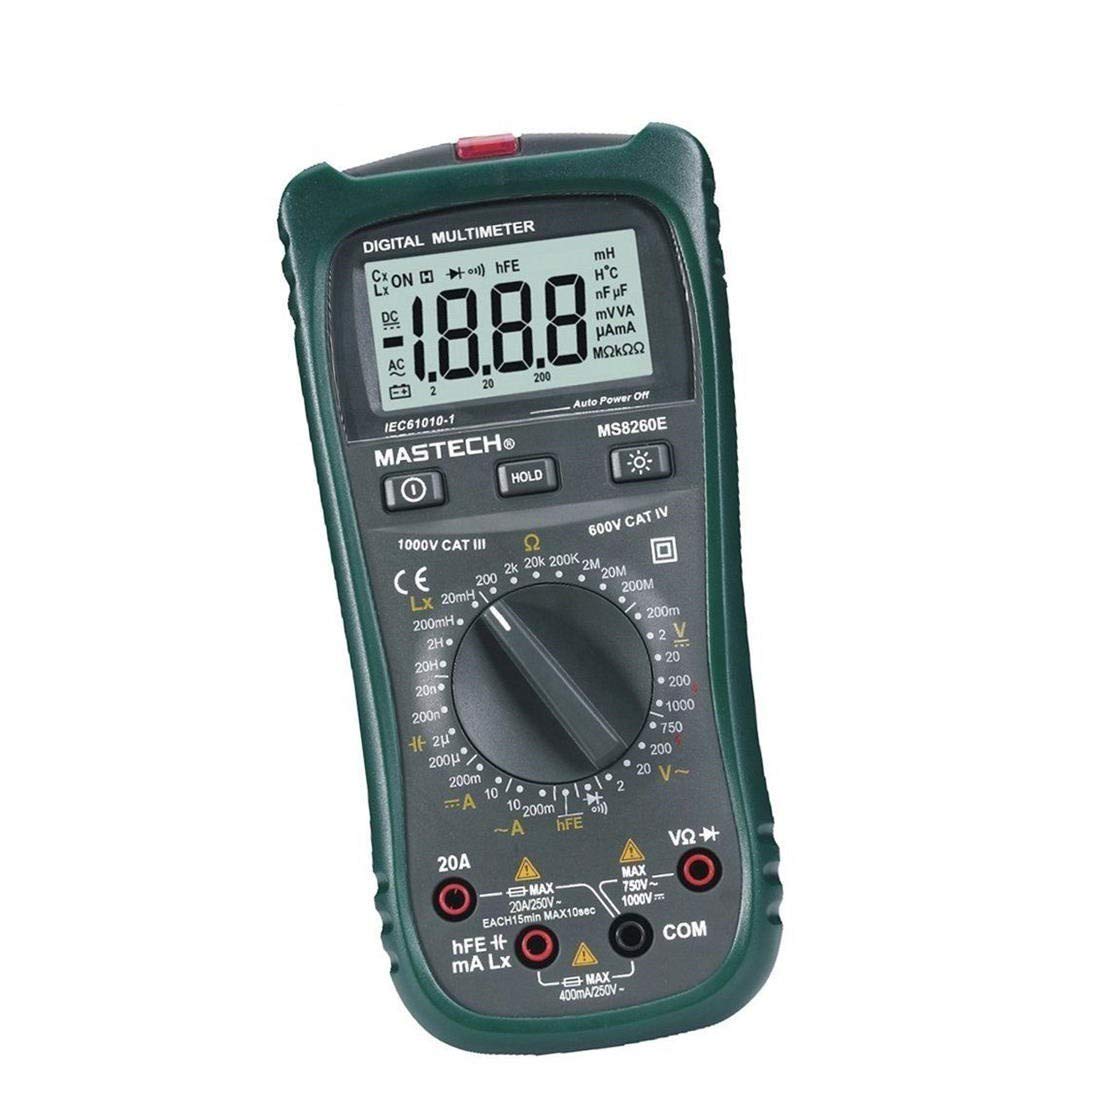
Figura 1: Fronte view of the MASTECH MS8260E Digital Multimeter, showing the LCD display, function rotary switch, and input jacks.
2. Informazioni sulla sicurezza
Per garantire un funzionamento e una manutenzione sicuri del contatore, seguire queste linee guida di sicurezza:
- Prima di utilizzare il misuratore, leggere e comprendere tutte le istruzioni contenute nel presente manuale.
- Rispettare sempre i codici di sicurezza locali e nazionali.
- Non utilizzare il misuratore se appare danneggiato o se l'isolamento dei puntali di prova è compromesso.
- Observe the input limits for each measurement range to prevent electrical shock or damage to the meter. This meter is rated for CAT.IV 600V.
- Prestare attenzione quando si lavora con voltagsuperiori a 30 V CA RMS, 42 V di picco o 60 V CC. Questi voltagrappresentano un rischio di scossa elettrica.
- Scollegare sempre l'alimentazione dal circuito e scaricare tutti i componenti ad alto volumetage condensatori prima di effettuare misurazioni di resistenza, continuità, diodi o capacità.
- Per garantire letture accurate, sostituire immediatamente la batteria quando appare l'indicatore di batteria scarica.
- Non utilizzare il misuratore in ambienti con presenza di gas, vapori o polveri esplosivi.
3. Prodotto finitoview
The MS8260E multimeter is equipped with several features to facilitate accurate and convenient measurements:
- Large 2000 Counts LCD Display: Fornisce letture digitali chiare.
- Volume senza contatto integratotage (NCV) Rilevatore: Rileva AC voltage greater than 110V without physical contact, indicated by a flash warning.
- Funzione di conservazione dei dati: Blocca la lettura visualizzata per facilitarne la registrazione.
- Retroilluminazione del display: Improves visibility in dimly lit conditions.
- Spegnimento automatico: Conserves battery life by automatically turning off the meter after a period of inactivity.
- Indicazione di batteria scarica: Avvisa l'utente quando è necessario sostituire la batteria.
- Indicazione di polarità: Automatically displays negative polarity.
- 30-Range Rotary Switch: Selects various measurement functions including AC/DC voltage, AC/DC current, resistance, capacitance, inductance, diode check, continuity test, and transistor (hFE) check.
4. Impostazione
4.1 Installazione della batteria
The MS8260E requires one 9V battery (NEDA 1604/6F22). To install or replace the battery:
- Ensure the meter is turned off and disconnect all test leads from the input terminals.
- Individuare il coperchio del vano batterie sul retro del misuratore.
- Svitare la/le vite/i di fissaggio e rimuovere il coperchio.
- Inserire la batteria da 9 V rispettando la polarità corretta.
- Richiudere il coperchio del vano batteria e fissarlo con la/le vite/i.
4.2 Collegamento dei puntali di prova
Always connect the black test lead to the "COM" (common) input jack. Connect the red test lead to the appropriate input jack based on the desired measurement:
- Per voltage, Resistance, Capacitance, Inductance, Diode, Continuity, and hFE measurements: Connect the red lead to the "VΩCAPHz" jack.
- For Current measurements up to 200mA: Connect the red lead to the "mA" jack.
- For Current measurements up to 10A: Connect the red lead to the "10A" jack.
Ensure test leads are fully inserted into the jacks before taking measurements.
5. Istruzioni per l'uso
Turn the rotary switch to the desired function. The meter will display "OL" (Overload) if no input is present or if the input exceeds the range.
5.1 Volume CCtage Misura (DCV)
- Set the rotary switch to the desired DCV range (200mV, 2V, 20V, 200V, 1000V).
- Connect the black test lead to the "COM" jack and the red test lead to the "VΩCAPHz" jack.
- Collegare i puntali di prova al componente o al circuito da misurare, rispettando la polarità.
- Leggi il vol.tage valore sul display LCD.
5.2 Volume ACtage Misurazione (ACV)
- Set the rotary switch to the desired ACV range (2V, 20V, 200V, 750V).
- Connect the black test lead to the "COM" jack and the red test lead to the "VΩCAPHz" jack.
- Collegare i puntali di prova attraverso la tensione CAtage fonte.
- Leggi il vol.tage valore sul display LCD.
5.3 Misurazione della corrente continua (DCA)
- Set the rotary switch to the desired DCA range (200mA, 10A).
- For measurements up to 200mA, connect the red lead to the "mA" jack. For measurements up to 10A, connect the red lead to the "10A" jack. The black lead connects to "COM".
- Aprire il circuito in cui si desidera misurare la corrente e collegare il misuratore in serie al carico.
- Leggere il valore corrente sul display LCD.
5.4 Misurazione della corrente alternata (ACA)
- Set the rotary switch to the desired ACA range (200mA, 10A).
- For measurements up to 200mA, connect the red lead to the "mA" jack. For measurements up to 10A, connect the red lead to the "10A" jack. The black lead connects to "COM".
- Aprire il circuito in cui si desidera misurare la corrente e collegare il misuratore in serie al carico.
- Leggere il valore corrente sul display LCD.
5.5 Misurazione della resistenza (Ω)
- Set the rotary switch to the desired Ω range (200Ω, 2kΩ, 20kΩ, 200kΩ, 2MΩ, 20MΩ, 200MΩ).
- Connect the black test lead to "COM" and the red test lead to "VΩCAPHz".
- Assicurarsi che il circuito sia disattivato e che tutti i condensatori siano scarichi.
- Collegare i puntali di prova al resistore o al componente.
- Leggere il valore della resistenza sul display LCD.
5.6 Capacitance Measurement (CAP)
- Set the rotary switch to the desired CAP range (20nF, 200nF, 2uF, 200uF).
- Connect the black test lead to "COM" and the red test lead to "VΩCAPHz".
- Prima di collegare i puntali di prova, assicurarsi che il condensatore sia completamente scarico.
- Collegare i puntali di prova al condensatore.
- Leggere il valore della capacità sul display LCD.
5.7 Misurazione dell'induttanza (L)
- Set the rotary switch to the desired Inductance range (20mH, 200mH, 2H, 20H).
- Connect the black test lead to "COM" and the red test lead to "VΩCAPHz".
- Collegare i puntali di prova all'induttore.
- Leggere il valore dell'induttanza sul display LCD.
5.8 Test diodi
- Impostare il commutatore rotante sul simbolo Diodo.
- Connect the black test lead to "COM" and the red test lead to "VΩCAPHz".
- Collegare il cavo rosso all'anodo e il cavo nero al catodo del diodo. Una tensione direttatagVerrà visualizzata la caduta di tensione (in genere da 0.5 V a 0.8 V per i diodi al silicio).
- Reverse the leads. The display should show "OL" for a good diode.
5.9 Prova di continuità
- Impostare il selettore rotativo sul simbolo Continuità.
- Connect the black test lead to "COM" and the red test lead to "VΩCAPHz".
- Collegare i puntali di prova al circuito o al componente.
- Se la resistenza è inferiore a circa 30Ω, il cicalino suonerà, indicando la continuità.
5.10 Test del transistor (hFE)
- Portare il selettore in posizione hFE.
- Identify the type (NPN or PNP) and pinout (Emitter, Base, Collector) of the transistor.
- Insert the transistor leads into the corresponding sockets in the hFE test socket on the meter.
- Leggere il valore hFE (guadagno di corrente CC) sul display LCD.
5.11 Senza contatto voltage (NCV) Rilevamento
- Impostare l'interruttore rotante sulla posizione NCV.
- Hold the top front part of the meter near the AC voltage fonte (ad esempio, una presa elettrica o un filo isolato).
- Se AC voltage greater than 110V is detected, the NCV indicator light will flash, and the buzzer may sound.
6. Manutenzione
6.1 Pulizia
Pulisci il contatore con l'adamp panno e un detergente delicato. Non utilizzare abrasivi o solventi. Assicurarsi che il misuratore sia asciutto prima dell'uso.
6.2 Sostituzione della batteria
When the "BAT" symbol appears on the display, the battery needs to be replaced. Refer to Section 4.1 for battery installation instructions.
6.3 Sostituzione del fusibile
If the current measurement function fails, the fuse may need replacement. This operation should only be performed by qualified personnel. Refer to the service manual or contact customer support for fuse specifications and replacement procedures.
6.4 Conservazione
If the meter is not to be used for an extended period, remove the battery to prevent leakage and damage to the meter. Store the meter in a cool, dry place away from direct sunlight.
7. Risoluzione Dei Problemi
| Problema | Possibile causa | Soluzione |
|---|---|---|
| Nessun display o display debole | Low battery; Meter off | Replace battery; Turn on meter |
| "OL" visualizzato | Input exceeds range; Open circuit (for resistance/continuity) | Select higher range; Check circuit connection |
| Letture errate | Low battery; Incorrect range selected; Poor test lead contact | Replace battery; Select appropriate range; Ensure good contact |
| Misurazione della corrente non funzionante | Fusibile bruciato | Replace fuse (by qualified personnel) |
8. Specifiche
| Funzione di misurazione | Allineare | Precisione |
|---|---|---|
| Volume DCtage(DCV) | 200 mV, 2 V, 20 V, 200 V, 1000 V | ±0.5% (200 mV-200 V), ±0.8% (1000 V) |
| Volume ACtage(ACV) | 2 V, 20 V, 200 V, 750 V. | ±0.8% (2V-200V), ±1.2% (750V) |
| Corrente CC (DCA) | 200 mA, 10 A | ±1.5% (200mA), ±2.0% (10A) |
| Corrente CA (ACA) | 200 mA, 10 A | ±1.8% (200mA), ±3.0% (10A) |
| Resistenza (Ω) | 200Ω, 2kΩ, 20kΩ, 200kΩ, 2MΩ, 20MΩ, 200MΩ | ±0.8% (200Ω-2MΩ), ±1.0% (20MΩ), ±5.0% (200MΩ) |
| Capacità (CAP) | 20nF, 200nF, 2uF, 200uF | ±4.0% (20nF-2uF), ±5.0% (200uF) |
| Induttanza (L) | 20mH, 200mH, 2H, 20H | ±3.0% |
| Continuità udibile | Buzzer sounds at <30Ω | N / A |
| Test diodi | 1mA, 2.8V | N / A |
| Transistor (hFE) | 0 - 1,000 | N / A |
Specifiche generali:
- Display: 2000 conteggi LCD
- Valutazione di sicurezza: CAT.IV 600V
- Energia: 9V battery (NEDA 1604/6F22)
- Peso: Approximately 1 kg (including battery)
9. Garanzia e supporto
For warranty information, technical support, or service inquiries, please refer to the warranty card included with your product or visit the official Mastech website. Do not attempt to repair the meter yourself, as this may void the warranty and pose safety risks.