
MTX Audio JH15001
MTX Audio JH15001 Jackhammer Series 1500W Monoblock Classe D Car Audio Amppiù vivace
Manuale di istruzioni ufficiale
Introduzione
This manual provides detailed instructions for the installation, operation, and maintenance of your MTX Audio JH15001 Jackhammer Series 1500W Monoblock Class-D Car Audio Amplifier. The JH15001 is a high-performance monoblock amplifier designed to deliver powerful and clear audio to your car's subwoofer system. It features a Class-D design for efficiency, robust power output, and a range of adjustable controls to fine-tune your sound.
Le caratteristiche principali includono:
- 1500W Monoblock Class-D Amppiù vivace
- Flexible power output: 650 watts x 1 ch. at 4 Ohm, 1100 watts x 1 ch. at 2 Ohm, 1650 watts x 1 ch. at 1 Ohm
- Wide frequency response: 20Hz - 250Hz
- Variable Low Pass Filter (40Hz - 250Hz, 12dB/Oct)
- Variable Subsonic Filter (20Hz - 50Hz, 12dB/Oct)
- Adjustable Bass Boost (0 - 12dB) at 45Hz
- Includes Remote Bass Knob for convenient control
Informazioni sulla sicurezza
Si prega di leggere attentamente tutte le istruzioni prima di installare e utilizzare il vostro amplificatore. Il mancato rispetto di queste linee guida può causare danni al amplifier, your vehicle, or personal injury. Keep this manual for future reference.
- Fonte di energia: Per evitare cortocircuiti, scollegare sempre il terminale negativo della batteria del veicolo prima di effettuare qualsiasi collegamento elettrico.
- Cablaggio: Use appropriate gauge wiring for power, ground, and speaker connections as recommended in the installation section. Improper wiring can lead to overheating and fire.
- Montaggio: Montare il amplifier securely in a dry, well-ventilated area away from direct sunlight, heat sources, and moisture. Ensure adequate airflow around the amplificatore per un raffreddamento adeguato.
- Livelli del volume: L'esposizione prolungata a livelli di volume elevati può causare danni all'udito. Regolare il volume in modo responsabile.
- Installazione professionale: If you are unsure about any aspect of the installation, seek assistance from a qualified car audio professional.
Prodotto finitoview
The MTX Audio JH15001 amplifier is designed for robust performance and ease of use. Below are images illustrating the amplifier's design and control panel.

Figura 1: Fronte view of the MTX Audio JH15001 amplifier, showing the MTX Audio logo and Jackhammer JH15001 model name, along with the control knobs for Gain, LPF, Subsonic, and Bass Boost.
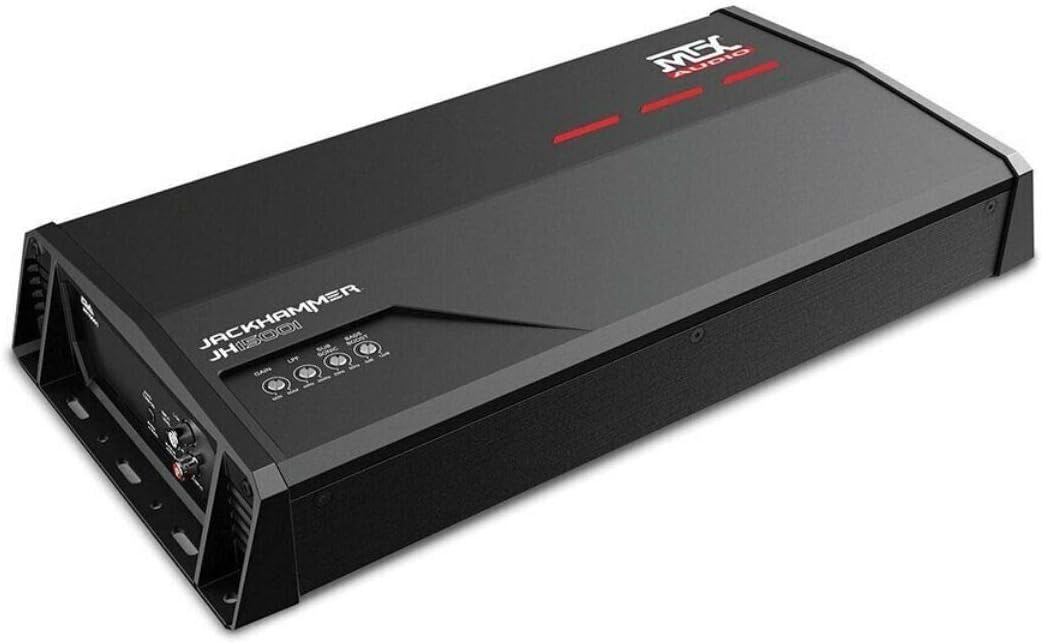
Figura 2: Angolato view of the MTX Audio JH15001 amplifier, providing a perspective of its compact design and heat sink fins.
Configurazione e installazione
Un'installazione corretta è fondamentale per prestazioni e sicurezza ottimali. Seguire attentamente questi passaggi.
Considerazioni sul cablaggio
- Always use high-quality power and ground cables. For the JH15001, a minimum of 4-gauge power and ground wire is recommended.
- Install an in-line fuse holder within 18 inches of the vehicle's battery. The fuse rating should match the amplifier's requirements (typically 80-100A for this power level).
- Ensure all connections are clean, tight, and free from corrosion.
Collegamenti di potenza

Figura 3: Posteriore view of the MTX Audio JH15001 amplifier, detailing the Power Input (GND, REM, +12V) and Speaker Output terminals.
- Terra (GND): Connect the ground terminal to a clean, unpainted metal surface of the vehicle's chassis. The ground wire should be as short as possible, ideally less than 3 feet (1 meter).
- Remoto (REM): Connect the remote terminal to the remote turn-on output of your head unit. This wire signals the amplifier per accendersi quando l'unità principale è attiva.
- +12 V: Connect the +12V terminal to the positive terminal of your vehicle's battery, via the in-line fuse holder.
Collegamenti degli altoparlanti
The JH15001 is a monoblock amplifier, designed for a single subwoofer or multiple subwoofers wired to a single channel. Refer to Figure 3 for the speaker output terminals.
- Connect your subwoofer(s) to the "SPEAKER OUTPUT" terminals. Ensure correct polarity (+ to + and - to -).
- IL amplifier is stable down to 1 Ohm. Ensure your subwoofer's impedance (or combined impedance of multiple subwoofers) matches the amplifier's capabilities for optimal performance and to prevent damage.
Connessioni di ingresso

Figura 4: Posteriore view of the MTX Audio JH15001 amplifier, showing the Line Input (RCA) and Auto Turn On switch.
- Ingresso linea (RCA): Connect the RCA output from your head unit or signal processor to the "LINE INPUT" (L CH and R CH) on the amppiù vivace.
- Accensione automatica: Questo interruttore consente il amplifier to turn on automatically by sensing a DC offset or audio signal on the input. Set to "REM" if using a dedicated remote wire, or "AUDIO" if using signal sensing.
- Livello di ingresso: This switch adjusts the input sensitivity for either "PRE IN" (low-level RCA input) or "SPK IN" (high-level speaker input, if using a line output converter).
Manopola per bassi remoti
Connect the included remote bass knob to the "EBC" port on the amplifier (refer to Figure 4). This allows for convenient adjustment of the bass level from the driver's seat.
Istruzioni per l'uso
Una volta installato, è possibile ottimizzare il ampimpostazioni del convertitore per prestazioni audio ottimali.
Regolazione del guadagno
The "GAIN" knob (refer to Figure 1) matches the ampsensibilità di ingresso del convertitore al volume di uscitatage of your head unit. This is not a volume control. To set the gain:
- Turn the gain knob all the way down (counter-clockwise).
- Imposta il volume dell'unità principale a circa il 75-80% del suo massimo.
- Girare lentamente il amplifier's gain knob clockwise until you hear slight distortion, then back it off slightly until the sound is clean.
Filtro passa basso (LPF)
The "LPF" knob (refer to Figure 1) controls the low-pass crossover frequency. This filter allows only frequencies below the set point to pass through to the subwoofer. Adjust this between 40Hz and 250Hz to blend the subwoofer's output with your main speakers.
Filtro subsonico
The "SUBSONIC" knob (refer to Figure 1) controls a high-pass filter specifically for the subwoofer channel, preventing extremely low, inaudible frequencies from being played. These frequencies can waste amplifier power and potentially damage the subwoofer. Adjust this between 20Hz and 50Hz, typically set slightly below your LPF or subwoofer's resonant frequency.
Aumento dei bassi
The "BASS BOOST" knob (refer to Figure 1) provides an adjustable boost (0-12dB) at 45Hz. Use this sparingly to enhance bass impact. Excessive bass boost can lead to distortion and potential damage to your subwoofer.
Accensione automatica
As mentioned in the input connections, the "AUTO TURN ON" switch (Figure 4) allows the amplifier to power on without a dedicated remote wire. If your head unit does not have a remote output, set this to "AUDIO" to detect an audio signal, or "DC" (if available, though not explicitly labeled as DC on this model, it's implied by "AUDIO" vs "REM") to detect a DC offset on the speaker lines. For best results and reliability, using the "REM" setting with a remote wire from the head unit is recommended.
Manutenzione
Your MTX Audio amplifier requires minimal maintenance to ensure long-lasting performance.
- Pulizia: Pulire periodicamente il ampl'esterno del filtro con un panno morbido e asciutto. Non utilizzare prodotti chimici aggressivi o detergenti abrasivi.
- Ventilazione: Assicurarsi che il ampLe alette di raffreddamento del lifier sono prive di polvere e detriti. Un buon flusso d'aria è essenziale per prevenire il surriscaldamento.
- Connessioni: Occasionally check all power, ground, and speaker connections to ensure they remain tight and secure. Loose connections can cause performance issues or damage.
Risoluzione dei problemi
Se riscontri problemi con il tuo amplifier, consultare la tabella sottostante per problemi comuni e relative soluzioni.
| Problema | Possibile causa | Soluzione |
|---|---|---|
| Nessun potere / Amplifier non si accende | Blown fuse, loose power/ground/remote wire, incorrect Auto Turn On setting. | Check in-line fuse, verify all power connections are secure, ensure remote wire has +12V, or adjust Auto Turn On switch. |
| Nessuna uscita audio | Loose RCA cables, incorrect input level setting, speaker wires disconnected, amplifier in modalità protetta. | Check RCA connections, ensure Input Level switch is correct (PRE IN/SPK IN), verify speaker wiring, check for protect light (usually red). |
| Suono distorto | Gain set too high, LPF/Subsonic settings incorrect, poor ground connection, damaged speaker. | Reduce gain, adjust LPF/Subsonic filters, check ground connection, inspect speaker for damage. |
| AmpSurriscaldamento del lifier | Insufficient ventilation, impedance too low, gain set too high. | Assicurare un corretto flusso d'aria intorno amplifier, verify speaker impedance is not below 1 Ohm, reduce gain. |
Specifiche
Detailed technical specifications for the MTX Audio JH15001 amppiù vivace.
| Caratteristica | Specificazione |
|---|---|
| Modello | JH15001 |
| Tipo | Monoblock Class-D Car Audio Amppiù vivace |
| Numero di canali | 1 |
| Potenza di uscita RMS (4 Ohm) | 650 watt x 1 canale |
| Potenza di uscita RMS (2 Ohm) | 1100 watt x 1 canale |
| Potenza di uscita RMS (1 Ohm) | 1650 watt x 1 canale |
| Risposta in frequenza | 20Hz - 250Hz |
| Filtro passa-basso (variabile) | 40Hz - 250Hz, 12dB/Octave |
| Subsonic Filter (Variable) | 20Hz - 50Hz, 12dB/Octave |
| Aumento dei bassi | 0 - 12 dB a 45 Hz |
| Voltage | 12 Volt (CC) |
| Temperatura di esercizio | 40 gradi Celsius |
| Dimensioni articolo (L x P x A) | 18 x 12 x 6 pollici |
| Peso dell'articolo | 10.18 libbre |
| Tipo di montaggio | Montaggio in superficie |
| Produttore | Audio MTX |
| Specifica Met | Commissione federale delle comunicazioni |
| Codice UPC | 715442242115 |
Garanzia e supporto
MTX Audio products are designed for reliability and performance. For information regarding warranty coverage, please refer to the warranty card included with your product or visit the official MTX Audio website. For technical support, troubleshooting assistance beyond this manual, or service inquiries, please contact MTX Audio customer service through their official channels.
Always ensure you have your product model number (JH15001) and purchase details available when contacting support.
Ask a question about this manual
Ask about setup, troubleshooting, compatibility, parts, safety, or missing instructions. Manuals+ will review the question and use this page’s manual context to help answer it.