
Lepro PR4100067-WW-US-NF
Lepro LED Strip Light
Manuale d'uso
Model: PR4100067-WW-US-NF
Prodotto finitoview
The Lepro LED Strip Light provides versatile and efficient lighting for various indoor applications. This dimmable 16.4ft (5m) strip features 300 warm white LEDs (3000K) and comes with a dimmer and a 12V power adapter, offering a complete lighting solution. Its strong 3M adhesive backing ensures easy and secure installation.

Image: Complete Lepro LED Strip Light kit, showing the coiled LED strip, dimmer switch, and power adapter.
Caratteristiche principali:
- Dimmerabile: The 16.4ft LED strip includes a dimmer for adjustable brightness, enhancing convenience and energy saving.
- Strong 3M Adhesive: Features professional and strong 3M adhesive for secure mounting. Extra mounting brackets/fixing clips are also included.
- Kit standard: Comes as a complete kit with a 16.4ft (5m) non-waterproof light strip, a dimmer, and a 1.5A 12V US plug power adapter.
- Bright and Safe: Equipped with 300 LEDs for ample brightness. Operates at a safe 12V DC, ensuring strong heat dissipation and long service life.
- Ampiamente utilizzato: Ideal for decorating and lighting various indoor spaces such as kitchens, living rooms, bedrooms, TV backgrounds, mirrors, walls, stairs, ceilings, and cabinets.
Informazioni sulla sicurezza
Si prega di leggere attentamente tutte le istruzioni di sicurezza prima dell'installazione e dell'uso. Il mancato rispetto di queste istruzioni può causare scosse elettriche, incendi o altri pericoli.
- Questo prodotto è progettato per solo per uso internoNon esporre all'acqua o a elevata umidità.
- Assicurarsi che l'alimentazione sia scollegata prima dell'installazione o della manutenzione.
- Use only the provided 12V DC power adapter. Using an incompatible power supply may damage the strip and pose a fire risk.
- Do not bend the LED strip sharply or at angles less than 90 degrees, as this can damage the circuit board.
- Do not cover the LED strip with materials that could impede heat dissipation, as this may lead to overheating.
- Tenere fuori dalla portata dei bambini.

Image: Close-up of the LED strip and the UL Listed 12V power adapter, highlighting the "Safe to Use" feature.
Contenuto della confezione
Your Lepro LED Strip Light package should contain the following items:
- 1 x 16.4ft (5m) Non-Waterproof LED Strip Light
- 1 x Dimmer Switch
- 1 x 1.5A 12V Power Adapter (US Plug)
- Additional Mounting Brackets/Fixing Clips (if applicable)
Guida all'installazione
Follow these steps for a simple and secure installation of your LED strip light:
- Fase 1: preparare la superficie
Ensure the surface where you plan to install the LED strip is clean, dry, and smooth. Wipe the surface thoroughly to remove any dust, dirt, or grease. A clean surface ensures optimal adhesion of the 3M tape.
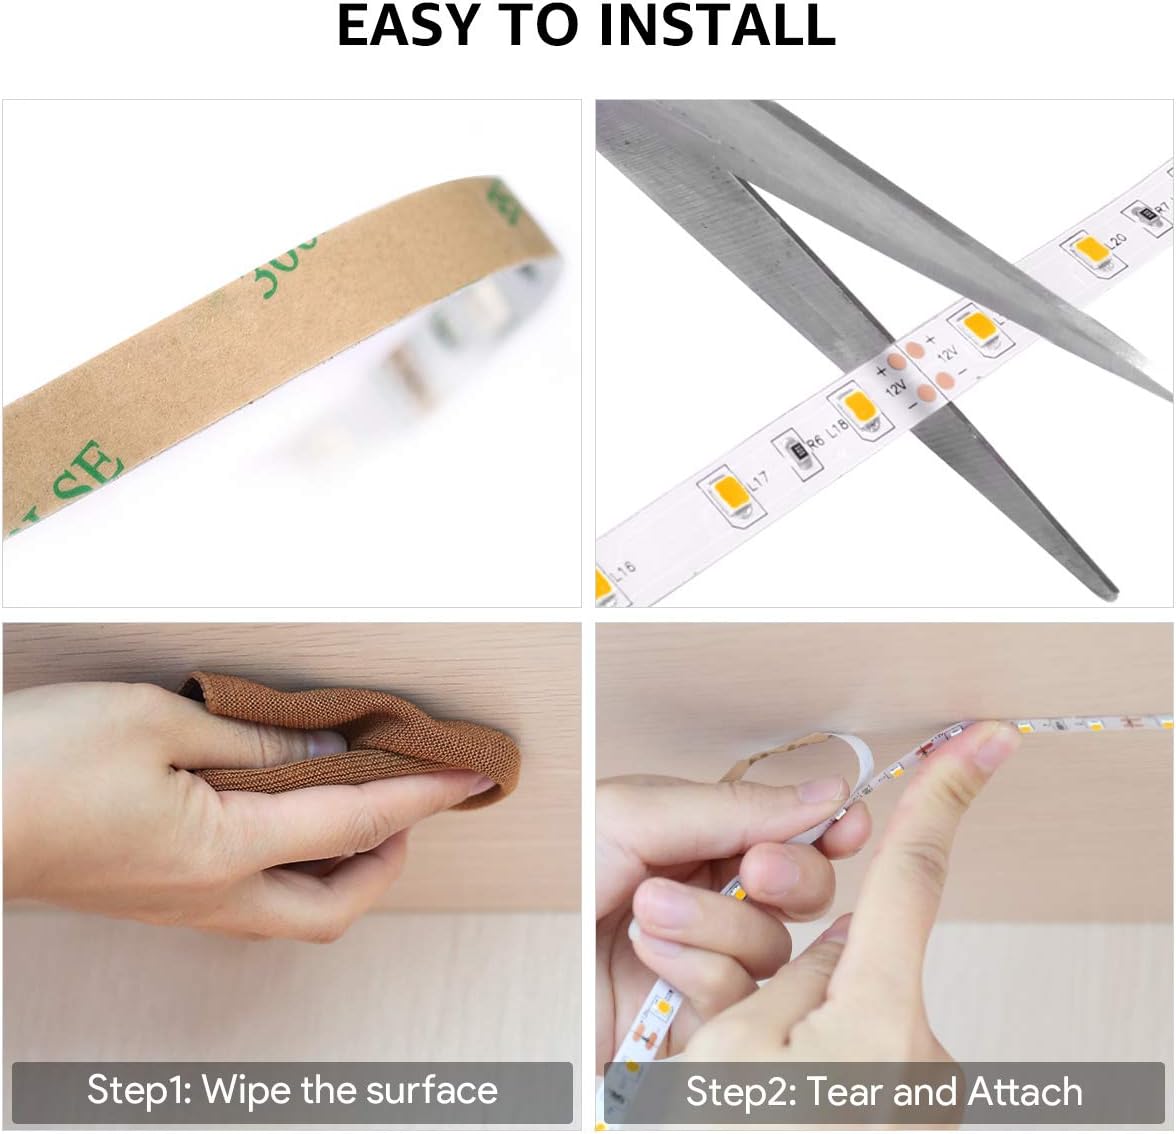
Image: Step-by-step guide for easy installation, including cleaning the surface, removing adhesive, cutting, and pressing the strip.
- Step 2: Measure and Cut (Optional)
If the 16.4ft length is too long for your application, you can cut the LED strip at designated cutting marks (usually indicated by a copper pad and a scissor icon). Ensure you cut only at these marks to avoid damaging the circuit.
- Step 3: Remove Adhesive Backing
Carefully peel off the protective backing from the 3M adhesive tape on the back of the LED strip. Peel only a small section at a time to prevent the adhesive from collecting dust or sticking prematurely.
- Step 4: Attach the LED Strip
Press the exposed adhesive side of the LED strip firmly onto the prepared surface. Work your way along the desired path, pressing down to ensure good contact. For added security, use the included mounting clips if necessary, especially around corners or areas with potential stress.
- Passaggio 5: collegare l'alimentazione
Connect the LED strip to the dimmer switch, and then connect the dimmer switch to the 12V power adapter. Finally, plug the power adapter into a standard wall outlet. Ensure all connections are secure.

Image: Schematic diagram illustrating how to connect the 5-meter LED strip to the dimmer and power adapter.
Istruzioni per l'uso
The Lepro LED Strip Light is designed for simple operation:
- Accensione/spegnimento: Once connected to power, the LED strip can be turned on or off using the rotary knob on the dimmer switch.
- Regola luminosità: Rotate the knob on the dimmer switch clockwise to increase brightness and counter-clockwise to decrease brightness. The dimmer allows for any-level adjustment from 10% to 100% illumination.

Image: Visual representation of the dimmable feature, showing the dimmer knob and the LED strip at 10%, 50%, and 100% brightness levels.
Applicazioni:
The flexibility and dimmable nature of the Lepro LED Strip Light make it suitable for a wide range of decorative and functional lighting purposes:
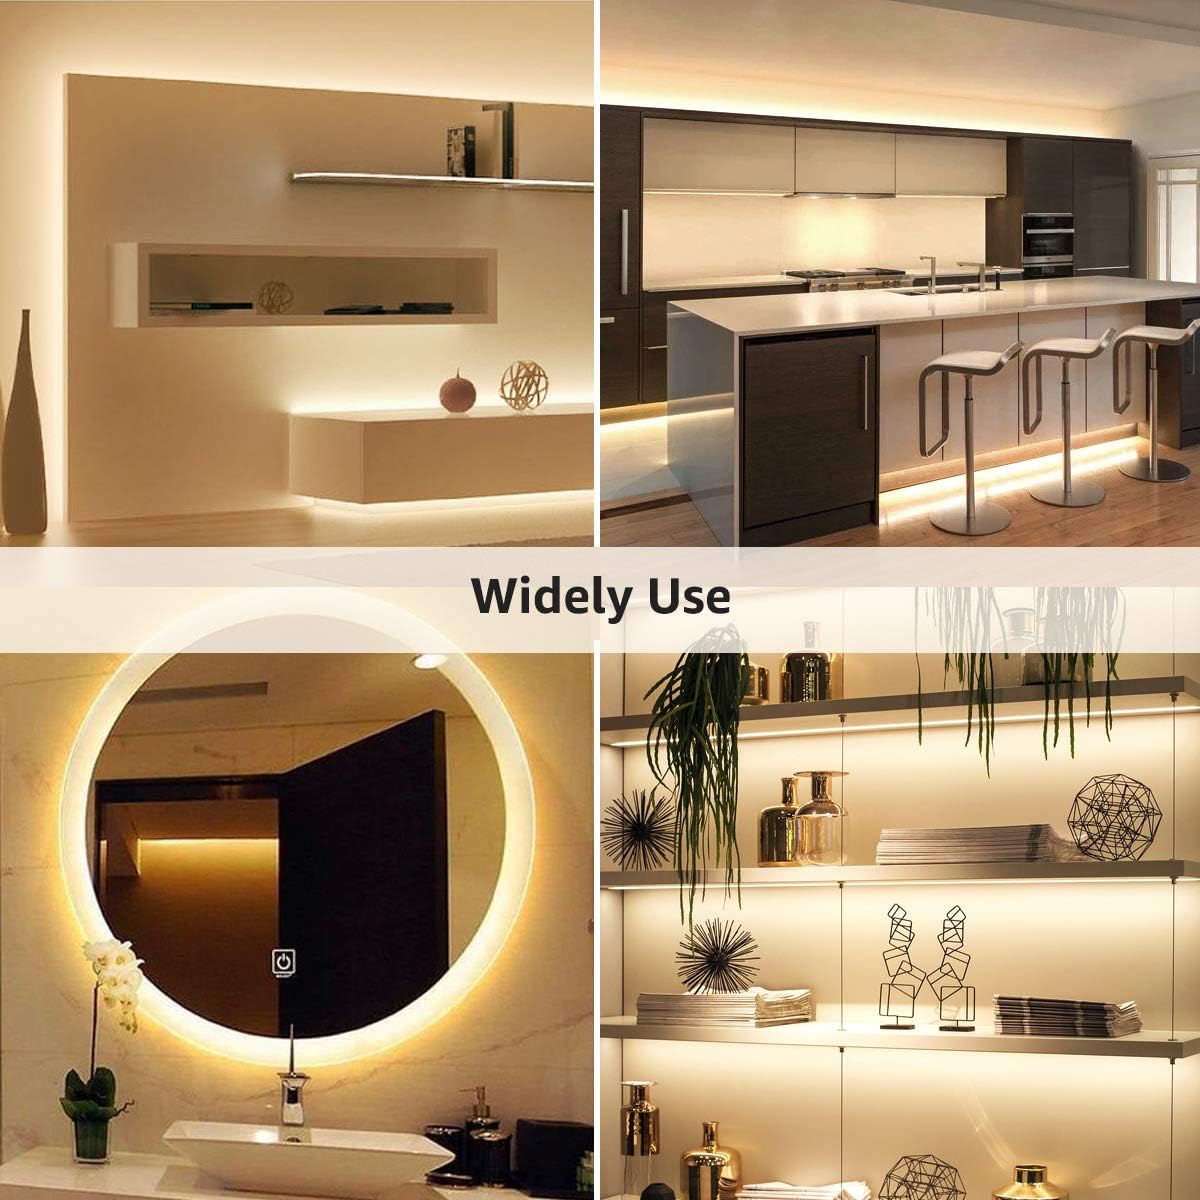
Immagine: Examples of wide usage, including lighting for shelves, kitchen cabinets, vanity mirrors, and display cases.

Immagine: Examples showcasing the flexibility, cuttable design, and DIY potential of the LED strip lights in various installations.
Manutenzione
To ensure the longevity and optimal performance of your Lepro LED Strip Light, follow these simple maintenance guidelines:
- Pulizia: Disconnect the power before cleaning. Gently wipe the LED strip with a soft, dry cloth. Do not use abrasive cleaners or solvents, as they may damage the strip or its adhesive.
- Ispezione: Periodically check the strip for any signs of damage, such as cuts, frayed wires, or loose connections. If any damage is found, discontinue use and contact customer support.
- Magazzinaggio: If storing the LED strip for an extended period, ensure it is coiled loosely and kept in a cool, dry place away from direct sunlight and extreme temperatures.
Risoluzione dei problemi
If you encounter issues with your LED Strip Light, refer to the following common problems and solutions:
| Problema | Possibile causa | Soluzione |
|---|---|---|
| Le luci non si accendono. | Nessuna alimentazione, connessione allentata, adattatore difettoso. | Check if the power adapter is securely plugged into the outlet. Ensure all connections (strip to dimmer, dimmer to adapter) are firm. Test the outlet with another device. |
| Le luci sono fioche o tremolanti. | Dimmer setting too low, insufficient power, damaged section. | Adjust the dimmer knob to increase brightness. Ensure the power adapter is providing sufficient power. Inspect the strip for any visible damage. |
| L'adesivo non aderisce. | Surface not clean or smooth, old adhesive. | Clean the surface thoroughly before application. Ensure the surface is smooth and non-porous. Use the included mounting clips for extra support. |
| Part of the strip is not lighting up. | Damage to the circuit, improper cutting. | This usually indicates damage to a section of the strip. If the strip was cut, ensure it was cut only at the designated marks. This issue may require replacement of the strip. |
Specifiche
| Attributo | Dettaglio |
|---|---|
| Marca | Lebbroso |
| Numero di modello | PR4100067-WW-US-NF |
| Tipo di sorgente luminosa | GUIDATO |
| Colore chiaro | Bianco caldo |
| Temperatura del colore | 3000 gradi Celsius |
| Numero di LED | 300 |
| Lunghezza | 16.4 piedi (5 m) |
| Voltage | 12V CC |
| Cosatage | 15 watt |
| Flusso luminoso | 1200 lumen |
| Metodo di controllo | Remote (Dimmer Knob) |
| Uso interno/esterno | Al chiuso |
| Livello di resistenza all'acqua | Non resistente all'acqua |
| Materiale | Plastica |
| Peso dell'articolo | 7.4 once |
| Dimensioni del pacco | 4.49 x 4.37 x 2.64 pollici |
Garanzia e supporto
The Lepro LED Strip Light is covered by a Garanzia di 2 anno dalla data di acquisto. Questa garanzia copre difetti di materiali e lavorazione in condizioni di normale utilizzo.
For warranty claims, technical support, or any questions regarding your product, please contact Lepro customer service through the retailer's platform or the official Lepro websito. Quando contatti l'assistenza, tieni a portata di mano la ricevuta d'acquisto e il numero del modello.
Ask a question about this manual
Ask about setup, troubleshooting, compatibility, parts, safety, or missing instructions. Manuals+ will review the question and use this page’s manual context to help answer it.