
1. Prodotto finitoview
The Walfront Digital Power Analyzer Watt Meter is a versatile instrument designed for measuring various electrical parameters in DC circuits. It provides clear and accurate readings for voltage, current, power, energy (Wh), and charge (Ah). This device is suitable for use with 12V, 24V, 36V, and 48V battery bank systems, handling up to 100 amps intermittently and 50 ampè continuamente.
Le caratteristiche principali includono:
- Display LCD chiaro: Provides precise and easy-to-read measurements.
- Ampio volumetage Gamma: Operates from 0 to 60 volts.
- Alta capacità di corrente: Supporta fino a 100 amps picco e 50 amps continuo.
- Misurazione multifunzione: Measures energy (Wh), charge (Ah), power (W), current (A), and voltage(V).
- Basso consumo energetico: Efficient design with only 0.001 Ohms resistance and 36 mA consumption.
- Alta precisione: Offers 0.01 A current and 0.01 V voltage resolutions.
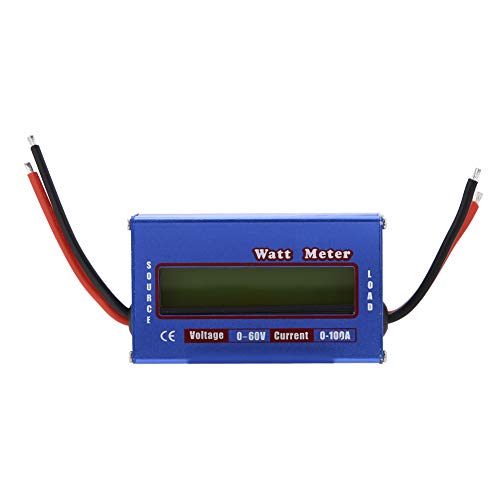
Figura 1: Fronte view of the Walfront Digital Power Analyzer Watt Meter, showing the LCD screen and approximate dimensions.
2. Informazioni sulla sicurezza
Si prega di leggere attentamente tutte le istruzioni di sicurezza prima di utilizzare il dispositivo. La mancata osservanza di queste istruzioni può causare scosse elettriche, incendi o lesioni gravi.
- Always ensure the device is connected correctly according to the wiring diagram.
- Non superare il volume massimotage (60V) or current (100A peak, 50A continuous) ratings.
- Evitare il contatto con circuiti sotto tensione.
- Do not operate the device in wet conditions or in the presence of flammable gases or vapors.
- Tenere il dispositivo lontano dalla portata dei bambini.
- If the device appears damaged, do not use it.
3. Configurazione e connessione
The watt meter features two sets of wires: "SOURCE" and "LOAD".
- Identificare i terminali: The device has clearly labeled "SOURCE" and "LOAD" connections. The "SOURCE" side connects to your power supply (e.g., battery), and the "LOAD" side connects to the device you wish to measure (e.g., motor, ESC).
- Connetti alla fonte di alimentazione: Connect the red wire from the "SOURCE" side to the positive (+) terminal of your DC power source (e.g., battery). Connect the black wire from the "SOURCE" side to the negative (-) terminal of your DC power source.
- Connect to Load: Connect the red wire from the "LOAD" side to the positive (+) input of your electrical load. Connect the black wire from the "LOAD" side to the negative (-) input of your electrical load.
- Assicurare la polarità: Always ensure correct polarity (positive to positive, negative to negative) to prevent damage to the meter and connected devices.
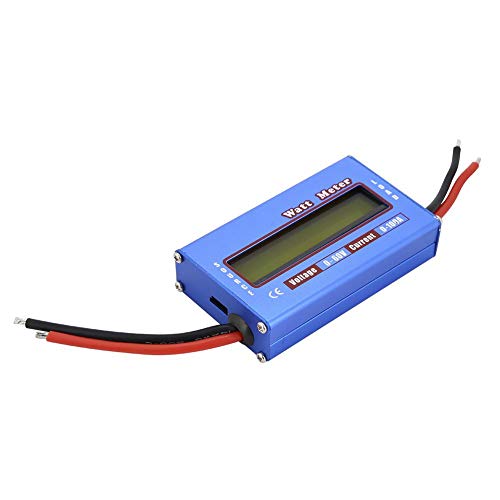
Figura 2: in alto view of the watt meter, indicating "SOURCE" and "LOAD" connections for proper wiring.

Figura 3: lato view of the watt meter, illustrating the robust wire connections.
4. Funzionamento
Once properly connected, the watt meter will automatically power on and display real-time measurements on its LCD screen.
4.1 Lettura del display
The LCD display shows various parameters simultaneously. Common readings include:
- Voltage(V): L'attuale voltage del circuito.
- Corrente (A): The current flowing through the circuit.
- Potenza (W): The instantaneous power consumption.
- Energia (Wh): The total energy consumed over time.
- Charge (Ah): The total charge (amp-hours) passed through the circuit.
- Picco Amps (Ap): The highest current recorded during the measurement period.
- Voltage Minimum (Vm): Il voltage recorded (sag).
4.2 Resetting Measurements
To reset accumulated energy (Wh) and charge (Ah) readings, disconnect the power from the meter for a few seconds and then reconnect it. This will clear the accumulated values and start new measurements.
5. Manutenzione
The Walfront Digital Power Analyzer Watt Meter requires minimal maintenance.
- Pulizia: Pulire il dispositivo con un panno morbido e asciutto. Non utilizzare detergenti abrasivi o solventi.
- Magazzinaggio: Conservare il dispositivo in un luogo fresco e asciutto, lontano dalla luce solare diretta e da temperature estreme.
- Ispezione: Periodically inspect the wires and connections for any signs of wear or damage.
6. Risoluzione Dei Problemi
| Problema | Possibile causa | Soluzione |
|---|---|---|
| Nessun display/Dispositivo non si accende | Incorrect wiring; No power from source; Damaged device. | Check all connections for correct polarity and secure contact. Ensure the power source is active. If damaged, discontinue use. |
| Letture imprecise | Loose connections; Device operating outside specified range; Interference. | Verify all connections are tight. Ensure voltage and current are within 0-60V and 0-100A. Relocate away from strong electromagnetic fields. |
| Readings not resetting | Continuous power supply. | Disconnect power completely for a few seconds to clear accumulated data. |
7. Specifiche
| Parametro | Valore |
|---|---|
| Marca | Walfront |
| Modello | Walfront36hxv74n9g |
| Voltage Gamma | 0 - 60 V CC |
| Intervallo attuale | 0 - 100A (100A peak, 50A continuous) |
| Risoluzione attuale | 0.01 A |
| Voltage Risoluzione | 0.01 Volt |
| Resistenza | 0.001 Ohm |
| Consumo energetico | 36mA |
| Dimensioni | 4.13 x 3.03 x 1.38 pollici (circa) |
| Peso | 0.1 chilogrammi (circa) |
| Colore | Nero, Blu |
8. Garanzia e supporto
For warranty information and technical support, please refer to the documentation provided with your purchase or contact Walfront customer service. Keep your purchase receipt as proof of purchase.
Manufacturer: Eujgoov