1. Introduzione
The SINGER SGM-M3405 is a versatile household sewing machine designed to meet a wide range of sewing needs, from basic repairs to creative decorative projects. Featuring 23 stitch patterns, including essential, stretch, and decorative options, this machine offers flexibility for various fabrics and techniques. Its user-friendly design incorporates features such as a one-step buttonhole, adjustable stitch length and width, an integrated needle threader, and a bright LED light for enhanced visibility. The heavy-duty metal frame ensures stability and durability, making it a reliable tool for all your sewing endeavors.
2. Importanti istruzioni di sicurezza
To ensure safe operation and prevent injury or damage, please read and follow these instructions carefully:
- Scollegare sempre la macchina dalla presa elettrica durante la pulizia, la lubrificazione o quando non è in uso.
- Tenere le dita lontane da tutte le parti in movimento. È necessaria una cura speciale intorno all'ago della macchina per cucire.
- Utilizzare la placca ago corretta. Una placca sbagliata può causare la rottura dell'ago.
- Do not pull or push fabric while stitching. This may deflect the needle and cause it to break.
- Spegnere la macchina da cucire quando si effettuano regolazioni nella zona dell'ago, come l'infilatura dell'ago, la sostituzione dell'ago, l'infilatura della bobina o la sostituzione del piedino premistoffa.
- Use only genuine SINGER accessories and parts.
- Non utilizzare mai la macchina con le aperture di ventilazione bloccate. Mantenere le aperture di ventilazione della macchina per cucire e del pedale libere da accumuli di lanugine, polvere e stracci.
3. Identificazione delle parti
Familiarize yourself with the main components of your SINGER SGM-M3405 sewing machine:


4. Configurazione e utilizzo iniziale
4.1 Disimballaggio
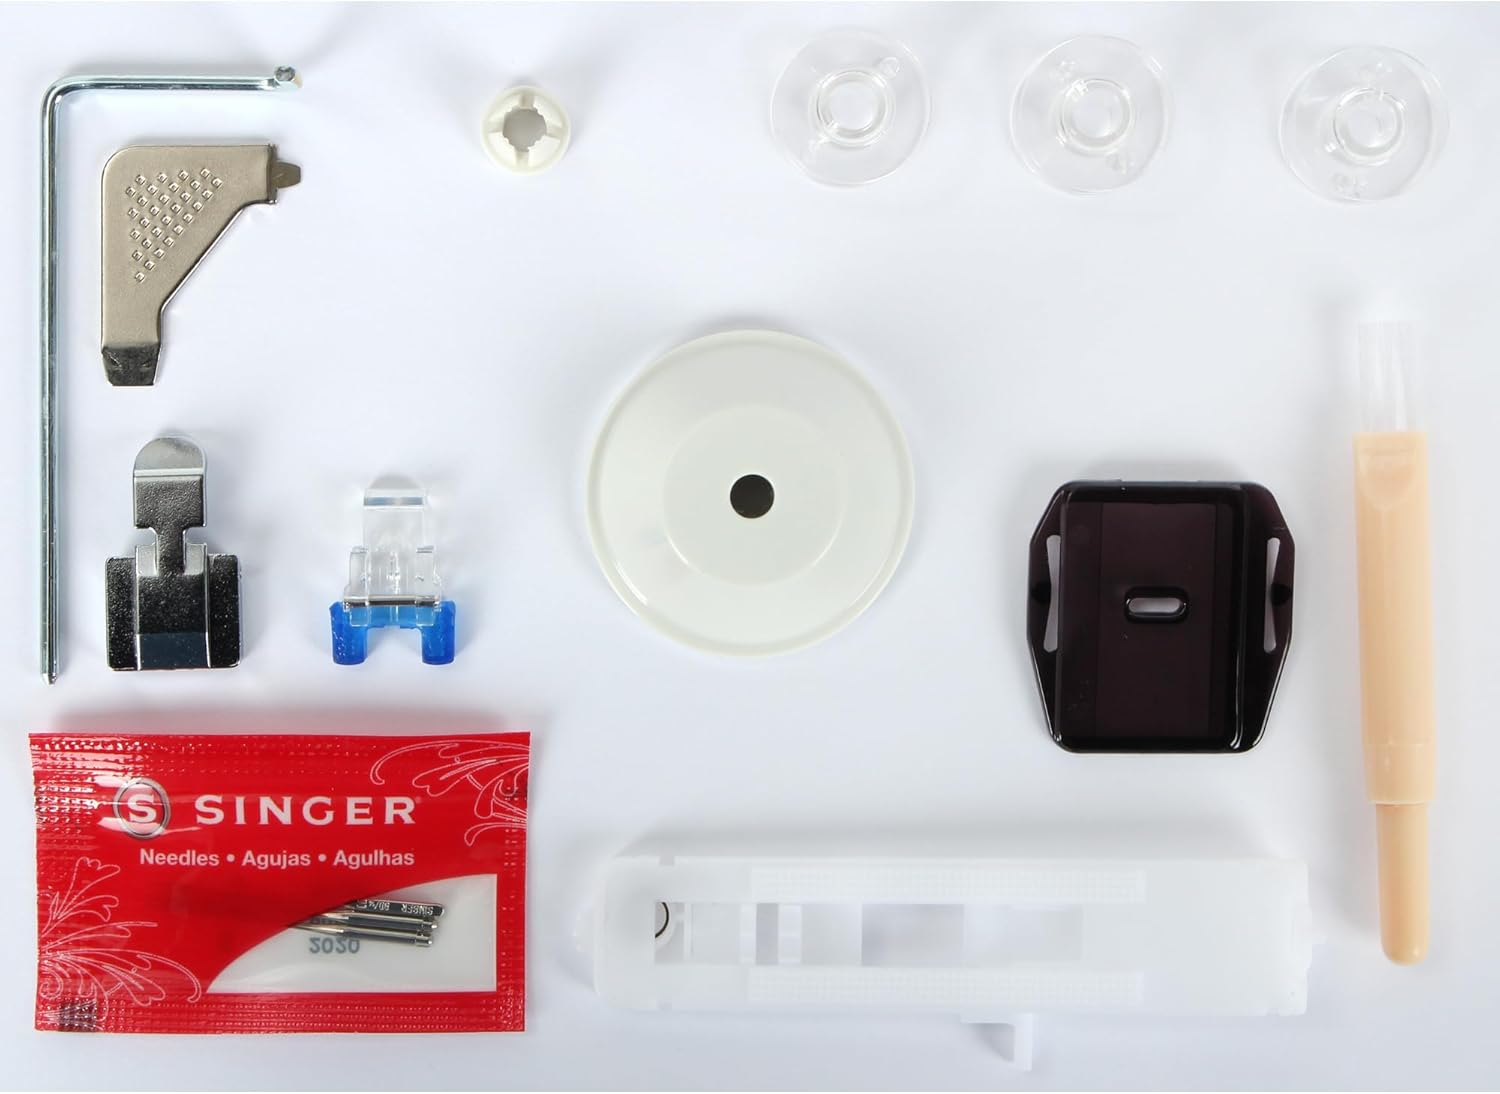
Carefully remove the machine from its packaging. Retain all packaging materials for future storage or transport. Ensure all included accessories are present as shown in Figure 3.7.
4.2 Collegamento di alimentazione
Locate the power input socket at the rear of the machine (Figure 3.8). Connect the power cord to the machine and then to a suitable electrical outlet (127 Volts). Turn on the main power switch, also located at the rear.
4.3 Avvolgimento della bobina
- Place an empty bobbin onto the bobbin winder spindle on the top right of the machine (Figure 3.2).
- Posizionare un rocchetto di filo sul portarocchetto.
- Far passare il filo attraverso il disco di tensione dell'avvolgimento della bobina.
- Avvolgere il filo in senso orario attorno alla bobina per alcune volte.
- Spingere l'alberino avvolgitore della bobina verso destra.
- Gently press the foot controller. The bobbin will begin to wind.
- Once the bobbin is full, the winding will stop automatically. Cut the thread and push the spindle back to the left.
4.4 Inserting the Bobbin (Front-Loading)
- Open the bobbin case cover located at the front of the machine, beneath the needle plate.
- Inserire la bobina avvolta nella capsula, assicurandosi che il filo si svolga nella direzione corretta (solitamente in senso antiorario).
- Tirare il filo attraverso la molla di tensione della capsula della bobina.
- Close the bobbin case cover securely.
4.5 Infilatura del filo superiore
- Sollevare l'alzapiedino.
- Posizionare un rocchetto di filo sul portarocchetto.
- Far passare il filo attraverso il guidafilo superiore.
- Bring the thread down through the right channel, around the U-turn, and up through the left channel (Figure 3.2).
- Passare il filo attraverso la leva tendifilo da destra a sinistra.
- Bring the thread down through the remaining guides to the needle.
- Use the built-in needle threader or manually thread the needle from front to back.
4.6 Raising the Bobbin Thread
- Tenere delicatamente il filo superiore con la mano sinistra.
- Turn the handwheel towards you (counter-clockwise) to lower the needle into the needle plate and then raise it.
- The upper thread will catch the bobbin thread, forming a loop.
- Pull the loop to bring the bobbin thread up through the needle plate opening.
- Tirare sia il filo superiore che quello della bobina sotto il piedino premistoffa e verso la parte posteriore della macchina.
5. Funzionamento della macchina
5.1 Selezione del punto
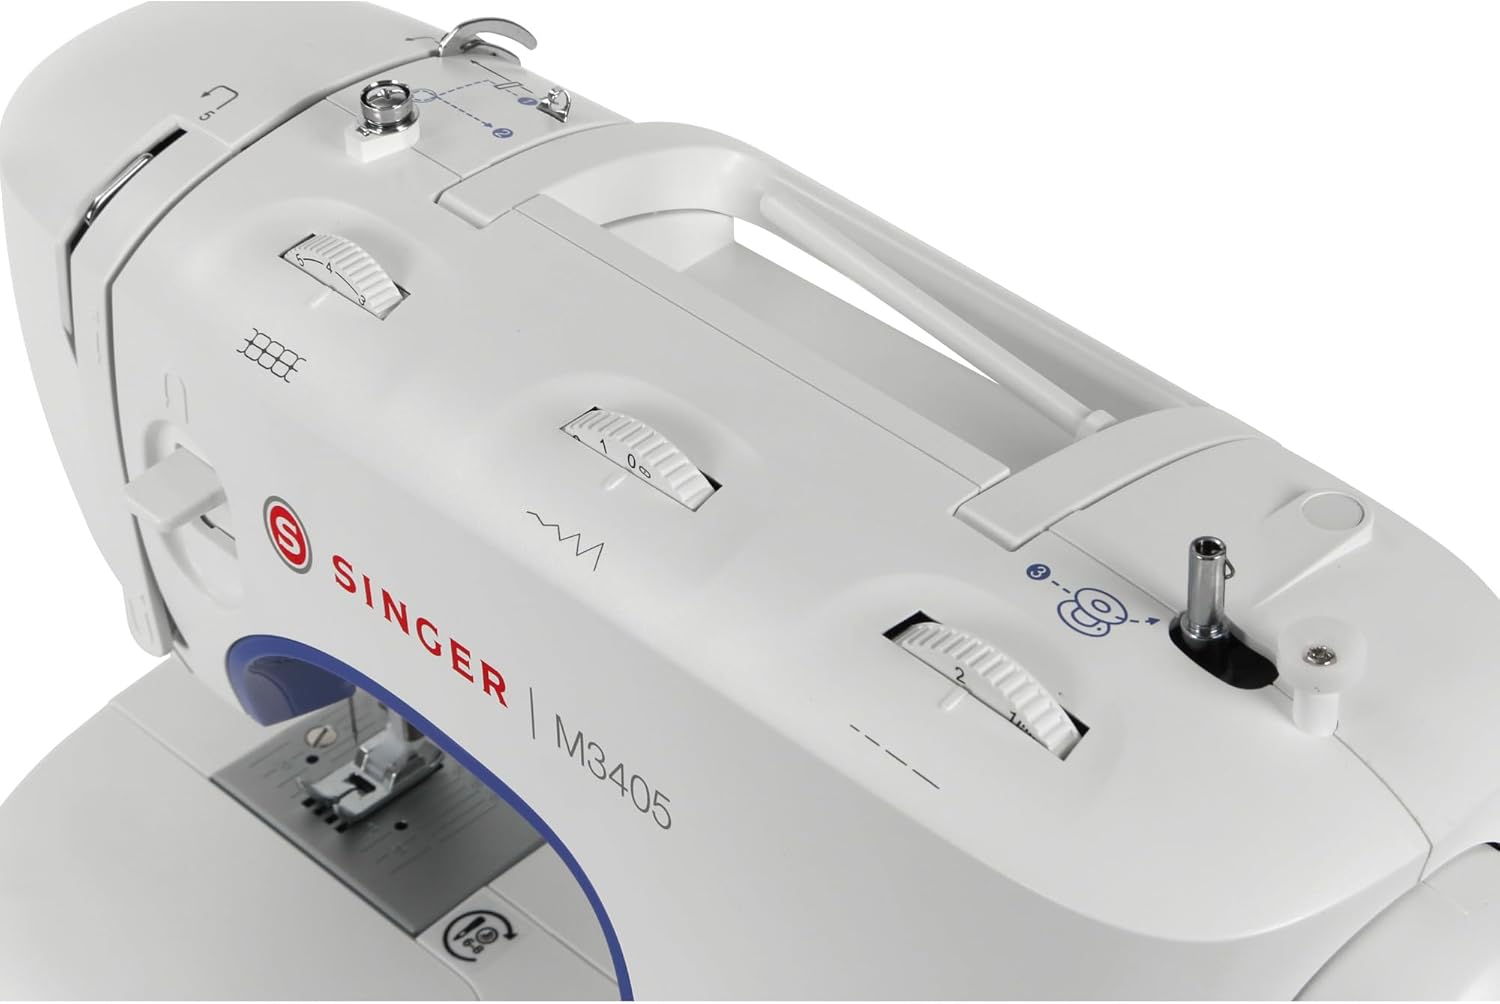
The SGM-M3405 offers 23 stitch patterns. To select a stitch, simply turn the stitch selection dial (Figure 3.3) until the desired stitch pattern aligns with the indicator mark. The dial clearly displays basic, stretch, and decorative stitches.
5.2 Regolazione della lunghezza e della larghezza del punto
The machine features separate dials for adjusting stitch length and width, providing creative control over your projects. Turn the stitch length dial to increase or decrease the length of your stitches. Turn the stitch width dial to adjust the width of zigzag and decorative stitches. Experiment with different settings to achieve desired effects for various sewing techniques and decorative applications.
5.3 Cucitura di una cucitura
- Place the fabric under the presser foot, aligning the edge with the desired seam allowance guide on the needle plate.
- Abbassare il piedino premistoffa.
- Premere delicatamente il pedale per iniziare a cucire.
- To secure the beginning and end of a seam, use the reverse lever to sew a few stitches backward, then forward again.
- When finished, raise the needle to its highest position, lift the presser foot, and pull the fabric away from the machine.
- Cut the threads using the thread cutter located on the machine.
5.4 One-Step Buttonhole
The SGM-M3405 simplifies buttonhole creation with its one-step feature. Attach the buttonhole foot. Place the button you intend to use into the buttonhole foot's holder. The machine will automatically sew a buttonhole perfectly sized for your button, ensuring consistent results every time.
5.5 Utilizzo del braccio libero
To access the free arm (Figure 3.5), simply slide off the removable accessory storage compartment (Figure 3.6). The free arm is ideal for sewing small, cylindrical items such as cuffs, collars, pant hems, and children's clothing, allowing the fabric to rotate freely around the arm.
5.6 Using the Needle Threader
The integrated needle threader provides quick and easy needle threading. With the needle in its highest position, lower the threader mechanism and align the small hook with the needle eye. Guide the thread through the hook, and it will pull the thread through the needle eye as you release the mechanism.
5.7 Illuminazione a LED
The long-lasting LED light illuminates the sewing area, providing clear visibility and eliminating shadows. This feature is particularly useful when working on dark fabrics or in dimly lit environments, enhancing precision and reducing eye strain.
6. Manutenzione
Una manutenzione regolare garantisce la longevità e le prestazioni ottimali della tua macchina da cucire.
6.1 Pulizia
Periodically clean the lint and dust from the bobbin area and feed dogs using a small brush. Always unplug the machine before cleaning. Do not use harsh chemicals or abrasive materials.
6.2 Lubrificazione
Refer to your machine's specific lubrication points if indicated in the full manual. Many modern sewing machines, including this model, are designed to be self-lubricating in key areas and may not require user lubrication.
6.3 Sostituzione dell'ago
Replace the needle regularly, especially if it becomes bent, dull, or if you notice skipped stitches. To replace, loosen the needle clamp screw, remove the old needle, insert a new needle with the flat side facing the back, and tighten the screw securely.
7. Risoluzione Dei Problemi
Questa sezione affronta i problemi più comuni che potresti incontrare e le relative soluzioni.
| Problema | Possibile causa | Soluzione |
|---|---|---|
| Punti saltati | Ago sbagliato, ago piegato, infilatura non corretta, misura dell'ago sbagliata per il tessuto. | Change needle, re-thread machine, ensure correct needle type/size. |
| Rottura del filo | Incorrect threading, too much upper thread tension, poor quality thread, bent needle. | Re-thread, adjust tension, use good quality thread, replace needle. |
| Tangled Thread (Bird's Nest) | Improper upper threading, incorrect bobbin insertion, incorrect tension. | Re-thread upper and bobbin, check bobbin insertion, adjust tension. |
| Macchina che non cuce | Machine unplugged, power switch off, bobbin winder engaged, foot controller not connected. | Check power, ensure bobbin winder is disengaged, check foot controller connection. |
8. Specifiche tecniche
| Caratteristica | Specificazione |
|---|---|
| Marca | SINGER |
| Numero di modello | SGM-M3405 (230218102) |
| Colore | Bianco/Blu |
| Dimensioni del prodotto (L x P x A) | Dimensioni: 38 x 20 x 30 cm |
| Peso dell'articolo | 6 chilogrammi |
| Potenza/Watttage | 70 Watt |
| Voltage | 127 Volt |
| Materiale | Metal (Heavy-Duty Metal Frame) |
| Spegnimento automatico | NO |
| Livello di rumore | 44 decibel |
| Schemi di punti | 23 (Basic, Stretch, Decorative) |
| Tipo di asola | One-Step |
| Tipo di bobina | Caricamento frontale |
| Illuminazione | GUIDATO |
| Braccio libero | SÌ |
| Infila ago | SÌ |
9. Garanzia e assistenza clienti
For information regarding your product's warranty, please refer to the warranty card included with your purchase or visit the official SINGER website. For technical assistance, spare parts, or service inquiries, please contact SINGER customer support through their official channels. Keep your proof of purchase for warranty claims.