1. Introduzione
This manual provides essential information for the setup, operation, maintenance, and troubleshooting of your Blackmagic Design ATEM Mini HDMI Live Switcher. Please read these instructions carefully to ensure optimal performance and longevity of your device.

Figure 1: Blackmagic Design ATEM Mini HDMI Live Switcher
2. Configurazione e connessioni
The ATEM Mini is designed for easy integration into your live production workflow. Follow these steps to connect your devices:
- Collegamento elettrico: Connect the included power adapter to the 'POWER' input on the rear panel of the ATEM Mini. Ensure the power cable is securely screwed into place to prevent accidental disconnection during operation.
- Ingressi HDMI: Connect up to four HDMI sources (cameras, computers, gaming consoles) to the HDMI inputs labeled '1' through '4' on the rear panel.
- Uscita HDMI: Connect a monitor or display to the 'HDMI OUT' port to view your program output. This output is for program monitoring only.
- Webcam Output: Collegare il 'WEBCAM OUT' USB-C port to your computer. The ATEM Mini will appear as a standard webcam, allowing you to use it with streaming software like OBS, YouTube Live, Facebook Live, or Skype.
- Ingressi audio: Connect microphones to the 'MIC 1' and 'MIC 2' 3.5mm stereo mini-jack inputs. These inputs are independently controllable via the built-in Fairlight audio mixer.
- ATEM Control (Ethernet): Connect an Ethernet cable to the 'ATEM CONTROL' port to connect the switcher to your network for software control via the ATEM Software Panel.

Figura 2: Collegamenti del pannello posteriore
Video 1: Oltreview of the Blackmagic Design ATEM Mini's features and connectivity.
3. Operating the ATEM Mini
The ATEM Mini features an intuitive control panel for seamless live switching and production.

Figure 3: ATEM Mini Control Surface
3.1. Switching Between Sources
- Program Buttons (1-4): Press the numbered buttons (1, 2, 3, 4) to instantly switch your live program output to the corresponding HDMI input. The active program source button will be illuminated.
- Pulsante Taglia: Provides an instant, hard cut transition between the current program source and the selected preview fonte.
- Pulsante automatico: Initiates a professional transition effect (e.g., dissolve, wipe) between the current program source and the selected preview source. The duration of the transition can be adjusted.
- FTB (Fade to Black) Button: Fades the program output to a black screen.
3.2. Controllo audio
- Controlli del microfono: Use the 'ON/OFF' buttons and 'Up/Down' arrows for MIC 1 and MIC 2 to control the levels and activate/deactivate your microphone inputs.
- Audio Follow Video (AFV): The ATEM Mini features a full Fairlight audio mixer, allowing independent control of all audio sources, including embedded HDMI audio and microphone inputs.
3.3. Video Effects and Overlays
- Immagine nell'immagine (PIP): Use the 'PICTURE IN PICTURE' controls to enable and adjust the size and position of a secondary video source overlaid on your main program.
- Digitazione: The 'KEY' section provides controls for chroma keying, allowing you to overlay graphics or video with transparency.
- Effetti: Adjust transition durations and select various effects using the 'DURATION' and 'EFFECT' controls.
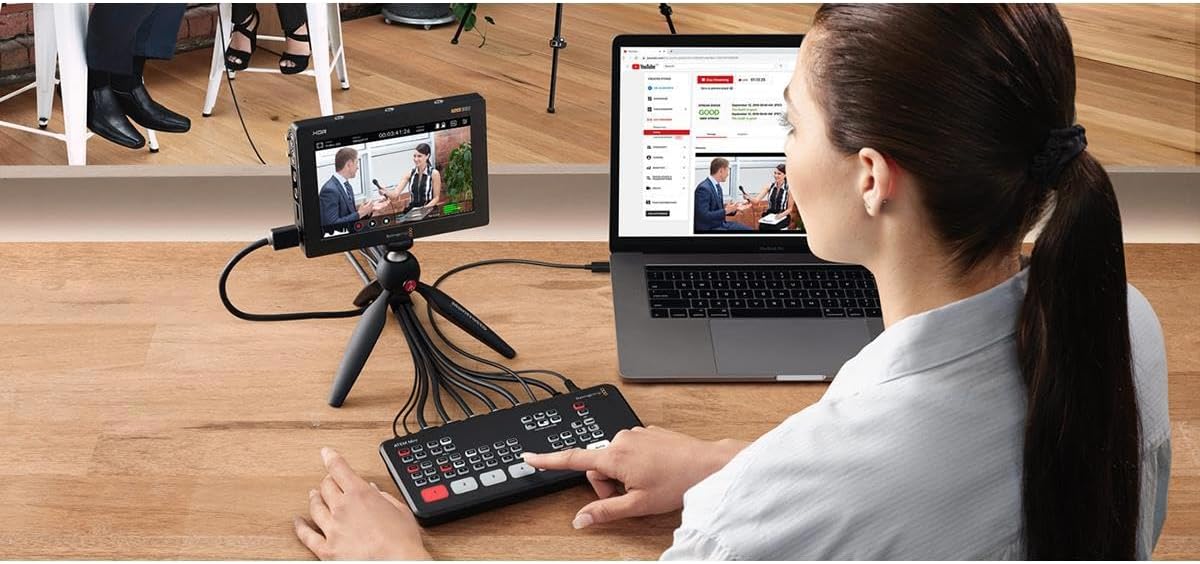
Figure 4: Typical ATEM Mini Workflow with Laptop
4. Caratteristiche principali
- Multi-Camera Production: Connect up to 4 HDMI inputs for live switching between cameras, computers, or gaming consoles, enabling dynamic multi-camera productions.
- Direct Streaming: The USB-C output functions as a webcam, allowing direct streaming to popular platforms like YouTube Live, Facebook Live, and Skype without additional capture cards.
- Integrated Audio Mixer: Features a full Fairlight audio mixer with independent control over all HDMI audio and two microphone inputs for professional sound mixing.
- Professional Transitions and Effects: Includes various broadcast-quality transitions such as cuts, dissolves, and wipes, along with Picture-in-Picture and keying capabilities.
- ATEM Software Control: The device includes ATEM Software Control for Mac or Windows, providing advanced features and precise control over your production.
5. Manutenzione
- Pulizia: Use a soft, dry cloth to clean the exterior of the ATEM Mini. Avoid liquid cleaners or abrasive materials.
- Ventilazione: Assicurarsi che il dispositivo abbia una ventilazione adeguata per evitare il surriscaldamento. Non ostruire le aperture di ventilazione.
- Magazzinaggio: Store the ATEM Mini in a cool, dry place away from direct sunlight and extreme temperatures when not in use.
6. Risoluzione Dei Problemi
- Nessuna uscita video: Check all HDMI cable connections. Ensure input sources are powered on and outputting a compatible resolution (up to 1080p60). Verify the correct input is selected on the ATEM Mini.
- Nessun audio: Check microphone connections and ensure they are powered (if required). Verify audio levels are adjusted correctly on the ATEM Mini. For HDMI sources, ensure audio is embedded and not muted.
- Webcam Output Not Recognized: Ensure the USB-C cable is securely connected to both the ATEM Mini and your computer. Try a different USB-C port or cable. Restart your computer and the ATEM Mini.
- Interruzione di corrente: The secure screw-on power connector helps prevent accidental disconnections. If power is lost, ensure the connection is secure and restart the device.
7. Specifiche
| Attributo | Valore |
|---|---|
| Dimensioni del prodotto | 11.1 x 5.7 x 4.6 pollici |
| Peso dell'articolo | 1.1 libbre |
| Numero di modello | OB02410 |
| Produttore | Progettazione della magia nera |
| Colore | nero |
| Tipo di connettore | Cavo HDMI |
| Dispositivi compatibili | Camera, Gaming Console |
| Tipo di cavo | Cavo HDMI |
8. Garanzia e supporto
For warranty information and technical support, please refer to the official Blackmagic Design websito o contattare direttamente il servizio clienti. Conservare la ricevuta d'acquisto per eventuali reclami in garanzia.