
Suuonee 90113-SM1-005
Automotive Wheel Stud Instruction Manual
Marca: Suuonee | Modello: OE: 90113-SM1-005
1. Prodotto finitoview
This manual provides essential information for the installation, operation, and maintenance of the Suuonee Automotive Wheel Stud, designed as a direct replacement for OE part number 90113-SM1-005. Manufactured from high-quality carbon steel with a stainless steel finish, this wheel stud offers stable performance, high reliability, and excellent resistance to corrosion and high temperatures.

Figure 1: The Suuonee Automotive Wheel Stud, a precision-engineered component for secure wheel mounting.
Le caratteristiche principali includono:
- Sostituzione diretta: Specifically designed to match OE part number 90113-SM1-005, ensuring compatibility.
- Costruzione durevole: Made from high-quality carbon steel with a smooth, comfortable stainless steel finish, providing resistance to high temperatures, deformation, and corrosion.
- Prestazioni affidabili: Engineered for stable and highly reliable performance in automotive wheel applications.
- Installazione semplice: Designed for straightforward installation and removal, simplifying the replacement process.
2. Configurazione e installazione
Proper installation of the wheel stud is crucial for vehicle safety. While the product is designed for easy installation, it is recommended that installation be performed by a qualified mechanic or an individual with appropriate automotive repair experience. Always refer to your vehicle's service manual for specific torque specifications and procedures.
2.1 Strumenti necessari
- Wheel lug wrench or impact gun
- Cric e cavalletti
- Chiave dinamometrica
- Wire brush (for cleaning hub)
- Occhiali e guanti di sicurezza
2.2 Passaggi di installazione
- Preparare il veicolo: Park the vehicle on a level surface, engage the parking brake, and loosen the lug nuts on the wheel where the stud will be replaced.
- Sollevare e fissare: Sollevare il veicolo in sicurezza utilizzando un cric e sostenerlo con cavalletti. Rimuovere i dadi delle ruote e la ruota.
- Remove Old Stud (if applicable): If replacing a damaged stud, carefully remove it from the wheel hub. This may involve hammering it out from the back or using a specialized tool.
- Pulisci l'hub: Use a wire brush to clean any rust or debris from the wheel hub and the stud hole to ensure a flush fit.
- Install New Stud: Insert the new Suuonee wheel stud into the hub from the back. Ensure the splines on the stud align with the splines in the hub.
- Seat the Stud: Use a lug nut (or a specialized stud installer tool) and a washer to pull the stud through the hub until it is fully seated. Tighten the lug nut until the stud head is flush against the back of the hub. Do not overtighten.
- Reinstallare la ruota: Place the wheel back onto the hub, ensuring it sits flush. Hand-tighten the lug nuts.
- Veicolo inferiore e coppia: Lower the vehicle until the wheel just touches the ground. Using a torque wrench, tighten the lug nuts to the manufacturer's specified torque in a star pattern.
- Controllo finale: Lower the vehicle completely and re-check the lug nut torque after driving a short distance (e.g., 50-100 miles).

Figure 2: The wheel stud is a critical component for securing the wheel to the vehicle's hub.
3. Funzionamento e funzione
The Suuonee Automotive Wheel Stud functions as a critical fastener, providing the threaded post onto which the wheel's lug nuts are tightened. Once properly installed and the wheel is mounted, the stud ensures the wheel remains securely attached to the vehicle's hub during operation. Its robust construction and precise threading are designed to withstand the dynamic forces and stresses encountered during driving, including acceleration, braking, and cornering.
Properly torqued lug nuts on these studs distribute the load evenly, preventing wheel wobble and ensuring safe vehicle handling. The hexagonal head type ensures a secure fit within the hub, preventing rotation of the stud itself.
4. Manutenzione
While wheel studs are designed for durability and minimal maintenance, periodic inspection is recommended to ensure continued safety and performance.
4.1 Programma di ispezione
- During Tire Rotations: Inspect all wheel studs for damage, corrosion, or stretching.
- After Wheel Removal/Installation: Always check for proper lug nut torque.
- Annualmente: A thorough visual inspection for any signs of wear or damage.
4.2 What to Look For
- Fili danneggiati: Look for stripped, cross-threaded, or corroded threads on the stud.
- Bent or Stretched Studs: Any visible bending or elongation of the stud indicates it needs replacement.
- Corrosione: While the stainless steel finish offers good resistance, excessive corrosion can weaken the stud or affect lug nut seating.
- Loose Studs: Ensure the stud is firmly seated in the hub and does not spin freely.
If any damage or excessive wear is observed, the wheel stud should be replaced immediately to prevent potential wheel detachment.
5. Risoluzione Dei Problemi
This section addresses common issues related to wheel studs and their potential solutions.
| Problema | Possibile causa | Soluzione |
|---|---|---|
| Lug nut won't tighten or spins freely. | Stripped threads on stud or lug nut. | Replace the damaged wheel stud and/or lug nut. Do not attempt to force. |
| Wheel wobble or vibration after installation. | Improperly torqued lug nuts, unseated stud, or damaged wheel/hub. | Re-torque lug nuts to specification. Inspect stud seating. Check wheel and hub for damage. Seek professional inspection if problem persists. |
| Stud appears bent or stretched. | Over-torquing, impact, or material fatigue. | Immediately replace the damaged wheel stud. Ensure correct torque is applied during future installations. |
| Difficulty installing new stud. | Incorrect stud size, debris in hole, or misaligned splines. | Verify correct OE part number. Clean the hub hole thoroughly. Ensure splines are aligned before seating. Do not force. |
Nota di sicurezza: Any issues related to wheel studs or wheel attachment should be addressed immediately. Driving with damaged or improperly installed wheel studs can lead to serious accidents.
6. Specifiche del prodotto
The following are the technical specifications for the Suuonee Automotive Wheel Stud (OE: 90113-SM1-005):
- Part Number (OE Equivalent): 90113-SM1-005
- Materiale: Acciaio al carbonio
- Dimensioni filettatura: Numero di modello: M12
- Finitura esterna: Acciaio inossidabile
- Tipo di testa: Esagonale
- Applicazione: Automotive wheel fastening
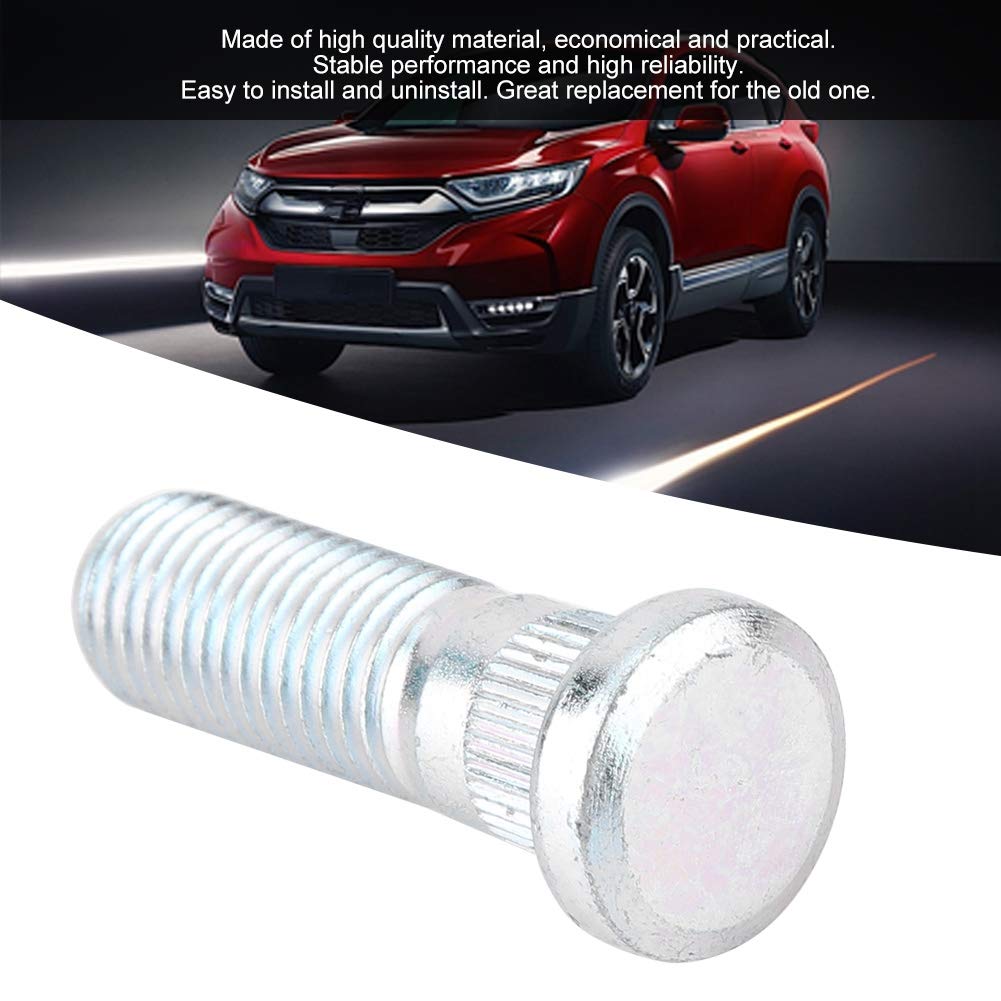
Figure 3: The wheel stud is manufactured from high-quality material for durability and reliability.
7. Garanzia e supporto
Suuonee is committed to providing high-quality automotive components. This product is backed by a return policy that allows for free returns within 7 days of arrival. For any questions regarding product compatibility, installation, or performance, please contact your retailer or the manufacturer directly.
For further assistance or to report an issue, please refer to the contact information provided with your purchase or visit the official Suuonee support channels.
Ask a question about this manual
Ask about setup, troubleshooting, compatibility, parts, safety, or missing instructions. Manuals+ will review the question and use this page’s manual context to help answer it.