1. Introduzione
This manual provides detailed instructions for the installation, operation, and maintenance of your ZEBRONICS H81 LGA 1150 Socket Motherboard. Designed for Intel Core i7/i5/i3 processors, this ATX motherboard supports DDR3 memory and features an Intel H81 Chipset. Please read this manual thoroughly before proceeding with installation to ensure proper functionality and to prevent damage.

Immagine 1: Principale view of the ZEBRONICS H81 LGA 1150 Motherboard, showcasing il suo layout e i suoi componenti.
2. Specifiche
The following table outlines the key technical specifications of the ZEBRONICS H81 Motherboard:
| Caratteristica | Descrizione |
|---|---|
| Supporto del processore | Intel Core i7/i5/i3 processors (LGA 1150 Socket) |
| Chipset | Intel H81 |
| Supporto di memoria | 2 x DDR3 dual-channel slots, 1066/1333/1600MHz, Max 32GB |
| Rete locale | Realtek 8105E 100/1000 Mbps |
| Audio | Realtek 662, 3x Audio Jacks for 6 channel HD Audio |
| Porte del pannello posteriore | 1x USB Mouse/Keyboard, 1x VGA, 1x HDMI, 2x USB 3.0, 2x USB 2.0, 1x LAN, 3x Audio Jacks |
| Connettori integrati | Front panel, Speaker, Front panel audio, USB 2.0, 4x SATA, 4-pin CPU fan, SYS fan, 24-pin ATX power, 4-pin ATX 12V power, Clear CMOS header |
| Slot di espansione | 1 slot PCI Express x16 |
| Fattore di forma | ATX |
| Dimensioni | Dimensioni: 21.3 x 5.7 x 26.8 cm |
| Peso | 560 grammi |

Image 2: Visual representation of key features including H81 Chipset, DDR3 support, LGA 1150 socket, HDMI, 5.1 Audio, 100/1000 LAN, 4 SATA ports, and PCIe slot.
3. Guida all'installazione
Per una corretta installazione della scheda madre e dei suoi componenti, seguire questi passaggi:
- Preparazione: Ensure your computer case is compatible with the ATX form factor. Gather necessary tools including a screwdriver, thermal paste, and anti-static wrist strap.
- Installa CPU: Open the CPU socket lever. Carefully align the CPU with the socket (match the golden triangle on the CPU with the triangle on the socket) and gently place it in. Close the lever to secure the CPU. Apply a thin, even layer of thermal paste to the CPU's heat spreader.
- Installare il dissipatore della CPU: Mount the CPU cooler according to its manufacturer's instructions, ensuring good contact with the CPU and proper fan orientation. Connect the CPU fan cable to the 4-pin CPU fan connector on the motherboard.
- Installa RAM: Open the clips on both ends of the DDR3 memory slots. Align the RAM modules with the slots, ensuring the notch on the module matches the key in the slot. Press down firmly on both ends until the clips snap into place.
- Montare la scheda madre: Install the I/O shield into the rear opening of your computer case. Carefully place the motherboard into the case, aligning the screw holes with the standoffs. Secure the motherboard with screws.
- Connetti alimentazione: Connect the 24-pin ATX main power connector and the 4-pin ATX 12V CPU power connector from your power supply to the corresponding ports on the motherboard.
- Collegare i dispositivi di archiviazione: Use SATA cables to connect your hard drives or SSDs to the SATA ports on the motherboard. Connect the power cables from your power supply to these devices.
- Collegare i cavi del pannello frontale: Connect the power switch, reset switch, HDD LED, power LED, and front panel audio/USB cables from your case to the respective headers on the motherboard. Refer to the motherboard diagram for correct pin assignments.
- Installare le schede di espansione (facoltativo): If installing a graphics card or other PCI Express cards, insert them into the appropriate slots and secure them with a screw.
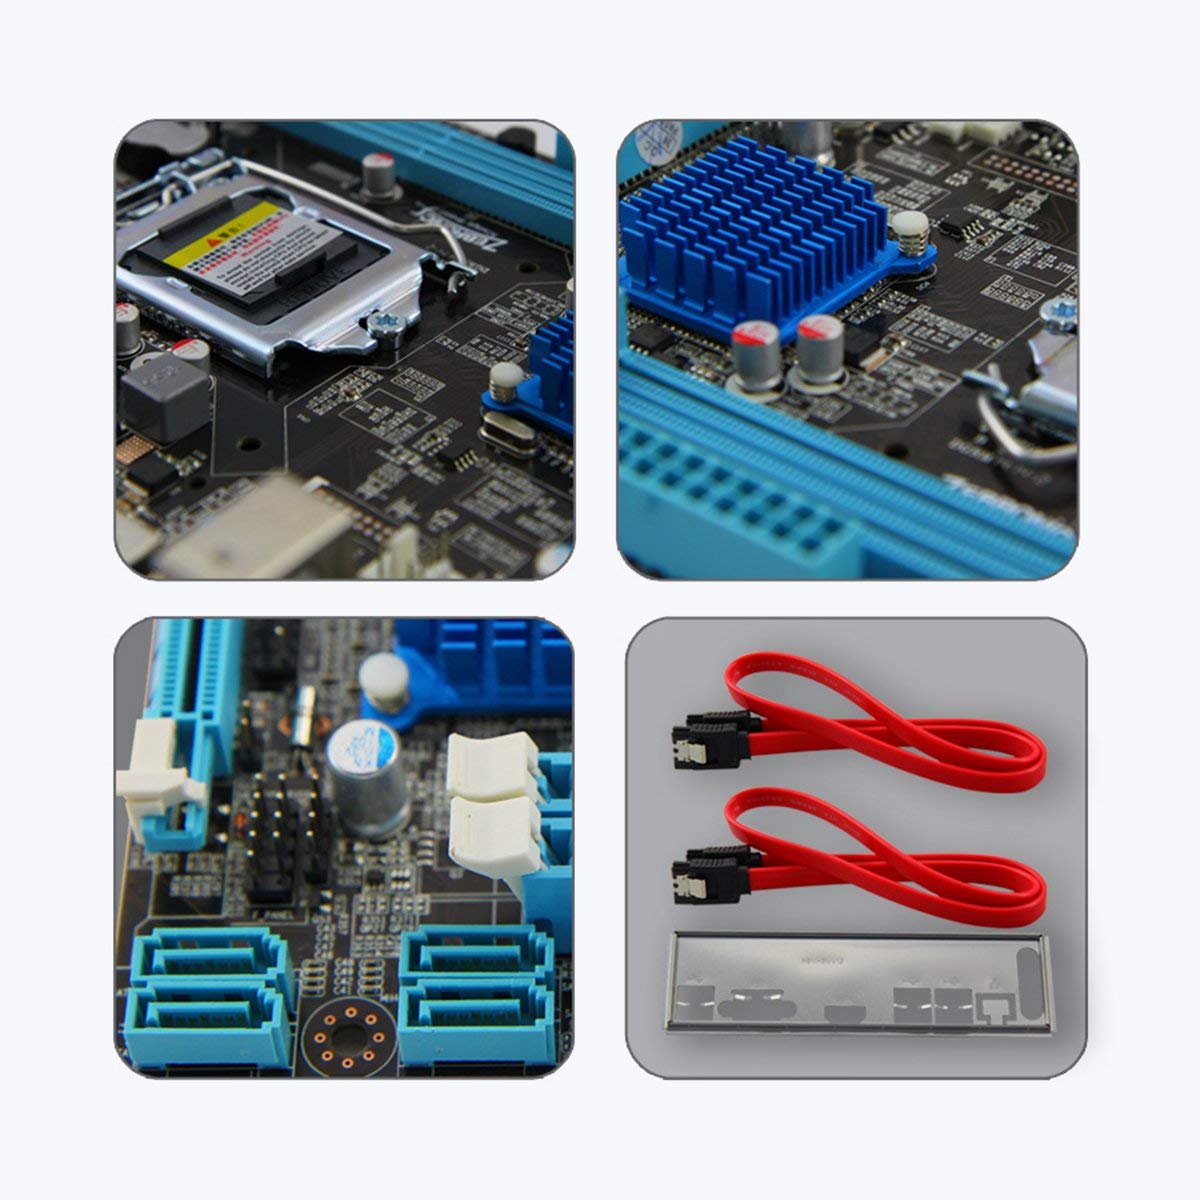
Immagine 3: Primo piano views of motherboard components such as the CPU socket, chipset heatsink, SATA ports, and included accessories like SATA cables and the I/O shield.
4. Istruzioni per l'uso
Una volta installati e collegati tutti i componenti, puoi accendere il sistema:
- Accensione iniziale: After ensuring all connections are secure, connect your monitor, keyboard, and mouse. Plug in the power cord and press the power button on your computer case.
- Configurazione BIOS/UEFI: During startup, repeatedly press the designated key (usually DEL or F2) to enter the BIOS/UEFI setup utility. Here you can configure boot order, system time, and other advanced settings. Save changes and exit to continue booting.
- Installazione del sistema operativo: Insert your operating system installation media (USB drive or DVD) and follow the on-screen prompts to install the OS.
- Installazione del driver: After OS installation, install the necessary drivers for your motherboard (chipset, LAN, audio, graphics) from the included driver CD or the ZEBRONICS websito.
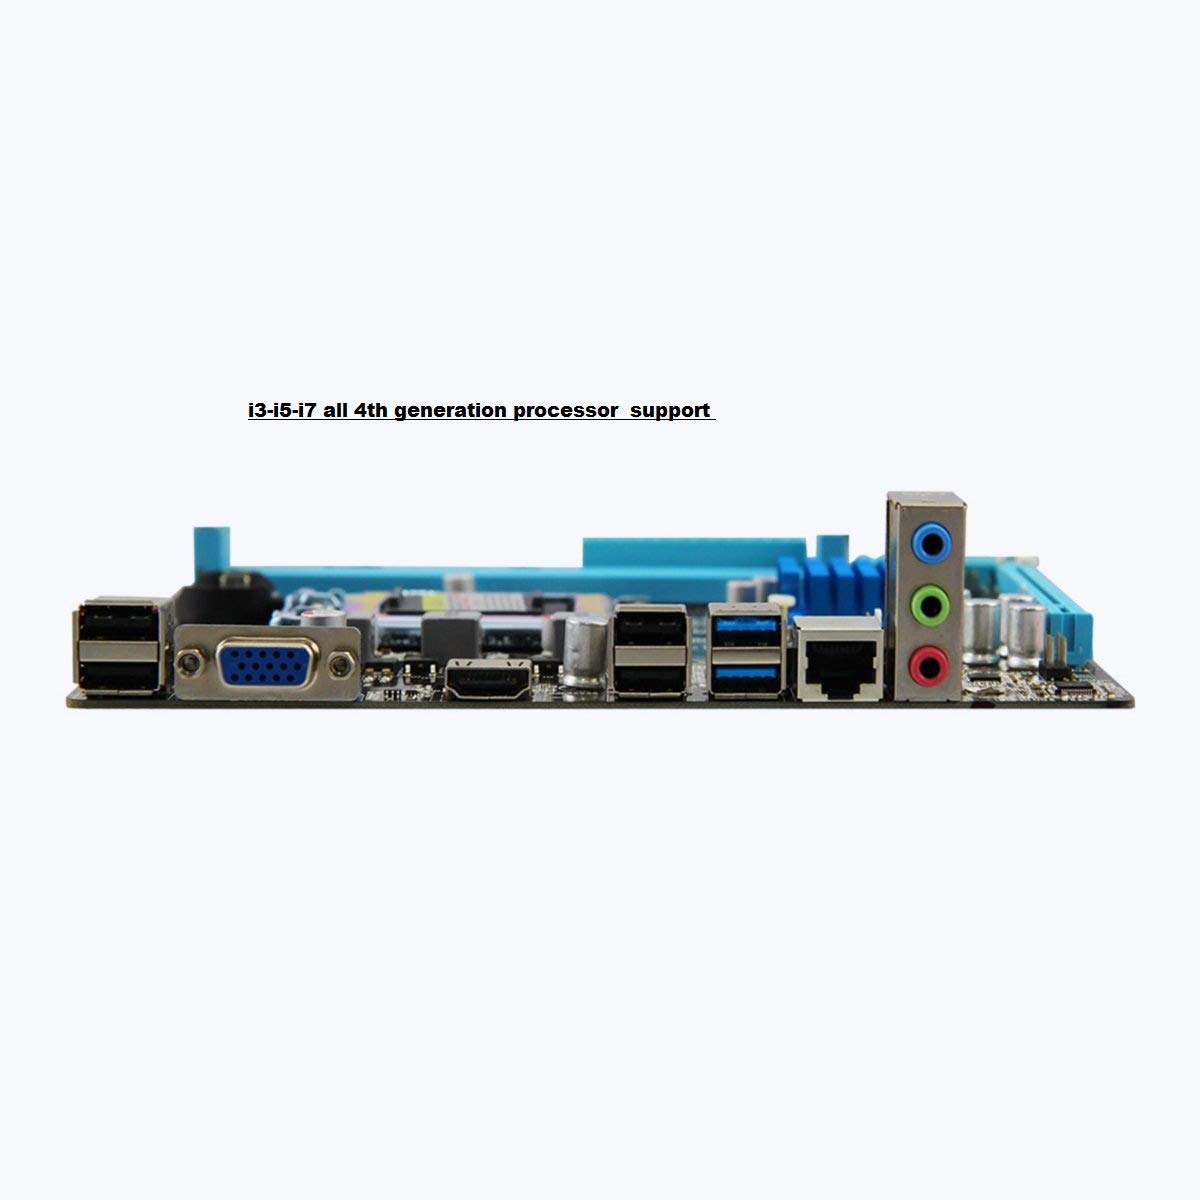
Image 4: Rear I/O panel of the ZEBRONICS H81 Motherboard, showing ports for USB, VGA, HDMI, LAN, and audio.
5. Manutenzione
Una manutenzione regolare contribuisce a garantire la longevità e le prestazioni ottimali della scheda madre:
- Rimozione della polvere: Pulisci periodicamente la polvere dall'interno del case del computer, in particolare da dissipatori e ventole, utilizzando aria compressa. Assicurati che il sistema sia spento e scollegato prima di pulire.
- Aggiornamenti driver: Keep your motherboard drivers (chipset, LAN, audio) updated to the latest versions available from the ZEBRONICS official websito per garantire compatibilità e prestazioni.
- Aggiornamenti BIOS/UEFI: Only update the BIOS/UEFI if necessary, following the instructions provided by ZEBRONICS carefully. Incorrect BIOS updates can render your motherboard inoperable.
- Gestione dei cavi: Assicurarsi che i cavi interni siano disposti in modo ordinato per migliorare il flusso d'aria ed evitare interferenze.
6. Risoluzione Dei Problemi
Se riscontri problemi con la scheda madre, fai riferimento ai seguenti passaggi comuni per la risoluzione dei problemi:
- Nessuna alimentazione/Nessun avvio:
- Check all power connections (24-pin ATX, 4-pin ATX 12V, CPU fan).
- Assicurarsi che l'alimentazione sia accesa e funzionante.
- Verificare il collegamento dell'interruttore di alimentazione sul pannello frontale.
- Try clearing the CMOS (refer to the Clear CMOS header on the motherboard).
- Nessuna visualizzazione:
- Ensure the monitor is connected to the correct video output (VGA or HDMI on the motherboard, or dedicated graphics card).
- Reinstallare i moduli RAM. Provare ad avviare il computer con un solo modulo RAM.
- Se si utilizza una scheda grafica dedicata, assicurarsi che sia correttamente inserita e alimentata.
- Instabilità/arresti anomali del sistema:
- Controllare il surriscaldamento. Assicurarsi che il dissipatore della CPU sia installato correttamente e che le ventole funzionino correttamente.
- Eseguire strumenti di diagnostica della memoria per verificare l'integrità della RAM.
- Update motherboard drivers and BIOS/UEFI.
- Problemi con le periferiche (USB, LAN, audio):
- Ensure drivers for these components are installed and up to date.
- Controllare i collegamenti fisici dei cavi e dei dispositivi.
- Test with different peripherals to isolate the issue.
7. Garanzia e supporto
Your ZEBRONICS H81 Motherboard comes with a Garanzia di 2 anno provided by CORE COMPUTERS. Please retain your proof of purchase for warranty claims.
For technical support, driver downloads, or further assistance, please visit the official ZEBRONICS support websito oppure contatta il loro servizio clienti.