
Lorex W463AQD-E
Lorex 2K Dual Lens Indoor Wi-Fi Security Camera W463AQD-E User Manual
Model: W463AQD-E
1. Introduzione
This manual provides detailed instructions for the installation, configuration, and operation of your Lorex 2K Dual Lens Indoor Wi-Fi Security Camera, model W463AQD-E. Please read this manual thoroughly before using the product to ensure proper functionality and safety. Keep this manual for future reference.

Image 1.1: Lorex 2K Dual Lens Indoor Wi-Fi Security Camera with its retail packaging.
2. Contenuto della confezione
Verify that all items listed below are included in your package. If any items are missing or damaged, please contact Lorex customer support.
- 1 × 2K Dual-Lens Indoor Pan-Tilt Camera
- 1 × 32GB MicroSD Card (pre-installed)
- 1 × 6.5 ft (2 m) Power Cable
- 1 × staffa di montaggio
- 3 × Ancoraggi e viti
- 1 × Adattatore di alimentazione
3. Prodotto finitoview
Familiarize yourself with the components and features of your Lorex security camera.
3.1 Componenti della fotocamera

Immagine 3.1: anteriore view of the camera, showing the dual lenses and call button.

Immagine 3.2: Lato view of the camera, highlighting its dome shape.

Immagine 3.3: Indietro view of the camera, showing the power input and reset button.

Image 3.4: Bottom label displaying model number W463AQD-E and other regulatory information.
3.2 Caratteristiche principali
- Video HD quad da 2K: Cattura video chiari e dettagliatitage.
- Design a doppia lente: Fornisce funzionalità di sorveglianza avanzate.
- Panoramica e inclinazione a 360°: Regolare da remoto la telecamera viewing angle to cover a full 360-degree area.
- Monitoraggio automatico: Segue automaticamente il movimento rilevato all'interno del suo campo di view.
- Smart Person & Pet Detection: Differentiates between human and pet activity to reduce false alerts.
- Visione notturna IR: Provides clear video in low-light conditions up to 33 feet.
- Conversazione bidirezionale: Allows for real-time communication through the camera's built-in microphone and speaker.
- Quick Call Button: Enables visitors to initiate a call to your connected device.
- Archiviazione flessibile: Supports local storage via an included 32GB MicroSD card and optional cloud storage or Lorex Fusion recorders.
- Modalità privacy: Physically hides the camera lens for enhanced privacy when needed.
- Connettività Wi-Fi: Connects to your home network wirelessly (2.4GHz).
4. Impostazione
4.1 Configurazione iniziale e connessione dell'app
- Accensione: Collegare l'adattatore di alimentazione alla fotocamera e collegarlo a una presa di corrente. La fotocamera si accenderà e inizierà la sequenza di avvio.
- Download Lorex Home App: Download the Lorex Home app from the App Store (iOS) or Google Play Store (Android) on your smartphone or tablet.
- Creare un account: Open the Lorex Home app and follow the on-screen instructions to create a new account or log in to an existing one.
- Aggiungi dispositivo: Tap the '+' icon in the app to add a new device. Scan the QR code located on the bottom of your camera or on its packaging.
- Connettiti al Wi-Fi: Follow the app's prompts to connect the camera to your 2.4GHz Wi-Fi network. Ensure your mobile device is connected to the same Wi-Fi network during setup.
- Configurazione completa: Once connected, follow the remaining steps in the app to name your camera and finalize the setup process.

Image 4.1: The Lorex Home application interface for managing camera feeds.
4.2 Montaggio della telecamera
The camera can be placed on a flat surface or mounted to a ceiling or wall using the included mounting bracket.
- Scegli la posizione: Select a suitable indoor location with a clear view and within range of your Wi-Fi network.
- Segna i buchi: Place the mounting bracket at the desired location and mark the screw holes with a pencil.
- Fori di perforazione: Drill pilot holes at the marked spots. If mounting on drywall, insert the included anchors.
- Staffa di sicurezza: Align the mounting bracket with the holes and secure it using the provided screws.
- Collega la fotocamera: Twist the camera onto the mounting bracket until it clicks securely into place.
5. Funzionamento
5.1 Vivere View e controlli
Accedi alla diretta view of your camera through the Lorex Home app. From the live view schermo, è possibile controllare varie funzioni della fotocamera.
- Panoramica e inclinazione: Use the directional controls in the app to remotely adjust the camera's horizontal (pan) and vertical (tilt) angles.
- Zoom digitale: Pizzica per ingrandire o ridurre il feed video in diretta.
- Dual Lens View: The app may offer options to switch between or combine views from the dual lenses.

Image 5.1: Camera shown with a smartphone displaying the dual lens live view nell'app Lorex Home.
5.2 Two-Way Talk and Call Button
The camera features two-way audio for communication and a physical call button.
- Conversazione bidirezionale: Nella vita reale view, tap the microphone icon to speak through the camera's speaker. Tap again to end.
- Pulsante di chiamata: A person near the camera can press the physical call button on the camera to initiate a call to your connected mobile device.

Image 5.2: Demonstrating two-way talk functionality via the Lorex Home app.

Image 5.3: A user pressing the quick call button on the camera.
5.3 Rilevamento del movimento e avvisi
The camera uses smart detection to identify important events.
- Rilevamento intelligente: The camera can detect and differentiate between people and pets, sending specific alerts to your phone.
- Monitoraggio automatico: When motion is detected, the camera can automatically pan and tilt to follow the subject.
- Personalizzazione: Adjust motion detection zones and sensitivity settings within the Lorex Home app to minimize unwanted alerts.

Image 5.4: Auto-tracking feature following a baby's movement.

Immagine 5.5: Un altro view of the auto-tracking feature in action.

Image 5.6: Smart motion detection alerting to a person's presence.

Image 5.7: Pet detection and auto-tracking following a dog.
5.4 Night Vision and Smart Lighting
La telecamera garantisce una sorveglianza nitida anche in condizioni di scarsa illuminazione.
- Visione notturna IR: Infrared LEDs provide black and white video up to 33 feet in complete darkness.
- Smart Security Lighting: The camera features integrated lighting that can be configured to activate upon motion detection or on a schedule.

Image 5.8: Comparison of daytime and IR night vision footage of a sleeping baby.

Image 5.9: Clear night vision image of a baby sleeping.

Image 5.10: The camera's smart security lighting feature in action.
5.5 Registrazione e archiviazione
Your camera offers multiple options for storing recorded video footage.
- Archiviazione locale: A 32GB MicroSD card is pre-installed for local recording. This ensures your footage is stored directly on the device.
- Archiviazione cloud: Optional cloud storage plans are available for off-site backup of your recordings. Refer to the Lorex Home app for details.
- Lorex Fusion Recorders: The camera is compatible with Lorex Fusion recorders for integrated system storage.

Image 5.11: The included 32GB MicroSD card for private and secure local storage.
5.6 Modalità Privacy
Activate Privacy Mode to physically conceal the camera lens when surveillance is not desired.
- Attivazione: Privacy Mode can be activated through the Lorex Home app. When active, the camera lens will rotate downwards, blocking its view.
- Disattivazione: Deactivate Privacy Mode via the app to resume normal operation.
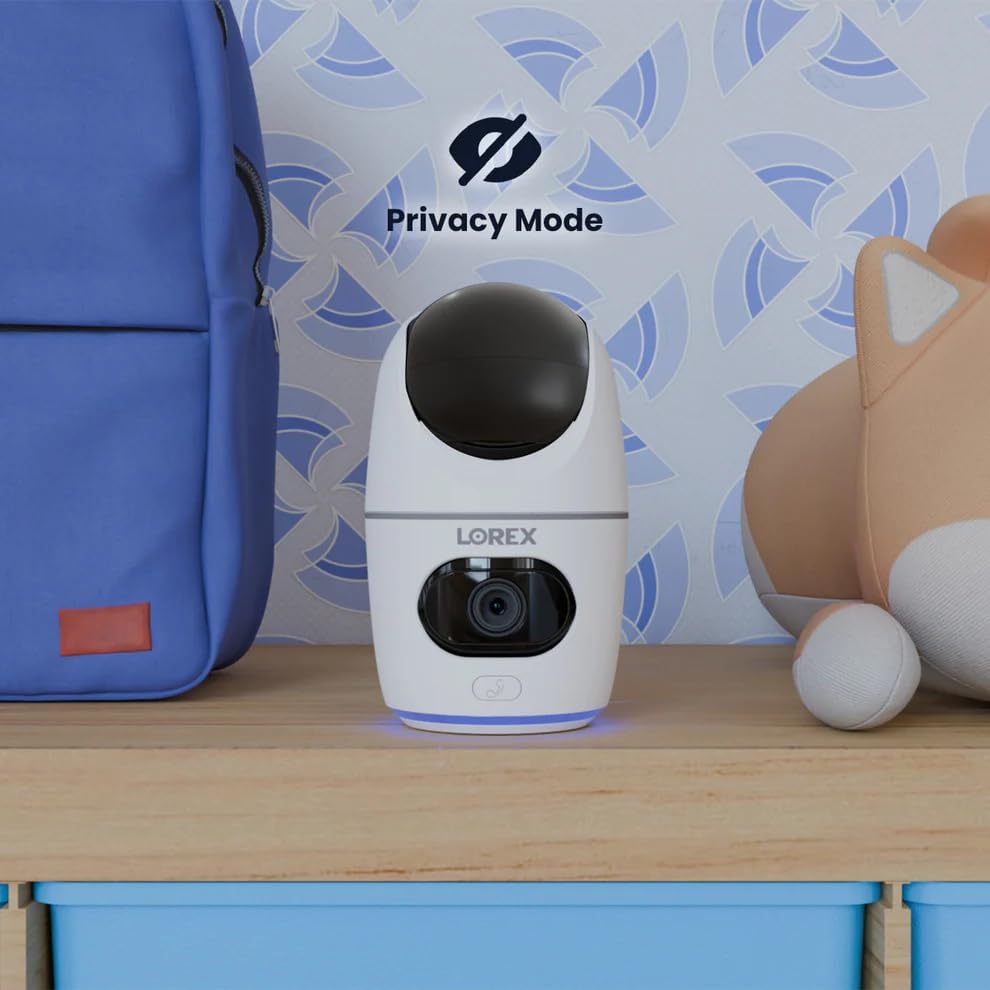
Image 5.12: The camera in Privacy Mode, with the lens retracted.
6. Manutenzione
- Pulizia: Utilizzare un panno morbido e asciutto per pulire l'obiettivo e il corpo della fotocamera. Evitare detergenti abrasivi o solventi.
- Aggiornamenti del firmware: Regularly check the Lorex Home app for available firmware updates to ensure optimal performance and security.
- Scheda MicroSD: Periodically check the status of the MicroSD card in the app. If the card is full and continuous recording is enabled, older footage will be overwritten. Back up important footage secondo necessità.
- Alimentazione elettrica: Ensure the camera is connected to a stable power source. Avoid using third-party power adapters that are not specified for this device.
7. Risoluzione Dei Problemi
| Problema | Soluzione |
|---|---|
| La fotocamera è offline o disconnessa. |
|
| Impossibile connettersi al Wi-Fi. |
|
| No video or poor video quality. |
|
| Motion alerts are too frequent or not received. |
|
8. Specifiche
| Caratteristica | Dettaglio |
|---|---|
| Numero di modello | Modello W463AQD-E |
| Risoluzione video | 2K (1440p) |
| Risoluzione fissa efficace | 4 MP |
| Viewangolo di ing | 360 Degrees (Pan-Tilt), 135 Degrees (Field of View) |
| Gamma di visione notturna | 33 Feet (IR Night Vision) |
| Connettività | Wi-Fi (2.4 GHz) |
| Magazzinaggio | 32GB MicroSD Card (included), supports up to 256GB, Cloud Storage (optional), Lorex Fusion compatible |
| Audio | Comunicazione bidirezionale (microfono e altoparlante integrati) |
| Rilevamento | Smart Person & Pet Detection, Auto-Tracking |
| Fonte di alimentazione | Corded Electric (5V=2A) |
| Dimensioni (L x P x A) | 5 x 6 x 5 pollici |
| Peso dell'articolo | 15.2 once |
| Uso interno/esterno | Solo al chiuso |
| Componenti inclusi | Camera, 32GB MicroSD Card, Power Cable, Mounting Bracket, Power Adapter |
9. Garanzia e supporto
For warranty information, technical support, or additional resources, please visit the official Lorex websito o contattare il loro servizio clienti.
- Lorex Websito: www.lorex.com
- Assistenza clienti: Refer to the Lorex website for contact details and support hours.
Product registration is recommended to receive updates and support.
Ask a question about this manual
Ask about setup, troubleshooting, compatibility, parts, safety, or missing instructions. Manuals+ will review the question and use this page’s manual context to help answer it.