
1. Introduzione
This manual provides detailed instructions for the installation, setup, operation, and maintenance of your Alpine DVR-C310R WiFi Enabled Dash Camera. Please read this manual thoroughly before using the product to ensure proper functionality and to prevent damage.
The Alpine DVR-C310R is a high-definition dash camera system designed to record vehicle activity. It features full HD video recording, high dynamic range (HDR) for clear imaging, and Wi-Fi connectivity for easy file management via a smartphone or PC application. A secondary rear camera is included for comprehensive vehicle monitoring.
2. Informazioni sulla sicurezza
Osservare le seguenti precauzioni di sicurezza per evitare lesioni o danni al dispositivo:
- Do not install the dash camera in a location that obstructs the driver's view o interferisce con il funzionamento del veicolo.
- Assicurarsi che tutti i cavi siano posizionati in modo sicuro e non interferiscano con gli airbag o altri dispositivi di sicurezza.
- Evitare di esporre il dispositivo a temperature estreme, alla luce solare diretta per periodi prolungati o a umidità eccessiva.
- Non tentare di smontare o modificare il dispositivo. Per qualsiasi intervento di manutenzione, rivolgersi a personale qualificato.
- Use only the specified power adapter and accessories provided with the product.
- Periodically check the mounting of the cameras to ensure they remain securely attached.
3. Contenuto della confezione
Verificare che tutti gli articoli siano presenti nel pacco:
- Alpine DVR-C310R Front Dash Camera
- Telecamera posteriore
- Mounting Bracket (for front camera)
- Cavo di alimentazione
- Cavo di collegamento della telecamera posteriore
- GPS Module (if included with your specific package)
- Manuale dell'utente (questo documento)
4. Prodotto finitoview
Familiarize yourself with the main components of the Alpine DVR-C310R system.
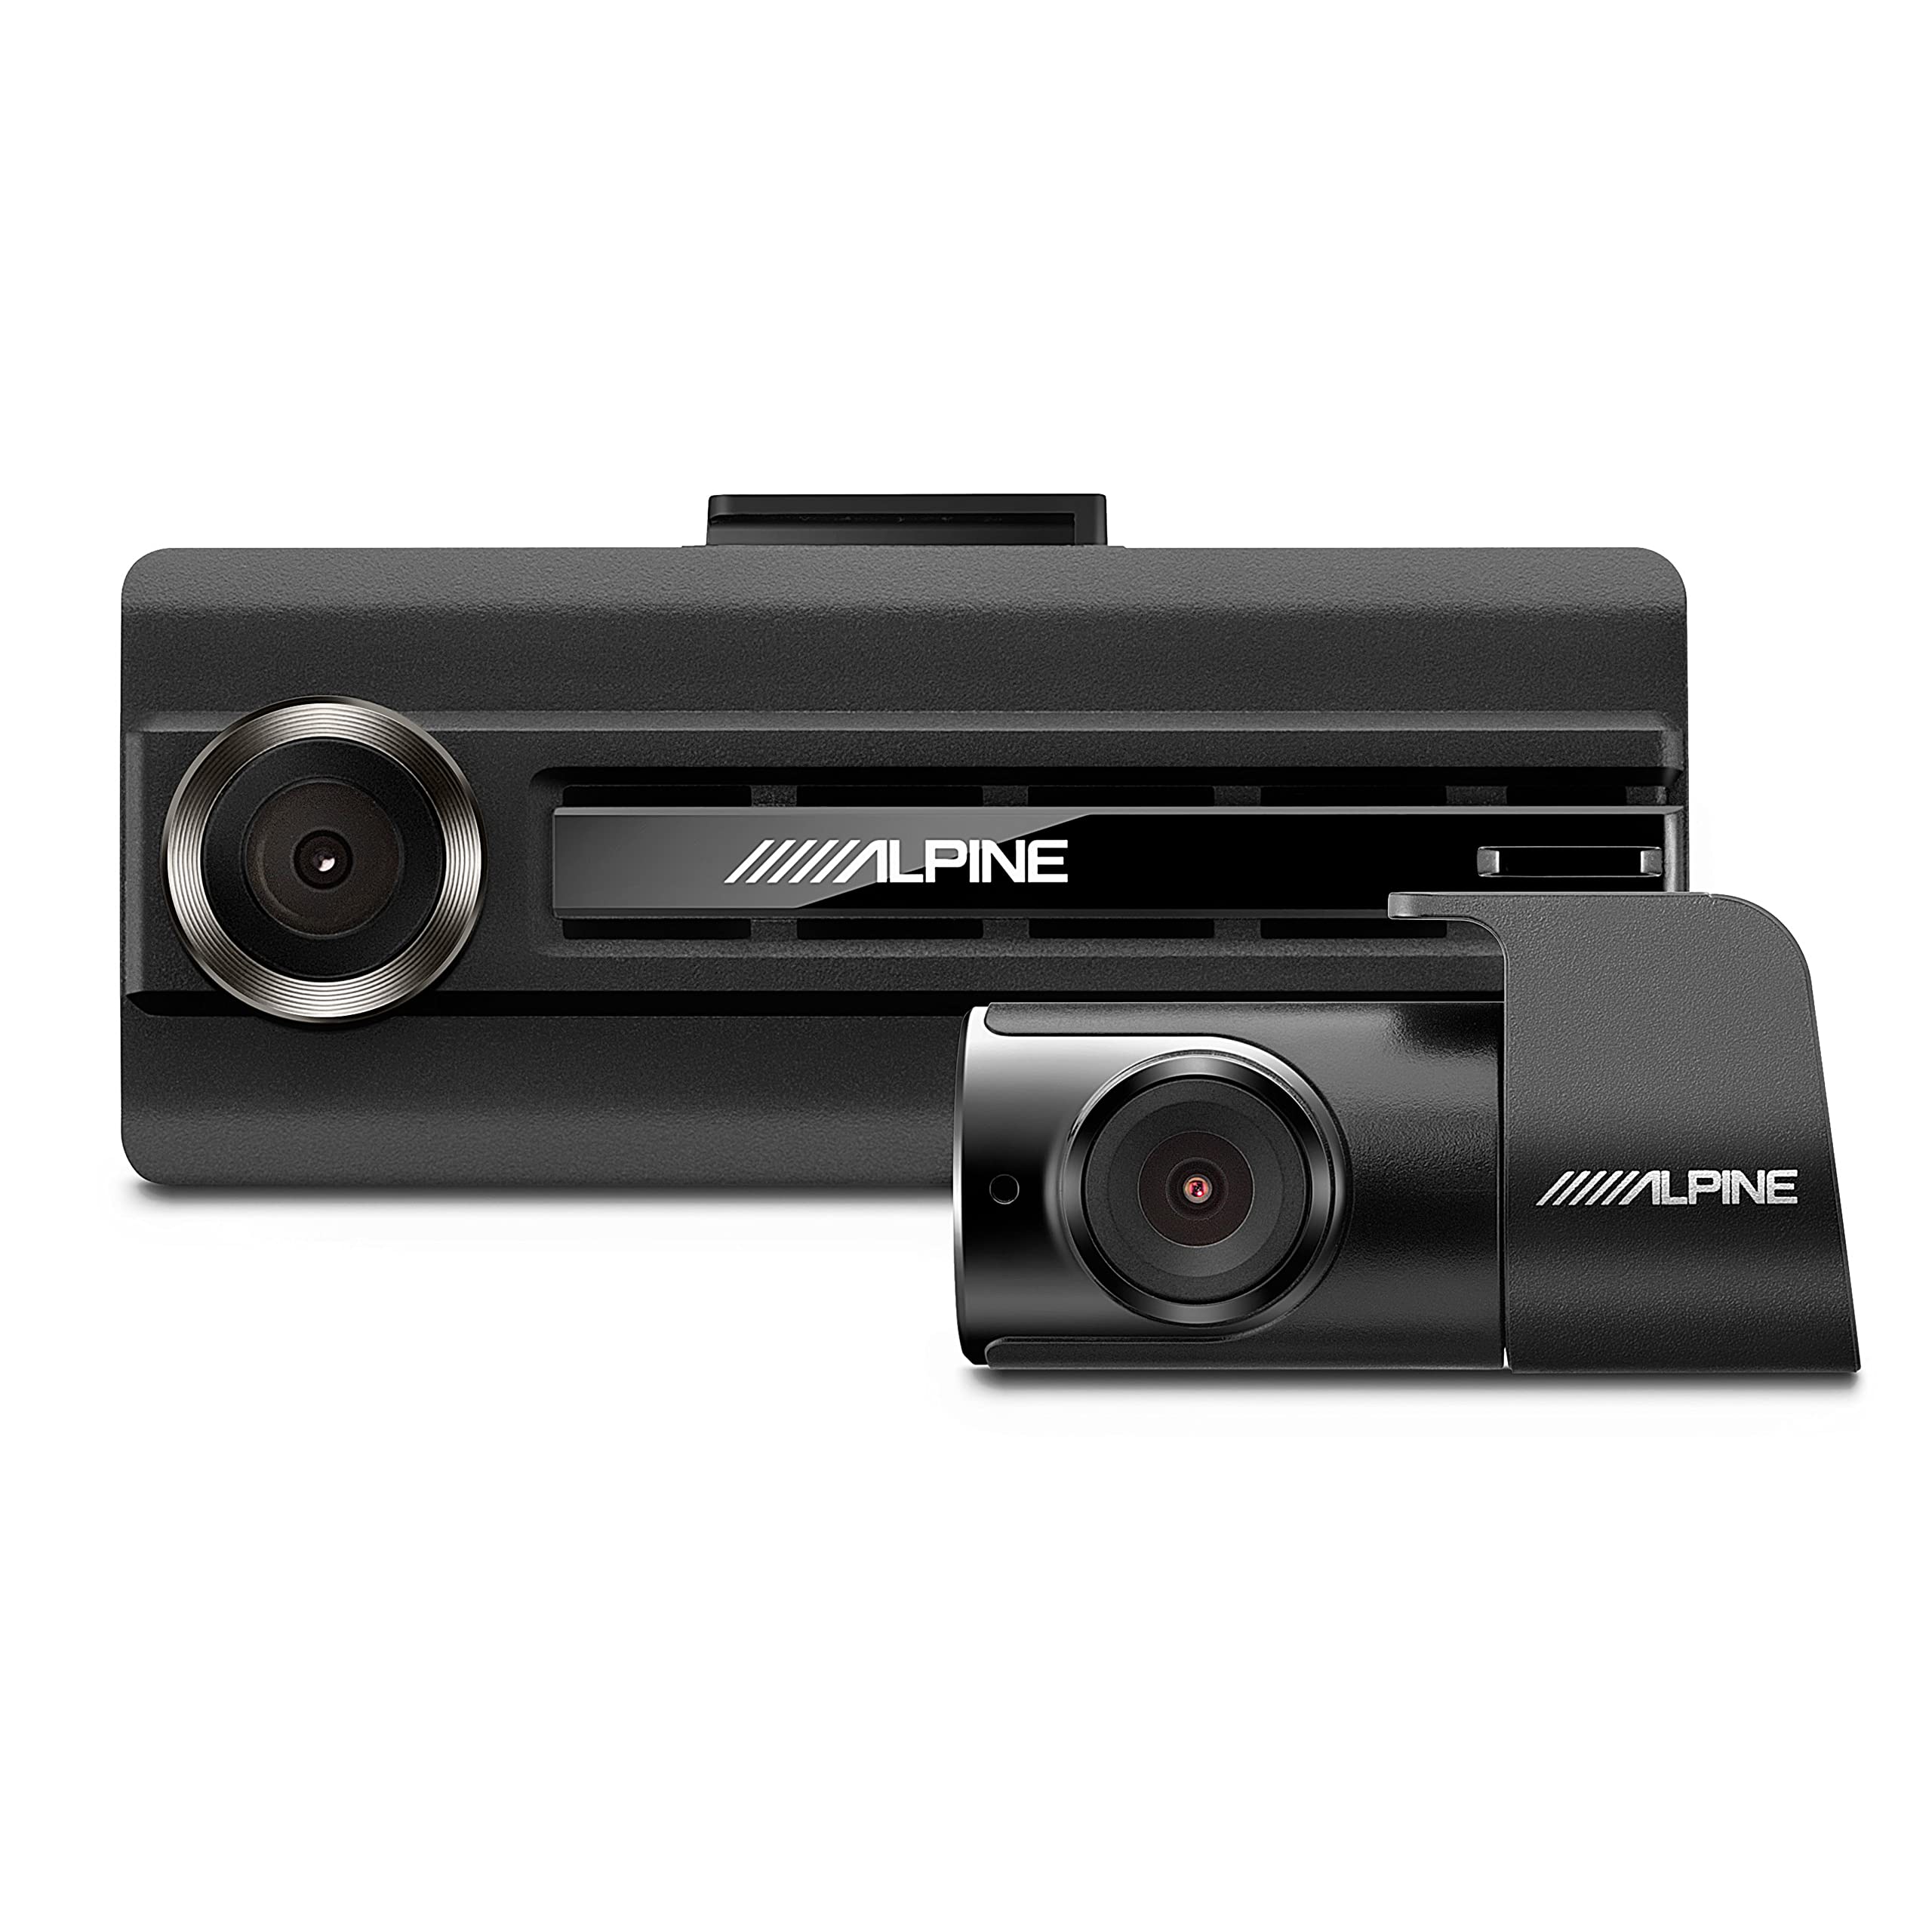
Figura 4.1: Alpine DVR-C310R Front and Rear Dash Cameras. This image displays both the main front dash camera and the smaller rear camera unit.
4.1 Front Dash Camera
The main unit records the forward view del tuo veicolo.

Figura 4.2: Davanti view of the Alpine DVR-C310R dash camera, highlighting the lens and Alpine branding.

Figura 4.3: Posteriore view of the Alpine DVR-C310R dash camera, showing the Wi-Fi and REC buttons, status indicators, DC-IN port, and microphone.
- Lente: Records full HD video.
- Pulsante REC: Manually initiate or save an event recording.
- Pulsante Wi-Fi: Activates/deactivates Wi-Fi for smartphone connection.
- LED di stato: Indicates recording status and Wi-Fi connection.
- Porta DC-IN: Ingresso di alimentazione per la telecamera.
- V-OUT Port: Si collega alla telecamera posteriore.
- Microfono: Records in-cabin audio.
- Pulsante di reset: Resets the device (requires a thin object like a paperclip).
- Slot per scheda MicroSD: For video storage.
4.2 Telecamera posteriore
The secondary camera records the rear view or internal cabin view, depending on installation.

Figura 4.4: Avvicinamento view of the Alpine DVR-C310R rear camera, showing its compact design and lens.
- Lente: Records video, typically in HD.
- V-OUT Port: Connects to the front camera.
4.3 Modulo GPS
The optional GPS module provides location and speed data for recorded footage.

Figura 4.5: Alpine GPS module, a small black rectangular unit with a connecting cable, used to add location data to recordings.
5. Installazione
Proper installation is crucial for optimal performance and safety. Professional installation is recommended.
5.1 Choosing Mounting Locations
- Fotocamera frontale: Mount on the windshield, typically behind the rearview specchio, assicurandosi che non ostruisca la visuale del conducente view o attivazione dell'airbag.
- Telecamera posteriore: Mount on the rear windshield for external recording, or on the dashboard/headliner for internal cabin recording (e.g., for rideshare drivers). Ensure a clear line of sight.

Figura 5.1: Superiore view of the front camera showing the integrated mounting bracket, which slides into a slot on the camera body.
5.2 Montaggio delle telecamere
- Clean the chosen windshield area thoroughly.
- Attach the mounting bracket to the front camera.
- Remove the protective film from the adhesive pad on the bracket and firmly press the camera onto the windshield. Hold for at least 30 seconds.
- Repeat for the rear camera, ensuring its orientation is correct for the desired recording angle.
5.3 Collegamenti di cablaggio
- Insert a compatible MicroSD card into the front camera's card slot.
- Connect the rear camera cable to the V-OUT port on the front camera and the corresponding port on the rear camera. Route the cable neatly along the vehicle's interior trim.
- Connect the power cable to the DC-IN port on the front camera. Route the power cable to a 12V power outlet (cigarette lighter socket) or a hardwire kit (sold separately for continuous recording).
- If using the GPS module, connect it to the designated GPS port on the front camera (if available) or integrate it as per its specific instructions.
- Ensure all cables are tucked away and secured to prevent interference with driving or vehicle components.
6. Configurazione iniziale e connessione Wi-Fi
After installation, perform the initial setup and connect to the camera via Wi-Fi.
6.1 Powering On and Initial Recording
- Start your vehicle's engine. The dash camera should power on automatically and begin recording.
- Observe the status LED on the front camera. It should indicate active recording (e.g., blinking red).
6.2 Connecting via Wi-Fi (Smartphone App)
- Download the official Alpine Dash Cam app from your smartphone's app store (iOS or Android).
- Press the Wi-Fi button on the front camera to activate its Wi-Fi hotspot. The Wi-Fi LED should illuminate.
- On your smartphone, go to Wi-Fi settings and connect to the network named "Alpine_DVR-C310R" (or similar). The default password is typically "1234567890" or found in the app/manual.
- Open the Alpine Dash Cam app. The app should automatically detect and connect to the camera.
- Through the app, you can adjust settings, view cibo vivotage, playback recorded videos, and transfer files al tuo telefono.
Note: Ensure your vehicle's Wi-Fi or other strong Wi-Fi signals do not interfere with the camera's Wi-Fi connection.
7. Istruzioni per l'uso
Understand the various recording modes and functions of your dash camera.
7.1 Registrazione continua
The camera automatically begins continuous loop recording when the vehicle's ignition is turned on. Older files are overwritten by new ones once the MicroSD card is full, ensuring continuous recording without manual intervention.
7.2 Event Recording (Impact Detection)
The built-in G-sensor detects sudden impacts or rapid acceleration/deceleration. When an event is detected, the camera automatically saves the current footage (before, during, and after the event) to a protected folder on the MicroSD card, preventing it from being overwritten.
- Registrazione manuale degli eventi: Press the REC button on the camera to manually save a segment of footage as an event file. This is useful for recording specific incidents you witness.
7.3 Modalità di sorveglianza del parcheggio
If hardwired (requires optional hardwire kit), the camera can monitor your vehicle while parked. It typically uses motion detection or impact detection to record events when the vehicle is off, conserving battery and storage space.
7.4 Video Playback and File Gestione
- Tramite l'app per smartphone: Connect to the camera via Wi-Fi using the Alpine Dash Cam app. You can view cibo vivotage, sfoglia registrato files (continuous, event, parking), and download desired videos to your phone.
- Tramite PC Viewlui: Remove the MicroSD card from the camera and insert it into a computer's card reader. Install the Alpine PC Viewer software (available for download from the Alpine websito) a view recordings, GPS data, and manage files.
8. Manutenzione
Regular maintenance ensures the longevity and optimal performance of your dash camera.
- Pulizia delle lenti: Gently wipe the camera lenses with a soft, lint-free cloth. Do not use abrasive cleaners or solvents.
- Gestione della scheda MicroSD: Periodically format the MicroSD card (at least once a month) using the camera's app or PC viewer. This helps maintain card health and prevents data corruption. Back up important files prima della formattazione.
- Aggiornamenti del firmware: Controlla l'Alpino website periodically for firmware updates. Updates can improve performance, add features, or fix bugs. Follow the instructions provided with the update carefully.
- Ispezione dei cavi: Ispezionare regolarmente tutti i cavi per verificare la presenza di segni di usura o danni. Sostituire immediatamente i cavi danneggiati.
9. Risoluzione Dei Problemi
Fare riferimento a questa sezione per trovare soluzioni ai problemi più comuni.
| Problema | Possibile causa | Soluzione |
|---|---|---|
| La fotocamera non si accende. | Nessuna alimentazione; collegamento allentato; cavo di alimentazione difettoso. | Check power cable connection to camera and power source. Ensure vehicle ignition is on. Test with another power source if possible. |
| La registrazione si interrompe o si blocca. | MicroSD card error; full MicroSD card; faulty card; firmware issue. | Format the MicroSD card. Try a new, high-quality MicroSD card. Check for firmware updates. |
| Problemi di connessione Wi-Fi. | Incorrect password; interference; camera Wi-Fi not activated. | Ensure camera Wi-Fi is enabled. Verify password. Move away from other strong Wi-Fi signals. Restart camera and phone. |
| La qualità del video è scarsa o sfocata. | Dirty lens; protective film still on lens; improper mounting; extreme glare. | Clean the lens. Remove any protective film. Ensure camera is securely mounted and not vibrating. Consider a CPL filter for glare reduction (if compatible). |
| Rear camera image is upside down. | Rear camera installed upside down. | Re-orient the rear camera during installation. Some apps may offer image rotation settings. |
10. Specifiche
Key technical specifications for the Alpine DVR-C310R Dash Camera:
| Caratteristica | Dettaglio |
|---|---|
| Nome del modello | DVR-C310R |
| Risoluzione di acquisizione video | 1080p (Full HD) |
| Tecnologia di connettività | Wifi |
| Caratteristica speciale | Built-In WiFi, Impact Recording |
| Tipo di montaggio | Windshield Mount / Dashboard Mount |
| Metodo di controllo | Applicazione |
| Componenti inclusi | DVR-C310R (Front Camera), Rear Camera |
| Peso dell'articolo | 1.59 libbre (circa) |
| Colore | Nero |
| Produttore | Elettronica alpina |
11. Garanzia e supporto
For warranty information and technical support, please refer to the official Alpine Electronics webo contattare direttamente il servizio clienti. Conservare la ricevuta d'acquisto come prova d'acquisto per eventuali reclami in garanzia.
Official Alpine Websito: www.alpine-usa.com