
Pretul BOAP-1/2P3
Pretul Electric Peripheral Water Pump User Manual
Model: BOAP-1/2P3
1. Introduzione
Thank you for choosing the Pretul BOAP-1/2P3 Electric Peripheral Water Pump. This manual provides essential information for the safe and efficient operation, installation, and maintenance of your pump. Please read this manual thoroughly before use and keep it for future reference.
Informazioni importanti sulla sicurezza
ATTENZIONE: la mancata osservanza di queste istruzioni di sicurezza potrebbe causare scosse elettriche, incendi, lesioni gravi o morte.
- Always disconnect the pump from the power supply before performing any maintenance or installation.
- Ensure the pump is installed in a covered, dry, and well-ventilated area.
- Do not operate the pump in environments where the ambient temperature exceeds 40°C (104°F).
- Assicurarsi che tutti i collegamenti elettrici siano adeguatamente isolati e protetti dall'acqua.
- Do not run the pump dry. Always ensure the pump is completely filled with clean water before starting.
- Secure the pump horizontally on a flat surface using screws to prevent movement during operation.
- Questa pompa è progettata esclusivamente per il pompaggio di acqua pulita. Non utilizzarla per liquidi infiammabili, sostanze chimiche corrosive o acqua contenente particelle abrasive.
2. Prodotto finitoview
The Pretul BOAP-1/2P3 is a robust electric peripheral water pump designed to generate high pressure and lift water to significant altitudes. Its compact design and durable components ensure reliable performance.
Caratteristiche principali:
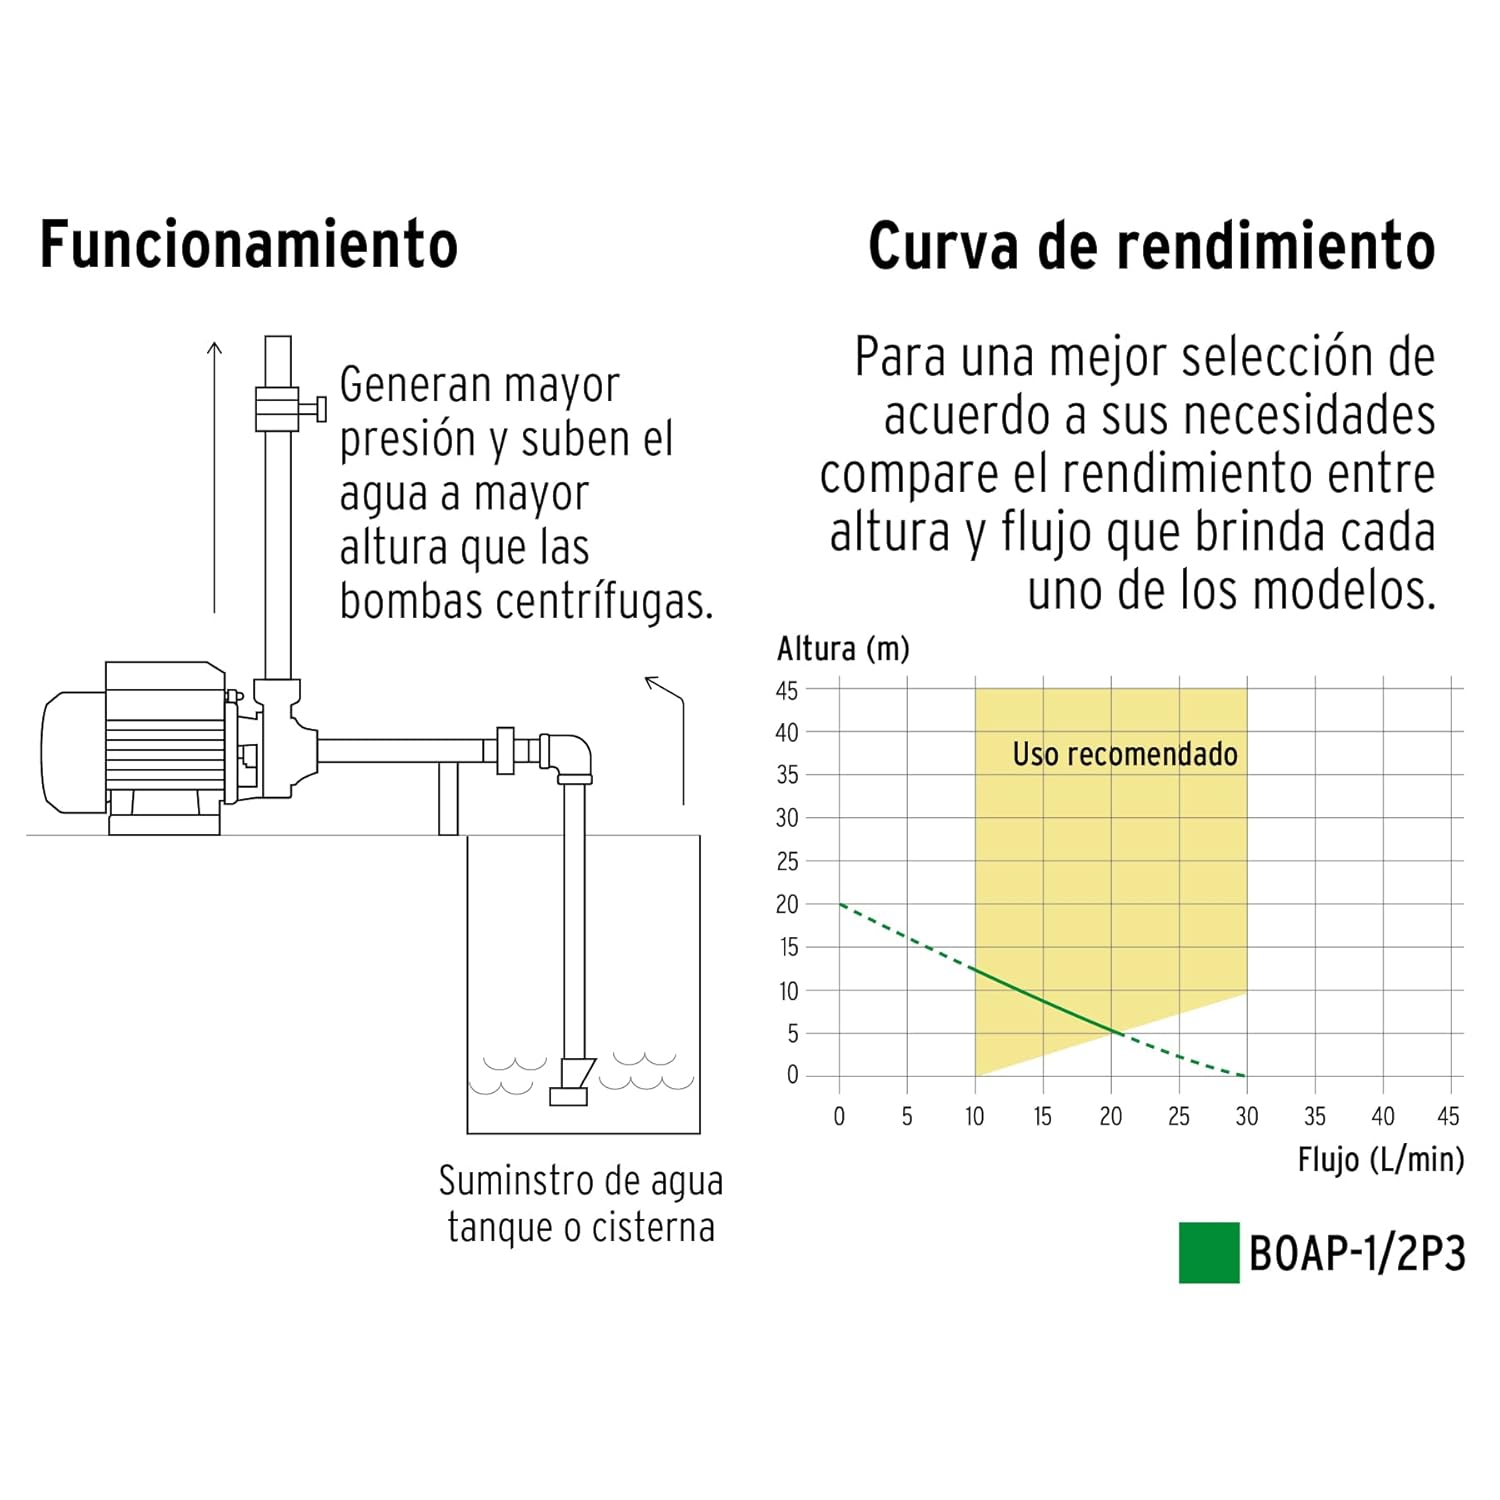
- Generates greater pressure and raises water to a higher altitude compared to centrifugal pumps.
- Single-phase electric motor with aluminum coils for efficient operation.
- Durable brass impeller for constant pressure and long lifespan.
- Integrated heat shield for engine protection against overheating.
- Continuous working capacitor for stable performance.
Diagramma dei componenti:

Descrizione dell'immagine: An exploded diagram of the Pretul BOAP-1/2P3 pump, highlighting key internal and external components. Labels indicate: Thermal protector, Continuous working capacitor, Motor with aluminum coils, Metal bearing for longer lifespan, Brass impeller for constant pressure, and Enclosed electric motor with external ventilation.

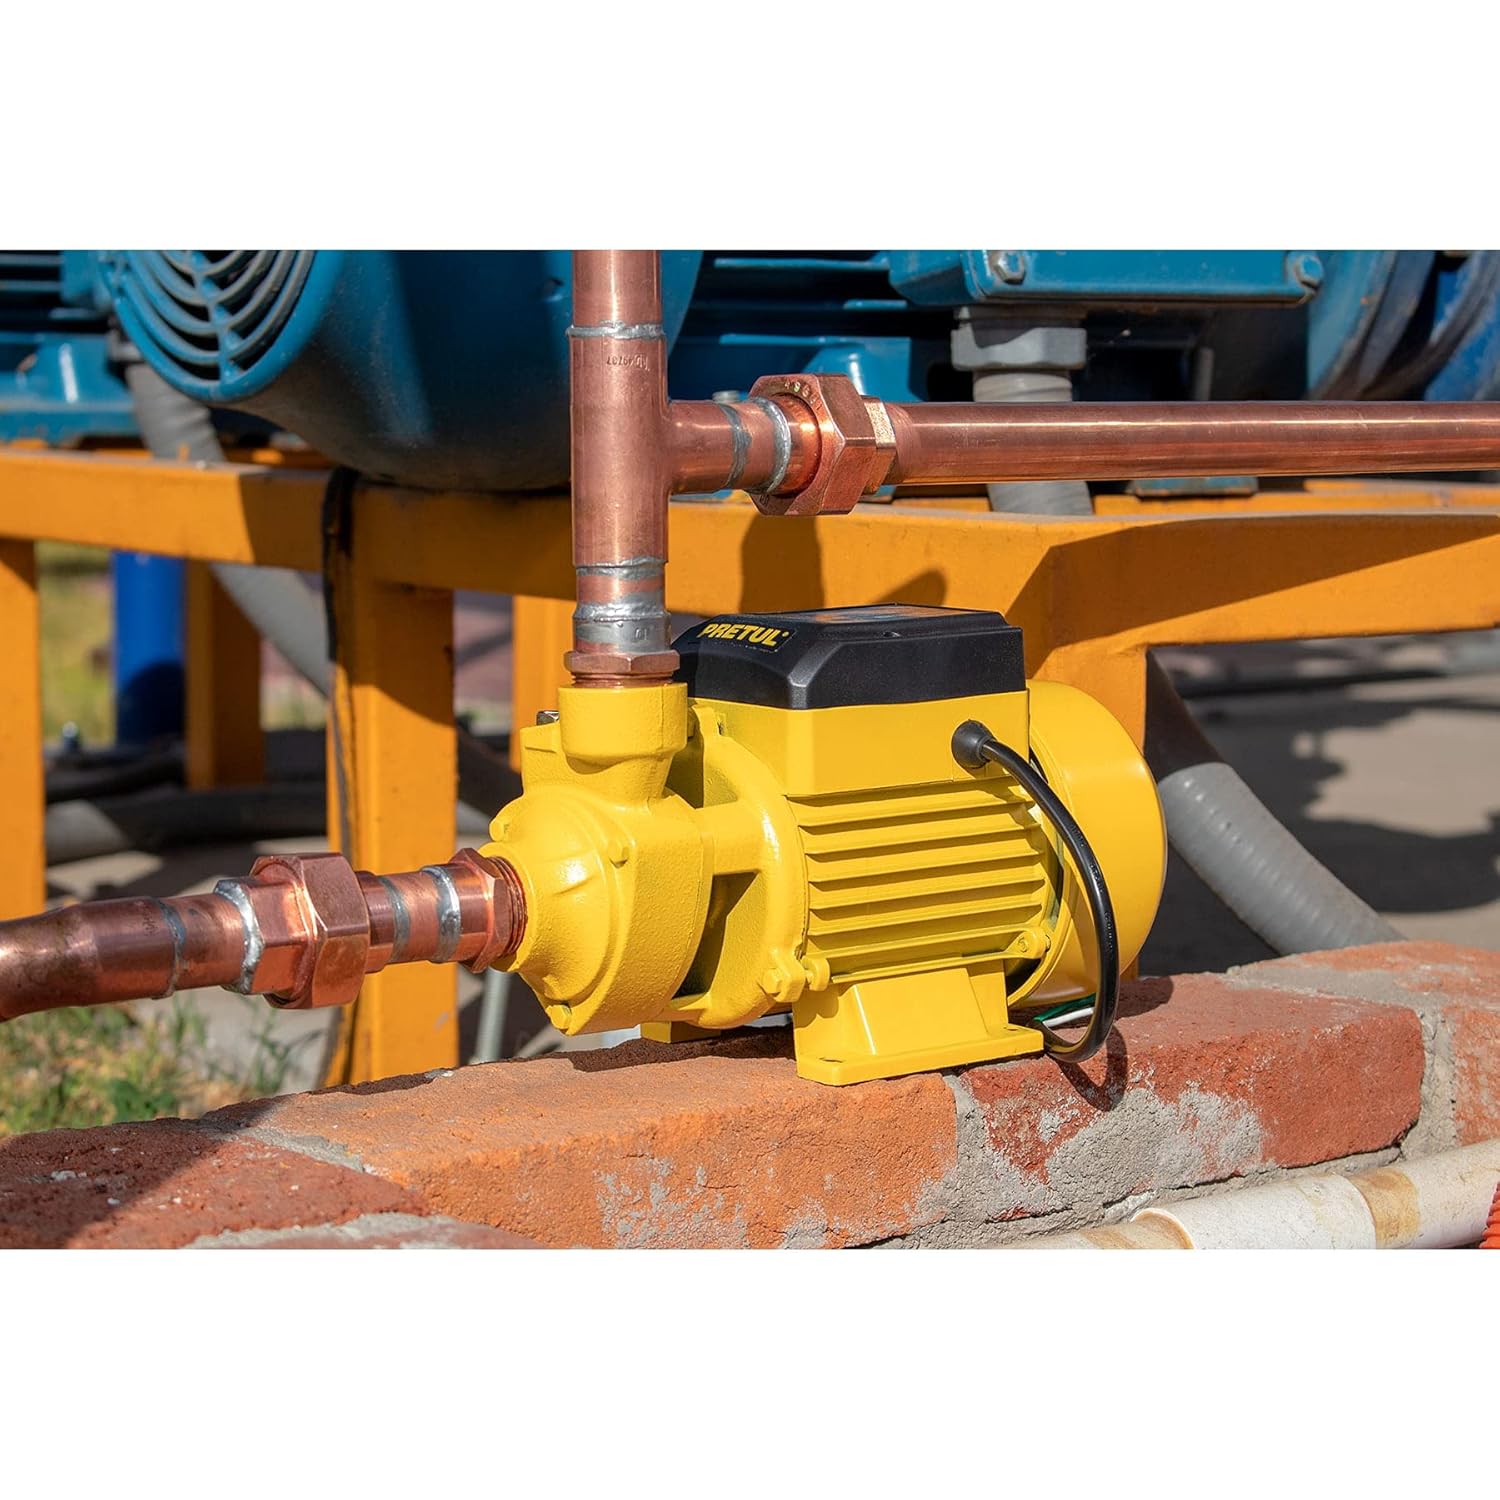
Descrizione dell'immagine: Two images showing the front and side views of the yellow Pretul BOAP-1/2P3 electric peripheral water pump. The pump has a black motor housing and a yellow pump body with a brass inlet/outlet.
3. Configurazione e installazione
Una corretta installazione è fondamentale per le prestazioni e la durata della pompa. Seguire attentamente queste linee guida:
- Posizione: Install the pump in a covered, dry, and well-ventilated area. Avoid direct exposure to rain, excessive humidity, or temperatures above 40°C (104°F).
- Montaggio: Place the pump horizontally on a flat, stable surface. Secure the pump firmly using screws through the designated mounting holes to prevent vibration and movement during operation.
- Tubazioni: Connect the inlet pipe to your water source (e.g., tank or cistern) and the outlet pipe to your desired discharge point. Ensure all connections are airtight to prevent air leaks, which can affect pump performance. Use appropriate thread sealant.
- Primerizzazione: Before the first use, or if the pump has run dry, completely fill the pump casing with clean water through the priming port. This ensures the pump is ready to create suction.
- Collegamento elettrico: Connect the pump to a suitable power supply as specified in the technical specifications. Ensure the voltage matches the pump's requirements. Use a grounded outlet and avoid extension cords if possible. If an extension cord is necessary, ensure it is rated for outdoor use and has adequate gauge.
Descrizione dell'immagine: A diagram illustrating the pump's operation, showing it drawing water from a tank and raising it to a higher point. Alongside, a performance curve graph (Altura (m) vs. Flujo (L/min)) indicates the recommended use area for the BOAP-1/2P3 model, demonstrating its ability to generate pressure and flow.

Descrizione dell'immagine: An infographic displaying key recommendations for the pump: install in covered places, dry and well-ventilated, in environments not exceeding 40°C, fill completely with clean water before first use, and place horizontally on flat surfaces, securing with screws.
4. Istruzioni per l'uso
Once the pump is properly installed and primed, you can begin operation:
- Assicurarsi che tutti i collegamenti siano ben saldi e che non vi siano perdite.
- Verify that the pump casing is completely filled with water.
- Connect the pump to the power supply. The pump will start operating.
- Monitor the pump during its initial operation to ensure proper water flow and pressure.
Ciclo di lavoro:
This pump is designed for intermittent use. To ensure optimal performance and longevity, adhere to the following duty cycle:
- Maximum continuous operation: 20 minuti.
- Minimum rest period after operation: 15 minuti.
- Do not operate the pump for more than 6 ore al giorno in totale.
Adhering to this duty cycle prevents overheating and extends the life of the motor and components.
5. Manutenzione
Regular maintenance ensures the efficient and safe operation of your pump. Always disconnect the pump from the power supply before performing any maintenance.
- Ispezione regolare: Periodically check the pump for any signs of damage, leaks, or unusual noises.
- Pulizia: Keep the pump exterior clean and free from dust and debris to ensure proper ventilation.
- Connessioni: Inspect all pipe connections and electrical wiring for tightness and integrity. Tighten any loose connections.
- Preparazione per l'inverno (se applicabile): If the pump is exposed to freezing temperatures, drain all water from the pump and pipes to prevent damage from ice expansion. Store in a dry, frost-free location.
6. Risoluzione Dei Problemi
This section provides solutions to common issues you might encounter with your pump.
| Problema | Possibile causa | Soluzione |
|---|---|---|
| La pompa non si avvia | No power; Motor overload; Damaged capacitor | Check power supply and circuit breaker; Allow motor to cool down; Contact qualified technician for capacitor replacement. |
| La pompa funziona ma non c'è flusso d'acqua | Pump not primed; Air leak in suction line; Clogged inlet/outlet; Water source empty | Re-prime the pump; Check all connections for leaks; Clear any blockages; Ensure water source is adequate. |
| Bassa pressione/flusso dell'acqua | Blocco parziale; Aria nel sistema; Girante usurata | Check for partial blockages; Bleed air from the system; Contact service for impeller inspection/replacement. |
| Rumore/vibrazioni eccessivi | Loose mounting; Air in pump; Bearing wear | Secure pump firmly; Re-prime the pump; Contact service for bearing inspection. |
Se il problema persiste dopo aver provato queste soluzioni, contattare l'assistenza clienti.
7. Specifiche tecniche
| Specificazione | Valore |
|---|---|
| Marca | prezzo |
| Numero di modello | BOAP-1/2P3 |
| Colore | Giallo |
| Materiale | Ottone |
| Stile | Fuori terra |
| Dimensioni del prodotto (L x P x A) | 29.3L x 12.7W x 24H centimetri |
| Fonte di alimentazione | Elettrico con cavo |
| Voltage | 110 Volt |
| Peso dell'articolo | 3 kg 550 gr |
| Produttore | Truper SA de CV |

Descrizione dell'immagine: A diagram showing the key dimensions of the Pretul BOAP-1/2P3 pump: Height (Alto) 15 cm, Base 12 cm, and Depth (Fondo) 24 cm.
8. Garanzia e supporto
Informazioni sulla garanzia:
Pretul products are manufactured to high-quality standards. For specific warranty terms and conditions, please refer to the warranty card included with your product packaging or visit the official Pretul websito. Conservare la ricevuta d'acquisto come prova d'acquisto per eventuali reclami in garanzia.
Assistenza clienti:
If you have any questions, require technical assistance, or need to report an issue with your pump, please contact Pretul customer support. Contact details can typically be found on the product packaging or the official Pretul websito.
When contacting support, please have your product model number (BOAP-1/2P3) and purchase details ready.
Ask a question about this manual
Ask about setup, troubleshooting, compatibility, parts, safety, or missing instructions. Manuals+ will review the question and use this page’s manual context to help answer it.