
1. Introduzione e oltreview
Thank you for choosing the Sony DCR-HC52 MiniDV Handycam Camcorder. This manual provides essential information to help you get the most out of your device. The DCR-HC52 is designed for capturing high-quality video on MiniDV tapes, featuring a powerful optical zoom and a clear LCD display.
Caratteristiche principali:
- Professional Quality Carl Zeiss Vario-Tessar Lens: Ensures clear and sharp image capture.
- 40X Optical / 2000X Digital Zoom: Allows for versatile shooting from wide to telephoto.
- 1/6" Advanced HAD CCD Imager, 680K Pixels (Gross): Provides good image quality for video recording.
- 2.7" Touch Panel SwivelScreen LCD Display (123K Pixels): Offre flessibilità viewing angles and intuitive control.
- InfoLITHIUM Battery with AccuPower Meter System: Provides accurate battery life indication.
Cosa c'è nella scatola:
- Sony DCR-HC52 MiniDV Handycam Camcorder
- Batteria
- Other accessories (e.g., power adapter, cables) may vary depending on the package.
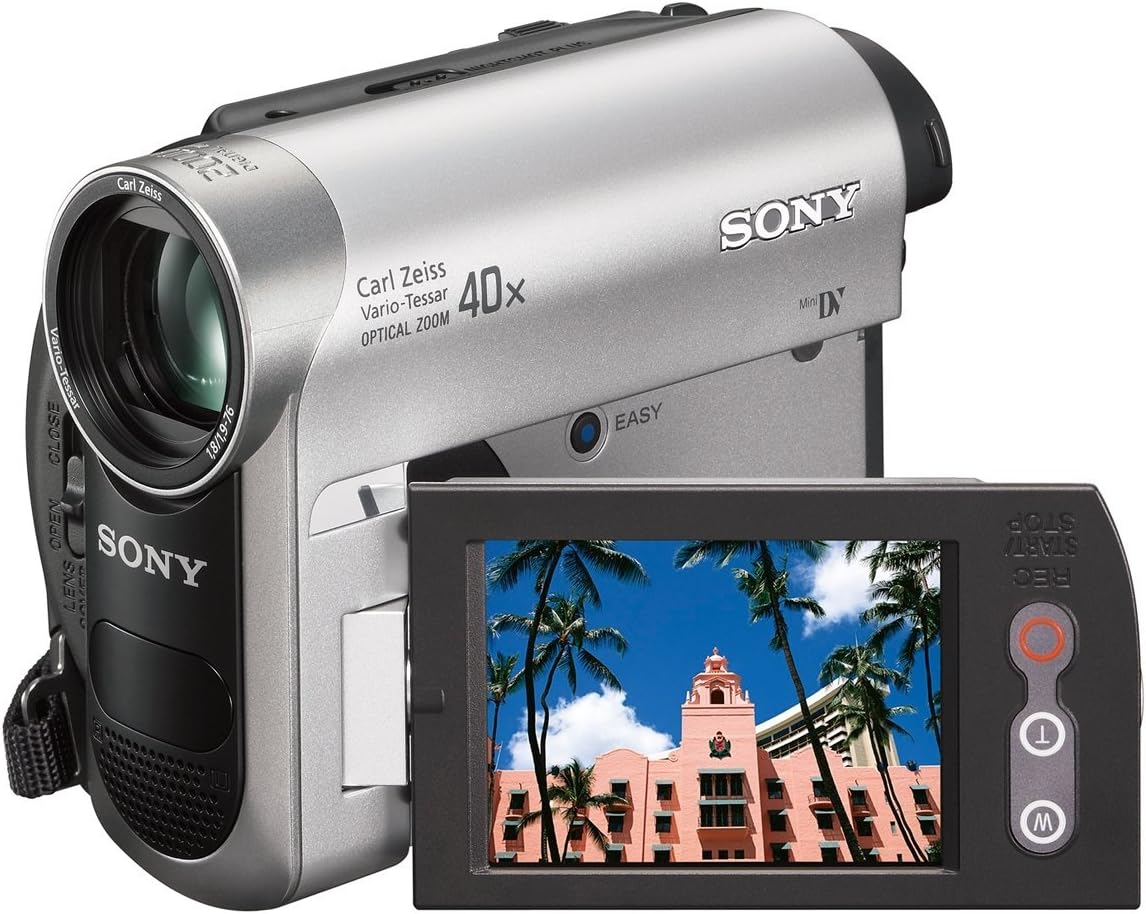
Figure 1.1: The Sony DCR-HC52 camcorder with its LCD screen open, displaying a sample image. This view highlights the compact design and the swivel screen functionality.
2. Impostazione
2.1 Ricarica e installazione della batteria
- Assicurarsi che la videocamera sia spenta.
- Aprire il coperchio del vano batterie.
- Insert the InfoLITHIUM battery into the compartment, ensuring it clicks into place.
- Chiudere il coperchio del vano batterie.
- Connect the AC power adapter to the camcorder's DC IN jack and then to a wall outlet to charge the battery. The charge indicator will light up during charging.
2.2 Inserting a MiniDV Tape
- Locate the tape compartment release button, usually marked with an arrow or 'EJECT'.
- Press the release button to open the tape compartment.
- Gently insert a MiniDV tape with the window facing outwards until it locks into position.
- Close the tape compartment cover firmly until it clicks.
2.3 Accensione iniziale
- Open the LCD screen or pull out the viewfinder. The camcorder will power on automatically.
- If the camcorder does not power on, ensure the battery is charged and correctly installed, or connect the AC adapter.
2.4 Connecting to External Devices (TV/Computer)
- HDMI: Use an HDMI cable to connect the camcorder's HDMI output to an HDMI input on your TV for high-definition playback.
- USB: Connect the camcorder to your computer using a USB cable for transferring video files (requires appropriate software, not included).
3. Utilizzo della videocamera
3.1 Registrazione di base
- Power on the camcorder by opening the LCD screen.
- Punta l'obiettivo verso il soggetto.
- Premere il tasto AVVIO/ARRESTO REG button to begin recording. The REC indicator will appear on the screen.
- Premere il tasto AVVIO/ARRESTO REG nuovamente il pulsante per interrompere la registrazione.
3.2 Operazione Zoom
Use the zoom lever located on the top of the camcorder to adjust the zoom. Push the lever towards 'T' for telephoto (zoom in) and towards 'W' for wide-angle (zoom out). The camcorder features 40x optical zoom and up to 2000x digital zoom.
3.3 Riproduzione
- Switch the camcorder to playback mode (usually indicated by a 'PLAY/VCR' switch or menu option).
- Use the playback controls (Play, Stop, Rewind, Fast Forward) to navigate through your recorded footage.
- View playback on the LCD screen or a connected TV.
3.4 Using the 2.7" Touch Panel SwivelScreen LCD Display
The LCD screen can be rotated for various shooting angles and folded for protection. It is a touch panel, allowing you to navigate menus and settings by touching the screen directly. Refer to the on-screen prompts for specific touch operations.

Figura 3.1: Un fronte view of the Sony DCR-HC52 camcorder, showcasing the Carl Zeiss Vario-Tessar lens and the open LCD screen. This perspective highlights the lens cover switch and the overall design.
4. Manutenzione
4.1 Pulizia della lente
Use a soft, lint-free cloth specifically designed for optical lenses to gently wipe the Carl Zeiss Vario-Tessar lens. Avoid using harsh chemicals or abrasive materials that could scratch the lens surface. For stubborn dust, use a lens blower brush.
4.2 Pulizia dello schermo LCD
Wipe the 2.7" touch panel LCD screen with a soft, dry cloth. For fingerprints or smudges, slightly dampen the cloth with water or a screen cleaning solution designed for electronics, then wipe gently. Do not apply liquid directly to the screen.
4.3 Cura e conservazione della batteria
- Store the InfoLITHIUM battery in a cool, dry place when not in use.
- For long-term storage, it is recommended to charge the battery to about 50% capacity.
- Evitare di esporre la batteria a temperature estreme.
4.4 General Camcorder Care
- Keep the camcorder away from dust, moisture, and direct sunlight.
- Do not expose the camcorder to strong vibrations or impacts.
- Always close the lens cover when not recording to protect the lens.
5. Risoluzione Dei Problemi
This section addresses common issues you might encounter with your Sony DCR-HC52 camcorder. If the problem persists, please refer to the support section.
5.1 Camcorder Does Not Power On
- Controllare la batteria: Assicurarsi che la batteria sia completamente carica e inserita correttamente.
- Adattatore per corrente alternata: Try connecting the AC adapter directly to a power outlet.
- Power Switch/LCD: Confirm the LCD screen is open or the power switch is in the 'ON' position.
5.2 No Image on Screen During Recording/Playback
- Copriobiettivo: Ensure the lens cover is open.
- Selezione della modalità: Verify the camcorder is in the correct recording or playback mode.
- Connessione esterna: If connected to a TV, ensure the TV input is set to the correct source (e.g., HDMI 1, AV).
5.3 Tape Error Message
- Reinsert Tape: Eject the MiniDV tape and reinsert it carefully.
- Try Another Tape: The tape might be damaged. Try using a new or different tape.
- Teste pulite: If the issue persists across multiple tapes, the camcorder's tape heads might need cleaning (refer to professional service).
6. Specifiche
Below are the technical specifications for the Sony DCR-HC52 MiniDV Handycam Camcorder:
| Caratteristica | Specificazione |
|---|---|
| Marca | Sony |
| Numero di modello | DCR-HC52 |
| Tecnologia del sensore fotografico | CCD |
| Risoluzione di acquisizione video | Formato: 720p |
| Zoom ottico | 40x |
| Digital Zoom | 2000x |
| Dimensioni dello schermo | 2.7 pollici |
| Tecnologia di connettività | HDMI, USB |
| Stabilizzazione dell'immagine | Ottico |
| Risoluzione fissa efficace | 0.68 MP |
| Tipo di lente | Zoom (Carl Zeiss Vario-Tessar) |
| Lunghezza focale minima | 1.9 millimetri |
| Lunghezza focale massima | 7.6 centimetri |
| Formato audio supportato | AAC, MP3, PCM |
| Codice UPC | 760575452306 |
7. Informazioni sulla garanzia
This Sony DCR-HC52 MiniDV Handycam Camcorder comes with a Garanzia limitata di 90 giorni. Please retain your proof of purchase for any warranty claims. The warranty covers manufacturing defects under normal use. It does not cover damage caused by misuse, accidents, unauthorized modifications, or normal wear and tear.
8. Supporto
For further assistance, technical support, or service inquiries regarding your Sony DCR-HC52 camcorder, please refer to the following:
- Ufficiale Sony Websito: Visita il supporto ufficiale Sony website for product manuals, FAQs, and driver downloads.
- Assistenza clienti: Contact Sony customer service for direct assistance. Refer to your region's Sony websito per i contatti.
Non erano disponibili video ufficiali del prodotto del venditore da incorporare in questo manuale.


