Introduzione
This manual provides detailed instructions for the safe and efficient use of your MYPIN 7L Automatic Pet Feeder. This device is designed to provide scheduled meals for your cats, dogs, and other small pets, ensuring consistent feeding times and portion control. Please read this manual thoroughly before operating the feeder and retain it for future reference.
Informazioni sulla sicurezza
- Use only dry pet food with a pellet size between 0.19 inches (5mm) and 0.59 inches (15mm). Do not use wet food.
- Tenere la mangiatoia lontana dall'acqua o da umidità eccessiva.
- Assicurarsi che l'adattatore di alimentazione sia collegato saldamente e che il cavo non sia danneggiato.
- Se si utilizzano le batterie, assicurarsi che siano inserite correttamente e sostituirle quando sono scariche per evitare interruzioni di corrente.
- Do not allow children or pets to play with the feeder.
- Disassemble only the removable parts for cleaning as instructed. Do not attempt to disassemble the main unit.
Contenuto della confezione
Verificare che tutti gli articoli siano presenti nel pacco:
- 1 x MYPIN Automatic Pet Feeder Unit
- 1 x adattatore di alimentazione
- 1 x Quick Start Guide (This manual serves as the detailed guide)
Prodotto finitoview
Familiarize yourself with the components of your automatic pet feeder.

Image: The MYPIN 7L Automatic Pet Feeder, illustrating its anti-stuck design, infrared detection, schedule feeding, 10-second voice record, dual power supply, and auto/manual feeding modes.
- Contenitore per alimenti: Capacità di 7 litri per cibo secco per animali domestici.
- Pannello di controllo: Features a 2-inch LCD screen and 6 physical buttons for programming.
- Vassoio per alimenti: Staccabile per una facile pulizia.
- Desiccant Storage Box: Posizionato sotto il coperchio per mantenere freschi gli alimenti.
- Voice Recorder/Speaker: For recording and playing a 10-second message.
- Porta di alimentazione: For DC power adapter.
- Vano batteria: For 3 x D-size batteries (backup power).
Istruzioni di installazione
- Disimballare e montare:
Remove all components from the packaging. Ensure the food tray is securely attached to the main unit.
- Install Desiccant Bag (Optional):
Open the top cover by pressing and lifting. Locate the desiccant storage box inside the lid. Insert a desiccant bag (not included) to help keep food fresh. Close the lid securely.

Image: Instructions on how to open the feeder lid to access the inbuilt desiccant storage box.
- Riempire il contenitore per alimenti:
Open the top cover. Pour dry pet food into the container. Ensure the food pellet size is between 0.19 inches (5mm) and 0.59 inches (15mm) to prevent jamming. Close the lid firmly to engage the unique inner buckles, preventing pets from accessing the food.
- Alimentare l'alimentatore:
Connect the DC power adapter to the feeder's power port and plug it into a wall outlet. For backup power, install 3 D-size batteries (not included) into the battery compartment at the bottom of the unit. The feeder will automatically switch to battery power in case of a power outage.
Istruzioni per l'uso
Impostazione dell'ora corrente
- Press the "SET" button to enter time setting mode.
- Use the "UP" and "DOWN" buttons to adjust the hour. Press "SET" to confirm.
- Use the "UP" and "DOWN" buttons to adjust the minute. Press "SET" to confirm.
Programming Meal Times and Portions
The feeder supports up to 4 meals per day, with up to 20 portions per meal. Each portion is approximately 5 grams.
- Press the "MEAL" button to cycle through Meal 1 to Meal 4 settings.
- For each meal, press "SET" to adjust the feeding time (hour and minute) using "UP" and "DOWN" buttons, confirming each with "SET".
- After setting the time, use "UP" and "DOWN" to adjust the number of portions (1-20) for that meal. Press "SET" to confirm.
- Repeat for all desired meals. If a meal is not set, it will not dispense food.
Registrazione vocale
You can record a 10-second voice message that will play at each scheduled mealtime to call your pet.
- Press and hold the "REC" (microphone) button.
- Speak clearly into the microphone for up to 10 seconds.
- Release the "REC" button to save the recording. The message will play automatically during scheduled meals.
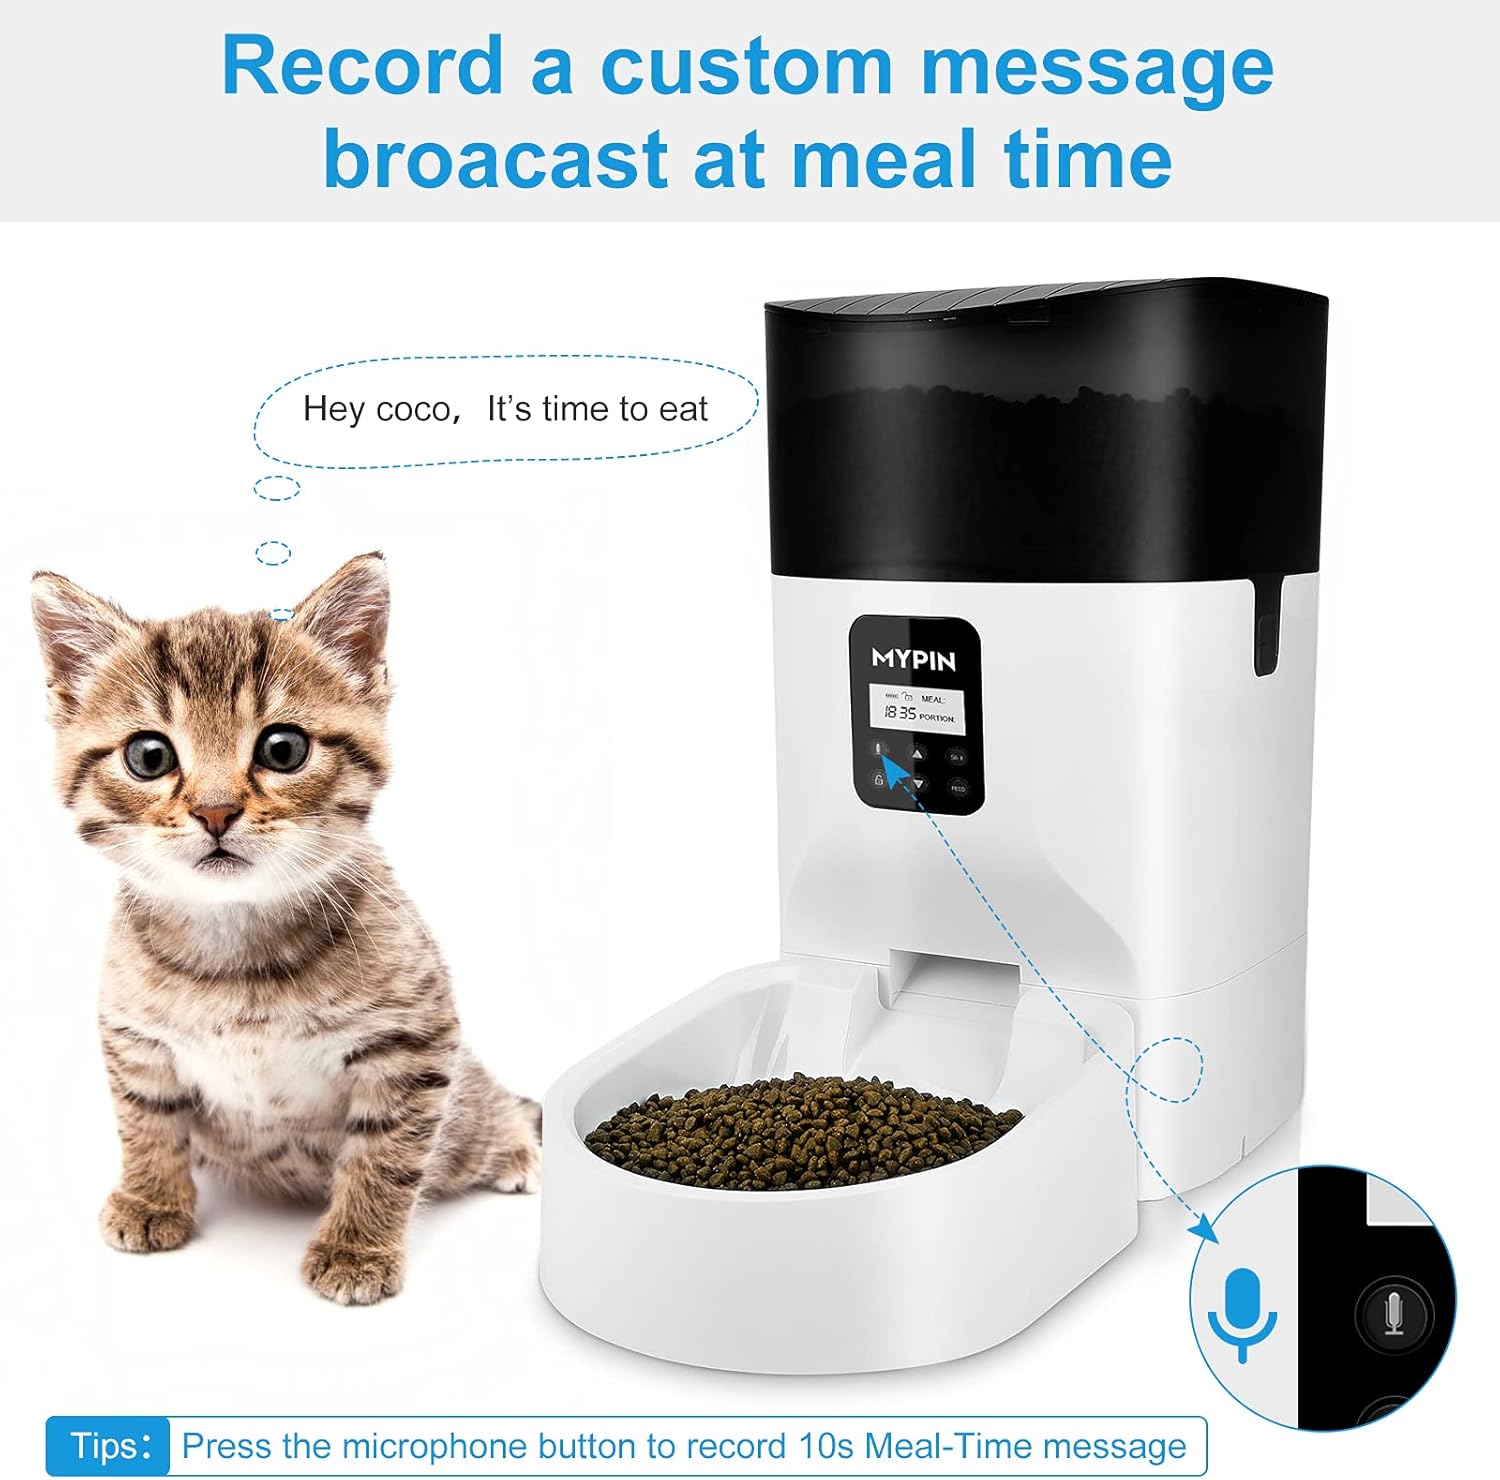
Image: A visual representation of the voice recording feature, showing a kitten being called to eat by a recorded message from the feeder.
Alimentazione manuale
To dispense food manually, press the "MANUAL" button. One portion will be dispensed each time the button is pressed.
Funzione Blocco tasti
The control panel features a key lock function to prevent accidental changes to settings by pets or children. Refer to the LCD screen for the lock/unlock indicator and follow on-screen prompts or specific button combinations (usually a long press of a specific button) to activate or deactivate the lock.
Manutenzione e pulizia
Regular cleaning ensures hygiene and proper functioning of your pet feeder.

Image: The MYPIN pet feeder with its food container and tray detached, illustrating the ease of disassembly for cleaning.
- Smontaggio: Ensure the feeder is unplugged and batteries are removed. The food container and food bowl are designed to be easily removed for cleaning. Gently detach them from the main unit.
- Pulizia delle parti rimovibili: Wash the food container and food bowl with mild soap and water. Rinse thoroughly and dry completely before reassembling.
- Pulizia dell'unità principale: The main unit, including the dispensing mechanism, should non essere immerso in acqua. Pulirlo con un pannoamp cloth only. Ensure no water enters the electronic components.
- Rimontaggio: Once all parts are dry, reassemble the food container and food bowl onto the main unit, ensuring they click securely into place.
Risoluzione dei problemi
| Problema | Possibile causa | Soluzione |
|---|---|---|
| Il cibo non viene distribuito. |
|
|
| L'alimentatore non si accende. |
|
|
| Il coperchio è difficile da aprire/chiudere. |
|
|
| La registrazione vocale non viene riprodotta. |
|
|
Specifiche
- Modello: Alimentatore automatico per animali da 7 litri
- Capacità: 7 litri (circa 29 tazze)
- Materiale: Polietilene tereftalato
- Alimentazione elettrica: DC 5V/1A adapter (included) or 3 x D-size batteries (not included)
- Pasti al giorno: Fino a 4
- Porzioni per pasto: Fino a 20 (circa 5 g per porzione)
- Registrazione vocale: 10 secondi
- Alimenti compatibili: Solo cibo secco
- Food Pellet Size: 0.19" - 0.59" (5 mm - 15 mm)
- Dimensioni: Circa 40.28 x 25.4 x 24.1 cm
Garanzia e supporto
For warranty information or technical support, please refer to the contact details provided with your purchase or visit the official MYPIN websito. Conserva la ricevuta d'acquisto come prova d'acquisto.