
1. Introduzione
Thank you for choosing the Strex 12 LED Universal RCA Reversing Camera. This manual provides essential information for the proper installation, operation, and maintenance of your new reversing camera. Please read this manual thoroughly before use to ensure optimal performance and safety.
2. Informazioni sulla sicurezza
- Always ensure your vehicle is turned off and the parking brake is engaged before attempting any installation or maintenance.
- Disconnect the vehicle's battery before connecting any electrical components to prevent short circuits or damage.
- Assicurarsi che tutti i cavi siano adeguatamente isolati e fissati per evitare danni causati da vibrazioni, calore o umidità.
- Non ostruire la visuale della telecamera view with dirt, snow, or ice. Regularly clean the lens for clear visibility.
- This camera is designed as an aid for reversing and parking. Always check your surroundings visually and use your mirrors.
3. Contenuto della confezione
Verificare che tutti gli articoli siano presenti nel pacco:
- 1x Strex 12 LED Reversing Camera
- 1x Mounting material with 6M RCA cable
- 1x Manuale utente

Figura 3.1: Contenuto della confezione. The image displays the Strex 12 LED reversing camera, the included 6-meter RCA cable and power cable, and the product packaging.
4. Specifiche
| Caratteristica | Specificazione |
|---|---|
| Marca | Strex |
| Numero di modello | SP97 |
| Voltage | CC 12V |
| Risoluzione di registrazione video | Formato: 720p |
| Attuale Viewangolo di ing | 140 gradi |
| Tipo di lente | Grandangolo |
| Tecnologia dei sensori ottici | CMOS |
| Dimensioni del sensore ottico | 1/4 pollice |
| Tipo di connettore | RCA |
| Tipo di installazione | Posteriore-view montare |
| Dispositivi compatibili | Monitor |
| Dimensioni del prodotto | 40L x 23W x 23H millimetri |

Figure 4.1: Camera Dimensions. This image illustrates the physical dimensions of the Strex reversing camera, including its mounting bracket.
5. Configurazione e installazione
The Strex 12 LED Reversing Camera is designed for a plug-and-play installation. Follow these general steps:
- Scegli la posizione di montaggio: Select a suitable location at the rear of your vehicle, typically above the license plate, ensuring a clear view and that the camera does not obstruct any vehicle lights or features.
- Montare la fotocamera: Use the provided mounting hardware to securely attach the camera. Ensure it is firmly fixed to prevent movement from vibrations.
- Connetti alimentazione: Connect the camera's power cable to your vehicle's DC 12V system. It is recommended to connect it to the reverse light circuit so the camera activates automatically when the vehicle is put into reverse.
- Collegare il cavo video: Route the 6-meter RCA video cable from the camera to your in-car monitor or head unit. Ensure the cable is routed safely, avoiding moving parts, sharp edges, and excessive heat.
- Funzionalità di prova: Once all connections are made, turn on your vehicle and engage reverse gear to test the camera's functionality. Adjust the camera angle if necessary for optimal viewing.
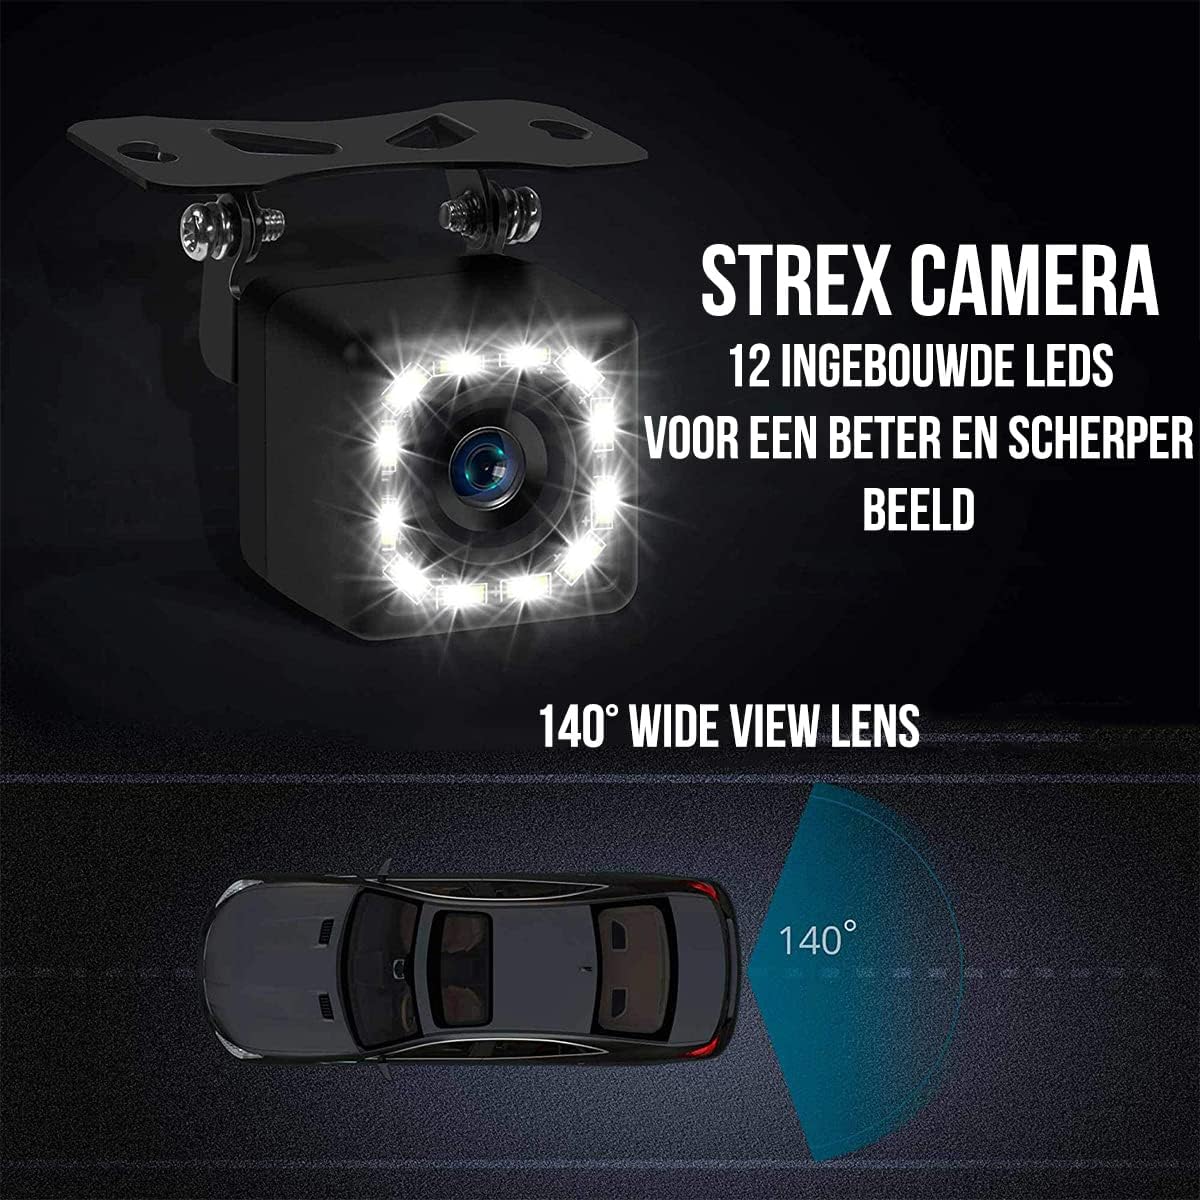
Figura 5.1: Caratteristiche della fotocamera. This image highlights the 12 built-in LEDs and the 140-degree wide-angle lens of the Strex camera, crucial for installation and operation.
6. Istruzioni per l'uso
The Strex 12 LED Reversing Camera provides clear visibility to assist with parking and reversing maneuvers.
- Attivazione automatica: When properly installed, the camera will automatically activate and display the rear view on your connected monitor when you shift your vehicle into reverse gear.
- Chiaro View: The camera features a 140° wide-angle lens, providing an expansive field of view to detect obstacles and other vehicles.
- Visione notturna migliorata: Equipped with 12 powerful LED lights and 720P resolution, the camera ensures a clear image even in low-light or completely dark conditions.

Figure 6.1: Ultra Clear Image. The camera's advanced lens and chip technology ensure a clear image both during the day and at night.

Figure 6.2: Improved Night Vision. This comparison demonstrates the superior clarity and brightness provided by the Strex camera's night vision capabilities.
7. Manutenzione
To ensure the longevity and optimal performance of your Strex Reversing Camera, follow these maintenance guidelines:
- Pulizia regolare: Pulire periodicamente l'obiettivo della fotocamera con un panno morbido eamp panno per rimuovere sporco, polvere e macchie d'acqua. Evitare detergenti abrasivi che potrebbero graffiare la lente.
- Controllare le connessioni: Occasionally inspect all cable connections to ensure they are secure and free from corrosion or damage.
- Resistenza alle intemperie: The camera features an IP68 waterproof rating, making it resistant to rain, snow, and other extreme weather conditions. However, avoid direct high-pressure water jets on the camera.

Figure 7.1: Robust and Waterproof Design. The image emphasizes the camera's durable construction and IP68 waterproof rating, ensuring reliable performance in all weather conditions.
8. Risoluzione Dei Problemi
If you encounter issues with your Strex Reversing Camera, refer to the following common problems and solutions:
- Nessuna immagine sul monitor:
- Check all power connections to ensure the camera is receiving 12V power.
- Verify the RCA video cable is securely connected to both the camera and the monitor.
- Ensure your monitor is set to the correct input source for the camera.
- Check the vehicle's reverse light circuit for proper function if the camera is wired to it.
- Scarsa qualità dell'immagine:
- Pulisci l'obiettivo della fotocamera per rimuovere sporco, polvere o umidità.
- Assicurarsi che non vi siano ostacoli nel campo di ripresa della telecamera view.
- Controllare che il cavo video non sia piegato o danneggiato.
- Verify the monitor's display settings (brightness, contrast) are correctly adjusted.
- Segnale intermittente:
- Controllare che tutti i collegamenti dei cavi non siano allentati o corrosi.
- Assicurarsi che l'alimentazione della telecamera sia stabile.
Se questi passaggi non risolvono il problema, contattare l'assistenza clienti.
9. Garanzia e supporto
This Strex product comes with a standard manufacturer's warranty. Please refer to the warranty card included in your package or contact your retailer for specific warranty terms and conditions.
For technical support, troubleshooting assistance, or warranty claims, please contact Strex customer service through the retailer where you purchased the product or visit the official Strex websito per le informazioni di contatto.