
1. Introduzione
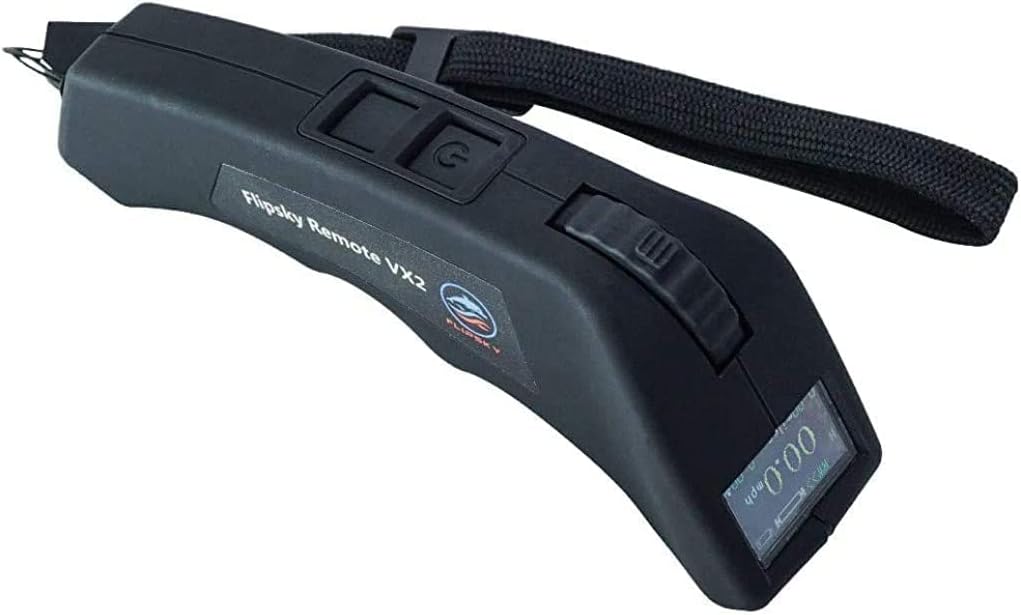
This manual provides detailed instructions for the proper use and maintenance of your FLIPSKY VX2 Pro V6 Version Skateboard Remote Control. Please read this manual thoroughly before operating the device to ensure safe and correct usage.
2. Contenuto della confezione
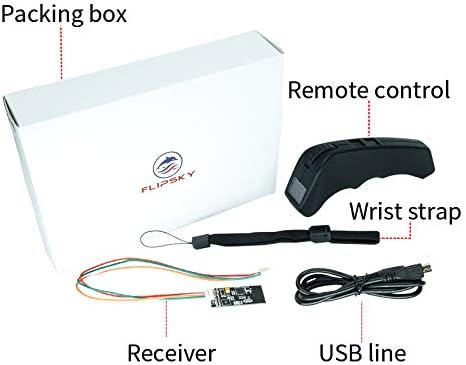
Verifica che tutti gli articoli elencati di seguito siano inclusi nel tuo pacchetto:
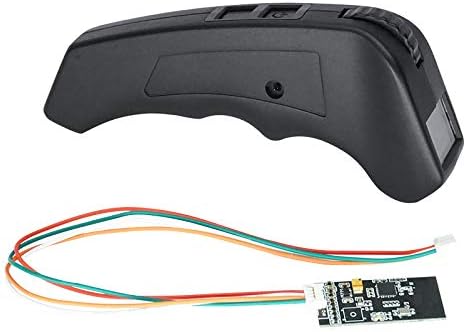
- Remote Control (VX2 Pro V6 Version)
- Ricevitore
- Cinturino da polso
- Cavo di ricarica USB
3. Prodotto finitoview
The FLIPSKY VX2 Pro remote control features a color screen and an ergonomic design for comfortable handling. Key components are identified below:
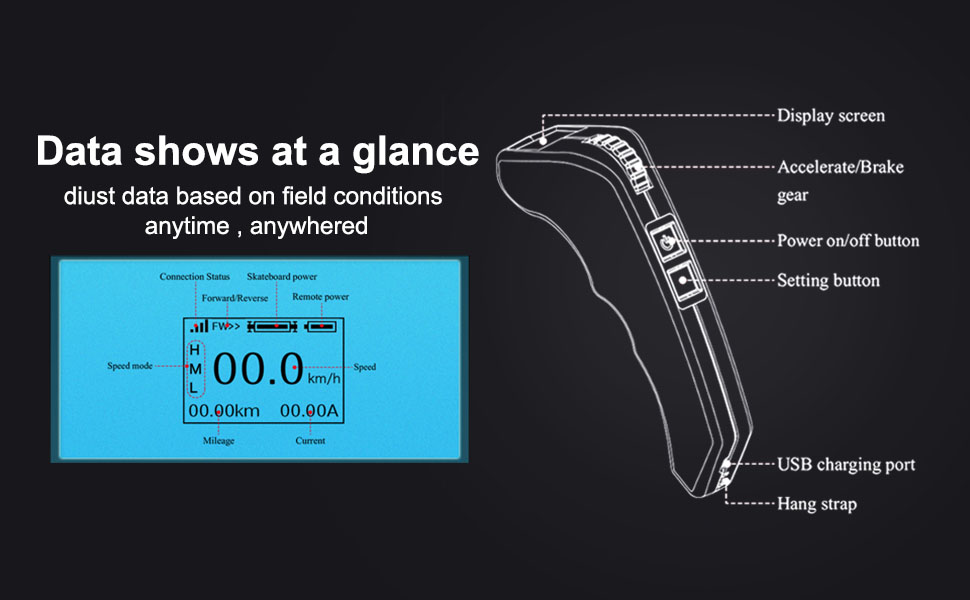
Display Screen Content:
The 0.95" OLED display provides real-time data. The screen typically shows:
- Stato della connessione: Indicates if the remote is connected to the receiver.
- Skateboard Power: Battery level of the skateboard.
- Alimentazione remota: Battery level of the remote.
- Forward/Reverse Indicator: Shows current direction.
- Modalità velocità: Displays current speed setting (H, M, L for High, Medium, Low).
- Velocità: Current speed in km/h or miles/h.
- Chilometraggio: Distanza totale percorsa.
- Attuale: Real-time current draw (in Ampere).
4. Impostazione
4.1 Schema elettrico
Connect the receiver to your Electronic Speed Controller (ESC) according to the diagram below. Ensure correct polarity and pin assignment.
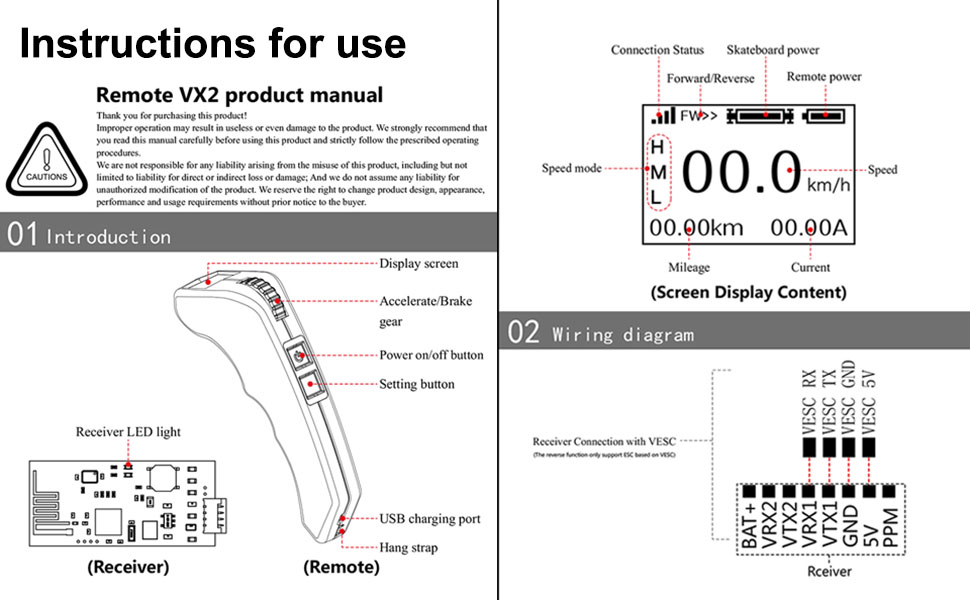
The receiver has pins for VESC RX, VESC TX, VESC GND, and VESC 5V. Connect these to the corresponding pins on your ESC. The receiver also has a LED light to indicate status.
4.2 Istruzioni per l'associazione
The remote will not function until it is successfully paired with the receiver. Follow these steps to pair your remote:
- Fase 1: Power on the remote and press the Setting button for 3 seconds. The remote will enter parameter setting mode.
- Fase 2: Briefly press the Setting button and shift options to "Pairing". Then press the Setting button again until "Pairing" begins blinking. Release the button. The remote is now in Pairing Mode.
- Fase 3: Power on the receiver. The remote and receiver will attempt to pair. If the screen shows "Pairing succeed", pairing is successful.
Promemoria:
- If the receiver LED light does not illuminate within 10 seconds and then blinks, and the screen shows "Pairing failure" or "Pairing succeed" with a blinking status, it indicates a pairing failure. Re-power the receiver and try pairing again.
- If the signal light is blinking during pairing, retry all steps from the beginning.
5. Funzionamento
5.1 Accensione/spegnimento
- Accensione: Press the power on/off button for 1 second. The screen will display "FLIPSKY".
- Spegni: Press the power on/off button for 2 seconds. The remote will shut down.
- Spegnimento automatico: The remote will power off in 10 minutes without any operation, except when in cruise control mode.
5.2 Accelerazione e frenata
The remote features an accelerate/brake gear (throttle wheel) for controlling speed.
- Accelerazione: Push the accelerate/brake gear forward to increase speed.
- Frenata: Pull the accelerate/brake gear backward to apply brakes.
5.3 modalità di velocità
The remote supports three speed modes: Low (L), Medium (M), and High (H).
- To change speed mode: Keep the accelerate/brake gear in its default or original status (neutral position). Briefly press the Setting button to switch between speed modes.
- The remote is set to High speed mode by default after powering on.
5.4 Modalità Crociera
Cruise mode allows you to maintain a constant speed without continuously holding the throttle.
- Engage Cruise Mode: Push the accelerate gear to the desired speed. While maintaining that speed, briefly press the power button once. Your electric skateboard is now in cruise mode.
- Exit Cruise Mode: Push the accelerate gear or pull the brake gear to exit cruise mode.
5.5 Impostazione dei parametri
Per accedere e regolare i parametri:
- Press the Setting button for 3 seconds to enter remote setting mode.
- Briefly press the Setting button to shift through the setting options.
- To revise a data setting option: Shift to the option you want to revise. Then press the Setting button for 3 seconds until the option begins blinking.
- While the option is blinking, adjust the accelerate/brake gear to increase or decrease the data.
- Once the revised data is confirmed, briefly press the Power button to confirm the revision and exit the parameter setting menu.
Supported Parameter Settings:
- Setting and saving of Battery Cells
- Coppie di poli
- Tipo di ruota
- Puleggia motore
- Wheel Pulley
- Diametro della ruota
- Calibrazione dell'acceleratore
Remark: For Wheel Type, Motor Pulley, and Wheel Pulley, settings can only be adjusted if the "Pulley option" is selected.
6. Manutenzione
To ensure the longevity and optimal performance of your FLIPSKY VX2 Pro remote control, follow these maintenance guidelines:
- Pulizia: Pulisci il telecomando con un panno morbido e asciutto. Evita di utilizzare prodotti chimici aggressivi o detergenti abrasivi.
- Magazzinaggio: Conservare il telecomando in un luogo fresco e asciutto, lontano dalla luce solare diretta e da temperature estreme.
- Cura della batteria: The remote uses a rechargeable Li-ion battery. Charge the battery regularly, even if not in use, to maintain its health. Avoid fully discharging the battery for extended periods.
- Protezione dagli impatti: Avoid dropping the remote or subjecting it to strong impacts, as this can damage internal components or the display screen.
7. Risoluzione Dei Problemi
If you encounter issues with your FLIPSKY VX2 Pro remote, refer to the following common problems and solutions:
| Problema | Possibile causa | Soluzione |
|---|---|---|
| Il telecomando non si accende. | Batteria scarica o pulsante di accensione non premuto correttamente. | Charge the remote's battery. Press and hold the power button for 1 second. |
| Remote does not pair with receiver. | Incorrect pairing procedure, receiver not powered, or interference. | Ensure receiver is powered. Re-attempt pairing following Section 4.2. Check for obstructions or other 2.4GHz devices. |
| Loss of signal connection during use. | Interference, distance from receiver, or receiver malfunction. | Ensure clear line of sight between remote and receiver. Reduce distance. Check receiver wiring. If persistent, re-pair the devices. |
| Telemetry data (speed, distance) is inaccurate. | Incorrect parameter settings (e.g., wheel diameter, pulley ratio). | Access Parameter Setting (Section 5.5) and verify that Wheel Diameter, Motor Pulley, and Wheel Pulley settings are correctly configured for your skateboard. |
| Remote screen is blank or unresponsive. | Remote battery depleted, software issue, or hardware damage. | Charge the remote. Try a hard reset by holding the power button for an extended period (e.g., 10 seconds). If the issue persists, contact support. |
8. Specifiche
| Caratteristica | Dettaglio |
|---|---|
| Modello | VX2 Pro V6 Version |
| Display | Colorful Screen, 0.95" OLED |
| Connettività | Frequenza radio 2.4 GHz |
| Modalità di velocità | 3 (Basso, Medio, Alto) |
| Batteria | Batteria ricaricabile Li-ion |
| Dati in tempo reale | Speed, Mileage, Current, Battery Levels |
| Opzioni dell'unità | km/h and miles/h |
| Compatibilità | FSESC and other ESCs (e.g., FOCBOX), Electric Skateboard, Boat |
| Peso dell'articolo | 6.5 once (circa 184 grammi) |
9. Garanzia e supporto
Information regarding product warranty and customer support was not available in the provided product data. For warranty details or technical assistance, please refer to the official FLIPSKY websito o contattare il rivenditore presso il quale è stato acquistato il prodotto.
For further inquiries, you may also refer to the seller's information:
- Venditore: Shenzhen Flipsky Technology Company Limited
- ID venditore: A3QK84HB8OFPD6