
1. Introduzione
This manual provides comprehensive instructions for the safe and effective use, installation, and maintenance of your WINDFIRE Tactical Flashlight. This high-performance LED weapon light is designed for reliability and durability in various tactical and outdoor environments. Please read this manual thoroughly before operating the device.
2. Contenuto della confezione
Dopo aver aperto la confezione, verificare che siano presenti tutti i seguenti componenti:
- 1 x LED Tactical Weapon Flashlight
- 1 x Remote Pressure Switch
- 1 x 45 Degree 1" Quick Release Offset Weaver Rails Picatinny Mount
- 1 x Caricabatterie
- 1 x scatola di immagazzinaggio
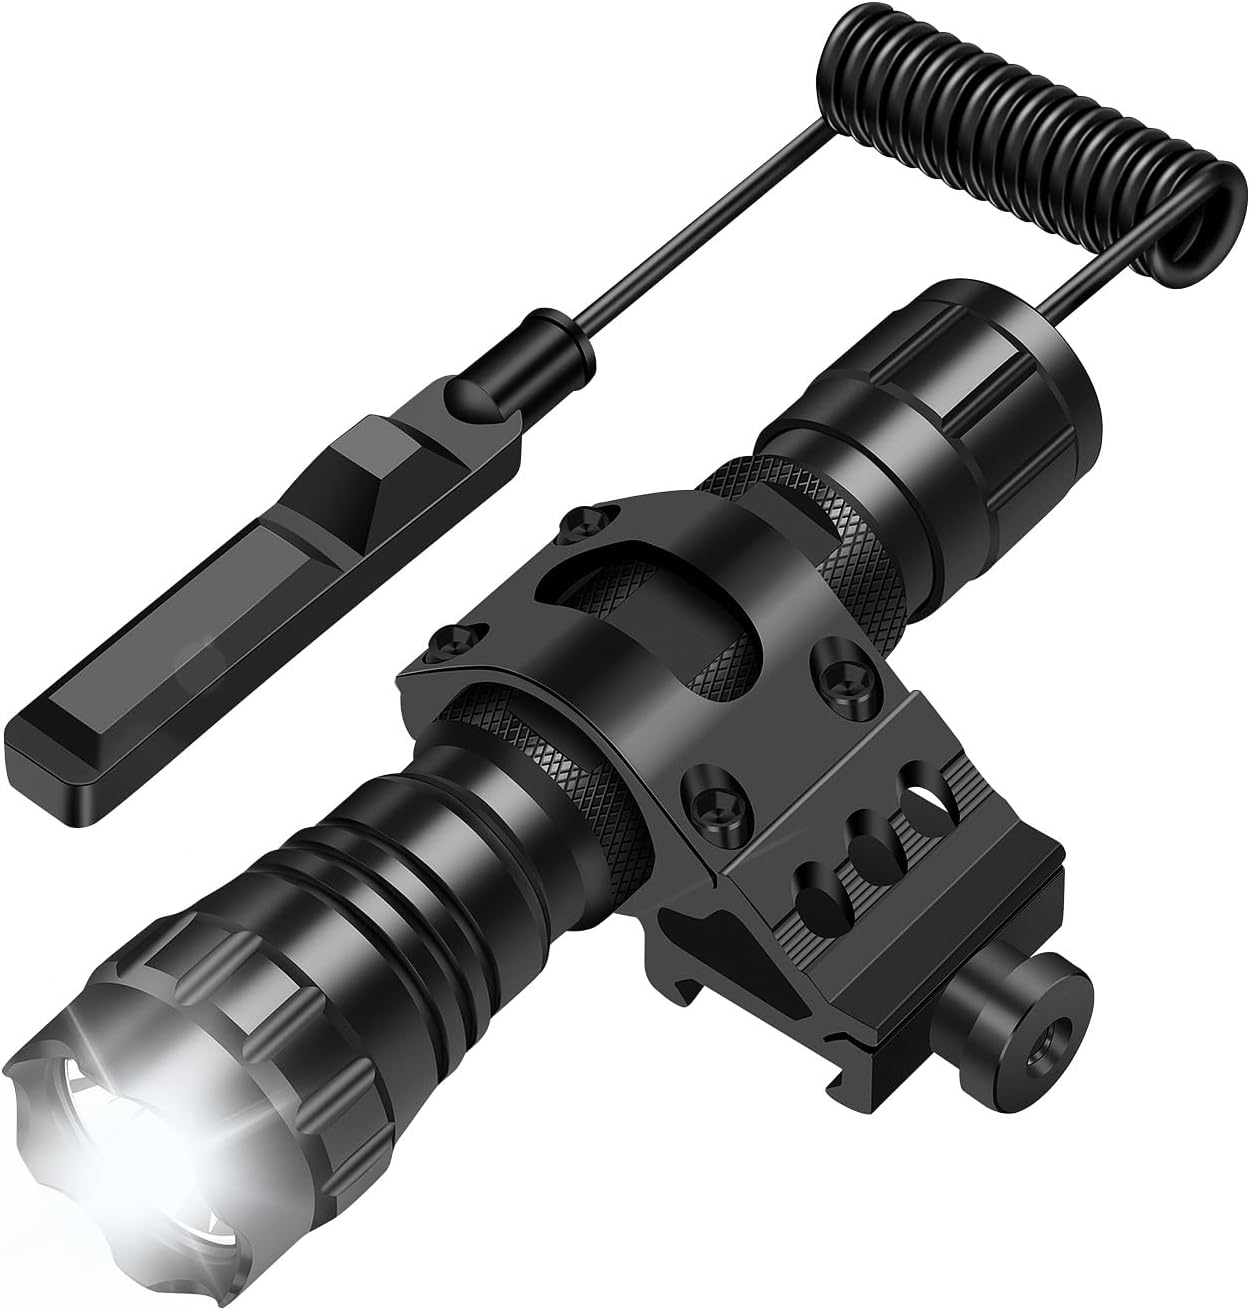
Image: Complete WINDFIRE Tactical Flashlight kit, including the flashlight, remote pressure switch, and offset mount.
3. Specifiche
Key technical specifications for the WINDFIRE Tactical Flashlight:
| Caratteristica | Specificazione |
|---|---|
| Numero di modello | WF-501B |
| Tipo di sorgente luminosa | GUIDATO |
| Luminosità | 2200 lumen (massimo) |
| Distanza del percorso luminoso | 700 piedi (circa 213 metri) |
| Fonte di alimentazione | Alimentato a batteria (è necessaria 1 batteria ai polimeri di litio) |
| Durata | Circa 5 ore (con batteria completamente carica) |
| Materiale | Lega di alluminio di qualità aeronautica |
| Tipo di finitura | Anodizzato nero opaco |
| Livello di resistenza all'acqua | IP65 impermeabile |
| Peso dell'articolo | 3.18 once (circa 90 grammi) |
| Tipo di montaggio | Rifle Mount (Picatinny/Weaver Rail) |

Image: The WINDFIRE Tactical Flashlight demonstrating its IP65 water-resistant capabilities in a wet environment.
4. Informazioni sulla sicurezza
To ensure safe operation and prevent damage to the flashlight or injury, please observe the following safety precautions:
- Sicurezza degli occhi: Non guardare direttamente la luce LED e non puntarla direttamente negli occhi di persone o animali. La luce ad alta intensità può causare danni temporanei alla vista o danni permanenti agli occhi.
- Calore: The flashlight may become warm during prolonged use. This is normal. Avoid direct contact with the hot surface for extended periods.
- Sicurezza della batteria: Use only the recommended battery type. Do not mix old and new batteries, or different types of batteries. Do not dispose of batteries in fire. Keep batteries out of reach of children.
- Resistenza all'acqua: The flashlight is IP65 water-resistant, meaning it can withstand splashes and rain. It is non designed for diving or prolonged submersion in water.
- Bambini: Tenere la torcia e i suoi componenti fuori dalla portata dei bambini per evitare lesioni accidentali o l'ingestione di piccole parti.
5. Impostazione
5.1 Installazione della batteria
- Svitare il tappo posteriore della torcia ruotandolo in senso antiorario.
- Insert the recommended Lithium Polymer battery with the positive (+) end facing towards the flashlight head.
- Riavvitare il tappo posteriore in senso orario fino a quando non è ben stretto.
5.2 Mounting the Flashlight (Picatinny Rail Offset Mount)
The included 45-degree offset mount is designed for 20mm standard Picatinny/Weaver rails and fits flashlights with a 1-inch (25mm) body diameter.
- Loosen the screws on the mount to open the flashlight ring and the rail clamp.
- Place the flashlight into the 1-inch ring of the mount. Ensure it is seated firmly.
- Tighten the screws on the flashlight ring to secure the flashlight. Do not overtighten.
- Position the mount onto your 20mm Picatinny/Weaver rail.
- Tighten the nuts on the rail clamp to secure the mount to the rail. Ensure the mount is stable and does not wobble.

Immagine: dettagliata view of the 45-degree quick release offset mount, showing its dimensions and how it attaches to a Picatinny rail.
5.3 Connecting the Remote Pressure Switch
The remote pressure switch provides versatile control options for your flashlight.
- Unscrew the standard tail cap from the flashlight.
- Screw the remote pressure switch's connector onto the flashlight's tail end, ensuring a secure connection.
- Route the pressure switch cable along your firearm or desired mounting surface.
- Secure the pressure pad to a convenient location using the adhesive backing or appropriate mounting accessories (not included).

Image: The WINDFIRE Tactical Flashlight with the remote pressure switch attached, illustrating its coiled cable and pressure pad.
6. Istruzioni per l'uso
The WINDFIRE Tactical Flashlight offers two primary methods of operation: the standard tail cap switch and the remote pressure switch.
6.1 Tail Cap Switch Operation
When using the standard tail cap switch:
- Per attivare: Press the button on the tail cap firmly until it clicks. The flashlight will illuminate.
- Per spegnere: Press the button again firmly until it clicks. The flashlight will turn off.
6.2 Remote Pressure Switch Operation
The remote pressure switch features two distinct modes for flexible control:
- Modalità di accensione costante: Press the designated button on the pressure switch firmly to activate constant illumination. Press it again to turn the flashlight off.
- Momentary On Mode: Press and hold the designated pressure pad to activate momentary illumination. The light will remain on as long as the pad is pressed and will turn off upon release.

Image: Illustration showing the two types of flashlight switches: the standard tail cap switch and the remote pressure switch with its constant on and momentary on functions.
6.3 Caricamento della batteria
Use the provided charger to recharge the battery when its performance diminishes.
- Rimuovere la batteria dalla torcia.
- Place the battery into the charger according to the polarity indicators.
- Collegare il caricabatterie a una presa di corrente adeguata.
- Monitor the charger's indicator light (if available) to determine charging status. Unplug the charger once the battery is fully charged.
7. Manutenzione
7.1 Pulizia
- Pulire il corpo della torcia con un panno pulito e morbido.
- Per lo sporco ostinato, una leggera damp è possibile utilizzare un panno e procedere all'asciugatura.
- Non utilizzare detergenti o solventi abrasivi poiché potrebbero danneggiare la finitura.
7.2 Cura della batteria
- Ricaricare regolarmente la batteria, anche se non viene utilizzata frequentemente, per preservarne la durata.
- Se si conserva la torcia per un periodo prolungato, rimuovere la batteria per evitare perdite.
7.3 Conservazione
- Conservare la torcia in un luogo fresco e asciutto, lontano dalla luce solare diretta e da temperature estreme.
- Use the provided storage box to protect the flashlight and its accessories when not in use.
8. Risoluzione Dei Problemi
If you encounter issues with your WINDFIRE Tactical Flashlight, refer to the following common problems and solutions:
| Problema | Possibile causa | Soluzione |
|---|---|---|
| La torcia non si accende. | Battery is dead or low. Battery inserted incorrectly. Loose tail cap. | Charge or replace battery. Ensure battery polarity is correct. Tighten tail cap securely. |
| La luce è fioca o tremolante. | Batteria scarica. Collegamenti allentati. Contatti sporchi. | Recharge battery. Ensure tail cap and remote switch (if used) are tight. Clean battery contacts with a clean cloth. |
| Remote pressure switch not working. | Switch not securely connected. Damaged switch. | Ensure the remote switch is fully screwed onto the flashlight. If still not working, the switch may need replacement. |
| Mount is loose on rail. | Mounting nuts not tightened sufficiently. | Tighten the mounting nuts firmly. |
9. Garanzia e supporto
For information regarding warranty coverage, returns, or technical support, please refer to the product's purchase documentation or contact WINDFIRE customer service directly through the retailer where the product was purchased. Keep your proof of purchase for any warranty claims.