
1. Prodotto finitoview
The HOMCOM Model 837-061 shoe cabinet is designed for efficient shoe storage and organization in entryways or hallways. It features three tilt-out compartments for shoes and a side cabinet with a hanging bar for umbrellas or small bags. The top surface can be used for keys, phones, or decorative items.
- Spacious Shoe Storage: Three tilt-out compartments, each accommodating up to 4 pairs of shoes, for a total capacity of 6-12 pairs (depending on shoe size and type).
- Divisori regolabili: Each shoe compartment includes a removable and adjustable divider with two positions to customize storage space.
- Mobiletto laterale: A dedicated side cabinet with a door and hanging bar, suitable for umbrellas, small bags, or other accessories.
- Costruzione durevole: Made from resistant engineered wood (MDF) for long-lasting use.
- Sicurezza antiribaltamento: Includes an anti-tip safety system to secure the cabinet to the wall, preventing accidental tipping.

Image 1.1: The HOMCOM shoe cabinet, Model 837-061, shown in a typical home entryway with decorative items on top.
2. Informazioni sulla sicurezza
Si prega di leggere attentamente tutte le istruzioni di sicurezza prima del montaggio e dell'uso. Il mancato rispetto di queste istruzioni può causare lesioni o danni al prodotto.
- Dispositivo antiribaltamento: It is mandatory to install the included anti-tip device to secure the cabinet to a wall. This prevents the cabinet from tipping over, especially if children or pets attempt to climb it.
- Capacità di peso: Do not exceed the maximum supported weight of 15 kg (33 lbs) on the top surface. Overloading can compromise stability.
- Montaggio: Montare il prodotto su una superficie morbida e pulita per evitare graffi. Assicurarsi che tutte le viti e gli elementi di fissaggio siano ben serrati prima dell'uso.
- Posizionamento: Place the cabinet on a flat, level surface to ensure stability.
- Sicurezza dei bambini: Durante il montaggio, tenere le parti di piccole dimensioni e i materiali di imballaggio lontano dalla portata dei bambini.

Image 2.1: Illustration of the anti-tip design, showing how to secure the cabinet to the wall for enhanced stability and safety.
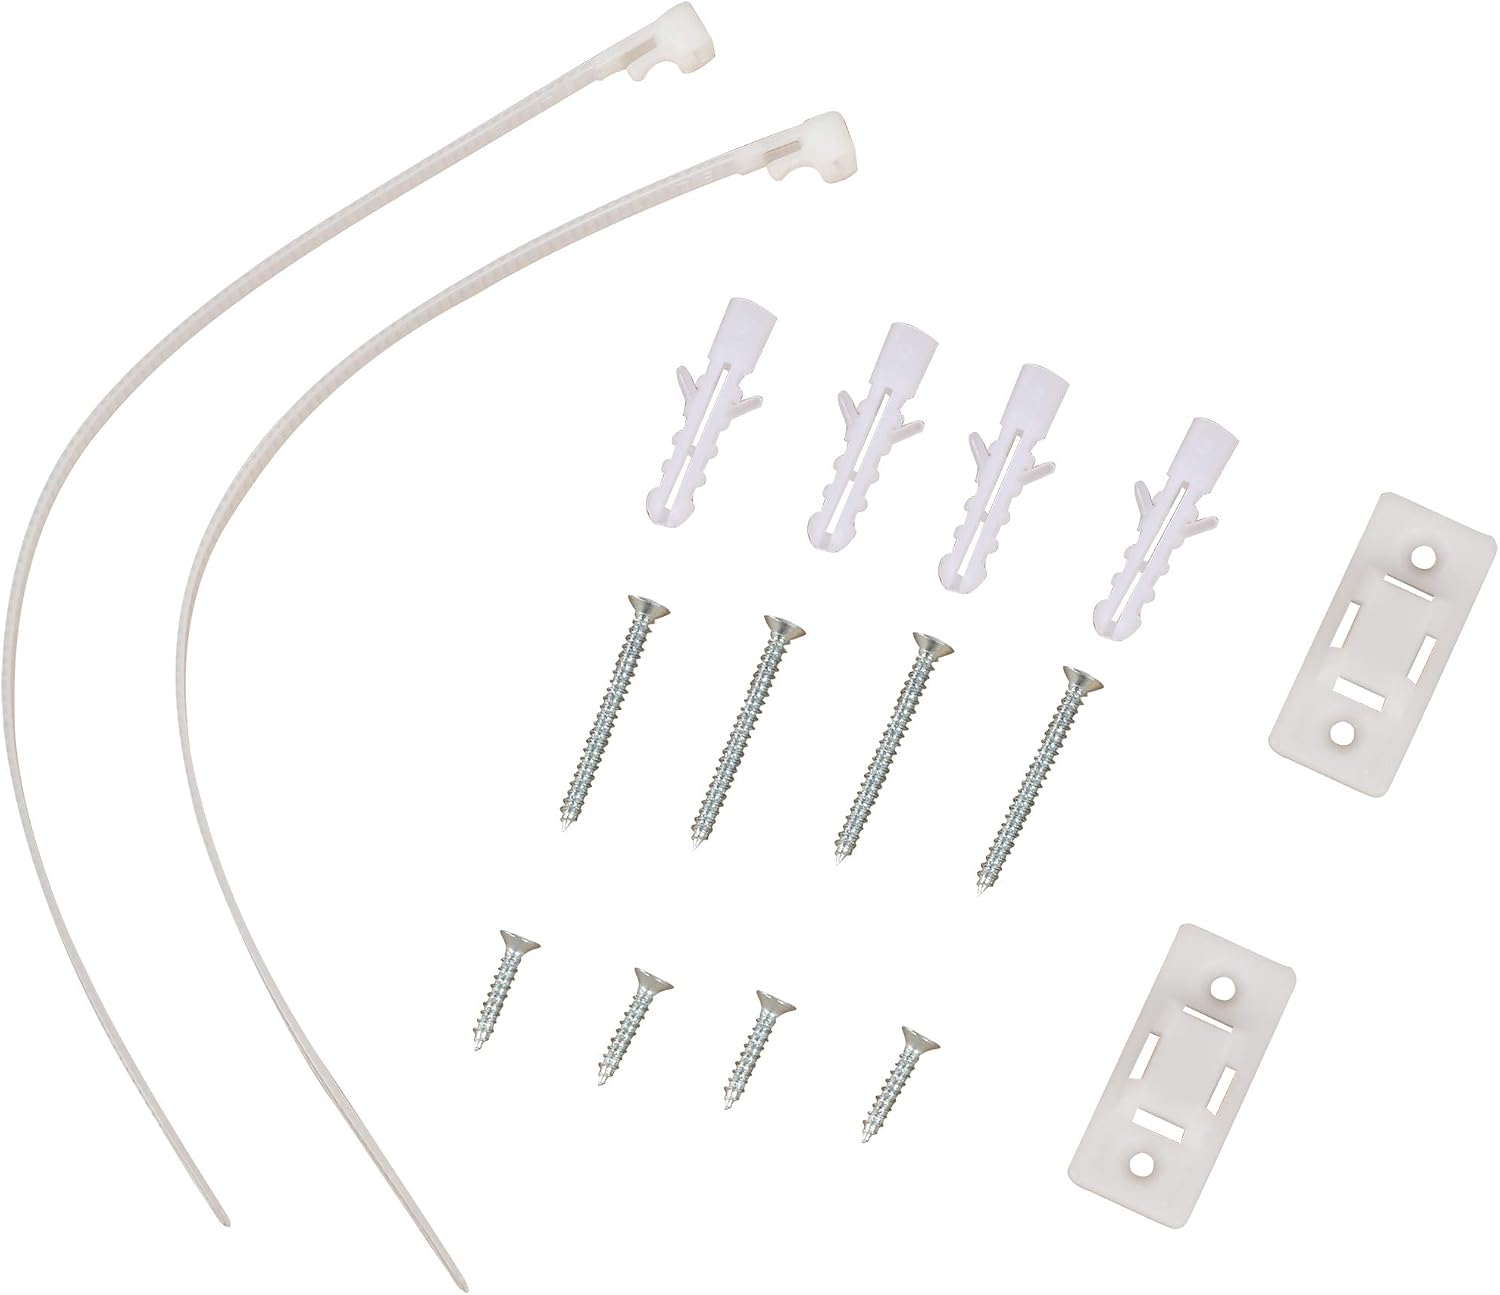
Image 2.2: Detail of the anti-tip bracket installed on the rear panel of the shoe cabinet.
3. Installazione e assemblaggio
This product requires assembly. It is recommended to have two people for assembly. Please ensure all parts are present before beginning.
3.1. Contenuto della confezione
Verify that all components and hardware are included in the package. Refer to the parts list in your physical instruction manual for detailed identification.

Image 3.1: All screws, wall anchors, and anti-tip straps included for assembly and secure installation.
3.2. Fasi di assemblaggio (linee guida generali)
- Disimballare e identificare: Carefully unpack all components and lay them out on a soft, clean surface. Identify each part using the provided labels or diagrams.
- Montare il telaio principale: Begin by connecting the main side panels and base using the designated screws and dowels. Ensure connections are snug but do not overtighten initially.
- Installare gli scomparti per le scarpe: Attach the mechanisms for the tilt-out shoe compartments to the interior of the cabinet. Insert the adjustable dividers into the desired positions.
- Porte di collegamento: Secure the three tilt-out doors to their respective mechanisms. Attach the side cabinet door using hinges.
- Install Side Cabinet Bar: Place the hanging bar inside the side cabinet.
- Serraggio finale: Once all components are in place, carefully tighten all screws to ensure structural integrity.
- Installare il dispositivo antiribaltamento: Attach the anti-tip brackets to the top rear of the cabinet. Secure the straps to a wall stud or use appropriate wall anchors (provided) to prevent tipping.
Note: For detailed, step-by-step assembly instructions, please refer to the printed manual included with your product.
4. Istruzioni per l'uso
4.1. Storing Shoes
To store shoes, gently pull the handle of a tilt-out compartment. The door will tilt forward, revealing the internal shelves. Place shoes on the shelves, ensuring they fit within the compartment's depth and height. Push the door back until it closes securely.

Image 4.1: The shoe cabinet with all three tilt-out compartments open, demonstrating the three-level hanging shelves and capacity for up to 12 pairs of regular-sized shoes.
4.2. Adjusting Dividers
Each tilt-out compartment features an adjustable divider. To adjust, open the compartment door. The divider can be moved between two positions or removed entirely to accommodate different shoe sizes or types (e.g., boots, high heels). Carefully lift and reposition the divider as needed.

Immagine 4.2: Un primo piano view illustrating the adjustable divider mechanism within a shoe compartment, allowing for flexible storage configurations.
4.3. Using the Side Cabinet
The side cabinet provides additional storage. Open the door to access the interior, which includes a hanging bar. This space is ideal for storing umbrellas, small bags, or other entryway essentials.
5. Manutenzione
Proper maintenance will ensure the longevity and appearance of your HOMCOM shoe cabinet.
- Pulizia: Pulire le superfici con un panno morbido, damp panno. Evitare l'uso di prodotti chimici aggressivi, detergenti abrasivi o umidità eccessiva, poiché potrebbero danneggiare la finitura del legno ingegnerizzato.
- Spolverare: Spolverare regolarmente il mobile con un panno asciutto e morbido per evitare l'accumulo di polvere.
- Fuoriuscite: Asciugare immediatamente eventuali fuoriuscite per evitare danni o macchie causati dall'umidità.
- Controllo hardware: Controllare periodicamente tutte le viti e gli elementi di fissaggio per assicurarsi che siano ben serrati. Serrarli nuovamente se necessario.
- Evitare la luce solare diretta: L'esposizione prolungata alla luce solare diretta può causare lo sbiadimento o la decolorazione della finitura del legno.
- Controllo dell'umidità: Mantenere una temperatura ambiente e un livello di umidità stabili per evitare deformazioni o crepe nel legno.

Image 5.1: A close-up showing the layers of engineered wood (MDF) used in the construction of the cabinet, highlighting its natural and resistant properties.
6. Risoluzione Dei Problemi
Se riscontri problemi con la tua scarpiera, fai riferimento ai seguenti problemi comuni e alle relative soluzioni:
- Il mobile sembra instabile:
- Assicurarsi che il mobile sia posizionato su una superficie piana e livellata.
- Verificare che tutte le viti di montaggio siano ben serrate.
- Confirm the anti-tip device is correctly installed and anchored to the wall.
- Tilt-out doors do not close properly:
- Check if shoes are obstructing the closing mechanism.
- Ensure the internal dividers are correctly positioned and not interfering with the door.
- Verify that the door hinges and mechanisms are properly aligned and tightened.
- Side cabinet door is misaligned:
- Adjust the hinges if they are adjustable.
- Assicurarsi che il mobile sia in piano.
- Parti mancanti o componenti danneggiati:
- Contact HOMCOM customer service with your model number and a description of the issue.
7. Specifiche
| Marca | CASACOM |
| Numero di modello | 837-061 |
| Materiale | Legno ingegnerizzato (MDF) |
| Colore | Naturale |
| Dimensioni complessive (L x P x A) | 79 cm x 26 cm x 120 cm (31.1" x 10.2" x 47.2") |
| Capacità di peso massima (superficie superiore) | 15 kg (33 libbre) |
| Capacità della scarpa | 6-12 pairs (depending on shoe size/type) |
| Assemblaggio richiesto | SÌ |

Image 7.1: Detailed dimensions of the shoe cabinet: 79 cm width, 26 cm depth, and 120 cm height.
8. Garanzia e supporto
For warranty information, product support, or to order replacement parts, please contact HOMCOM customer service. Refer to your purchase documentation or the HOMCOM official websito per i contatti.
Quando contatti l'assistenza, tieni a portata di mano il numero del modello (837-061) e la data di acquisto.