
Introduzione
The Montech Fighter 500 is an ATX mid-tower computer gaming case designed for optimal airflow and component visibility. It features a mesh 3D front panel, a tempered glass side panel, and pre-installed Rainbow LED fans. This manual provides essential information for setting up, operating, maintaining, and troubleshooting your Montech Fighter 500 case.
Caratteristiche del prodotto
- Pieno View Pannello laterale in vetro temperato: Allows for a clear view of internal components and lighting effects.
- Fine Metal Mesh Front Panel: Designed for maximum airflow to keep components cool.
- Unique M Modeling Architecture: Distinctive front panel design.
- Dazzling Rainbow Fans: Four pre-installed 120mm LED Rainbow fans provide cooling and aesthetic lighting.
- Excellent Dust Resistance: Features a magnetic top vent screen for easy cleaning and dust prevention.
Istruzioni di installazione
1. Preparazione del caso
Carefully unbox the Montech Fighter 500 case. Remove the tempered glass side panel by unscrewing the thumb screws, typically located at the rear corners of the panel. Place the case on a stable, flat surface.

Immagine: Interno view of the Montech Fighter 500 case, highlighting the spacious layout for component installation.
2. Installazione della scheda madre
The Montech Fighter 500 supports ATX, Micro ATX, and Mini-ITX motherboards. Install the necessary standoffs onto the motherboard tray according to your motherboard's form factor. Carefully place your motherboard onto the standoffs and secure it with screws.
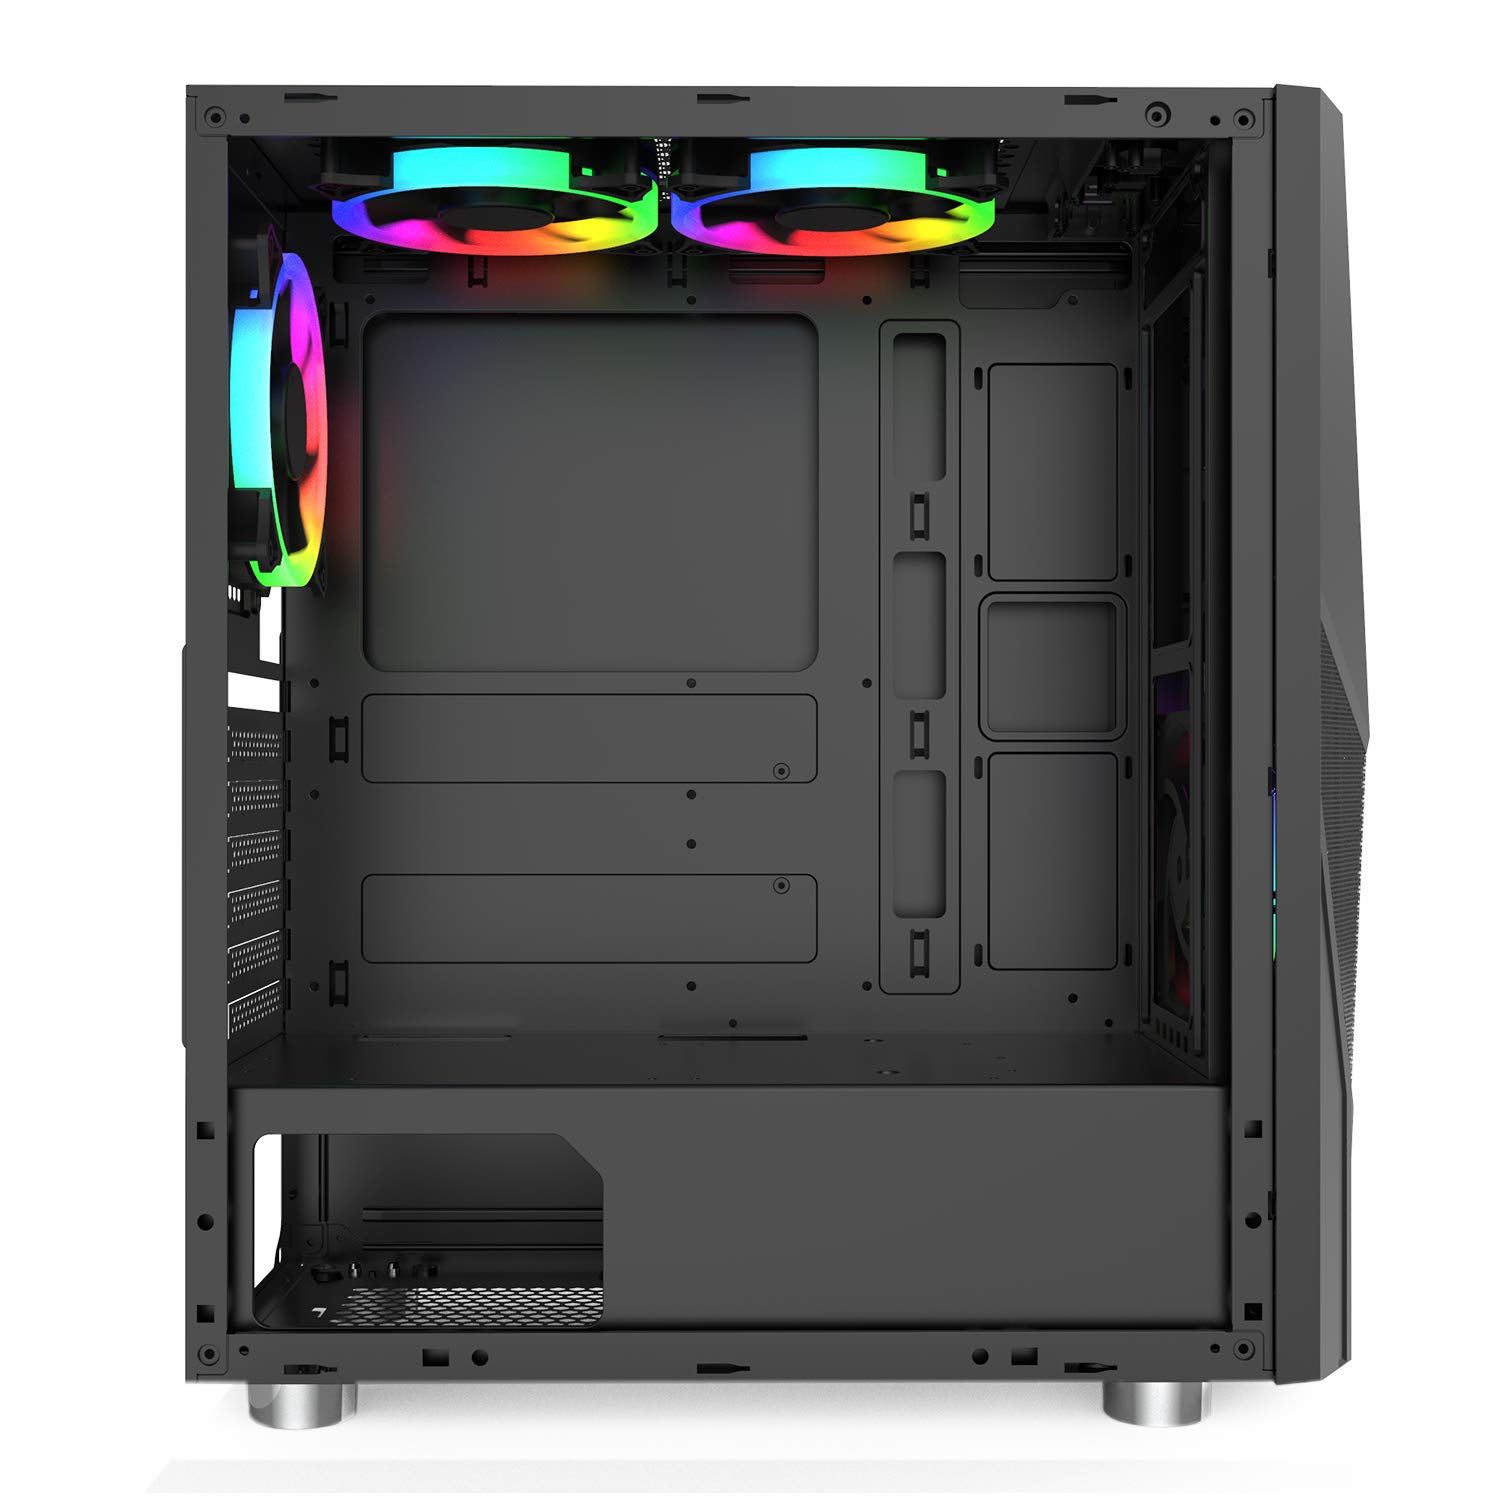
Image: Side interior view of the case, illustrating the motherboard mounting area and cutouts for cable management.
3. Installazione dell'unità di alimentazione (PSU)
The PSU mounts at the bottom of the case. Slide your ATX power supply into the designated compartment from the rear of the case and secure it with screws.

Immagine: In basso view of the case, highlighting the PSU mounting area and its dedicated ventilation.
4. Installazione dell'unità
The case provides 4 internal bays for 3.5-inch hard drives. Locate the drive cages and install your storage devices as per the case's design, typically using trays or direct mounting with screws.
5. Ventola e sistema di raffreddamento
The Montech Fighter 500 comes with four pre-installed 120mm Rainbow LED fans. Ensure all fan cables are properly connected to your motherboard or a fan controller for power and lighting control.
6. Collegamenti del pannello frontale
Connect the front panel cables (USB 2.0 x 2, audio, power switch, reset switch, LED indicators) to the corresponding headers on your motherboard. Refer to your motherboard manual for correct pin assignments.

Immagine: Posteriore view of the case, detailing the expansion slots and rear fan mount.
Istruzioni per l'uso
Once all components are installed and connected, and the side panel is re-secured, your Montech Fighter 500 case is ready for operation. The pre-installed Rainbow LED fans will illuminate upon system power-on, providing both cooling and visual effects. The mesh front panel and bottom mesh ensure consistent airflow for optimal component temperatures.

Immagine: Frontale view of the Montech Fighter 500, demonstrating the mesh design and the visual effect of the Rainbow LED fans.
Manutenzione
Una manutenzione regolare aiuta a garantire prestazioni ottimali e longevità dei componenti del PC.
Pulizia del filtro antipolvere
The Montech Fighter 500 features a magnetic top vent screen for dust resistance. Periodically remove this filter, clean it with compressed air or a soft brush, and reattach it. The bottom mesh filter for the PSU should also be cleaned regularly.

Immagine: in alto view of the case, illustrating the magnetic dust filter for easy removal and cleaning.
Pulizia generale
Utilizzare un morbido, damp cloth to clean the exterior surfaces of the case, including the tempered glass panel. Avoid abrasive cleaners. For interior cleaning, use compressed air to remove dust from fans and components.
Risoluzione dei problemi
- Il sistema non si accende: Double-check all power connections, including the PSU to the wall, PSU to motherboard, and front panel power switch cable to the motherboard header.
- Fans Not Spinning/Lighting: Ensure fan power cables are securely connected to the motherboard or fan controller. Verify that the fan headers are enabled in the BIOS/UEFI settings if applicable.
- Problemi di surriscaldamento: Confirm that all case fans are spinning correctly and oriented for proper airflow (intake/exhaust). Ensure dust filters are clean and not obstructing airflow.
- Porte USB non funzionanti: Check the front panel USB cables are correctly connected to the motherboard's USB headers.
For more complex issues related to specific components (motherboard, CPU, GPU), refer to their respective user manuals or contact the component manufacturer's support.
Specifiche
| Caratteristica | Specificazione |
|---|---|
| Marca | Montech |
| Nome del modello | Combattente 500 |
| Tipo di caso | Mid Tower |
| Compatibilità della scheda madre | ATX, Micro ATX, Mini-ITX |
| Colore | Nero |
| Materiale di recinzione | Vetro, Metallo |
| Metodo di raffreddamento | Aria |
| Numero di fan | 4 (Pre-installed) |
| Dimensioni della ventola | 120 millimetri |
| Porte USB totali | 5 (2x USB 2.0, 3x other) |
| Internal Bays Quantity | 4 (for 3.5-inch drives) |
| Fattore di forma del disco rigido | 3.5 pollici |
| Tipo di montaggio dell'alimentatore | Montaggio inferiore |
Garanzia e supporto
For warranty information and technical support, please refer to the documentation included with your purchase or visit the official Montech websito. Conservare la prova d'acquisto per eventuali reclami in garanzia.