
1. Prodotto finitoview
Thank you for choosing the Lepro 10W LED Outdoor Floodlight. This manual provides essential information for the safe installation, operation, and maintenance of your new floodlight. Please read it thoroughly before use and retain it for future reference.
This product is a high-efficiency, IP65 waterproof LED floodlight designed for outdoor and indoor lighting applications such as gardens, yards, garages, and security lighting.
2. Informazioni sulla sicurezza
- Scollegare sempre l'alimentazione prima dell'installazione o della manutenzione.
- In caso di dubbi, l'installazione deve essere eseguita da un elettricista qualificato.
- Garantire l'alimentazione voltage corrisponde ai requisiti del prodotto (220 Volt).
- Non guardare direttamente la sorgente luminosa a LED quando è accesa.
- Tenere il prodotto lontano da materiali infiammabili.
- Non modificare il prodotto in alcun modo.
- Ensure all connections are secure and properly insulated to maintain IP65 rating.
3. Contenuto della confezione
Il pacchetto tipicamente include:
- 2 x Lepro 10W LED Outdoor Floodlights
- Hardware di montaggio (viti, tasselli)
- Manuale di istruzioni
4. Caratteristiche del prodotto
- Alta luminosità: 10W LED chip provides 850 lumens of 5000K cool white light, equivalent to a 70W incandescent bulb.
- Design durevole: Constructed from die-cast aluminum and ultra-thin tempered glass, offering rust-proof and high-quality electrostatic adsorption surface treatment.
- Installazione semplice: Features a bracket that can be easily mounted to ceilings, walls, or floors using two self-locking screws. Includes a 1-meter cable for connection.
- Dissipazione efficiente del calore: Ultra-thin body design with an integrated heat sink ensures optimal thermal performance and extends product lifespan.
- IP65 impermeabile e ampia applicazione: Rated IP65 for protection against dust and water jets, suitable for various indoor and outdoor lighting projects including gardens, squares, billboards, factories, docks, stadiums, patios, warehouses, courtyards, garages, driveways, and entrances.
5. Specifiche
| Specificazione | Valore |
|---|---|
| Numero di modello | PR340010-DW-EU-2 |
| Consumo energetico | 10 Watt |
| Flusso luminoso | 850 lumen |
| Temperatura del colore | 5000K (bianco freddo) |
| Voltage | 220 Volt CA |
| Grado di protezione IP | IP65 (impermeabile) |
| Materiale | Alluminio, vetro temperato |
| Dimensioni del prodotto (L x P x A) | Dimensioni: 9 x 2.4 x 7.8 cm |
| Peso | 200 grammi |
| Angolo del fascio | 110 gradi |
| Lunghezza del cavo | 1 metro |
| Tipo di montaggio | Wall-mounted, Ceiling-mounted, Ground-mounted |
Per informazioni dettagliate sull'efficienza energetica, consultare il database EPREL:
6. Configurazione e installazione
Per un'installazione corretta e sicura, seguire questi passaggi:
- Prepararsi per l'installazione:
- Prima di iniziare qualsiasi lavoro elettrico, disattivare l'alimentazione principale tramite l'interruttore automatico.
- Gather necessary tools: drill, screwdriver, wire strippers, electrical tape, and a pencil.
- Scegli la posizione di montaggio:
Select a suitable location on a wall, ceiling, or ground that provides the desired illumination area. The floodlight can be adjusted to direct light as needed.
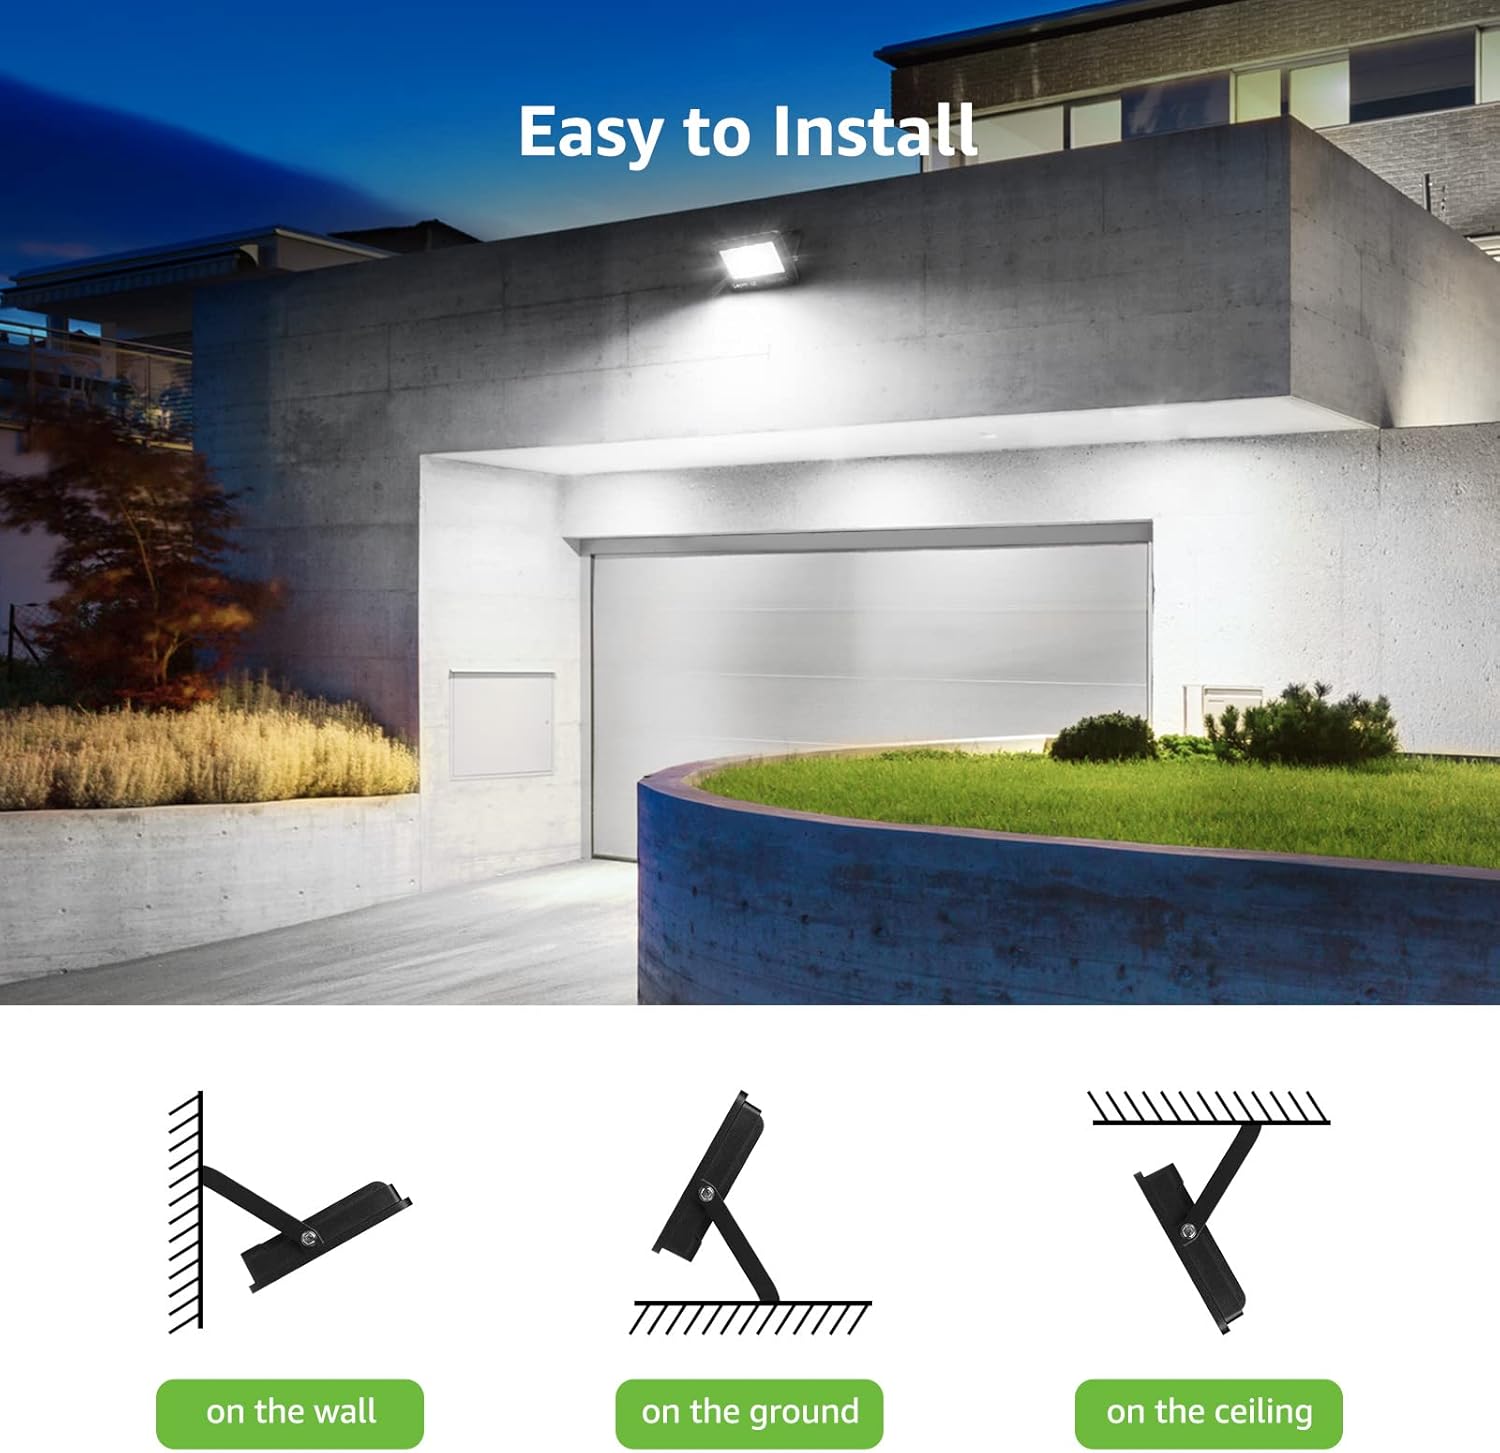
Image: Illustration of various mounting positions for the floodlight (wall, ground, ceiling).
- Segnare e praticare i fori:
Use the floodlight's mounting bracket as a template to mark the drilling points on the chosen surface. Drill appropriate holes for the included mounting hardware.
- Fissare la staffa:
Attach the mounting bracket securely to the surface using the provided screws and anchors. Ensure it is firm and stable.
- Collegamento del cablaggio:
Connect the floodlight's cable to your main power supply. Observe the standard wiring color codes:
- Filo marrone: Filo sotto tensione
- Filo giallo e verde: Linea di terra
- Filo blu: Filo neutro

Immagine: dettagliata view of the floodlight's heat sink and wiring color codes for electrical connection.
Ensure all connections are tight and insulated with appropriate waterproof connectors or electrical tape to maintain the IP65 rating, especially for outdoor installations.
- Fissare il proiettore:
Mount the floodlight unit onto the secured bracket using the self-locking screws. Adjust the angle of the floodlight to your desired position.
- Ripristina alimentazione:
Una volta completata l'installazione e verificati tutti i collegamenti, ripristinare l'alimentazione tramite l'interruttore automatico.

Image: The floodlight installed above a garage, demonstrating its wide beam angle and bright illumination.

Image: An outdoor floodlight illuminating a garden area from a height, showing its coverage.
7. Istruzioni per l'uso
The Lepro 10W LED Outdoor Floodlight operates by direct electrical connection. Once properly installed and connected to a power source, it can be controlled via a standard wall switch or an external timer/sensor system (not included).
- Per attivare: Activate the connected wall switch or power source.
- Per spegnere: Deactivate the connected wall switch or power source.
The floodlight provides instant full brightness upon activation.
8. Manutenzione
Una manutenzione regolare garantisce prestazioni ottimali e longevità del vostro proiettore:
- Pulizia: Pulire periodicamente la superficie del vetro con un panno morbido eamp cloth to remove dust and debris. Do not use abrasive cleaners or solvents. Ensure power is off before cleaning.
- Ispezione: Regularly check the mounting bracket and wiring for any signs of damage, corrosion, or loose connections. Tighten screws if necessary.
- Resistenza ambientale: The IP65 rating ensures resistance to water and dust. The floodlight is designed to withstand various weather conditions, including heat and frost.

Image: Visual representation of the floodlight's IP65 waterproof, heat resistance, and frost resistance features.
9. Risoluzione Dei Problemi
Se riscontri problemi con il tuo proiettore, fai riferimento ai seguenti problemi comuni e alle relative soluzioni:
| Problema | Possibile causa | Soluzione |
|---|---|---|
| La luce non si accende. | Nessuna alimentazione elettrica. Collegamento del cablaggio allentato. Interruttore difettoso. | Controllare che l'interruttore automatico sia acceso. Verificare che tutti i collegamenti elettrici siano saldi. Test the switch with another device or replace it. |
| Sfarfallio di luce. | Alimentazione instabile. Collegamento allentato. | Ensure stable power. Check for loose wiring and tighten connections. |
| Luminosità ridotta. | Lente sporca. Componenti LED obsoleti. | Clean the glass surface of the floodlight. If the product is old, reduced brightness may indicate end of lifespan. |
If the problem persists after trying these solutions, please contact Lepro customer support.
10. Garanzia e supporto
Lepro products are designed for quality and durability. This product is covered by a standard return policy of 30 days from the date of purchase. For specific warranty terms and conditions, please refer to your purchase documentation or contact Lepro customer support.
For technical assistance, troubleshooting, or warranty claims, please visit the official Lepro website or contact their customer service department. You can often find support information on the product packaging or the retailer's websito.
Risorse online: