1. Introduzione
This manual provides comprehensive instructions for the Fafeicy Portable Mini Spot Welder. This device is designed for precise spot welding of small batteries, power tool battery packs, and model aircraft batteries. It features a microcomputer-controlled output pulse and an LCD screen for displaying welding parameters. Please read this manual thoroughly before operation to ensure safe and effective use.
2. Informazioni sulla sicurezza
- This controller requires users to have a basic understanding of electronics and safety awareness.
- Quando si utilizza la saldatrice a punti, indossare sempre dispositivi di protezione individuale adeguati, compresi occhiali di sicurezza.
- Assicurare una corretta ventilazione nell'area di lavoro per evitare di inalare i fumi.
- Non utilizzare il dispositivo in condizioni di umidità o in prossimità di materiali infiammabili.
- Although the MOS tube drive is protected, a blown tube may occur during use. If a tube blows, simply replace it.
- Ensure the power source is correctly connected with the correct polarity (DC9-12V). Incorrect polarity can damage the device.
- Tenere fuori dalla portata dei bambini.
3. Contenuto della confezione
Verifica che tutti gli articoli siano presenti nel tuo pacco:
- 1 x Portable Mini Spot Welder Unit
- 1 x Connector (Plug)
- 2 x Power Input Lines
- 2 x Soldering Pins
4. Prodotto finitoview
The Fafeicy Portable Mini Spot Welder features a compact design with an integrated control panel and connection points.
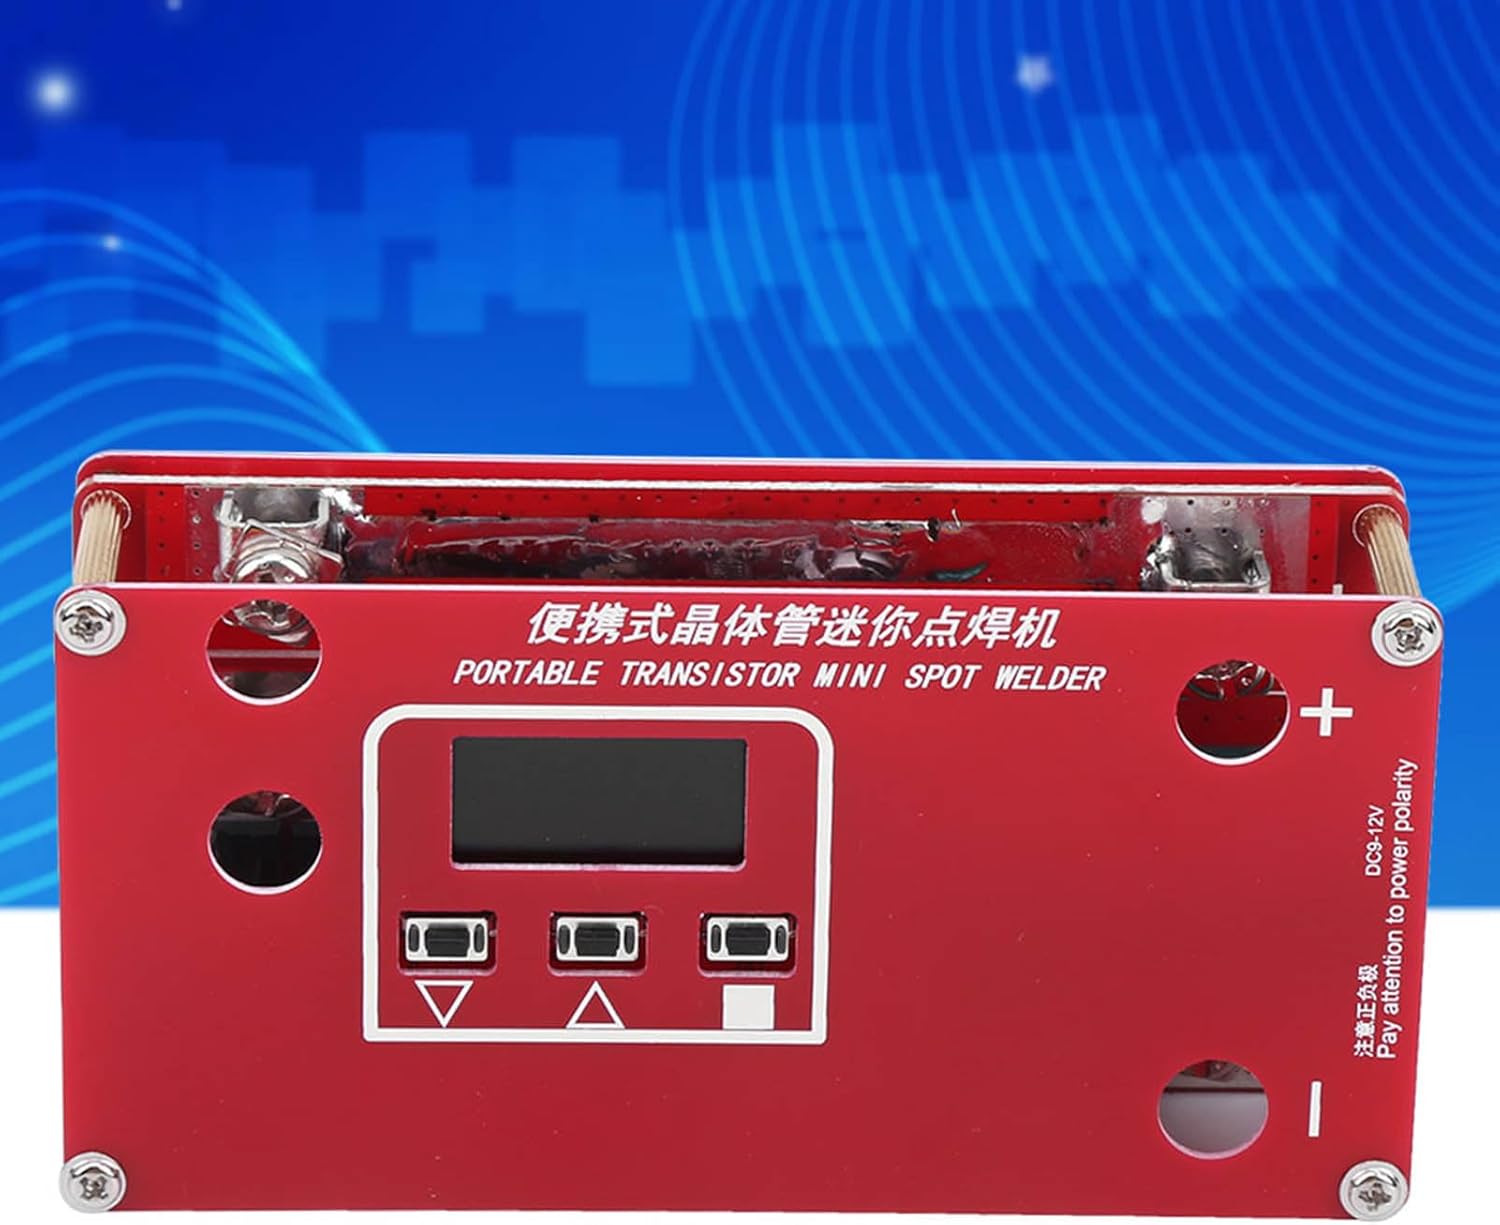
Figura 1: Fronte view of the spot welder with LCD and control buttons.

Figura 2: in alto view of the spot welder, highlighting the main board and terminals.
Componenti chiave:
- Schermo LCD: Visualizza i parametri e le impostazioni di saldatura.
- Pulsanti di controllo: Used for navigation and adjusting settings.
- Terminali di ingresso alimentazione: Marked '+' and '-' for connecting the power source (DC9-12V).
- Soldering Pin Connections: U-shaped cold-pressed terminals for connecting the soldering pins.
5. Impostazione
Follow these steps to set up your spot welder:
- Collegare la fonte di alimentazione: The welding power can be supplied by a lithium battery or a 12V car battery. Connect the provided power input lines to the '+' and '-' terminals on the spot welder. Ensure correct polarity.
- Connect Soldering Pins: Attach the two soldering pins to the U-shaped cold-pressed terminals. These terminals are designed for easy disassembly and replacement.
- Prepare Welding Surface: Ensure the nickel-plated steel strip and the battery terminals are clean and free of oxidation for optimal welding results.
- Grind Welding Needle (Optional but Recommended): For best results, grind the tip of the soldering pins to a rounded shape. This reduces pressure and improves weld quality.

Figura 3: Esample of a connector plug.
6. Istruzioni per l'uso
The controller supports both automatic welding mode and a manual trigger interface.
Automatic Welding Mode:
- Power on the device. The LCD screen will display current welding parameters.
- Adjust welding parameters (e.g., pulse duration, power level) using the control buttons as needed. Refer to the LCD display for current settings.
- Place the nickel-plated steel strip onto the battery terminal.
- Press both soldering pins firmly onto the nickel strip, ensuring good contact with the battery terminal underneath. The device will automatically detect contact and initiate the welding pulse.
- Lift the pins after the weld is complete.
Modalità di attivazione manuale:
If available, connect a manual trigger switch to the designated interface. This allows you to manually control when the welding pulse is initiated after placing the pins.
Suggerimenti per la saldatura:
- For optimal welding of 0.1mm to 0.15mm nickel-plated steel strips, a 3S, 40C, 5000mHA lithium battery or a 12V, 50Ah car battery is recommended as a power source. Note that a car battery refers to a dedicated automotive battery, not a standard lead-acid battery.
- Experiment with settings on scrap material before welding your final components.
- Apply consistent and firm pressure to the soldering pins during welding.
7. Manutenzione
Regular maintenance ensures the longevity and performance of your spot welder.
- Pulizia: Keep the device clean and free of dust and debris. Use a dry cloth for cleaning.
- Soldering Pins: Inspect soldering pins regularly for wear. If they become dull or pitted, re-grind them to a rounded tip or replace them.
- MOS Tube Replacement: In case of a blown MOS tube, it can be replaced. This requires basic electronic repair skills.
- Magazzinaggio: Store the spot welder in a dry, cool place away from direct sunlight and moisture.

Figura 4: Interno view of the spot welder, showing the power board and components.
8. Risoluzione Dei Problemi
| Problema | Possibile causa | Soluzione |
|---|---|---|
| Nessuna alimentazione/LCD non si accende | Incorrect power connection, dead power source, faulty cable. | Check power input lines for correct polarity. Ensure power source (battery) is charged and functional. Inspect cables for damage. |
| Poor weld quality (weak or no weld) | Insufficient power, dirty welding surface, incorrect settings, worn soldering pins, insufficient pressure. | Ensure power source meets recommended specifications. Clean nickel strip and battery terminals. Adjust welding parameters. Re-grind or replace soldering pins. Apply firm and consistent pressure. |
| Device sparks excessively or component failure | Overload, short circuit, blown MOS tube. | Reduce welding power settings. Check for short circuits. If a MOS tube is blown, replace it (requires electronic repair skills). |
9. Specifiche
| Caratteristica | Specificazione |
|---|---|
| Marca | Fafeicy |
| Numero di modello | Fafeicyrnwiga79c82383 |
| Tipo di articolo | Mini Spot Welder |
| Dimensioni del prodotto | Dimensioni: 1 x 1 x 1 cm |
| Peso | 210 grammi |
| Stile | Penna saldante |
| Tipo di fonte di alimentazione | Battery Powered (DC9-12V) |
| Cosatage | 600 L |
| Caratteristiche speciali | Automatic welding mode / Manual activation interface |
| Batterie incluse | NO |
| Batterie richieste | NO |
| Usi specifici del prodotto | Electronic applications (small batteries, power tools, model aircraft, etc.) |
| Spessore di saldatura consigliato | 0.1 ~ 0.15 mm nickel-plated steel strip |
10. Note importanti
- Please be aware that new and old versions of this product may be shipped randomly. Ensure this is acceptable before ordering.