
Introduzione
This manual provides comprehensive instructions for the Vivitar Podcast and Social Media Microphone MIC918. This high-quality condenser microphone is designed for clear audio capture for various applications, including podcasting, live streaming, gaming, voice-overs, and vocal recording. It features a simple plug-and-play USB connection, integrated volume control, and a stable tripod stand for optimal positioning.
Informazioni sulla sicurezza
- Non esporre il microfono all'acqua o a umidità eccessiva.
- Evitare temperature estreme o la luce solare diretta.
- Non tentare di smontare o modificare il microfono. Ciò invaliderà la garanzia.
- Tenere il microfono lontano da forti campi magnetici.
- Utilizzare solo un panno morbido e asciutto per la pulizia.
Prodotto finitoview
Contenuto della confezione
- Vivitar MIC918 Microphone Unit
- treppiede
- Integrated USB Connection Cable
Componenti del microfono
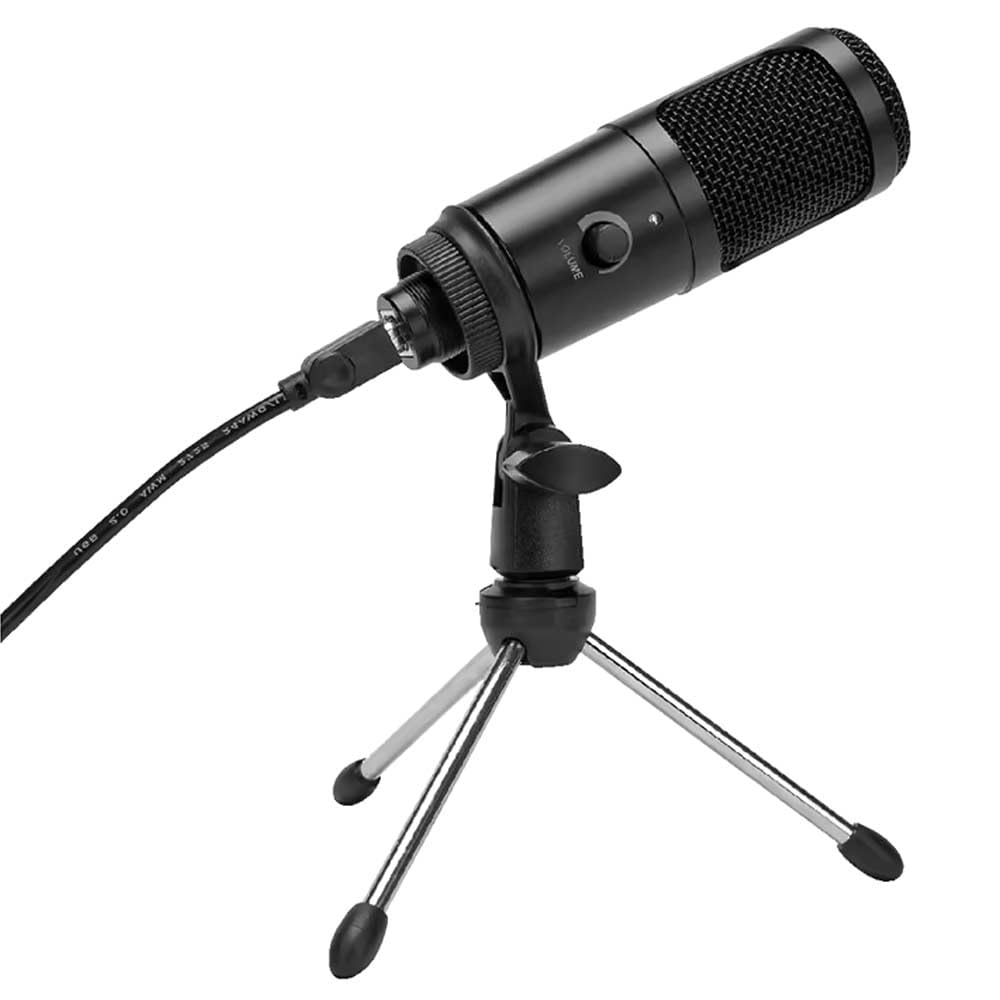
Figura 1: Vivitar MIC918 Microphone unit attached to its tripod stand, showing the integrated USB cable.

Figura 2: Lato view of the Vivitar MIC918 Microphone, highlighting the volume control knob and the Vivitar brand logo.
The microphone unit features a durable metal construction. The front side includes a volume control knob for easy audio level adjustments. The microphone is designed with a unidirectional polar pattern to focus on sound directly in front of it, reducing background noise.
Impostare
Collegamento del microfono
- Montare il supporto: If not already assembled, unfold the tripod stand and ensure it is stable on a flat surface. Securely attach the microphone unit to the stand's mounting point. The rotating shaft ring allows for angle adjustment.
- Connetti al dispositivo: Plug the integrated USB cable from the microphone into an available USB port on your computer, laptop, or compatible gaming console.
- Collega e usa: The Vivitar MIC918 is a plug-and-play device. Your operating system (Windows, macOS, etc.) should automatically detect and install the necessary drivers. No additional software installation is typically required.
- Seleziona come dispositivo di input: After connecting, navigate to your device's sound settings or the audio settings within your recording/streaming software. Select the "Vivitar MIC918" or similar USB audio device as your primary input (microphone) device.
Operativo
Regolazione del volume
The microphone features a built-in volume control knob located on its side (refer to Figure 2). Rotate this knob clockwise to increase the microphone's input sensitivity (volume) and counter-clockwise to decrease it. Adjust this to achieve the desired recording level without distortion.
Posizionamento del microfono
For optimal audio capture, position the microphone directly in front of the sound source (e.g., your mouth for speaking or singing). The tilting tripod stand allows you to adjust the microphone's angle to best suit your needs. Due to its unidirectional polar pattern, the microphone is most sensitive to sounds coming from the front and less sensitive to sounds from the sides or rear, helping to minimize ambient noise.
Manutenzione
- Pulizia: Use a soft, dry, lint-free cloth to wipe the microphone's exterior. Do not use liquid cleaners, aerosols, or solvents.
- Magazzinaggio: When not in use, store the microphone in a clean, dry place, away from dust and extreme temperatures.
- Gestione: Maneggiare il microfono con cura. Evitare di farlo cadere o di sottoporlo a forti urti.
Risoluzione dei problemi
| Problema | Possibile causa | Soluzione |
|---|---|---|
| Nessuna uscita audio dal microfono. | Microfono non collegato correttamente. È stato selezionato un dispositivo di input errato. Il volume del microfono è troppo basso. | Assicurarsi che il cavo USB sia collegato saldamente sia al microfono che al dispositivo. Verify that "Vivitar MIC918" is selected as the input device in your system's sound settings or recording software. Increase the volume using the knob on the microphone and check system input levels. |
| Poor sound quality (e.g., muffled, too quiet, background noise). | Posizionamento errato del microfono. Elevato rumore ambientale. Input level too high or too low. | Position the microphone closer to the sound source and ensure it's facing directly towards it. Registrare in un ambiente più silenzioso. Adjust the microphone's volume knob and system input levels to an optimal range, avoiding clipping or being too faint. |
| Microfono non riconosciuto dal computer. | Porta USB o cavo difettosi. Problema con il driver di sistema. | Prova a collegare il microfono a un'altra porta USB del tuo computer. Restart your computer. If the issue persists, check your operating system's device manager for any driver conflicts or updates. |
Specifiche
| Caratteristica | Specificazione |
|---|---|
| Marca | Vivitar |
| Numero di modello | MIC918 |
| Connettività | USB (Plug and Play) |
| Tipo di microfono | Condensatore |
| Modello polare | Unidirezionale |
| Signal-to-Noise Ratio | 78 dB |
| Materiale di recinzione | Metallo |
| Peso dell'articolo | 0.95 libbre (circa 0.43 kg) |
| Dimensioni articolo (L x P x A) | 8.86 x 5.36 x 2.49 pollici (circa 22.5 x 13.6 x 6.3 cm) |
| Fonte di alimentazione | Elettrico con cavo (tramite USB) |
| Dispositivi compatibili | Computers, Laptops, Gaming Consoles |
Informazioni sulla garanzia
The Vivitar Podcast and Social Media Microphone MIC918 comes with a 3-Year USA Warranty. For specific terms, conditions, and to register your product, please refer to the official Vivitar webo contattare direttamente l'assistenza clienti. Conservare la prova d'acquisto per eventuali reclami in garanzia.
Assistenza clienti
For further assistance, technical support, or inquiries regarding your Vivitar MIC918 microphone, please visit the official Vivitar website or contact their customer service department. Contact information can typically be found on the Vivitar websito nelle sezioni "Supporto" o "Contattaci".