
1. Introduzione e oltreview
The LiTime 10 Amp Lithium Battery Charger is designed for 12V (12.8V) LiFePO4 batteries, delivering stable charging through CC/CV modes. It supports 0V activation to revive batteries under BMS protection. This charger is equipped with a built-in cooling fan for efficient operation in various temperature conditions (-4°F to 104°F) and features multiple safety protections. It is suitable for RVs, trucks, cars, and solar systems.

Figure 1: LiTime 10 Amp Lithium Battery Charger.

Figure 2: Multi-level protection features of the charger.
Video 1: Oltreview of LiTime Automotive Grade LiFePO4 Lithium Battery and Charger capabilities.
Video 2: Demonstrating the use of LiTime products in a camper van power system.
Video 3: Oltreview of LiTime battery accessories, including chargers.
2. Configurazione e connessione
Before connecting, ensure the battery voltage corrisponde alla tensione di uscita del caricabatterietage (14.6V for 12V LiFePO4 batteries). The charger comes with an AC input cable and a DC output cable with an Anderson connector. An M8 terminal adapter is also included for direct battery post connection.
Passaggi di connessione:
- Ensure the charger's power switch is in the OFF position.
- Connect the DC output cable (with Anderson connector or M8 terminals) to your LiFePO4 battery. Ensure connections are firm to prevent overheating.
- Connect the AC input cable to a standard 100V-240V AC power outlet.
- Turn the charger's power switch to the ON position. The charger will begin charging, indicated by the LED status.
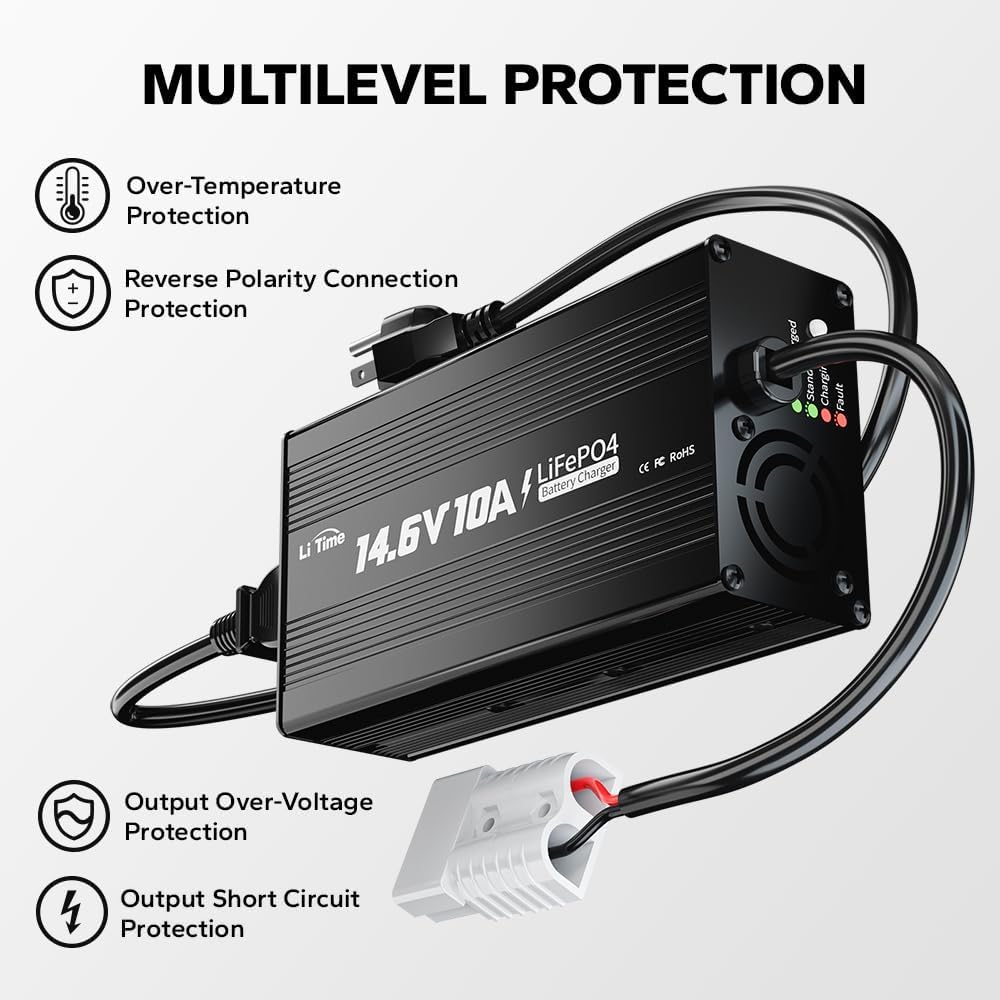
Figure 3: Charger connections including Anderson connector and M8 terminals.

Figure 4: Visual guide for connecting the charger to the battery and power source.

Figure 5: Contents of the product package, including charger, cables, and manual.
3. Istruzioni per l'uso
Stato dell'indicatore LED:
- LED Always on Red: La batteria è in carica.
- LED Always on Green: La batteria è completamente carica.
- LED Flashes Green: Charger is on standby.
- LED Flashes Red: Charger fault or under protection (e.g., over-temperature, reverse polarity, output short-circuit, output over-voltagE).

Figure 6: Explanation of LED indicator lights for charging status.
3-Stage Modalità di ricarica:
Il caricabatterie utilizza un 3-stage processo di ricarica per una salute e un'efficienza ottimali della batteria:
- Pre-Charge Stage (T1 - Activating): Se il volume della batteriatage is low, the charger will apply a limited current to activate it. This stage also supports 0V activation to revive batteries under BMS protection.
- Carica a corrente costante Stage (T2 - 10A Current Charging): When the battery is in the main charging time, the charger will charge the battery with a 10A current. The battery voltage rises above the set value, and the charger automatically switches to the next stage.
- Volume costantetage Ricarica Stage (T3 - Current Reducing & Charging Completed): Il caricatore passa al volume costantetage charging. The charging current gradually decreases. When the charging voltage o la corrente raggiunge il valore impostato, il caricabatterie spegne automaticamente la tensione di uscitatagee la ricarica della batteria è completata.

Figura 7: Diagramma che illustra i 3-stage processo di ricarica.

Figure 8: The charger's ability to activate 0V batteries after BMS protection.
Sistema di raffreddamento efficiente:
The charger is equipped with a built-in cooling fan to maintain stable charging efficiency and prevent overheating, extending the life of the charger and battery.

Figure 9: Internal cooling fan for temperature regulation during charging.
Video 4: Detailed explanation of the internal workings of a LiFePO4 charger from 0% to 100% charge.
4. Precauzioni di sicurezza
Always prioritize safety when operating the charger. This charger is designed with multilevel protections to prevent over-temperature, reverse polarity connection, output short-circuit, and output over-voltage.
- Check the battery specifications carefully before charging to ensure that the LiFePO4 battery matches the charger's technical data.
- Make sure the charger is properly connected to the battery. Avoid a short circuit.
- Scollegare immediatamente il cavo di ingresso/uscita del caricabatterie non appena si riscontra che il caricabatterie o la batteria presentano anomalie o sono danneggiati durante la ricarica.
- Do not use other input cables or extend the output connection cable personally, or please contact LiTime customer service.
- Non aprire, smontare o modificare il caricabatterie.
- Non utilizzarlo mai durante un temporale.
- Tenere il caricabatterie e la batteria lontano da acqua, fonti di calore, scintille, fiamme, gas infiammabili e sostanze chimiche pericolose.
- Do not place rods or other metal objects in vents or other openings.
- Place the charger in a well-ventilated area with sufficient heat dissipation to prevent overheating and damage.
- Do not puncture, drop, crush, burn, penetrate, shake, strike, or throw it with force.
- This 12 volt 10 amp lithium battery charger is not waterproof - not suitable for Marine environments such as boats, ships, yachts, trolling motors, etc.

Figure 10: Visual guide for important safety precautions.
5. Risoluzione Dei Problemi
Problemi comuni e soluzioni:
| Problema | Possibile causa | Soluzione |
|---|---|---|
| Charging indicator flashes red when charging. | Protezione da sovratemperatura | Cool down the charger to normal temperature. |
| Charging indicator flashes red after connected. | Under Reverse Polarity Connection / Output Short Circuit Protection / Output Over-Voltage Protezione | Connect the charger to the battery correctly. |
| Il caricabatterie non carica e il LED è spento dopo essere stato collegato alla rete elettrica. | Poor connection / Charger Internal Damage | Make sure all connections are correct and tight. Contact us at service@litime.com for further solutions. |

Figure 11: Troubleshooting table for common charger issues.
Charger Won't Start?
If your inverter is plugged in, it may be blocking the charger's initial "wake-up" pulse. Follow these steps:
- Unplug the inverter from the battery.
- Let the charger activate the battery.
- Reconnect the inverter after charging is complete.

Figure 12: Steps to resolve charger not starting due to inverter interference.
Video 5: Guide on what to do if the battery is not working or charging.
6. Specifiche del prodotto
| Specificazione | Valore |
|---|---|
| Ingresso volumetage | 100V to 240V AC, 50Hz to 60Hz |
| Volume di uscitatage | 14.6 Volt (CC) |
| Corrente di uscita | 10 Amps |
| Temperatura di esercizio | Da -4°C a 104°C (da -20°F a 40°F) |
| Temperatura di conservazione | Da -40°C a 158°C (da -40°F a 70°F) |
| Dimensioni del prodotto | 10.43 x 2.17 x 3.15 pollici (7.09"P x 3.58"L x 2.03"A) |
| Peso dell'articolo | 2.07 libbre |
| Numero di modello | L12V10A |
| Certificazioni | FCC, CE, RoHS, PSE |
7. Garanzia e supporto
LiTime Battery Charger comes with a 2-year quality warranty. For technical support and customer service, you can reach out via phone or online services. Quick feedback is typically provided within 24 hours.
Contact: service@litime.com