1. Introduzione
This manual provides detailed instructions for the installation, operation, and maintenance of your Phonocar VM494 9.7" Full HD Mirror Dash Cam. This device integrates a front-facing camera, a rear camera, and a full HD display into a rearview mirror, offering enhanced safety and recording capabilities for your vehicle. Please read this manual thoroughly before using the product to ensure proper function and longevity.
2. Contenuto della confezione
Verifica che tutti i seguenti elementi siano inclusi nel tuo pacchetto:
- 1 x Phonocar VM494 Mirror Dash Cam
- 1 x Rear Camera with 15-meter cable
- 1 x 12V Power Adapter (for cigarette lighter socket)
- 2 x Rubber Supports for fixing
- 1 x Manuale di istruzioni (questo documento)
3. Prodotto finitoview
The Phonocar VM494 is a multifunctional rearview mirror with an integrated front camera and a separate rear camera. It features a 9.7-inch Full HD touchscreen display for intuitive control and clear viewing.
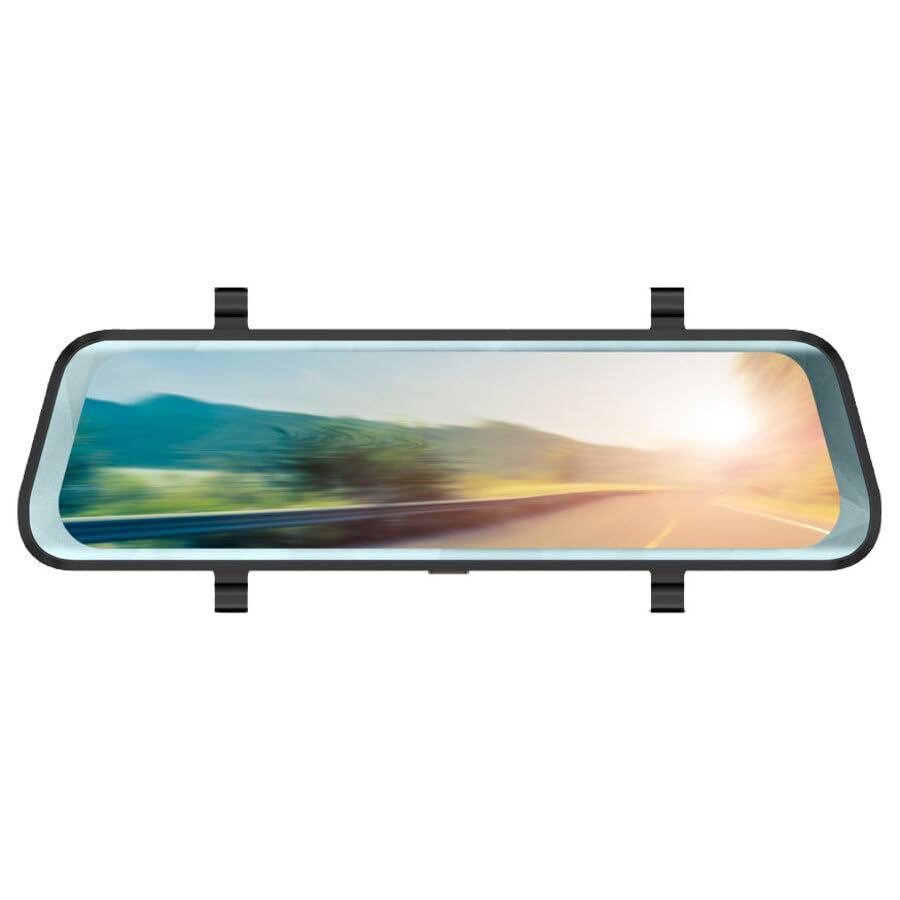
Figura 1: Phonocar VM494 Mirror Dash Cam. This image illustrates the main unit, highlighting the 9.7-inch Full HD display, the integrated front camera, and the rear camera connection. Key features such as Full HD recording, cycle recording, G-Sensor, emergency lock, touchscreen, and 144-degree wide angle are also indicated.
Componenti chiave:
- Schermo touchscreen Full HD da 9.7": Fornisce un chiaro view of recordings and real-time camera feeds, with touch control for settings.
- Integrated Front Camera: Adjustable in width, records in Full HD 1080P with a 144° wide-angle view.
- Ingresso telecamera posteriore: Connects the included external rear camera for simultaneous recording and parking assistance.
- Altoparlante: Integrated 1 Watt mono loudspeaker.
- Microfono: Standard full-direction microphone for audio recording.
- Power/Stand-by Button: Located on the unit for power control.
4. Installazione
The VM494 is designed for universal compatibility with 12V vehicles. Follow these steps for proper installation:
- Montaggio della Mirror Dash Cam:
Attach the VM494 mirror dash cam over your vehicle's original rearview mirror using the provided rubber supports. Ensure it is securely fastened and does not obstruct your view.
- Collegamento dell'alimentazione:
Connect the 12V power adapter cable to the dash cam and plug the other end into your vehicle's cigarette lighter socket. Route the cable neatly to avoid interference with driving controls.
- Installazione della fotocamera posteriore:
Montare la telecamera posteriore sul retro del veicolo, in genere sopra la targa o all'interno del lunotto posteriore, assicurando una visione chiara view. Connect the 15-meter cable from the rear camera to the designated input on the VM494 mirror dash cam. Route the cable carefully through the vehicle's interior trim.
- Regolazione della fotocamera anteriore:
Adjust the integrated front camera's position to ensure it captures the desired field of view through your windshield.
5. Funzionamento
5.1 Power On/Off and Stand-by
- To power on the device, press the Power/Stand-by button.
- To put the device in stand-by mode or turn it off, press and hold the Power/Stand-by button.
5.2 DVR and G-Sensor Function
Once powered on, the device automatically begins recording with the front camera. It records in Full HD (1080P) with both the front and rear cameras simultaneously. The recording is continuous, utilizing a cycle recording feature with options for 1, 3, or 5-minute segments.
- Registrazione del ciclo: The dash cam records video in continuous loops, overwriting the oldest footage quando la scheda di memoria è piena.
- Sensore G: In caso di impatto o collisione improvvisa, il G-Sensor integrato rileva automaticamente l'evento e blocca il video corrente file, preventing it from being overwritten during cycle recording. This ensures critical incident footage è conservato.
- Blocco di emergenza: Manually lock a recording by pressing the emergency lock button (if available, or via touchscreen menu) to protect it from being overwritten.
5.3 Automatic Rear Camera Display
When you engage reverse gear, the VM494 automatically displays the rear camera feed on the 9.7-inch screen, providing a clear view per parcheggiare e manovrare in sicurezza.
5.4 Automatic Screen Off (Traditional Mirror Mode)
The screen will automatically turn off after 1 minute of inactivity. This allows the device to function as a traditional rearview mirror while the DVR recording functions (front and rear cameras) continue to operate in the background. The mirror features anti-glare blue glass when the screen is off.
5.5 Controllo touchscreen
Navigate through the device's settings and functions using the intuitive 9.7-inch touchscreen display.
6. Specifiche tecniche
- Dimensioni dello schermo: 9.7 pollici
- Risoluzione dello schermo: 1280x480 pixel
- Fotocamera frontale: Adjustable in width
- Viewangolo di ing: 144° (wide angle, also during recording)
- Risoluzione di registrazione video: Risoluzione completa 1080P
- Formato video: 1080P, MOV 30 FPS
- Cycle Recording Options: 1, 3, 5 minuti
- Formato foto: JPG/TIFF/PNG
- Tipo di specchio: Anti-glare blue glass (when screen is off)
- Attivazione della telecamera posteriore: Automatic upon engaging reverse gear
- Altoparlante: 1 Watt mono
- Microfono: Standard full-direction
- Dimensioni: Dimensioni: 7 x 25.5 cm
- Alimentazione elettrica: 12V
- Caratteristiche speciali: G-Sensor, Touch Control
7. Risoluzione Dei Problemi
If you encounter issues with your Phonocar VM494, please refer to the following common solutions:
- Il dispositivo non si accende: Ensure the 12V power adapter is securely connected to both the dash cam and the vehicle's cigarette lighter socket. Check the vehicle's fuse for the cigarette lighter.
- Problemi di registrazione: Verify that a compatible memory card is inserted and properly formatted. Check if the memory card is full; if so, it may need to be formatted or replaced. Ensure cycle recording is enabled.
- La telecamera posteriore non visualizza: Check the connection of the rear camera cable to the main unit. Ensure the rear camera is properly installed and powered.
- Screen is black/off: The screen may be in automatic screen-off mode. Tap the screen to reactivate it. Ensure the device is powered on.
- Il touchscreen non risponde: Prova a riavviare il dispositivo. Se il problema persiste, assicurati che lo schermo sia pulito e privo di detriti.
8. Manutenzione
To ensure optimal performance and longevity of your VM494:
- Pulizia: Utilizzare un panno morbido e asciutto per pulire lo schermo e la lente. Evitare detergenti abrasivi o solventi.
- Temperatura: Evitare di esporre il dispositivo a temperature estreme, alla luce solare diretta per periodi prolungati o a elevata umidità.
- Scheda di memoria: Periodically format the memory card (e.g., once a month) to maintain optimal recording performance and prevent data corruption. Back up any important recordings before formatting.
- Connessioni via cavo: Assicurarsi che tutti i cavi siano collegati saldamente e non siano schiacciati o danneggiati.
9. Garanzia e supporto
For technical assistance, warranty information, or service inquiries, please contact Phonocar customer support. Refer to the contact details below:
Phonocar SpAVia F.lli Cervi, 167/C
42124 Reggio Emilia (Italia)
Telefono: +39 0522 941621
Fax: +39 0522 1602093
E-mail: info@fonocar.it
Websito: www.fonocar.com
Conservare la prova d'acquisto per eventuali richieste di garanzia.