Importanti istruzioni di sicurezza
Quando si utilizza un elettrodomestico, è necessario seguire sempre le precauzioni di sicurezza di base, tra cui le seguenti:
- Leggere tutte le istruzioni prima di utilizzare questa macchina da cucire.
- Conservare queste istruzioni in un luogo adatto vicino alla macchina.
- Tenere le dita lontane da tutte le parti in movimento. È necessaria una cura speciale intorno all'ago della macchina per cucire.
- Always use the correct needle plate. The wrong plate can cause the needle to break.
- Non utilizzare aghi piegati.
- Non tirare o spingere il tessuto durante la cucitura. Ciò potrebbe deviare l'ago e causarne la rottura.
- Switch the sewing machine off when making any adjustments in the needle area, such as threading the needle, changing the needle, threading the bobbin, or changing the presser foot.
- Scollegare sempre la macchina per cucire dalla presa elettrica quando si rimuovono i coperchi, si lubrifica o quando si effettuano altre regolazioni di manutenzione menzionate nel manuale di istruzioni.
- Non far cadere o inserire mai alcun oggetto in nessuna apertura.
- Non utilizzare all'aperto.
- Non operare in luoghi in cui vengono utilizzati prodotti aerosol (spray) o in cui viene somministrato ossigeno.
Prodotto finitoview
The SINGER M1155 is a versatile sewing machine designed for various sewing projects. It features a compact design and user-friendly controls.
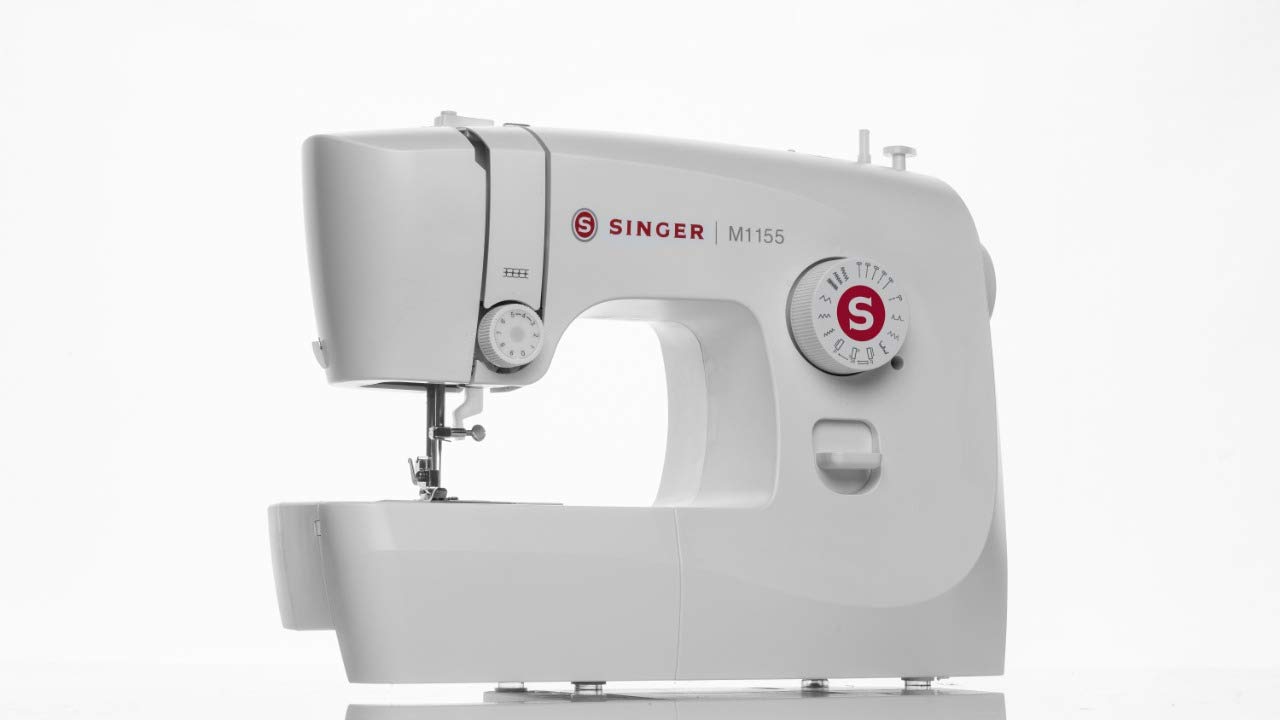
Immagine: Frontale view della macchina da cucire SINGER M1155, mostrataasinil suo design compatto e i comandi principali.
Componenti chiave:
- Selettore punti: Used to choose from 14 built-in stitches.
- Quadrante di tensione: Adjusts thread tension for different fabrics.
- Placca ago: Provides a flat surface for sewing.
- Piedino premistoffa: Holds fabric securely in place.
- Luce LED: Illumina l'area di cucitura per una migliore visibilità.
- Volantino: Solleva e abbassa manualmente l'ago.
- Interruttore di alimentazione: Accende e spegne la macchina.
- Connettore del pedale: For connecting the foot control.

Immagine: Posteriore view of the SINGER M1155 Sewing Machine, showing the power input and on/off switch.
Impostare
1. Disimballaggio e posizionamento
Carefully remove the machine from its packaging. Place the machine on a stable, flat surface. Ensure there is adequate space around the machine for comfortable operation.
2. Collegamento elettrico
Connect the foot control to the machine's foot pedal connector. Plug the power cord into the machine's power input, then into a suitable electrical outlet. Use the power switch located at the back of the machine to turn it on.
3. Avvolgimento della bobina
The SINGER M1155 features automatic bobbin winding. Follow the threading guides on the machine to wind thread onto an empty bobbin. Ensure the bobbin is wound evenly for smooth stitching.
4. Infilatura della macchina
The machine is designed for easy threading. Follow the numbered threading path for the upper thread, ensuring the thread passes through all guides and the tension discs correctly. The machine features a top drop-in bobbin system for convenient bobbin insertion.
5. Installazione dell'ago
Ensure the machine is turned off before changing the needle. Loosen the needle clamp screw, remove the old needle, and insert a new needle with the flat side facing the back of the machine. Tighten the needle clamp screw securely. The machine supports needle positions for left and center stitching.

Immagine: Primo piano view of the needle and presser foot area, illustrating the working space for threading and needle changes.
Istruzioni per l'uso
1. Selezione del punto
The SINGER M1155 offers 14 built-in stitches and 19 built-in functions, including a 4-step buttonhole. Turn the stitch selector dial to choose the desired stitch pattern. Refer to the stitch chart on the machine for available options.

Image: The stitch selection dial on the SINGER M1155, showing various stitch patterns and settings.
2. Cucito di base
Place the fabric under the presser foot. Lower the presser foot lever. Gently press the foot control to start sewing. Guide the fabric smoothly without forcing it. The machine has a 5 MM stitch width capability.
3. Utilizzo della luce LED
The integrated LED light illuminates your sewing area, providing clear visibility for detailed work and reducing eye strain. It activates automatically when the machine is powered on.

Image: The SINGER M1155 Sewing Machine with an arrow pointing to the LED light, indicating its position for illuminating the sewing area.
4. Spazio per gli accessori
The machine includes an accessory storage compartment within its extension table. This provides convenient storage for your bobbins, needles, and other small sewing tools.

Image: The SINGER M1155 Sewing Machine with its accessory drawer pulled out, showing space for storing small sewing tools.
Manutenzione
Una manutenzione regolare garantisce la longevità e le prestazioni ottimali della tua macchina da cucire.
1. Pulizia
- Rimozione dei pelucchi: Periodically remove the needle plate and clean out any lint or thread buildup from the bobbin case area and feed dogs using a small brush.
- Pulizia delle superfici: Pulire l'esterno della macchina con un panno morbido e asciutto. Non utilizzare prodotti chimici aggressivi o detergenti abrasivi.
2. Lubrificazione
Refer to the full service manual for specific lubrication points and frequency. Generally, modern sewing machines like the M1155 require minimal user lubrication.
Risoluzione dei problemi
Ecco le soluzioni ai problemi più comuni che potresti riscontrare:
- Punti saltati: Ensure the needle is inserted correctly and is not bent. Use the appropriate needle type and size for your fabric and thread. Re-thread the machine completely.
- Rottura del filo: Check for correct threading, proper thread tension, and ensure the needle is not bent or dull. Use quality thread.
- Arricciature del tessuto: Adjust thread tension. Use a smaller stitch length. Ensure the correct presser foot is used for the fabric type.
- La macchina non si avvia: Check if the power cord is securely plugged in and the power switch is on. Ensure the foot control is properly connected.
- Funzionamento rumoroso: Clean the machine thoroughly, especially the bobbin area, to remove any lint or debris. Ensure all parts are correctly assembled.
Specifiche
| Caratteristica | Dettaglio |
|---|---|
| Marca | SINGER |
| Numero di modello | S0442431 |
| Punti incorporati | 14 |
| Funzioni integrate | 19 |
| Tipo di asola | 4 Step Button Hole |
| Tipo di bobina | Top Drop-In Bobbin |
| Illuminazione | Luce LED |
| Avvolgimento della bobina | Automatico |
| Telaio | Telaio in metallo resistente |
| Larghezza del punto | 5 MILLIMETRI |
| Posizione dell'ago | Left & Center |
| Materiale | Plastica |
| Colore | Bianco |
| Fonte di alimentazione | Elettrico con cavo |
| Peso dell'articolo | 5 kg 860 gr |
| Dimensioni dell'articolo LxWxH | 50 x 50 x 28 centimetri |
| Componenti inclusi | Main Product, Foot Control, Accessories Box, Warranty Card |
Garanzia e supporto
Your SINGER M1155 Sewing Machine comes with a warranty. Please refer to the included Warranty Card for details regarding coverage and terms. Keep your purchase receipt as proof of purchase.
For technical assistance, service, or warranty claims, please contact Singer India Limited directly.
Produttore: Singer India Limited
Numero verde: 18001033474


