
Totale TG1061356
Total Tools Super Select Impact Drill 680W
Model: TG1061356 User Manual
1. Introduzione
This manual provides essential instructions for the safe operation, maintenance, and troubleshooting of your Total Tools Super Select Impact Drill 680W, model TG1061356. Please read this manual thoroughly before using the tool to ensure proper function and to prevent injury.
Informazioni importanti sulla sicurezza: Always wear appropriate personal protective equipment (PPE) such as safety glasses, hearing protection, and gloves when operating power tools. Ensure the work area is clean and well-lit. Disconnect the drill from the power source before making any adjustments or changing accessories.
2. Impostazione
2.1 Disimballaggio
Estrarre con cautela il trapano e tutti gli accessori dall'imballaggio. Verificare eventuali danni verificatisi durante il trasporto. Conservare l'imballaggio per un eventuale stoccaggio o trasporto futuro.
2.2 Fissaggio della maniglia ausiliaria
The auxiliary handle provides additional control and stability. To attach:
- Allentare la maniglia ausiliaria clamp ruotandolo in senso antiorario.
- Far scorrere la maniglia sulla parte anteriore del corpo del trapano.
- Regola la maniglia in una posizione comoda per la tua presa.
- Stringere la clamp ruotandolo in senso orario fino a fissarlo.

Figure 1: Total Tools Super Select Impact Drill with auxiliary handle. The handle is positioned at the front of the drill for improved control.
2.3 Installing a Drill Bit (Keyed Chuck)
This drill features a 13mm keyed chuck for secure bit retention.
- Scollegare dall'alimentazione: Assicurarsi che il trapano sia scollegato dalla presa di corrente.
- Apri Chuck: Insert the chuck key into one of the holes on the chuck and rotate counter-clockwise to open the chuck jaws.
- Inserisci bit: Place the drill bit into the chuck, ensuring it is centered and inserted as far as possible without touching the chuck jaws' base.
- Serrare il mandrino: Rotate the chuck key clockwise to tighten the chuck jaws firmly around the drill bit. Use all three holes on the chuck to ensure even and secure tightening.
- Rimuovi chiave: Always remove the chuck key before operating the drill.
2.4 Collegamento di alimentazione
Connect the drill's power cord to a suitable 220V AC power outlet. Ensure the outlet is properly grounded and rated for the drill's power requirements (680W).
3. Istruzioni per l'uso
3.1 Accensione/Spegnimento
- Per attivare: Premere il grilletto. La velocità di perforazione varia a seconda della pressione esercitata sul grilletto.
- To Lock On (for continuous operation): Press the trigger switch fully, then press the lock-on button (usually located on the side of the handle).
- To Turn Off (from locked-on position): Press the trigger switch fully again, then release it.
- To Turn Off (from momentary operation): Simply release the trigger switch.
3.2 Regolazione della velocità
The drill features variable speed control via the trigger switch. For precise control, a speed pre-selection dial may be present (refer to specific model features if available, otherwise rely on trigger control). Maximum speed is 3000 RPM.
3.3 Mode Selection (Drill / Impact)
This impact drill offers two modes: rotary drilling and impact drilling. A selector switch, typically located on the top or side of the drill, allows you to choose the appropriate mode.
- Rotary Drilling Mode (Drill Symbol): For drilling into wood, metal, plastics, and for screwdriving.
- Modalità di perforazione a percussione (simbolo del martello): Per forare muratura, calcestruzzo e mattoni.

Figura 2: lato view of the drill, highlighting the mode selector switch (typically near the chuck) and the product label with specifications.
3.4 Funzione inversa
The drill is equipped with a reverse rotation function, useful for removing jammed drill bits or for screwdriving applications. The forward/reverse switch is usually located above the trigger.
- Push the switch to the left for forward rotation (drilling).
- Push the switch to the right for reverse rotation (removing bits).
Prima di cambiare la direzione di rotazione, assicurarsi sempre che il trapano si sia fermato completamente.
3.5 Tecniche di perforazione
- Generale: Applicare una pressione costante e uniforme. Non forzare il trapano. Lasciare che sia la punta a fare il suo lavoro.
- Legna: Use high speeds and wood-specific drill bits.
- Metallo: Use lower speeds and metal-specific drill bits. Apply cutting oil for harder metals to prolong bit life.
- Masonry/Concrete (Impact Mode): Use impact-rated masonry bits. Apply firm, consistent pressure. The impact action will assist in breaking through hard materials.
4. Manutenzione
Una manutenzione regolare garantisce la longevità e il funzionamento sicuro del trapano.
4.1 Pulizia
- Scollegare l'alimentazione: Prima di pulire il trapano, staccare sempre la spina.
- Esterno: Wipe the exterior of the drill with a clean, damp stoffa. Non utilizzare prodotti chimici aggressivi o detergenti abrasivi.
- Fessure di ventilazione: Keep the ventilation slots clear of dust and debris to prevent overheating. Use compressed air if necessary.
4.2 Manutenzione del mandrino
Periodically clean the chuck jaws to ensure proper gripping of drill bits. A small amount of light machine oil can be applied to the chuck jaws to keep them moving smoothly.
4.3 Carbon Brush Inspection (If Applicable)
Some power tools use carbon brushes that wear over time. If your drill experiences reduced power or intermittent operation, the carbon brushes may need inspection or replacement. This procedure should ideally be performed by a qualified service technician.
4.4 Conservazione
Conservare il trapano in un luogo asciutto e sicuro, fuori dalla portata dei bambini. Proteggerlo dalla luce solare diretta e da temperature estreme.
5. Risoluzione Dei Problemi
Before attempting any repairs, ensure the drill is unplugged from the power source.
| Problema | Possibile causa | Soluzione |
|---|---|---|
| Il trapano non si avvia. | Nessuna alimentazione; cavo/spina di alimentazione difettosi; problema con l'interruttore di attivazione. | Check power outlet; inspect cord for damage; contact service if switch is faulty. |
| Potenza ridotta o funzionamento intermittente. | Worn carbon brushes; motor overheating; loose connections. | Inspect/replace carbon brushes (if applicable); allow drill to cool; check connections. |
| La punta del trapano si inceppa frequentemente. | Incorrect bit for material; excessive pressure; dull bit. | Use correct, sharp bit; reduce pressure; clear debris from hole. |
| Vibrazioni o rumori eccessivi. | Loose chuck; bent drill bit; internal component issue. | Ensure chuck is tight; replace bent bit; contact service for internal issues. |
If the problem persists after attempting these solutions, contact an authorized service center.
6. Specifiche
The following are the technical specifications for the Total Tools Super Select Impact Drill 680W (Model: TG1061356):
| Caratteristica | Dettaglio |
|---|---|
| Marca | Strumenti totali |
| Numero di modello | TG1061356 |
| Fonte di alimentazione | Elettrico con cavo |
| Potenza massima | 680 Watt |
| Voltage | 220 Volt |
| Tipo di Chuck | Con chiave |
| Dimensione massima del mandrino | 13 millimetri |
| Velocità | 3000 giri/min (senza carico) |
| Velocità regolabile | Yes (Variable via trigger) |
| Funzione inversa | SÌ |
| Funzionalità del martello | Yes (Impact Drill) |
| Peso dell'articolo | 209 g (0.21 chilogrammi) |
| Dimensioni del prodotto | Dimensioni: 10 x 20 x 37 cm |
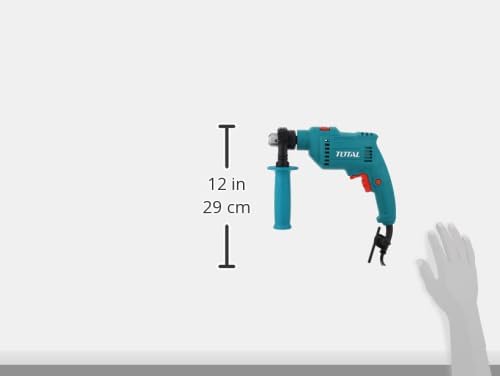
Figure 3: Approximate dimensions of the Total Tools Impact Drill.
7. Garanzia e supporto
Total Tools products are manufactured to high-quality standards. For specific warranty terms and conditions, please refer to the warranty card included with your product or visit the official Total Tools website. For technical support, service, or spare parts, please contact your local Total Tools authorized dealer or service center.
Conservare la prova d'acquisto per eventuali richieste di garanzia.
Ask a question about this manual
Ask about setup, troubleshooting, compatibility, parts, safety, or missing instructions. Manuals+ will review the question and use this page’s manual context to help answer it.