
1. Prodotto finitoview
The XPG Defender is a mid-tower ATX PC case designed for efficient airflow and ease of assembly. It features a mesh front panel, tempered glass side panel, and supports various motherboard sizes.
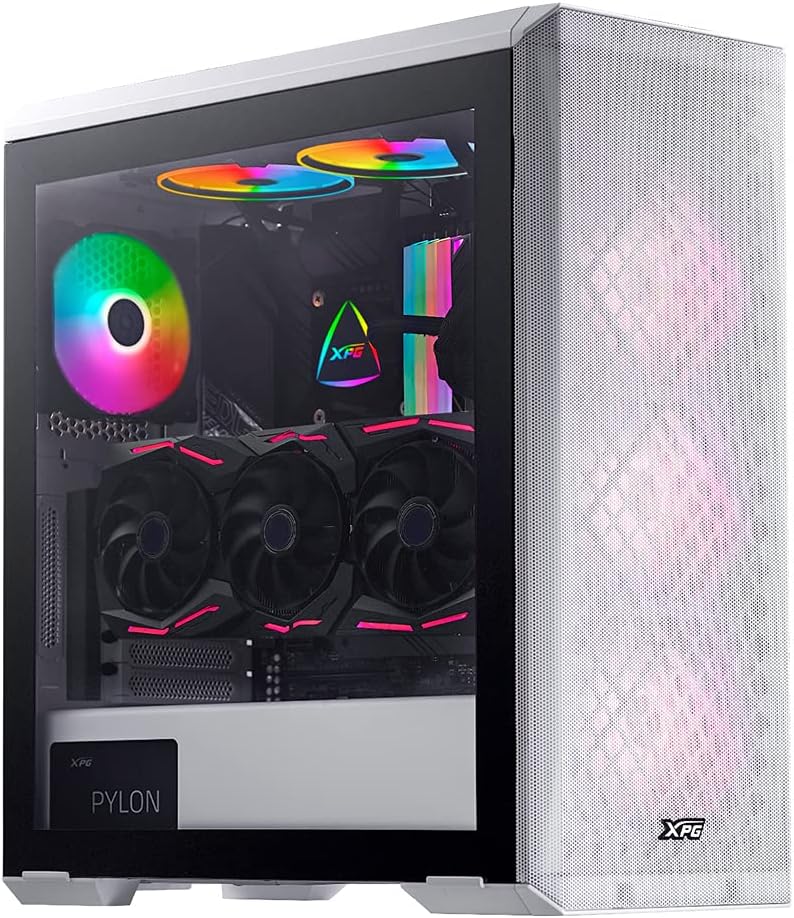
Image: XPG Defender PC Case, white, with tempered glass side panel and mesh front panel, showcasing internal components and RGB fans.
2. Configurazione e installazione
2.1 Disimballaggio e preparazione
- Estrarre con cautela il case del PC dalla confezione.
- Ispezionare la custodia per verificare che non vi siano segni di danni durante il trasporto.
- Posizionare la custodia su una superficie piana e stabile.
2.2 Rimozione dei pannelli
The tempered glass side panel is secured with thumbscrews. Carefully remove these screws and gently pull the panel away from the chassis. The mesh front panel is magnetic and can be pulled off directly to access front fan mounts.

Image: XPG Defender PC Case, white, with the mesh front panel detached, revealing the fan mounting points behind it.
2.3 Installazione della scheda madre
The XPG Defender supports Mini-ITX, Micro-ATX, ATX, and E-ATX motherboards. Install the necessary standoffs for your motherboard size, then secure the motherboard with screws.

Immagine: Interna view of the XPG Defender PC Case, white, showing the spacious interior, motherboard tray, and cable management cutouts.
2.4 Installazione dell'unità
The case provides space for two 2.5-inch drives and two convertible 2.5-inch/3.5-inch drive trays. Locate the drive bays and secure your storage devices using the provided screws or tool-less mechanisms.

Immagine: Interna view of the XPG Defender PC Case, white, focusing on the drive bays with trays for 2.5-inch and 3.5-inch drives.
2.5 Installazione dell'alimentatore
Install your power supply unit (PSU) into the rear mount area at the bottom of the case. Secure it with screws from the rear of the chassis.

Image: Rear internal view of the XPG Defender PC Case, white, highlighting the power supply shroud and drive bay area.
2.6 Scheda grafica e schede di espansione
Install your graphics card and other expansion cards into the appropriate PCIe slots on your motherboard. The case offers ample space for long graphics cards.

Immagine: Interna view of the XPG Defender PC Case, white, showing a graphics card installed, emphasizing the ample space for long GPUs.
2.7 Gestione dei cavi
Utilize the cable routing cutouts and tie-down points behind the motherboard tray to manage cables for a clean build and improved airflow.
3. Istruzioni per l'uso
3.1 Accensione
After connecting all internal components and external peripherals, connect the power cable to your PSU and press the power button located on the top I/O panel of the case.
3.2 Flusso d'aria e raffreddamento
The XPG Defender is designed with an efficient airflow layout, featuring a mesh front panel for optimal air intake. It comes with three pre-installed XPG VENTO 120 fans to facilitate cooling.

Immagine: Frontale view of the XPG Defender PC Case, white, with its mesh front panel and three illuminated fans visible behind it.
4. Manutenzione
4.1 Pulizia del filtro antipolvere
To maintain optimal airflow and prevent dust buildup, regularly clean the dust filters. The magnetic mesh front panel can be easily removed for cleaning. The bottom dust filter is also detachable for convenient maintenance.

Image: Close-up of the removable bottom dust filter of the XPG Defender PC Case, white, illustrating its easy access for cleaning.
4.2 Pulizia generale
Use a soft, dry cloth to wipe down the exterior of the case. For the tempered glass panel, use a glass cleaner and a microfiber cloth. Avoid abrasive cleaners or solvents.
5. Risoluzione Dei Problemi
- Nessun potere: Assicurarsi che tutti i cavi di alimentazione (dall'alimentatore alla presa a muro, dall'alimentatore alla scheda madre, dalla CPU alla GPU) siano collegati saldamente. Controllare l'interruttore di alimentazione sull'alimentatore.
- I ventilatori non girano: Verify that the fan cables are correctly connected to the motherboard or fan controller.
- Surriscaldamento: Ensure proper fan orientation for airflow (intake/exhaust). Clean dust filters and internal components regularly. Confirm CPU cooler and GPU fans are functioning correctly.
- Tempered Glass Handling: The tempered glass panel is durable but can shatter if subjected to sharp impacts or uneven pressure. Handle with care during installation and removal.
- Problemi di I/O del pannello frontale: Verificare che i connettori del pannello frontale (USB, audio, interruttori di accensione/reset) siano correttamente inseriti nei connettori della scheda madre.
6. Specifiche
| Dimensioni del prodotto | 19.37 x 8.66 x 17.36 pollici |
| Peso dell'articolo | 17.9 libbre |
| Numero modello articolo | DEFENDER-WHCWW |
| Compatibilità della scheda madre | Mini-ITX, Micro-ATX, ATX, E-ATX |
| Tipo di caso | Mid Tower |
| Colore | Bianco |
| Materiale | Vetro temperato |
| Tipo di montaggio dell'alimentatore | Montaggio posteriore |
| Metodo di raffreddamento | Fan |
| Dimensioni della ventola | 120 Millimeters (3 pre-installed) |
7. Garanzia e supporto
For warranty information and technical support, please refer to the official XPG website or contact XPG customer service directly. Keep your proof of purchase for warranty claims.
You can visit the XPG Store for more information: XPG Store