
1. Introduzione
This user manual provides essential information for the safe and efficient operation of the Qinlorgo A2-8075 Frequency Inverter. Please read this manual thoroughly before installation, operation, or maintenance to ensure proper usage and prevent damage or injury.
1.1 Avvertenze di sicurezza
ATTENZIONE: alto volumetage dentro.
- Do not connect AC power to output terminals (U, V, W).
- Discharging time is greater than 5 seconds.
- Do not inspect components unless the "CHARGE" lamp è spento.
- Ensure proper grounding before connecting the device.
- Solo personale qualificato dovrebbe eseguire l'installazione e la manutenzione.

Figura 1.1: Fronte view of the A2-8075 Frequency Inverter, highlighting the control panel and the high voltage warning label. The label explicitly states "CAUTION: High voltage inside" and lists critical safety precautions regarding power connection, discharge time, and inspection.
2. Prodotto finitoview
The Qinlorgo A2-8075 is a 3-phase frequency inverter designed for various industrial applications, including winding machines, mixers, extruders, conveyors, and splitters. It features a flame-retardant casing and a user-friendly control panel.
2.1 Componenti e caratteristiche
- Display digitale: Mostra lo stato operativo e i parametri.
- Pulsanti di controllo: RUN, STOP/RESET, SET, REV/FWD, JOG for easy operation.
- Prese d'aria di raffreddamento: Posizionati sui lati per la dissipazione del calore.
- Terminali di ingresso/uscita: Clearly labeled for power and motor connections.
- Flame-retardant Casing: Enhances safety in industrial environments.
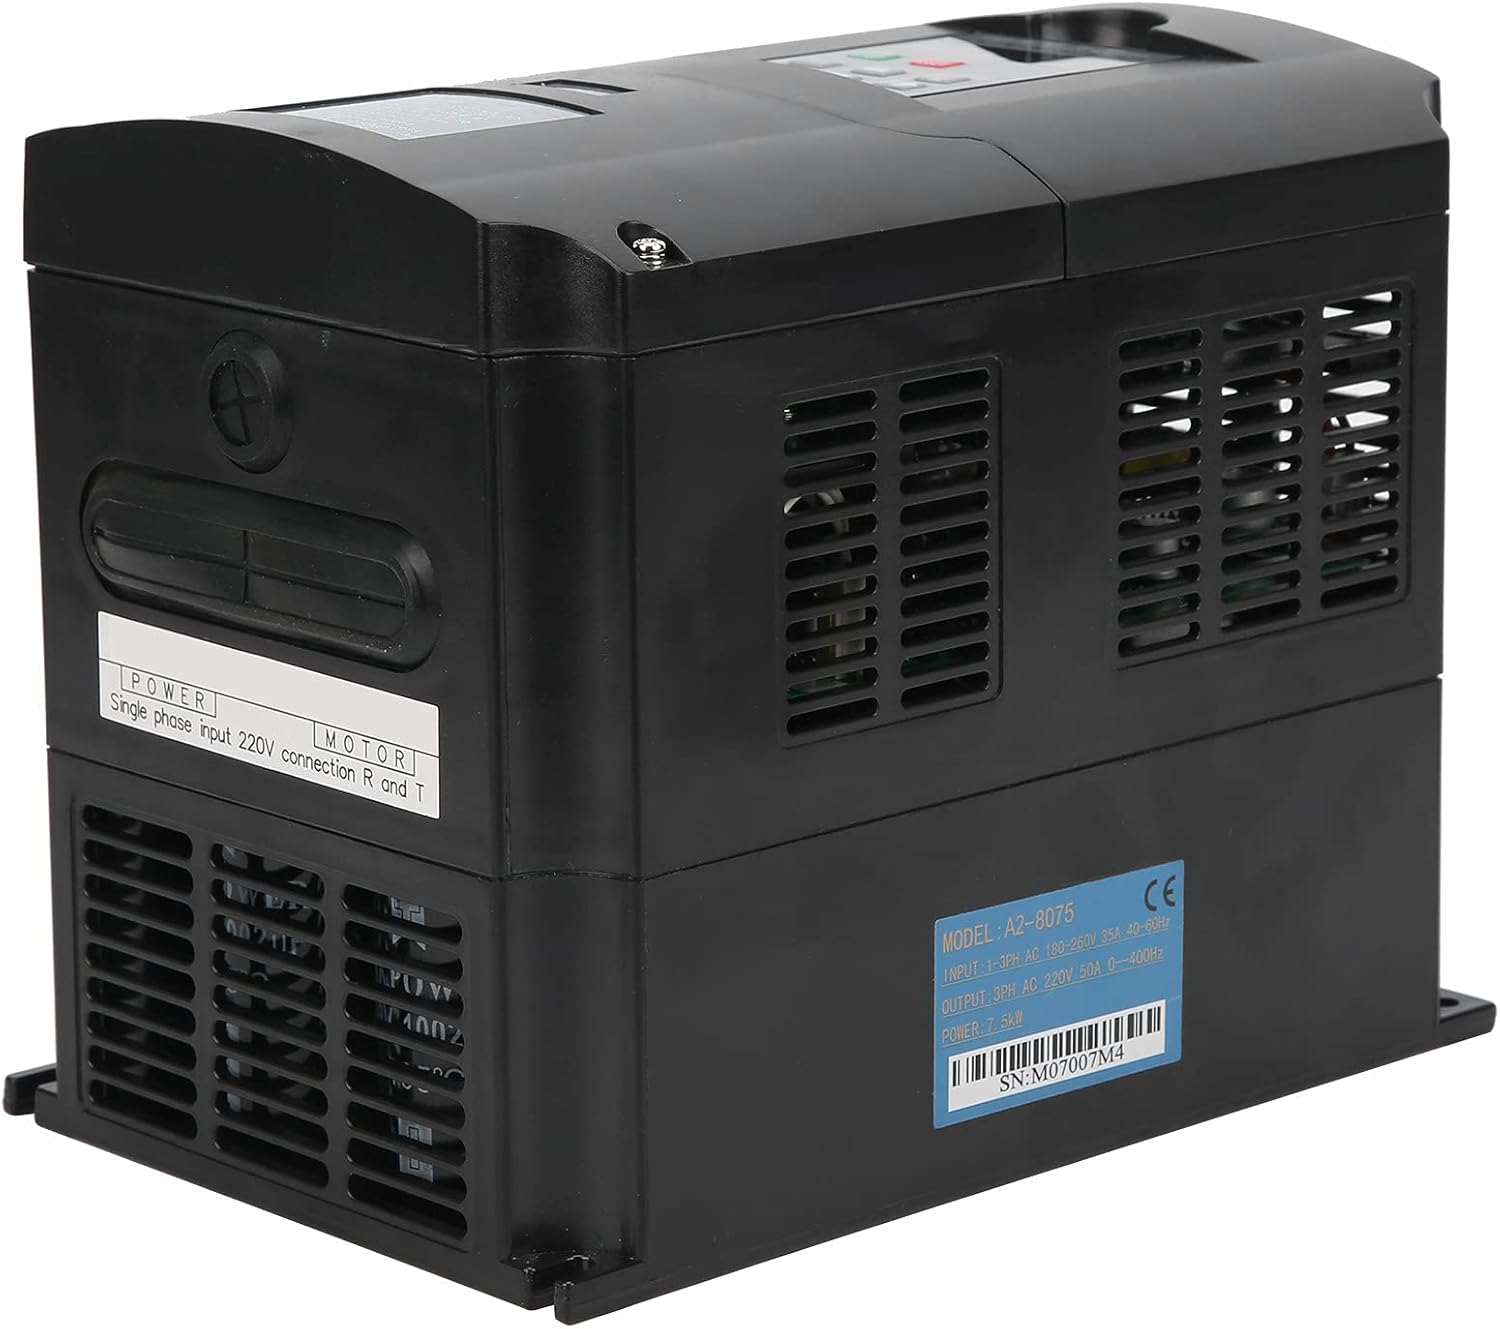
Figura 2.1: lato view of the A2-8075 Frequency Inverter. This image shows the cooling vents on the side and a label indicating "POWER Single phase input 220V connection R and T" for power input.

Figura 2.2: Angolato view of the A2-8075 Frequency Inverter, providing a clearer look at the control panel and the extensive ventilation on the sides, crucial for heat management during operation.
3. Specifiche
Technical specifications for the A2-8075 Frequency Inverter:
| Parametro | Valore |
|---|---|
| Modello | A2-8075 |
| Ingresso volumetage | 250 Volt |
| Volume di uscitatage | 220 Volt |
| Cosatage | 7.5 kW |
| Fonte di alimentazione | Battery Powered (Note: Typically refers to the control circuit, main power is AC) |
| Peso dell'articolo | 6.51 libbre (circa 2.95 kg) |
| Produttore | Qinlorgo |
| Numero di serie (ad esempioample) | M07007M4 |

Figura 3.1: Posteriore view of the A2-8075 Frequency Inverter, displaying the product label with "MODEL: A2-8075" and an example serial number "SN: M07007M4". This label also details input/output specifications.

Figure 3.2: Dimensions of the A2-8075 Frequency Inverter. The image indicates a height of 220mm (8.7in), a depth of 180mm (7.1in), and a width of 150mm (5.9in), providing crucial information for installation planning.
4. Configurazione e installazione
Proper installation is crucial for the safe and reliable operation of the frequency inverter. Ensure all power is disconnected before beginning installation.
4.1 Montaggio
- Choose a dry, well-ventilated area, free from direct sunlight, excessive dust, corrosive gases, and vibrations.
- Mount the inverter vertically on a stable surface, ensuring adequate clearance for cooling (refer to Figure 3.2 for dimensions).
- Ensure the ambient temperature is within the operating range specified in the full technical datasheet (not provided here).
4.2 Cablaggio
All wiring must comply with local electrical codes and regulations. Use appropriate wire gauges for the power and motor connections.
- Potenza in ingresso: Connect the 3-phase AC power supply to the designated input terminals (R, S, T). Ensure the input voltage matches the inverter's specifications (250V).
- Uscita motore: Connect the motor to the output terminals (U, V, W). Do not connect AC power to these terminals.
- Messa a terra: Connect the inverter to a reliable earth ground using the designated ground terminal. This is critical for safety.
- Cablaggio di controllo: Refer to the full wiring diagram (not provided in this manual) for connecting external control signals, such as start/stop, speed reference, and fault indicators.
5. Istruzioni per l'uso
This section outlines the basic operation of the A2-8075 Frequency Inverter using its control panel.
5.1 Pannello di controllo Sopraview
Figura 5.1: dettagliata view of the A2-8075 control panel. It features a 4-digit 7-segment display and buttons for RUN, STOP/RESET, SET, REV/FWD, and JOG, along with indicators for ERROR, FWD, REV, ANA, SEG, LOG, and MENT/PANEL.
- Display digitale: Mostra frequenza, corrente, volumetage codici di errore.
- Pulsante RUN (verde): Avvia il funzionamento del motore.
- Pulsante STOP/RESET (rosso): Stops motor operation and resets fault conditions.
- Pulsante IMPOSTA: Accede alla modalità di impostazione dei parametri e conferma le selezioni.
- REV/FWD Buttons (Up/Down Arrows): Adjusts frequency or navigates parameters.
- JOG Buttons (Left/Right Arrows): Used for momentary operation or specific parameter adjustments.
5.2 Sequenza operativa di base
- Accensione: Ensure all connections are secure and apply power to the inverter. The digital display should light up.
- Parameter Setting (if necessary): Use the SET button to enter parameter mode. Navigate with REV/FWD and JOG buttons to set desired frequency, acceleration/deceleration times, and other motor parameters. Refer to the comprehensive programming manual for detailed parameter descriptions.
- Avviamento del motore: Premere il tasto CORRERE button. The motor should begin to accelerate to the set frequency.
- Regola la frequenza: While running, use the REV/FWD buttons to adjust the output frequency and thus the motor speed.
- Arresto motore: Premere il tasto ARRESTO/RIPRISTINO pulsante. Il motore decelera e si ferma.
- Ripristina errore: If an error occurs, the display will show an error code. Address the cause of the error, then press the ARRESTO/RIPRISTINO pulsante per cancellare l'errore.
6. Manutenzione
Regular maintenance ensures the longevity and optimal performance of your A2-8075 Frequency Inverter. Always disconnect power before performing any maintenance.
- Pulizia: Pulire periodicamente l'esterno dell'inverter con un panno morbido e asciutto. Non utilizzare detergenti liquidi o solventi.
- Ventilazione: Ensure cooling vents (see Figure 2.1 and Figure 2.2) are free from dust and obstructions. Use compressed air to gently clear any accumulated dust from the heatsink fins.
- Connessioni: Regularly check all electrical connections for tightness. Loose connections can cause overheating and malfunction.
- Controllo ambientale: Monitor the operating environment to ensure it remains within specified conditions (temperature, humidity, dust levels).
- Durata del condensatore: I condensatori elettrolitici hanno una durata limitata. Sebbene non possano essere riparati dall'utente, è importante tenere presente che le prestazioni potrebbero peggiorare nel corso di molti anni di funzionamento continuo.

Figura 6.1: primo piano view of the cooling fan located on the side of the A2-8075 Frequency Inverter. Regular inspection and cleaning of this fan are essential for maintaining proper airflow and preventing overheating.
7. Risoluzione Dei Problemi
This section provides solutions to common issues you might encounter with the A2-8075 Frequency Inverter. For complex problems, contact qualified service personnel.
| Problema | Possibile causa | Soluzione |
|---|---|---|
| L'inverter non si accende. | No input power; loose connections; internal fuse blown. | Check power supply; verify all connections; consult service manual for fuse replacement (qualified personnel only). |
| Il motore non funziona. | Inverter in STOP mode; incorrect wiring; fault condition; motor issue. | Press RUN button; check motor and output wiring (U, V, W); check display for error codes and reset; test motor separately. |
| Guasto da sovracorrente. | Motor overload; short circuit in motor or wiring; rapid acceleration. | Reduce motor load; check motor and wiring for shorts; increase acceleration time parameter; press STOP/RESET. |
| Sovravoltagcolpa. | Alto volume di ingressotage; rapid deceleration; regenerative load. | Controllare l'input voltage; increase deceleration time parameter; consider adding a braking resistor if applicable. |
| Overheat fault. | Insufficient ventilation; high ambient temperature; blocked cooling fan. | Ensure proper airflow; clean cooling vents and fan; reduce ambient temperature; press STOP/RESET. |
8. Garanzia e supporto
The Qinlorgo A2-8075 Frequency Inverter is typically covered by a manufacturer's limited warranty against defects in materials and workmanship. The specific terms and duration of the warranty may vary based on your region and point of purchase.
- Richieste di garanzia: For warranty service, please retain your proof of purchase and contact the retailer or authorized distributor from whom you purchased the product.
- Supporto tecnico: For technical assistance, troubleshooting beyond this manual, or inquiries about spare parts, please contact Qinlorgo customer support or visit their official websito.
- Risorse online: Additional resources, including detailed wiring diagrams, programming guides, and firmware updates, may be available on the manufacturer's websito.