
1. Introduzione
This manual provides detailed instructions for the proper installation, operation, and maintenance of your Dynascan M-79V VHF Radio. Please read this manual thoroughly before using the radio to ensure optimal performance and safety. The Dynascan M-79V is a compact VHF transceiver designed for reliable communication within the 136-174 MHz frequency range.
2. Contenuto della confezione
Upon unpacking, please verify that all items listed below are present and in good condition. If any items are missing or damaged, contact your dealer immediately.
- Dynascan M-79V VHF Radio Unit
- Microfono
- Power Line (DC power cable)
- Support Mount (Mounting Bracket)
- Mounting Hardware (Screws, nuts, washers)
- Manuale dell'utente (questo documento)
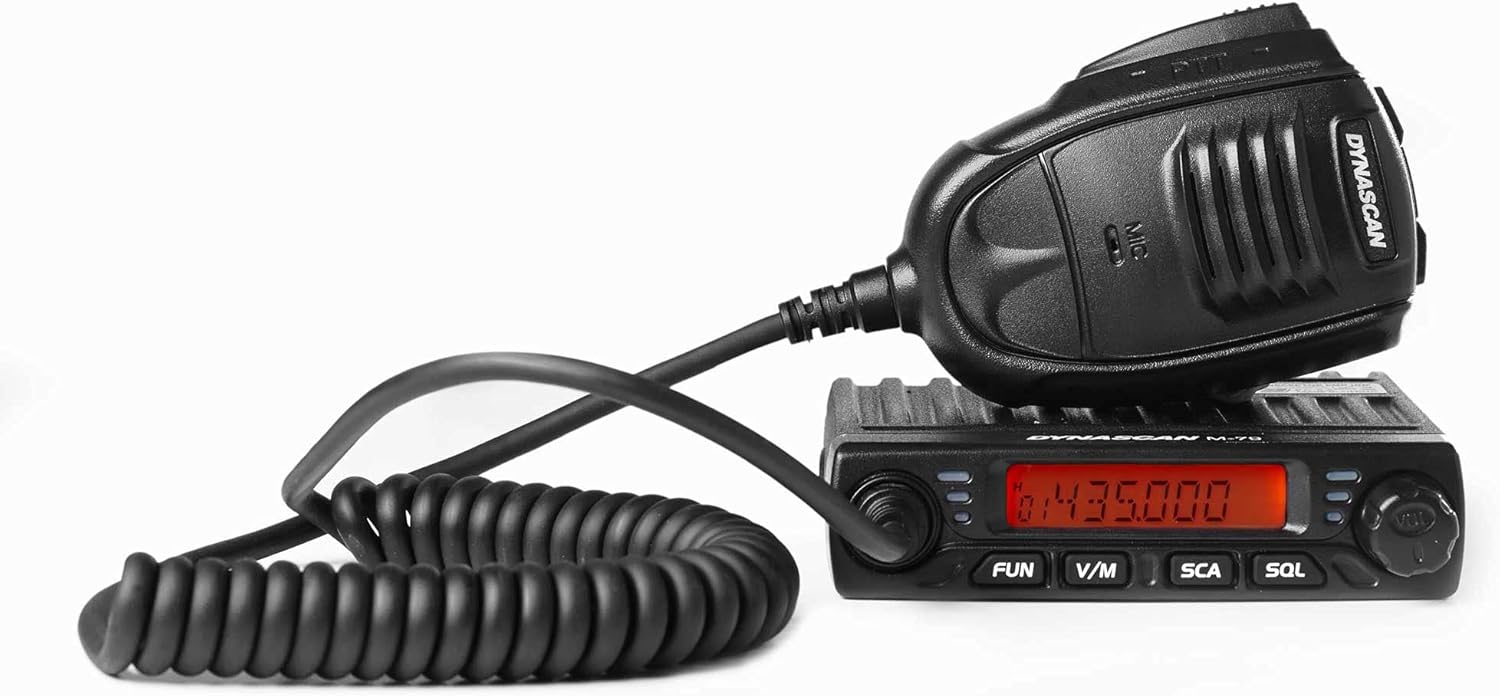
Figure 2.1: Dynascan M-79V VHF Radio unit with connected microphone.

Figure 2.2: All included components: radio unit, microphone, power cable, mounting bracket, and hardware.

Figura 2.3: dettagliata view of the mounting bracket and associated hardware.
3. Prodotto finitoview
The Dynascan M-79V features a compact design with essential controls for efficient operation.
3.1 Controlli del pannello frontale

Figure 3.1: Front panel of the Dynascan M-79V radio.
- Schermo LCD: Mostra la frequenza, il numero del canale e vari indicatori di stato.
- Manopola accensione/volume: Accende/spegne la radio e regola il volume audio.
- Manopola di selezione canale: Utilizzato per selezionare i canali o regolare la frequenza.
- Pulsante FUN: Activates function menu or special features.
- Pulsante V/M: Alterna tra la modalità VFO (frequenza) e la modalità Memoria (canale).
- SCA Button: Initiates or stops scanning.
- SQL Button: Adjusts the squelch level.
3.2 Collegamenti del pannello posteriore
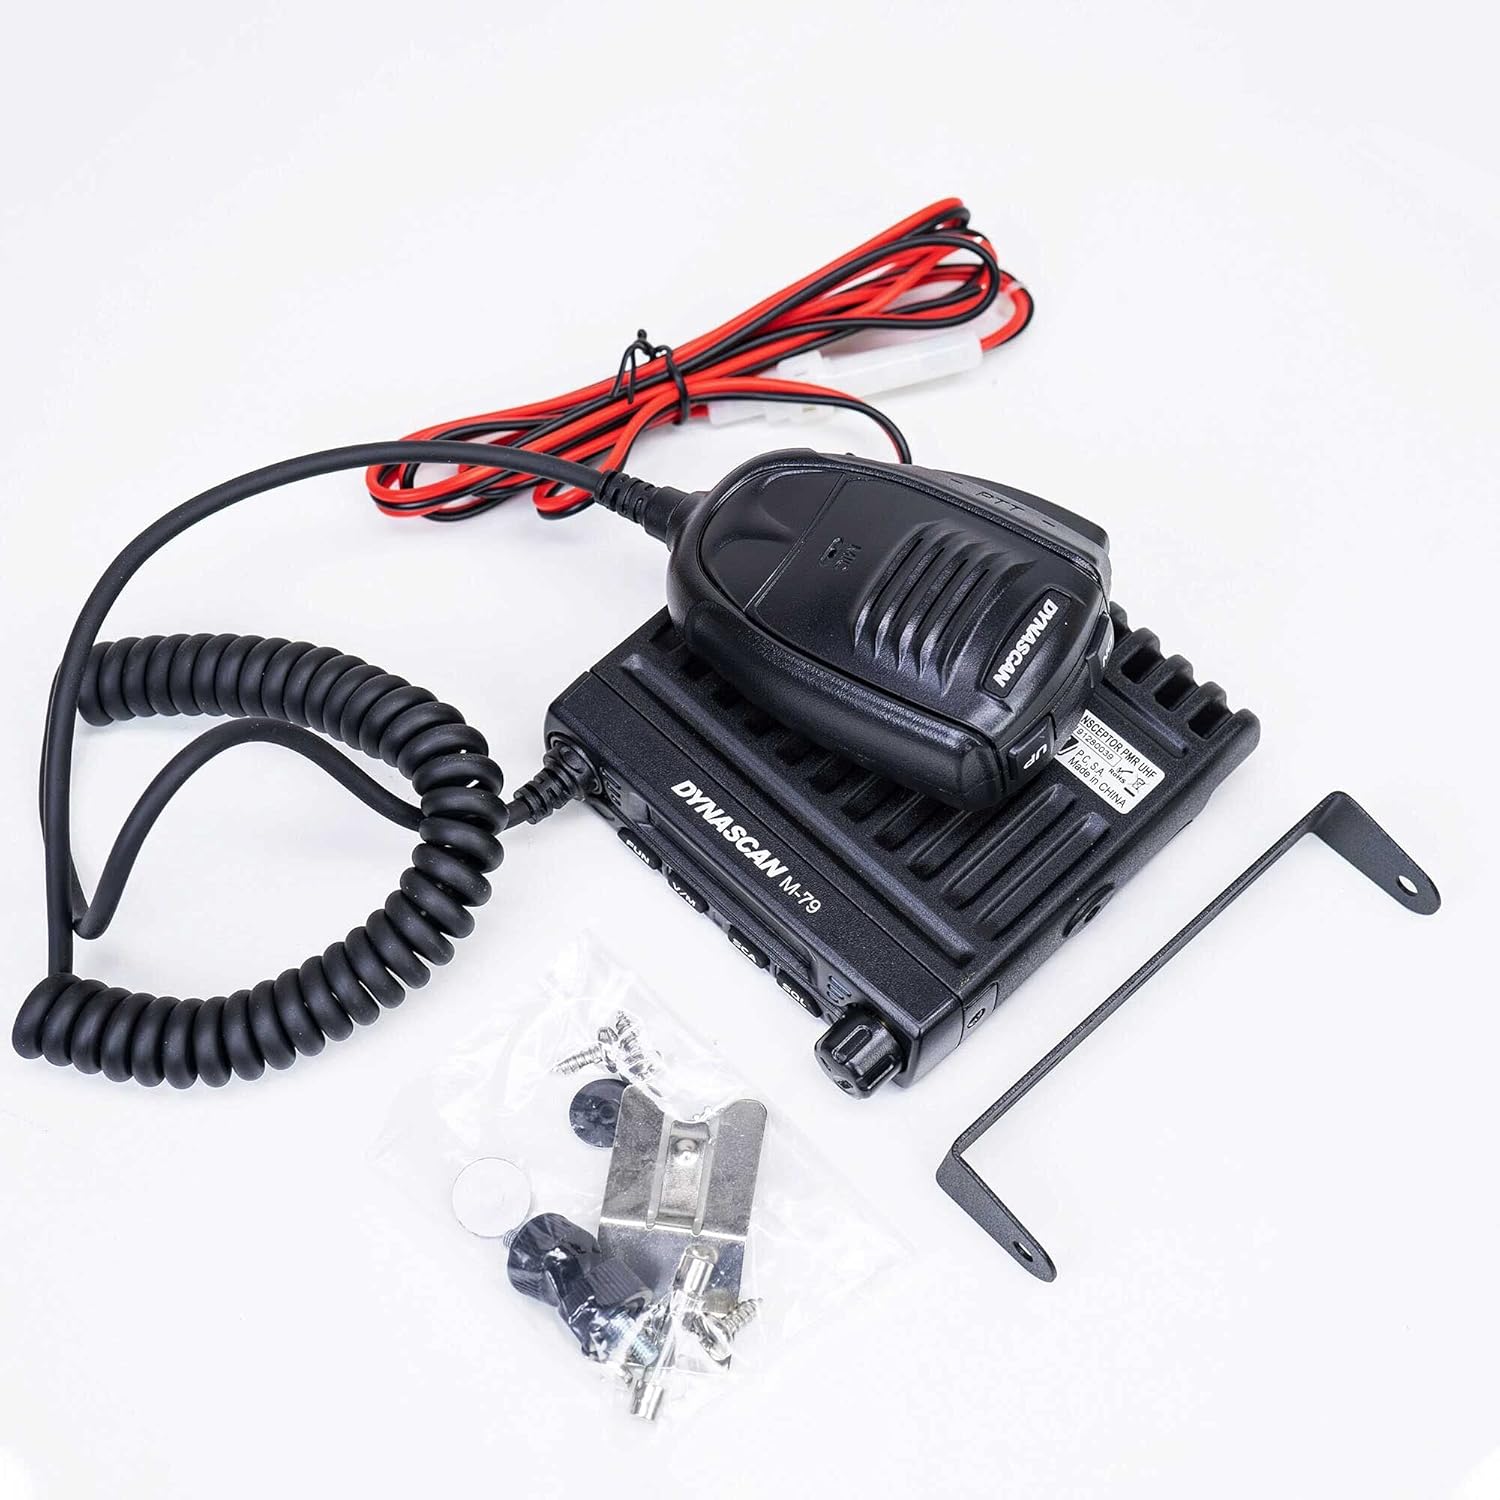
Figure 3.2: Rear panel connections of the Dynascan M-79V radio.
- Connettore ANT: Connects to the VHF antenna (SO-239 type).
- Ingresso alimentazione CC: Connects to the 13.8V DC power source.
- EXT.SP Jack: Per collegare un altoparlante esterno opzionale.
3.3 Microfono

Figure 3.3: Dynascan M-79V microphone with PTT button and coiled cable.
- Pulsante PTT (premi per parlare): Premere per trasmettere, rilasciare per ricevere.
- Elemento microfono: Per input vocale.
4. Impostazione
4.1 Montaggio della radio
- Select a secure and convenient location for mounting the radio, ensuring adequate ventilation.
- Utilizzare la staffa di montaggio fornita come modello per contrassegnare i punti di foratura.
- Praticare dei fori pilota e fissare la staffa di montaggio utilizzando le viti in dotazione.
- Attach the radio to the bracket using the thumb screws.
4.2 Collegamento dell'antenna
Connect a suitable VHF antenna (136-174 MHz) with a 50 Ohm impedance to the ANT connector on the rear panel. Ensure the connection is tight to prevent signal loss and potential damage.
4.3 Collegamento di alimentazione
Connect the supplied DC power cable to the 13.8V DC power input on the rear of the radio. Connect the other end of the power cable to a stable 13.8V DC power supply capable of providing sufficient current (refer to specifications for current draw). Observe correct polarity: red wire to positive (+), black wire to negative (-). Incorrect polarity can damage the radio.
4.4 Collegamento del microfono
Plug the microphone connector into the microphone jack on the front panel of the radio.
5. Istruzioni per l'uso
5.1 Accensione/spegnimento e regolazione del volume
- Per accendere la radio, ruotare la manopola di accensione/volume in senso orario.
- Continuare a ruotare in senso orario per aumentare il volume.
- Ruotare in senso antiorario per diminuire il volume.
- Per spegnere, ruotare completamente la manopola in senso antiorario fino a sentire uno scatto.
5.2 Selezione della frequenza e del canale
- Modalità VFO (modalità frequenza): Premere il tasto Vero/Uomo button to enter VFO mode. Use the Channel Selector knob to adjust the frequency. The frequency step can be configured in the menu.
- Modalità memoria (modalità canale): Premere il tasto Vero/Uomo button to enter Memory mode. Use the Channel Selector knob to select a programmed channel.
5.3 Squelch Adjustment (SQL)
The squelch function mutes the speaker when no signal is present, eliminating background noise.
- Premere il tasto SQL pulsante.
- Use the Channel Selector knob to adjust the squelch level. A lower number opens the squelch more easily (more sensitive), while a higher number requires a stronger signal to open (less sensitive).
- Premere SQL again or wait a few seconds to exit squelch adjustment.
5.4 Scanning (SCA)
The scan function allows the radio to automatically search for active signals across frequencies or programmed channels.
- Premere il tasto SCA pulsante per avviare la scansione.
- The radio will stop on an active signal.
- Premere SCA di nuovo per interrompere la scansione.
5.5 Trasmissione
To transmit, ensure you are on a clear frequency or channel.
- Premere e tenere premuto il tasto PTT pulsante sul microfono.
- Parla chiaramente nel microfono.
- Rilasciare il PTT pulsante per tornare alla modalità di ricezione.
5.6 Advanced Features (via FUN button)
IL DIVERTIMENTO button accesses various advanced settings and features. Consult the full user manual for detailed instructions on programming and using these functions.
- Scrambler: Crittografa la tua voce per comunicazioni private.
- Parla in giro: Allows direct radio-to-radio communication on a repeater output frequency.
- Timer di timeout (TOT): Limita la durata della trasmissione per evitare trasmissioni accidentali troppo lunghe.
- Blocco canale occupato (BCL): Impedisce la trasmissione su un canale occupato.
- CTCSS / DCS: Toni sub-udibili per chiamate selettive.
- Guadagno microfono: Regola la sensibilità del microfono.
6. Manutenzione
6.1 Cura generale
- Mantenere la radio asciutta. Se si bagna, asciugarla immediatamente.
- Non esporre la radio a temperature estreme.
- Evitare di far cadere la radio o di sottoporla a urti violenti.
- Pulisci l'esterno della radio con un panno morbido eamp stoffa. Non utilizzare prodotti chimici o solventi aggressivi.
6.2 Antenna and Power Cable Inspection
Regularly inspect the antenna and power cable for any signs of damage, fraying, or corrosion. Damaged cables or antennas can impair performance and pose safety risks.
7. Risoluzione Dei Problemi
| Problema | Possibile causa | Soluzione |
|---|---|---|
| La radio non si accende. |
|
|
| Nessuna ricezione o segnali deboli. |
|
|
| Impossibile trasmettere. |
|
|
8. Specifiche
| Gamma di frequenza | 136 - 174 MHz (VHF) |
| Canali programmabili | 199 canali |
| Passi di frequenza | 2.5 / 5 / 6.25 / 10 / 12.5 / 20 / 25 / 30 / 50 KHz |
| Alimentazione elettrica | 13.8V CC |
| Impedenza dell'antenna | 50 Ohm |
| Potenza di uscita | 17W, 10W, 5W (Selectable) |
| Dimensioni (L x A x P) | 10.5 x 10.5 x 2.5 cm (circa) |
| Peso | 435 grams (radio unit only) / 640 grams (item weight) |
| Caratteristiche speciali | Scrambler, Talk Around, Scan, Timeout Timer (TOT), Busy Channel Lockout (BCL), Squelch, CTCSS/DCS, Mic Gain |
9. Garanzia e supporto
For warranty information, please refer to the warranty card included with your purchase or contact your authorized Dynascan dealer. For technical support or service inquiries, please contact your point of purchase or visit the official Dynascan websito per i contatti.
Nota: le specifiche sono soggette a modifiche senza preavviso.