
1. Introduzione
This manual provides comprehensive instructions for the installation, operation, and maintenance of your PCCOOLER GI-CL240VC 240mm RGB All-in-One (AIO) CPU Liquid Cooler. Please read this manual thoroughly before installation to ensure correct setup and optimal performance. Retain this manual for future reference.
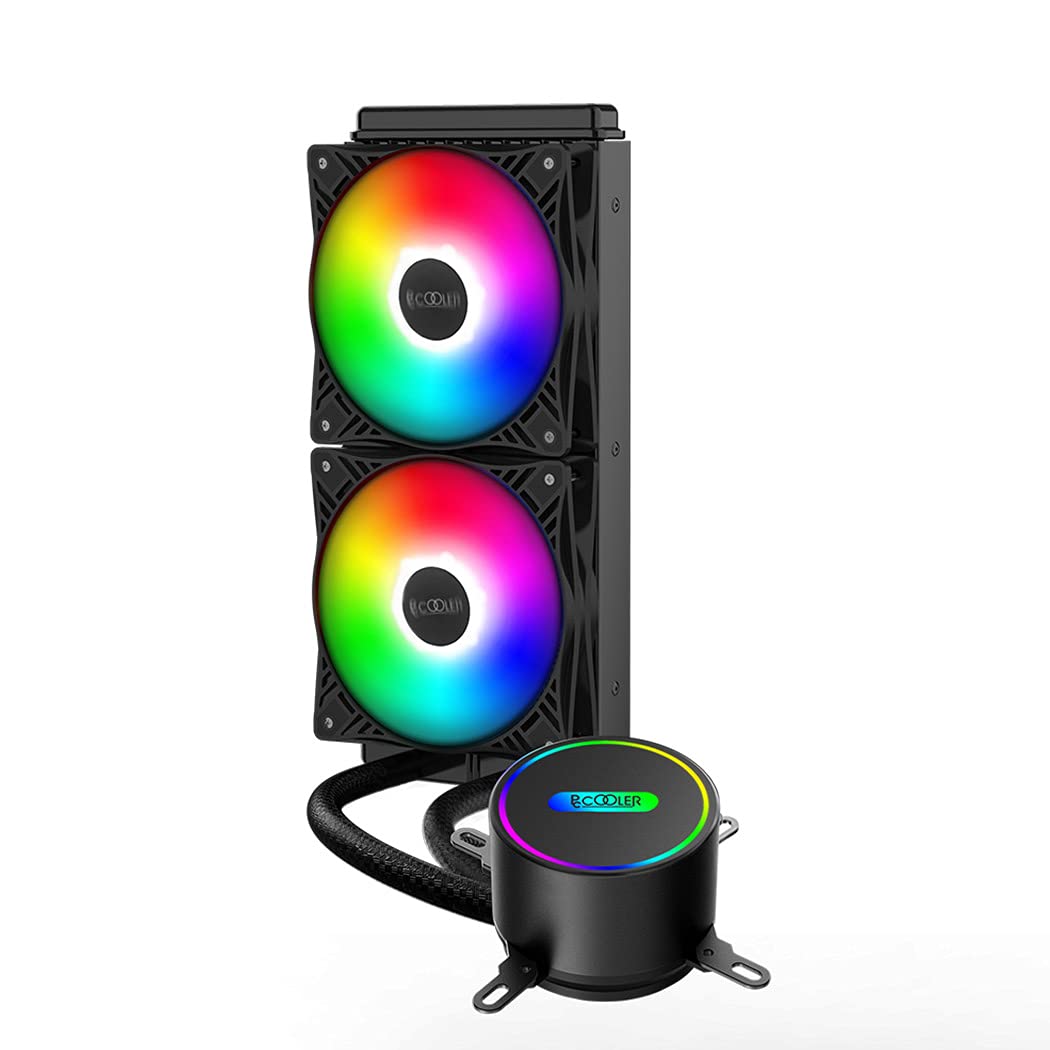
Figure 1.1: PCCOOLER GI-CL240VC 240mm RGB AIO CPU Liquid Cooler with dual fans and pump.
2. Contenuto della confezione
Verify that all components are present in the package before beginning installation. If any items are missing or damaged, contact your retailer or PCCOOLER support.
- Radiatore da 240 mm con pompa integrata e piastra fredda
- Two 120mm RGB PWM Fans
- Intel Mounting Bracket Kit (for LGA 1700/1200/115X/2011/2066)
- AMD Mounting Bracket Kit (for AM5/AM4/AM3+/AM3/AM2+/AM2/FM2+/FM2/FM1)
- Fan Screws and Radiator Mounting Screws
- Pasta termica (pre-applicata o in tubetto)
- Cavo sdoppiatore ventola
- RGB Controller Cable (if applicable)
- Manuale d'uso

Figure 2.1: Illustration of the PCCOOLER GI-CL240VC cooler components, including radiator, fans, and pump.
3. Informazioni sulla sicurezza
Observe the following safety guidelines during installation and operation:
- Prima dell'installazione, assicurarsi che il computer sia spento e scollegato dalla presa a muro.
- Maneggiare i componenti con cura per evitare danni.
- Avoid touching the fan blades while they are spinning.
- Non tentare di aprire la pompa o il radiatore, poiché ciò potrebbe invalidare la garanzia e causare perdite.
- Tenere il prodotto lontano da liquidi e temperature estreme.
4. Configurazione e installazione
Follow these steps carefully for proper installation. The process involves mounting the radiator, fans, and CPU block to your motherboard and case.
4.1. Preparare il radiatore e le ventole
- Attach the two 120mm RGB PWM fans to the radiator using the long fan screws. Ensure the fan airflow direction is appropriate for your case (typically blowing air through the radiator and out of the case, or into the case).
- Connect the fan power cables to the included fan splitter cable, then connect the splitter to a CPU_FAN or SYS_FAN header on your motherboard.
- If your fans have RGB cables, connect them to the RGB controller cable or directly to a compatible motherboard RGB header.

Figure 4.1: Enhanced nine-blade dual fans with RGB lighting.
4.2. Install the Radiator in Your PC Case
Mount the assembled radiator and fans to an available 240mm mounting location in your PC case (e.g., top, front, or side panel) using the shorter radiator mounting screws.
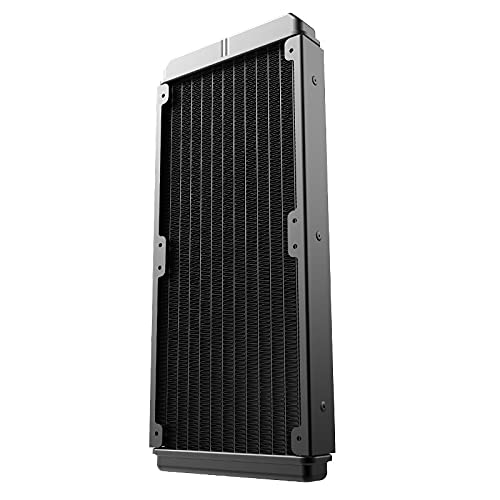
Figure 4.2: The 240mm radiator component of the liquid cooler.
4.3. Prepare the CPU Block for Your CPU Socket
Select the appropriate mounting bracket for your CPU socket (Intel or AMD) and attach it to the pump/cold plate unit. Refer to the specific instructions below for your CPU type.

Figure 4.3: Universal metal mounting kits and detailed view of the S-shaped radiator fins.
4.3.1. Intel Socket Installation (LGA 1700/1200/115X/2011/2066)
- Installare la piastra posteriore Intel sul retro della scheda madre, allineando i fori con il socket della CPU.
- Secure the standoffs through the motherboard holes into the backplate.
- Ensure the thermal paste is applied to the CPU IHS (Integrated Heat Spreader). If pre-applied, remove the protective film from the cold plate.
- Place the CPU block onto the CPU, aligning the mounting holes with the standoffs.
- Secure the CPU block with the provided thumb screws, tightening them in a diagonal pattern until snug. Do not overtighten.
4.3.2. AMD Socket Installation (AM5/AM4/AM3+/AM3/AM2+/AM2/FM2+/FM2/FM1)
- Remove the plastic retention clips from the stock AMD backplate (if present). The stock AMD backplate is typically used.
- Install the AMD standoffs onto the stock backplate.
- Ensure the thermal paste is applied to the CPU IHS. If pre-applied, remove the protective film from the cold plate.
- Place the CPU block onto the CPU, aligning the mounting holes with the standoffs.
- Secure the CPU block with the provided thumb screws, tightening them in a diagonal pattern until snug. Do not overtighten.

Figura 4.4: primo piano view of the CPU block with mounting hardware.

Figure 4.5: Minimalist style CPU block featuring RGB lighting.
4.4. Connect Pump Power
Connect the pump's 3-pin or 4-pin power cable to the CPU_OPT or AIO_PUMP header on your motherboard. Ensure the pump is receiving full power for optimal performance.
5. Istruzioni per l'uso
Once installed, the PCCOOLER GI-CL240VC operates automatically. The pump and fans will adjust their speed based on CPU temperature, controlled by your motherboard's BIOS settings or dedicated software.
- Accensione iniziale: After completing installation, power on your system. Check for any unusual noises or leaks.
- Impostazioni BIOS/UEFI: Access your motherboard's BIOS/UEFI to ensure the CPU_FAN or AIO_PUMP header is set to PWM mode and configured for optimal cooling performance.
- Controllo RGB: If connected to a compatible motherboard RGB header, use your motherboard's RGB software to customize lighting effects. If an external controller is used, refer to its specific instructions.
6. Manutenzione
Regular maintenance ensures the longevity and efficiency of your liquid cooler.
- Pulizia della polvere: Pulire periodicamente le alette del radiatore e le pale della ventola dalla polvere utilizzando aria compressa o una spazzola morbida. Assicurarsi che le ventole non siano in funzione durante la pulizia.
- Gestione dei cavi: Assicurarsi che tutti i cavi siano disposti ordinatamente e non ostruiscano il flusso d'aria o il funzionamento della ventola.
- Ispezione delle perdite: While AIO coolers are sealed, occasionally inspect the tubing and connections for any signs of leakage.
- Pasta termica: For long-term use (typically every 3-5 years), consider reapplying thermal paste to the CPU for optimal heat transfer.
7. Risoluzione Dei Problemi
In caso di problemi, fare riferimento ai seguenti problemi comuni e alle relative soluzioni:
- Temperature elevate della CPU:
- Ensure the CPU block is securely mounted and making full contact with the CPU.
- Verify that the pump is running (check BIOS/UEFI or listen for a faint hum).
- Confirm fans are spinning and correctly oriented for airflow.
- Controllare che la pasta termica sia stata applicata correttamente.
- Le ventole non girano/RGB non funziona:
- Controllare tutti i collegamenti dei cavi RGB e delle ventole alla scheda madre o al controller.
- Ensure fan headers in BIOS/UEFI are configured correctly.
- Verificare le impostazioni del software RGB.
- Rumore insolito:
- Identify if the noise is from fans (check for obstructions or loose screws) or the pump.
- A slight gurgling sound initially is normal as air bubbles settle. If persistent, ensure the radiator is mounted higher than the pump.
8. Specifiche
| Caratteristica | Specificazione |
|---|---|
| Modello | GI-CL240VC |
| Marca | PCCOOLER |
| Dimensioni del radiatore | 240mm |
| Dimensioni della ventola | 120 mm (x2) |
| Velocità di rotazione massima | 1600 giri al minuto |
| Livello di rumore | 30 decibel |
| Metodo di raffreddamento | Acqua |
| Tipo di materiale | Rame (piastra fredda) |
| Tipo di connettore di alimentazione | 4-Pin (Fans), 3/4-Pin (Pump) |
| Dispositivi compatibili | Scrivania |
| Prese compatibili | Intel LGA 1700/1200/115X/2011/2066, AMD AM5/AM4/AM3+/AM3/AM2+/AM2/FM2+/FM2/FM1 |
9. Garanzia e supporto
PCCOOLER products come with a limited warranty. For detailed warranty information, please refer to the warranty card included with your product or visit the official PCCOOLER website. If you require technical assistance or have questions regarding your GI-CL240VC cooler, please contact PCCOOLER customer support through their official channels.