1. Introduzione
Grazie per l'acquistoasing the VILINICE 6500 Lumens 720P Native Portable Projector. This manual provides essential information for the safe and efficient operation of your device. Please read it thoroughly before use and retain it for future reference.
2. Informazioni sulla sicurezza
To ensure safe operation and prolong the lifespan of your projector, please observe the following safety precautions:
- Non ostruire le aperture di ventilazione. Garantire un flusso d'aria adeguato attorno al proiettore per evitare il surriscaldamento.
- Avoid direct exposure to the projector lens light. The bright light can cause eye strain or damage.
- Do not place the projector in unstable locations. Ensure it is on a flat, stable surface to prevent falls.
- Tenere il proiettore lontano da acqua, umidità e materiali infiammabili.
- Utilizzare solo l'adattatore di alimentazione fornito con il proiettore.
- Non tentare di riparare il proiettore da soli. Per qualsiasi intervento di assistenza, rivolgersi a personale qualificato.
- Scollegare il proiettore durante i temporali o quando non viene utilizzato per lunghi periodi.
3. Contenuto della confezione
Si prega di controllare il contenuto della confezione all'apertura. Se qualche articolo risulta mancante o danneggiato, contattare l'assistenza clienti.
- VILINICE 6500 Lumens 720P Native Portable Projector
- Telecomando
- Cavo di alimentazione
- Cavo HDMI
- cavo AV
- Manuale d'uso
- 100-inch Projector Screen (as indicated in product images)
4. Prodotto finitoview
Familiarizzare con i componenti e le interfacce del proiettore.

Image: The VILINICE projector shown with its remote controls, highlighting its compact design.
4.1 Fronte e lato View
- Lente di proiezione: Emette l'immagine sullo schermo.
- Anello di messa a fuoco: Regola la nitidezza dell'immagine.
- Anello di correzione trapezoidale: Corregge la distorsione trapezoidale dell'immagine.
- Aperture di ventilazione: Per la dissipazione del calore. Non ostruire.

Image: The projector's rear and side panels displaying multiple connectivity options including AV, AUX, HDMI, USB, VGA, and SD card slot.
4.2 Rear and Side Interfaces
- Porta AV: Per collegare dispositivi più vecchi tramite un cavo AV.
- AUX (Audio Out) Port: Per collegare altoparlanti esterni o cuffie.
- Porte HDMI (x2): Per collegare dispositivi come laptop, console di gioco o chiavette TV.
- Porte USB (x2): For connecting USB drives to play media or power devices.
- Porta VGA: Per collegare computer dotati di uscita VGA.
- Slot per scheda SD: Per riprodurre contenuti multimediali direttamente da una scheda SD.
- Potenza in ingresso: Si collega all'alimentatore.
5. Impostazione
5.1 Posizionamento e proiezione
Position the projector on a stable surface. The optimal projection distance and screen size can vary. Ensure the projector is perpendicular to the screen for the best image quality.

Image: The projector set up for an outdoor movie night, demonstrating its portability and the included 100-inch screen.
The projector also features a mounting hole for ceiling or tripod installation.
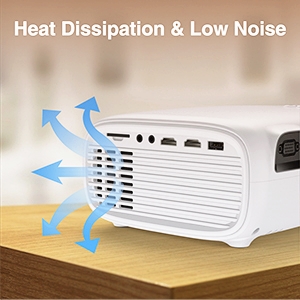
Immagine: Un dettaglio view of the projector's mounting hole, suitable for various installation methods.
5.2 Collegamento di alimentazione
Collegare il cavo di alimentazione all'ingresso di alimentazione del proiettore e quindi collegarlo a una presa di corrente.
5.3 Correzione della messa a fuoco e della distorsione trapezoidale
After powering on, adjust the focus ring on the projector lens until the image is clear. If the image appears trapezoidal, use the keystone correction ring to adjust it to a rectangular shape.

Image: Visual guide demonstrating how to adjust the focus and keystone correction for a clear and properly shaped image.
5.4 Collegamento dei dispositivi
Il proiettore supporta diverse sorgenti di input:
- HDMI: Connect laptops, TV sticks, gaming consoles (PS4, Xbox), or DVD players using an HDMI cable.
- USB: Insert a USB disk to play photos, videos, or music directly.
- VGA: Collegare computer o laptop più vecchi tramite un cavo VGA.
- AV: Connect legacy devices like VCRs or older DVD players.
- Scheda SD: Insert an SD card into the slot to access media files.
- Smartphone: For smartphone connectivity, an external MHL HDMI adapter (not included) may be required.
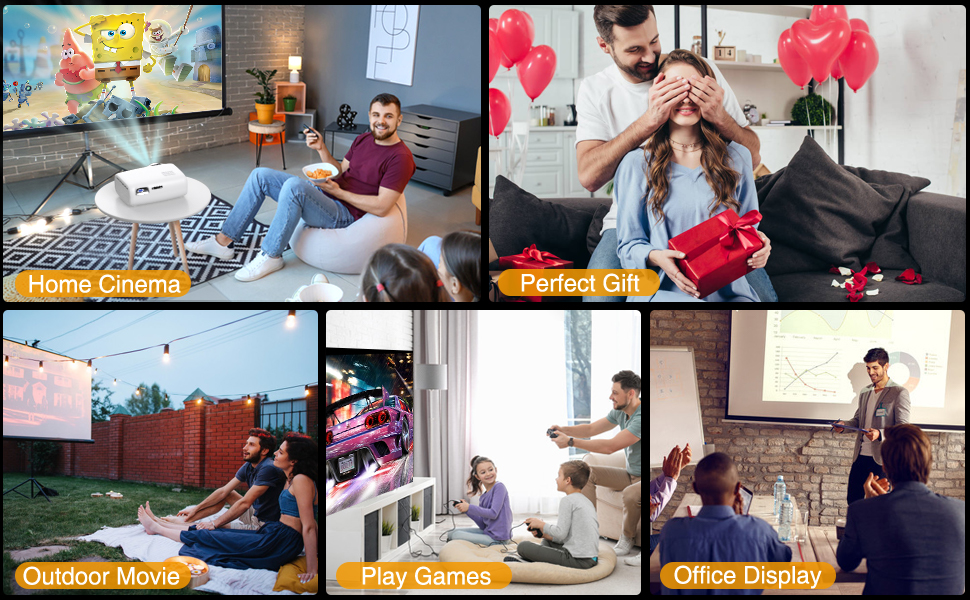
Image: Illustration of connecting a smartphone or laptop to the projector, emphasizing ease of use.
6. Funzionamento
6.1 Accensione/Spegnimento
Premere il pulsante di accensione sul proiettore o sul telecomando per accendere o spegnere il dispositivo.
6.2 Selezione della sorgente di input
Use the "Source" button on the remote control or the projector's control panel to select the desired input source (HDMI1, HDMI2, USB, VGA, AV, SD Card).
6.3 Regolazione delle impostazioni
Navigate the on-screen menu using the remote control to adjust various settings:
- Impostazioni immagine: Regola luminosità, contrasto, colore e proporzioni.
- Impostazioni audio: Control volume and audio modes. The projector features a built-in HiFi stereo speaker for an immersive audio experience.
- Funzione zoom: The projector supports a 100%-75% zoom function, allowing you to adjust the screen size without moving the projector.
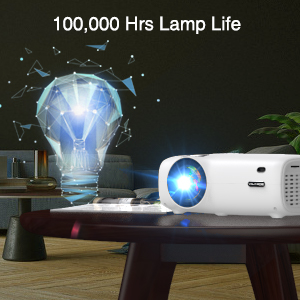
Image: Visual representation of the projector's zoom function, showing how the image size can be reduced from 100% to 75%.

Image: A family enjoying a movie projected by the VILINICE projector, highlighting the built-in HiFi stereo speaker for a great auditory experience.
7. Manutenzione
Proper maintenance ensures optimal performance and longevity of your projector.
- Pulizia delle lenti: Use a soft, lint-free cloth and lens cleaning solution specifically designed for optical lenses. Do not use abrasive cleaners.
- Rimozione della polvere: Regularly clean the projector's exterior with a soft, dry cloth. Use a can of compressed air to gently clear dust from ventilation openings.
- Magazzinaggio: Quando non in uso, conservare il proiettore in un luogo fresco e asciutto, lontano dalla luce solare diretta e da temperature estreme.
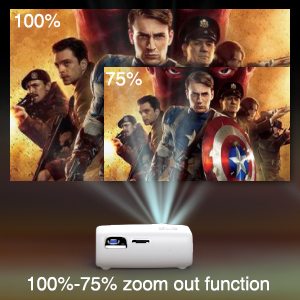
Image: Illustration of the projector's heat dissipation system, designed for efficient cooling and low noise operation.
The projector is designed with a long-lasting lamp durata fino a 100,000 ore.

Image: A visual representation emphasizing the projector's extended lamp lifespan of 100,000 hours.
8. Risoluzione Dei Problemi
In caso di problemi, fare riferimento ai seguenti problemi comuni e alle relative soluzioni:
- Nessun potere:
- Assicurarsi che il cavo di alimentazione sia collegato saldamente sia al proiettore sia alla presa di corrente.
- Controllare se la presa di corrente funziona.
- Nessuna immagine:
- Verificare che la sorgente di ingresso sia selezionata correttamente (ad esempio, HDMI1, USB).
- Check the connection cable (HDMI, VGA, AV) between the projector and the source device.
- Assicurarsi che il dispositivo sorgente sia acceso e che emetta un segnale.
- Immagine sfocata:
- Regolare l'anello di messa a fuoco sull'obiettivo del proiettore.
- Assicurarsi che la distanza di proiezione rientri nell'intervallo consigliato.
- Pulire la lente del proiettore se è sporca.
- Immagine trapezoidale:
- Adjust the keystone correction ring until the image is rectangular.
- Ensure the projector is placed on a flat surface and is perpendicular to the screen.
- Nessun suono:
- Aumentare il volume sia sul proiettore che sul dispositivo sorgente.
- Verificare che gli altoparlanti esterni siano collegati e funzionino correttamente.
- Assicurarsi che le impostazioni di uscita audio sul dispositivo sorgente siano corrette.
9. Specifiche
Below are the technical specifications for the VILINICE 6500 Lumens 720P Native Portable Projector:
| Caratteristica | Specificazione |
|---|---|
| Marca | VILINICE |
| Risoluzione dello schermo | Nativo 1280 x 720 (720P) |
| Risoluzione supportata | 1080P Full HD |
| Luminosità | 6500 lumen |
| Tipo di visualizzazione | LCD |
| Tecnologia di connettività | HDMI, MHL, USB, VGA |
| Caratteristica speciale | Portable, 100%-75% Zoom Function |
| Tipo di altoparlante | Built-In, Surround (HiFi Stereo) |
| Lamp Vita | Fino a 100,000 ore |
| Peso dell'articolo | 4.92 libbre |
| Dimensioni del prodotto | 12.6 x 5.51 x 8.27 pollici |
10. Garanzia e supporto
VILINICE products come with a standard manufacturer's warranty. For detailed warranty information, product support, or technical assistance, please refer to the warranty card included in your package or visit the official VILINICE website. Do not attempt to open or modify the projector, as this may void your warranty.