
1. Introduzione
Thank you for choosing the Melitta Enjoy Top Timer 1017-11 Filter Coffee Machine. This appliance is designed to brew delicious filter coffee with ease and convenience. Please read this manual carefully before first use to ensure proper operation and maintenance.
Contenuto della confezione:
- 1 Melitta Enjoy Top Timer 1017-11 Filter Coffee Machine
- 1 Glass Carafe
- 1 Removable Swivel Filter Holder
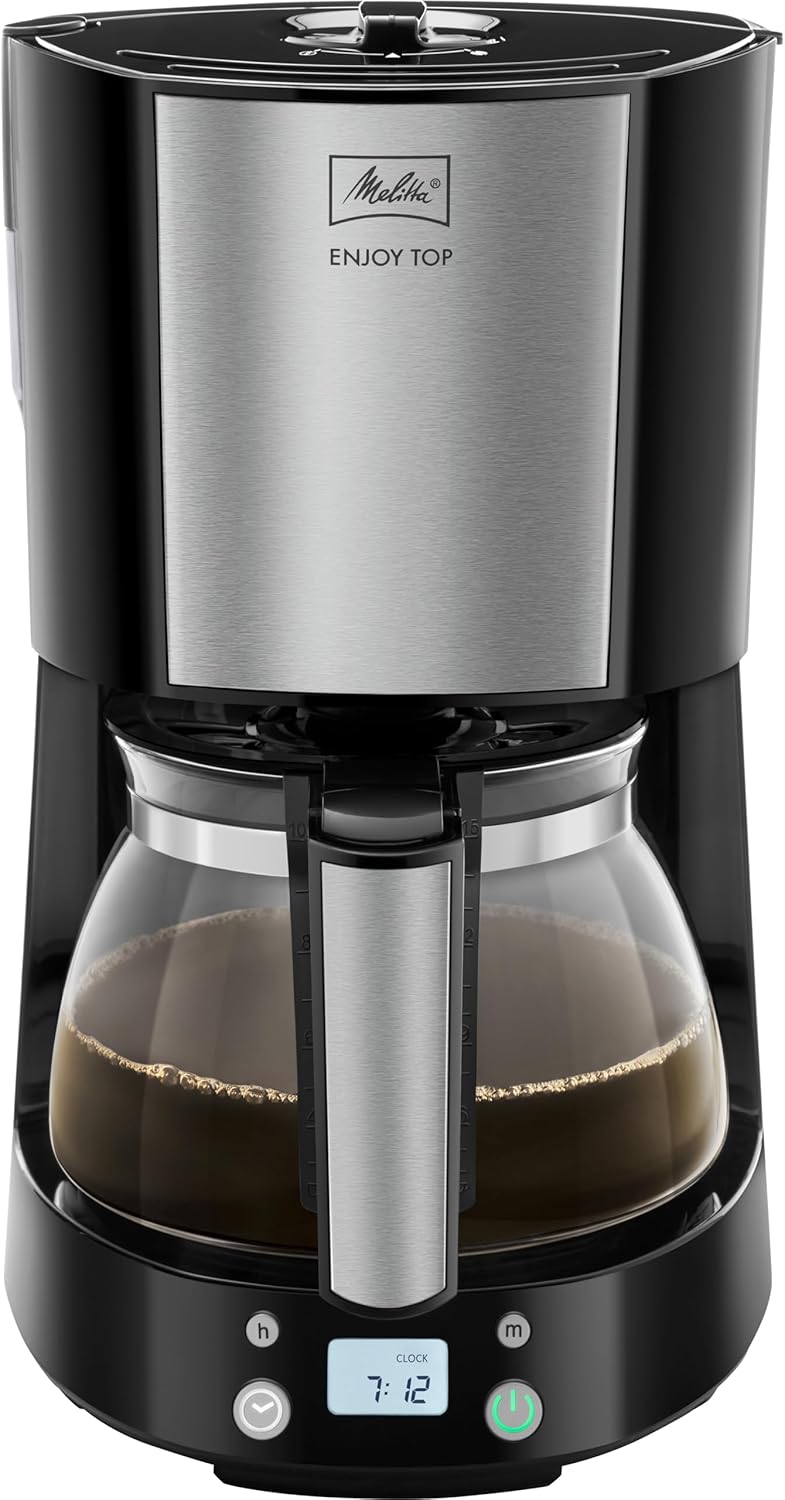
Davanti view of the Melitta Enjoy Top Timer coffee machine, showing the control panel, glass carafe, and water level indicator.
2. Importanti istruzioni di sicurezza
Per evitare lesioni o danni all'apparecchio, osservare le seguenti precauzioni di sicurezza:
- Leggere tutte le istruzioni prima di mettere in funzione l'apparecchio.
- Non immergere l'apparecchio, il cavo o la spina in acqua o altri liquidi.
- Tenere l'apparecchio fuori dalla portata dei bambini.
- Scollegare sempre l'apparecchio dalla presa di corrente prima di pulirlo e quando non è in uso.
- Non utilizzare alcun apparecchio con un cavo o una spina danneggiati oppure dopo che l'apparecchio stesso non funziona correttamente o è stato danneggiato in qualsiasi modo.
- Use the appliance only for its intended purpose of brewing coffee.
- Evitare il contatto con superfici calde. Utilizzare maniglie o manopole.
- Ensure the glass carafe is placed correctly on the warming plate during operation.
3. Componenti finitiview
Familiarize yourself with the parts of your Melitta Enjoy Top Timer coffee machine:
- Serbatoio dell'acqua: Transparent tank with a clear scale for easy filling.
- Coperchio: Covers the water tank and filter holder.
- Removable Swivel Filter Holder: Holds the coffee filter bag and swings out for easy access.
- Sistema antigoccia: Prevents coffee from dripping when the carafe is removed.
- Caraffa di vetro: Per raccogliere e servire il caffè preparato.
- Piastra riscaldante: Mantiene il caffè caldo dopo la preparazione.
- Pannello di controllo: Includes illuminated on/off switch, timer buttons, and AromaSelector dial.
- AromaSelector: Dial to adjust coffee strength from mild to intense.

Primo piano dall'alto view of the coffee machine, highlighting the lid and the AromaSelector dial for adjusting coffee strength.

Detail of the drip stop mechanism located above the glass carafe, ensuring no drips when the carafe is removed.
4. Impostazione
4.1 Primo utilizzo
- Disimballare tutti i componenti e rimuovere eventuali materiali di imballaggio.
- Clean the glass carafe, lid, and removable filter holder with warm soapy water. Rinse thoroughly and dry.
- Riempire il serbatoio dell'acqua con acqua fresca e fredda fino al livello massimo.
- Place an empty filter bag (size 1x4) into the filter holder.
- Run the machine with water only (without coffee) to clean the internal components. Repeat this process once or twice.
4.2 Preparazione per la fermentazione
- Assicurarsi che la macchina sia scollegata.
- Fill the water tank with the desired amount of fresh, cold water. The transparent tank has a scale for easy measurement.
- Swing out the removable filter holder.
- Insert a Melitta 1x4 filter bag into the filter holder.
- Add the desired amount of ground coffee into the filter bag. A general guideline is one level scoop (approx. 6-7g) per cup.
- Swing the filter holder back into place until it clicks.
- Posizionare la caraffa di vetro con il coperchio sulla piastra riscaldante.
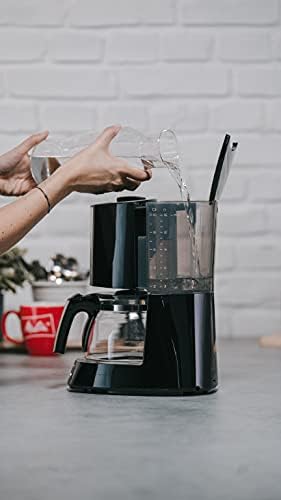
A person pouring fresh water into the transparent water tank of the coffee machine, illustrating the filling process.

The swivel filter holder of the coffee machine is shown open, revealing the filter basket designed for 1x4 filter bags.
5. Funzionamento
5.1 Erogazione del caffè
- After preparing the machine (Section 4.2), plug the power cord into a suitable electrical outlet.
- Press the illuminated On/Off switch to start the brewing process. The light will indicate that the machine is operating.
- Coffee will begin to drip into the glass carafe.
- Once brewing is complete, the machine will automatically switch to the warming function. The warming plate will keep the coffee hot for a period before automatically shutting off.
- To turn off the machine manually, press the On/Off switch again.
5.2 Using the AromaSelector
The AromaSelector allows you to customize your coffee's strength from mild to intense. Simply turn the dial on the top of the machine to your preferred setting before starting the brewing process.
5.3 Utilizzo della funzione Timer
The integrated timer allows you to program the machine to start brewing at a specific time.
- Set the current time using the 'h' (hour) and 'm' (minute) buttons on the control panel.
- Press the timer button (usually indicated by a clock icon). The display will show 'TIMER'.
- Use the 'h' and 'm' buttons to set the desired start time for brewing.
- Press the timer button again to confirm. The timer indicator will light up.
- Ensure the machine is prepared with water and coffee (Section 4.2). The machine will automatically start brewing at the set time.
6. Pulizia e manutenzione
Una pulizia regolare garantisce prestazioni ottimali e prolunga la durata della macchina da caffè.
6.1 Pulizia giornaliera
- Scollegare sempre l'apparecchio e lasciarlo raffreddare prima di pulirlo.
- Remove the used filter bag from the swivel filter holder.
- The filter insert, glass carafe, and its lid are dishwasher safe. Alternatively, wash them by hand with warm soapy water and rinse thoroughly.
- Pulisci l'esterno della macchina da caffè con un panno damp stoffa. Non utilizzare detergenti abrasivi.
- The water tank can be easily cleaned by hand.
6.2 Decalcificazione
Over time, mineral deposits (limescale) can build up in your coffee machine, affecting performance and taste. Descale your machine regularly, depending on water hardness and frequency of use.
- Use a commercially available descaling agent suitable for coffee machines, following the manufacturer's instructions.
- Fill the water tank with the descaling solution as instructed.
- Metti la caraffa di vetro sulla piastra riscaldante.
- Start the brewing cycle without coffee.
- After the descaling solution has run through, run the machine with fresh water at least twice to rinse thoroughly.
7. Risoluzione Dei Problemi
If you encounter problems with your coffee machine, refer to the following table for common issues and solutions:
| Problema | Possibile causa | Soluzione |
|---|---|---|
| Il caffè non si prepara. | Machine not plugged in; On/Off switch not pressed; no water in tank. | Check power connection; press On/Off switch; fill water tank. |
| Il caffè ha un sapore debole o troppo forte. | Incorrect coffee-to-water ratio; AromaSelector setting. | Adjust coffee amount; adjust AromaSelector dial. |
| Perdite d'acqua dalla macchina. | Water tank overfilled; carafe not correctly placed; filter holder not closed properly. | Do not overfill water tank; ensure carafe is centered; close filter holder securely. |
| Brewing process is slow. | Accumulo di calcare. | Decalcificare la macchina (Sezione 6.2). |
8. Specifiche tecniche
| Marca: | Melitta |
| Nome modello: | Enjoy Top Timer |
| Numero modello: | 1017-11 |
| Tipo di caffettiera: | Macchina per caffè americano |
| Capacità: | 1.3 litri (circa 10 tazze) |
| Colore: | Nero |
| Dimensioni del prodotto (PxLxA): | Dimensioni: 27.5 cm x 19 cm x 32 cm |
| Peso dell'articolo: | 2.25 chilogrammi |
| Cosatage: | 1080 Watt |
| Voltage: | 240 Volt |
| Modalità operativa: | Completamente automatico |
| Input dell'interfaccia utente: | Pulsanti |
| Coffee Type Used: | Filtro Borse |
| Dimensioni del filtro del caffè: | 1x4 (#6) |
| Tipo di filtro: | Reusable (for filter holder) |
| Caratteristiche speciali: | Removable Swivel Filter, Drip Stop, Timer, AromaSelector |
| Componenti inclusi: | Glass Carafe, Removable Swivel Filter |
| Materiale: | Acciaio inossidabile, plastica |
| Finitura esterna: | Acciaio inossidabile |
| Componenti lavabili in lavastoviglie: | Filter insert, Glass Carafe, Lid |
| Paese di origine: | Cina |
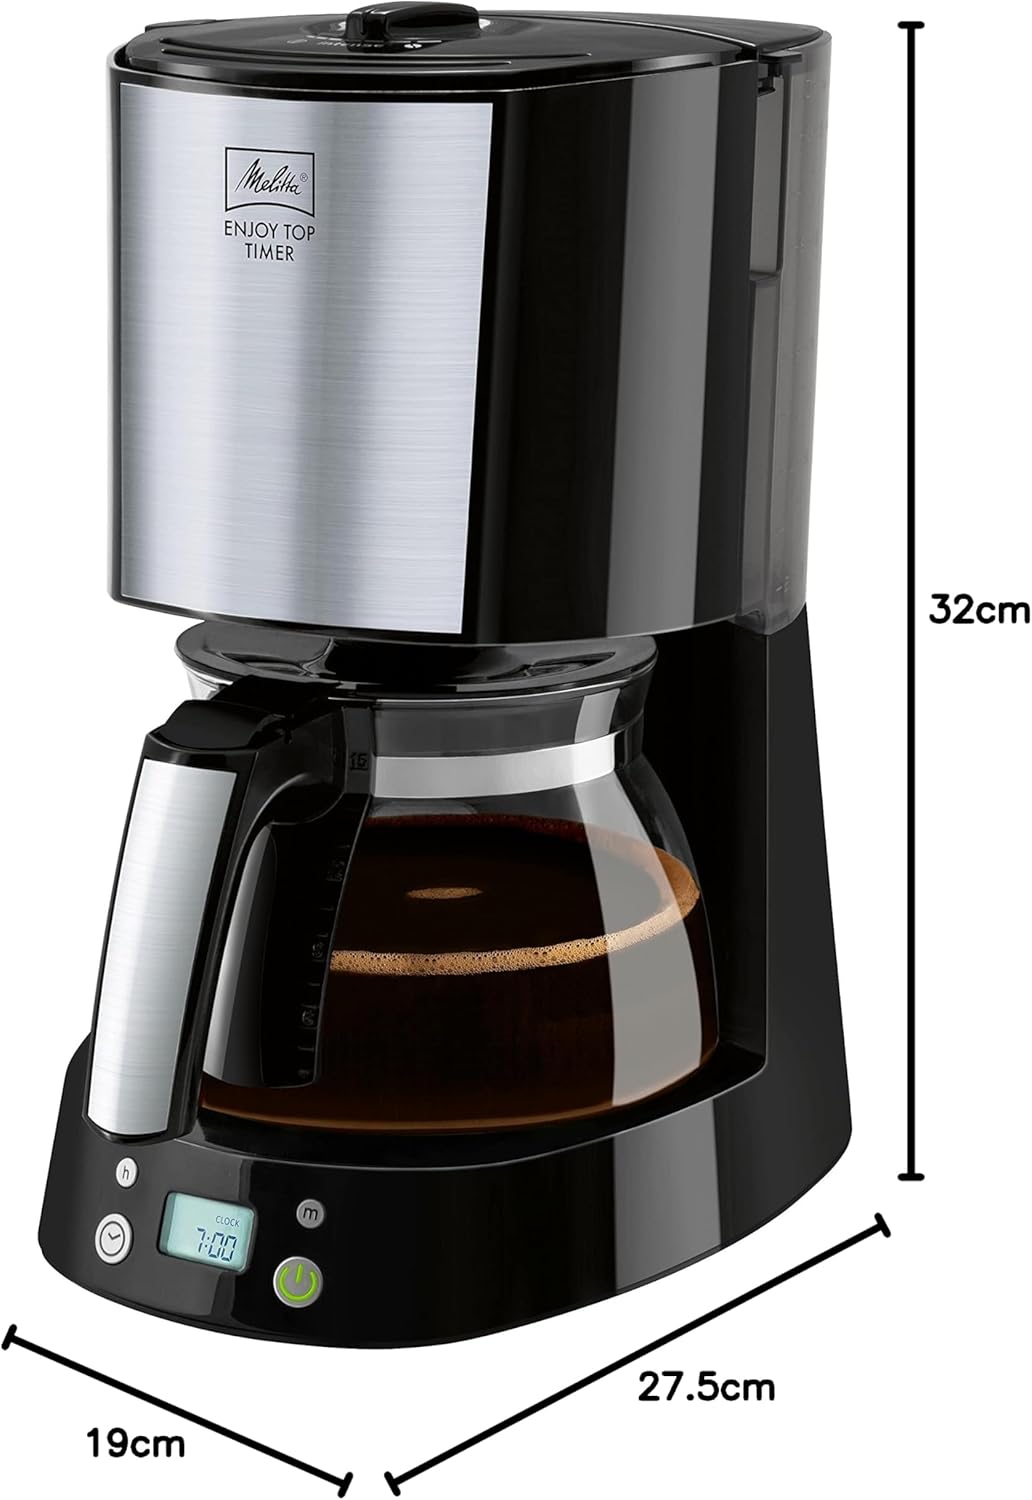
Diagram showing the dimensions of the coffee machine: 19 cm width, 27.5 cm depth, and 32 cm height.
9. Garanzia e assistenza clienti
For warranty information and customer support, please refer to the warranty card included with your product or visit the official Melitta websito. Conservare la prova d'acquisto per eventuali reclami in garanzia.


