
1. Prodotto finitoview
Thank you for choosing the Arlux Lighting Onyx R2 Round Recessed LED Spot Light. This product is designed for indoor use, providing efficient and modern illumination. This manual provides essential information for the safe installation, operation, and maintenance of your new LED spot light.
Informazioni sulla sicurezza
- Leggere attentamente tutte le istruzioni prima dell'installazione e dell'uso.
- L'installazione deve essere eseguita da un elettricista qualificato, nel rispetto delle normative e dei codici elettrici locali.
- Ensure the power supply is disconnected at the main circuit breaker before installation, maintenance, or cleaning.
- Non modificare il prodotto in alcun modo. Modifiche non autorizzate potrebbero invalidare la garanzia e comportare rischi per la sicurezza.
- Questo prodotto è progettato esclusivamente per uso interno. Non esporre a umidità o temperature estreme.
- Non guardare direttamente la sorgente luminosa a LED quando è accesa, poiché ciò potrebbe causare affaticamento o danni agli occhi.
- Tenere i materiali di imballaggio fuori dalla portata dei bambini.
2. Contenuto della confezione
Prima di procedere con l'installazione, verificare che tutti i componenti siano presenti e integri.
- 1 x Arlux Lighting Onyx R2 Round Recessed LED Spot Light
- 1 x LED Driver (Power Supply)
- Hardware di montaggio

Image 2.1: The Arlux Lighting Onyx R2 Recessed LED Spot Light shown with its separate LED driver (power supply) and connecting cable.
3. Specifiche
| Marca | Arlux Lighting |
| Modello | Onyx R2 |
| Tipo | Recessed LED Spot Light |
| Forma | Girare |
| Consumo energetico | 18 Watt |
| Flusso luminoso | 1550 lumen |
| Temperatura del colore | 4000 Kelvin (bianco neutro) |
| Materiale | Alluminio |
| Colore | Bianco |
| Peso dell'articolo | 390 grammi |
| Tipo di installazione | Montaggio a soffitto (incassato) |
| Fonte di alimentazione | Elettrico con cavo |
| Usi specifici | Ceiling illumination for indoor spaces |
4. Configurazione e installazione
4.1 Lista di controllo pre-installazione
- Strumenti necessari: Drill, hole saw (appropriate diameter for recess), wire strippers, screwdriver, voltagetester.
- Alimentazione elettrica: Ensure the electrical circuit is compatible with the spot light's power requirements (18W).
- Ceiling Space: Verify sufficient clearance above the ceiling for the fixture and driver.
- La sicurezza prima di tutto: Prima di iniziare qualsiasi lavoro elettrico, disattivare sempre l'alimentazione principale tramite l'interruttore automatico.
4.2 Passaggi di installazione
- Preparare il soffitto: Using an appropriate hole saw, cut a circular opening in the ceiling at the desired installation location. Refer to the product specifications for the exact cutout diameter (typically around Ø200-210mm for a Ø225mm fixture).
- Connect the Driver: Connect the AC input wires from your household electrical supply to the input terminals of the LED driver. Ensure correct polarity (Live, Neutral, Earth) as indicated on the driver. Secure connections firmly.
- Connect the Spot Light: Plug the DC output cable from the LED driver into the corresponding input port on the back of the Onyx R2 spot light. This connection is typically a simple plug-and-play connector.
- Insert the Spot Light: Gently push the spring clips on the sides of the spot light upwards and insert the fixture into the prepared ceiling opening. The spring clips will hold the light securely in place.
- Controllo finale: Ensure the spot light is flush with the ceiling surface and securely mounted.
- Ripristina alimentazione: Riattivare l'alimentazione principale tramite l'interruttore automatico.
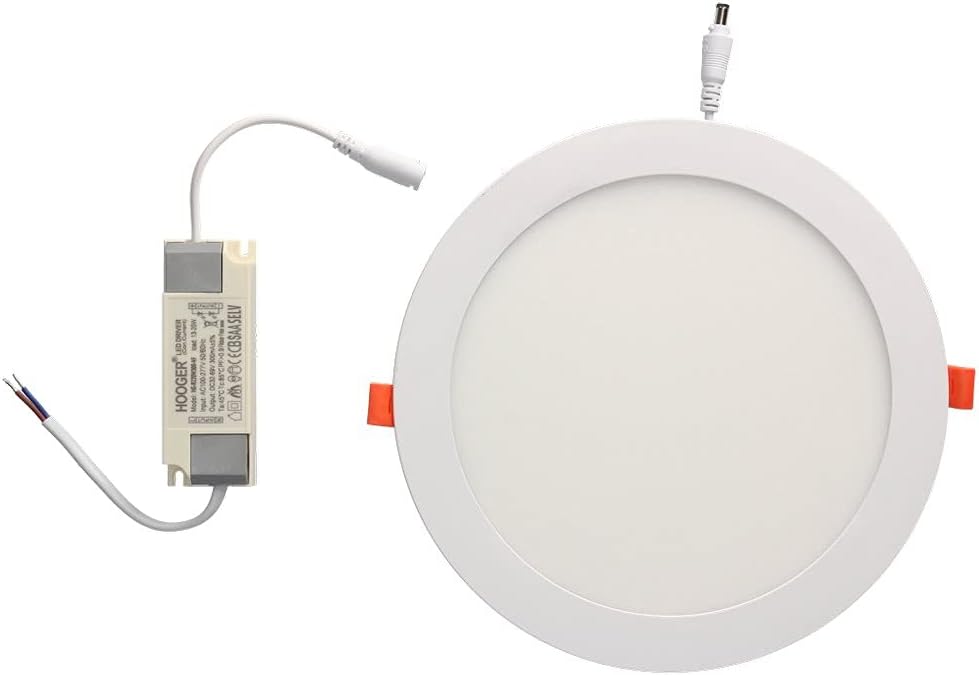
Image 4.1: The Arlux Lighting Onyx R2 Recessed LED Spot Light shown installed flush within a ceiling, providing ambient lighting.
5. Istruzioni per l'uso
The Arlux Lighting Onyx R2 Recessed LED Spot Light operates immediately upon receiving power. It is typically controlled by a standard wall switch connected to the electrical circuit.
- Accensione/spegnimento: Per accendere o spegnere la luce, utilizzare l'interruttore a parete collegato all'apparecchio di illuminazione.
- dimming: This model is not specified as dimmable. Attempting to use it with a non-compatible dimmer switch may cause damage or malfunction.
6. Manutenzione
The Arlux Lighting Onyx R2 LED Spot Light requires minimal maintenance.
- Pulizia: Ensure the power is off before cleaning. Wipe the surface of the light with a soft, dry, or slightly damp panno. Non utilizzare detergenti abrasivi, solventi o prodotti chimici aggressivi, poiché potrebbero danneggiare la finitura o i componenti elettrici.
- Longevità dei LED: LED lights have a long lifespan and do not require bulb replacement. If the light stops functioning, refer to the troubleshooting section.
7. Risoluzione Dei Problemi
If you encounter issues with your Arlux Lighting Onyx R2 LED Spot Light, please consult the following table before contacting support.
| Problema | Possibile causa | Soluzione |
|---|---|---|
| La luce non si accende | Nessuna alimentazione Collegamento del cablaggio allentato Driver LED difettoso Faulty light fixture | Controllare l'interruttore automatico e l'interruttore a parete. Verificare che tutti i collegamenti elettrici siano saldi (prima spegnere l'alimentazione). Test the driver if possible, or replace it. If driver is functional, the fixture may be faulty; contact support. |
| La luce tremola | Alimentazione instabile Cablaggio allentato Incompatible dimmer switch (if used) | Ensure stable power. Check for loose connections. Remove dimmer switch if not compatible, or replace with a compatible LED dimmer. |
| La luce è debole | Alimentazione errata Voltage goccia | Ensure the correct LED driver is used. Consultare un elettricista per verificare il voltage issues in your electrical system. |
8. Garanzia e supporto
Information regarding specific warranty terms for the Arlux Lighting Onyx R2 Round Recessed LED Spot Light is not available in the provided product details. For warranty inquiries or technical support, please contact your retailer or the manufacturer directly.
Spare parts availability information is also not available. Please contact your point of purchase for assistance with replacement components.