1. Introduzione
Thank you for choosing the Greadio MD-T26 Portable AM/FM/SW Radio. This manual provides detailed instructions for the proper setup, operation, and maintenance of your radio. Please read this manual thoroughly before use to ensure optimal performance and longevity of your device.
The Greadio MD-T26 is a versatile portable radio featuring AM, FM, and Shortwave (SW) bands, an LCD display for clear frequency and time viewing, and dual power options for both indoor and outdoor use. It is designed for ease of use with large, accessible controls and a built-in speaker for clear audio.

Figura 1: Fronte view of the Greadio MD-T26 Portable AM/FM/SW Radio.
2. Caratteristiche del prodotto
- Ricezione multibanda: Receives AM, FM, and Shortwave (SW) frequencies.
- Schermo LCD: Clear digital display for frequency and time settings.
- Opzioni doppia alimentazione: Operates via AC power or 4 x D cell batteries (not included).
- Altoparlante di alta qualità: Integrated 2W speaker for clear sound output.
- Controllo dei toni: Adjustable tone settings (Low/High) for personalized audio.
- Spinotto degli auricolari: 3.5mm stereo earphone jack for private listening.
- Design portatile: Equipped with a sturdy handle for easy transport.
3. Impostazione
3.1 Accensione della radio
The Greadio MD-T26 radio offers two methods for power supply:
- Alimentazione CA: For indoor use, connect the included AC power cable to the radio's AC input jack and then plug it into a standard wall outlet.
- Alimentazione a batteria: For portable use, insert four (4) D cell batteries (not included) into the battery compartment located on the back of the radio. Ensure correct polarity (+/-) as indicated inside the compartment.
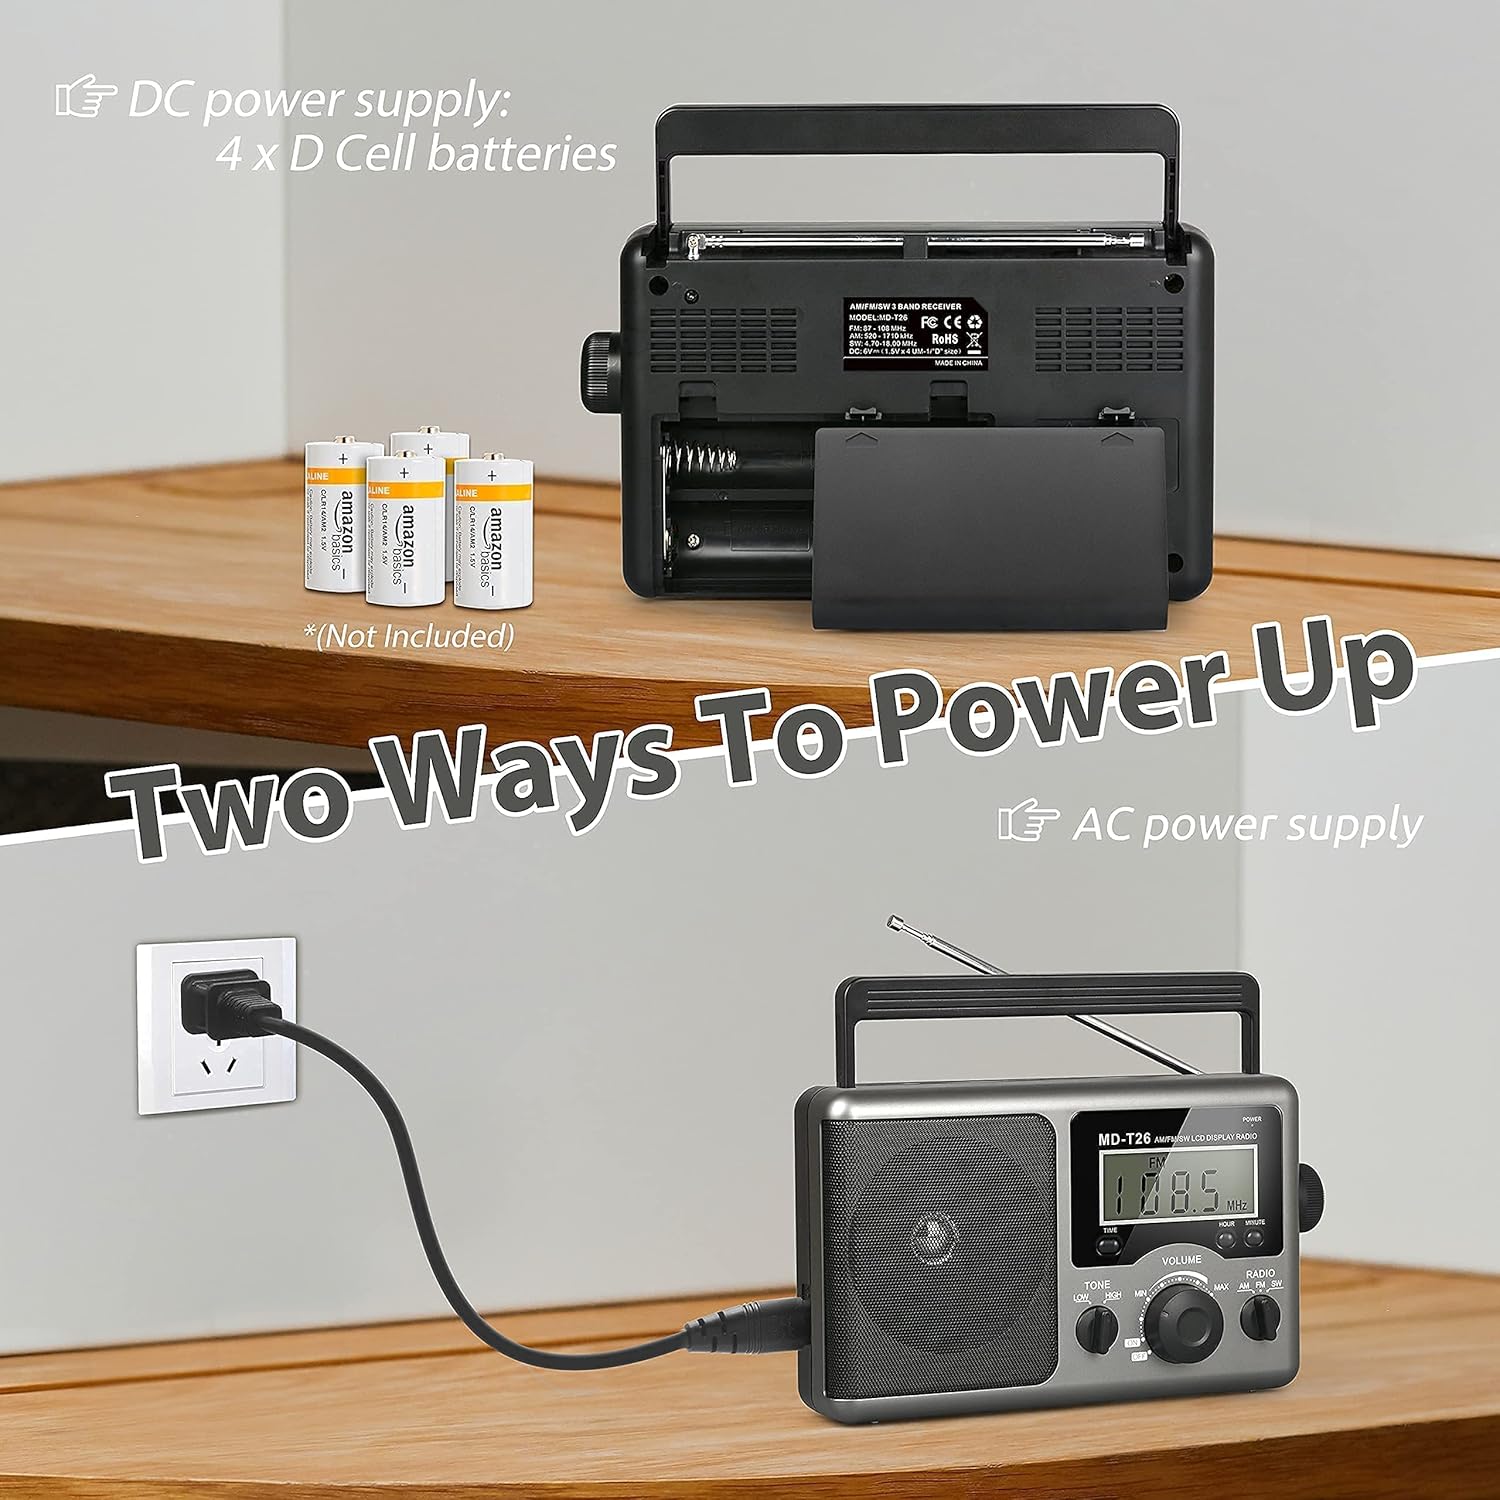
Figure 2: Illustration of AC power connection and battery compartment for D cell batteries.
3.2 Regolazione dell'antenna
For optimal reception, adjust the antenna as follows:
- Ricezione FM/SW: Extend the telescopic antenna fully and adjust its angle for the clearest signal.
- Ricezione AM: The radio uses a built-in ferrite rod antenna for AM. Rotate the entire radio unit to find the strongest signal.
4. Istruzioni per l'uso
4.1 controlli oltreview

Figura 3: dettagliata view del pannello di controllo della radio.
- Pulsante di accensione: Located on the top right, press to turn the radio ON/OFF.
- Manopola di accordatura: Located on the right side, rotate to select radio stations.
- Manopola VOLUME: Located on the front panel, rotate to adjust the sound level.
- RADIO Band Selector: Switch between AM, FM, and SW bands.
- Interruttore TONE: Select between LOW and HIGH tone settings.
- TIME/HOUR/MINUTE Buttons: Used for setting the time on the LCD display.
4.2 Turning On and Selecting a Band
- Premere il tasto ENERGIA button to turn on the radio. The LCD display will illuminate.
- Utilizzare il RADIO band selector switch to choose your desired band: AM, FM, or SW.
4.3 Sintonizzazione su una stazione
Once a band is selected, slowly rotate the ACCORDATURA knob on the right side of the radio. Observe the frequency displayed on the LCD screen. Stop rotating when you hear your desired station clearly.
4.4 Regolazione del volume e del tono
- Volume: Ruotare il VOLUME manopola sul pannello frontale in senso orario per aumentare il volume e in senso antiorario per diminuirlo.
- Tono: Utilizzare il TONO switch to select between 'LOW' for a warmer sound or 'HIGH' for a brighter sound, according to your preference.
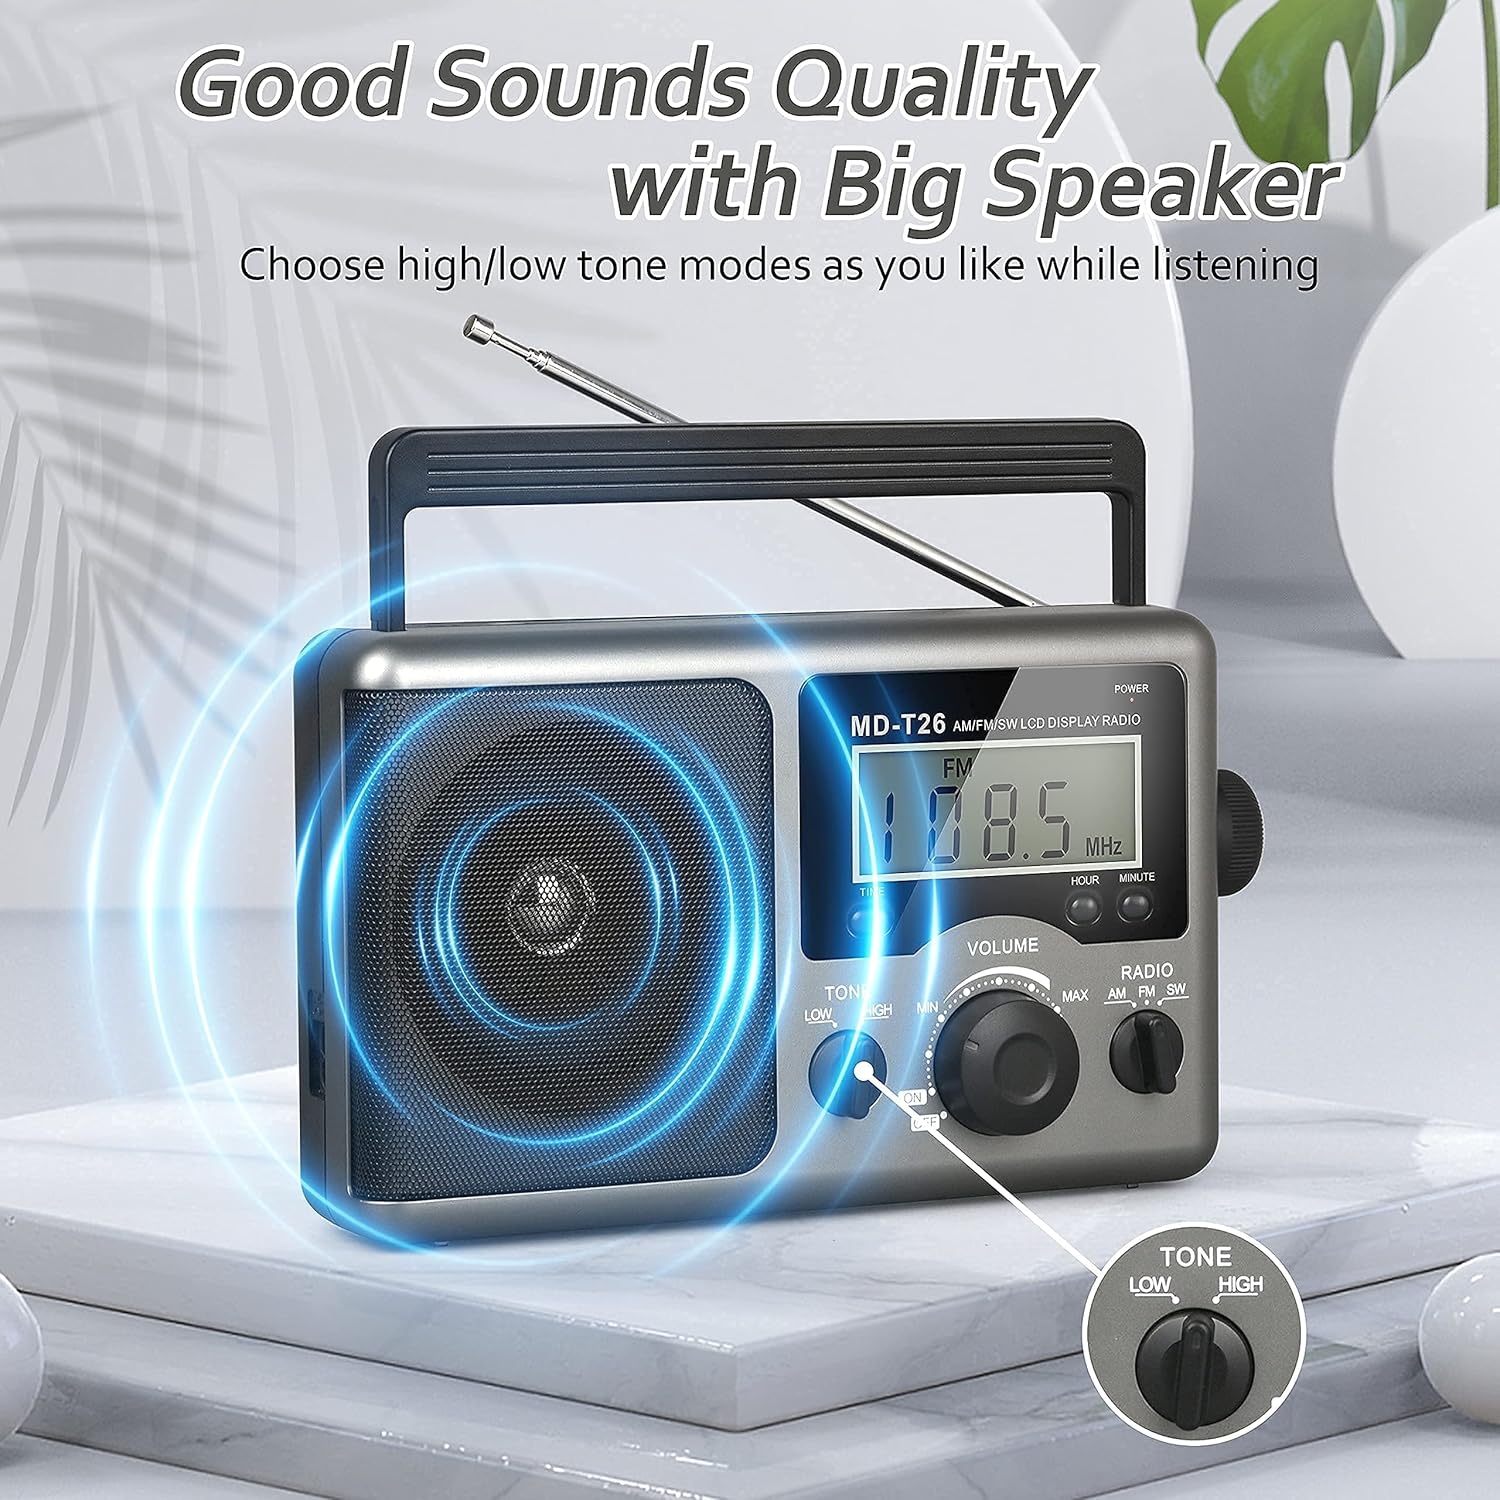
Figure 4: Speaker and Tone control detail.
4.5 Impostazione dell'ora
The LCD display can also show the current time. To set the time:
- Premere il tasto TEMPO button once to enter time setting mode.
- Utilizzare il ORA pulsante per regolare l'ora.
- Utilizzare il MINUTO pulsante per regolare i minuti.
- The time system is 24-hour format.
4.6 Utilizzo del jack per auricolari
For private listening, plug any standard 3.5mm stereo earphones (not included) into the SPINOTTO DEGLI AURICOLARI located on the side of the radio. The internal speaker will automatically mute when earphones are connected.
5. Manutenzione
- Pulizia: Pulire l'esterno della radio con un panno morbido e asciutto. Non utilizzare detergenti abrasivi o solventi.
- Cura della batteria: If the radio will not be used for an extended period, remove the D cell batteries to prevent leakage and damage.
- Magazzinaggio: Conservare la radio in un luogo fresco e asciutto, lontano dalla luce solare diretta e da temperature estreme.
- Resistenza all'acqua: Questa radio lo è non resistente all'acqua. Avoid exposure to rain, moisture, or splashing water.
6. Risoluzione Dei Problemi
| Problema | Possibile causa | Soluzione |
|---|---|---|
| Nessun potere | AC cable not connected, batteries depleted or incorrectly inserted. | Check AC cable connection. Replace batteries or ensure correct polarity. |
| Ricezione scarsa / Statica | Antenna not extended/adjusted, weak signal area, interference. | Extend and adjust telescopic antenna (FM/SW). Rotate radio for AM. Move to an area with better signal. Avoid sources of electronic interference. |
| Nessun suono dall'altoparlante | Volume too low, earphones connected. | Increase volume. Disconnect earphones if not intended for private listening. |
| Il display LCD non funziona | Problema di alimentazione, guasto interno. | Controllare l'alimentatore. Se il problema persiste, contattare l'assistenza clienti. |
7. Specifiche
| Caratteristica | Dettaglio |
|---|---|
| Marca | Greadio |
| Numero di modello | MD-T26 |
| Tecnologia di connettività | Auxiliary (for earphone) |
| Tecnologia sintonizzatore | AM, FM, SO |
| Fonte di alimentazione | AC Power, 4 x D Cell Batteries |
| Dispositivi compatibili | Auricolare |
| Tipo di visualizzazione | LCD |
| Interfaccia Hardware | 3.5mm Jack audio |
| Livello di resistenza all'acqua | Non resistente all'acqua |
8. Garanzia e supporto
8.1 Informazioni sulla garanzia
Greadio provides a Garanzia di 12 mesi per questo prodotto, coprendo i difetti di fabbricazione a partire dalla data di acquisto. Inoltre, un Garanzia di rimborso di 30 giorni viene offerto.
La presente garanzia non copre i danni causati da uso improprio, incidenti, modifiche non autorizzate o normale usura.
8.2 Assistenza clienti
For any questions, technical assistance, or warranty claims, please contact Greadio customer service. We offer Servizio clienti 24 ore su 7, XNUMX giorni su XNUMX per assisterti.
Fare riferimento alla confezione del prodotto o al rivenditore websito per le informazioni di contatto più aggiornate.