
Data di arrivo ETA251590000
ETA Falco Smart Robot Vacuum Cleaner with Mopping Function User Manual
Modello: ETA251590000
1. Introduzione
Thank you for choosing the ETA Falco Smart Robot Vacuum Cleaner with Mopping Function. This manual provides essential information for the safe and efficient operation, maintenance, and troubleshooting of your device. Please read this manual thoroughly before using the product and keep it for future reference.
Informazioni importanti sulla sicurezza
- Assicurarsi sempre che il robot sia posizionato su una superficie stabile e piana.
- Tenere il dispositivo lontano da acqua e umidità.
- Do not allow children or unauthorized persons to operate the robot.
- Use only the original charging adapter and accessories provided.
- Before cleaning or maintenance, ensure the robot is powered off and unplugged from the charging station.
- Avoid operating the robot near open flames or flammable materials.
2. Prodotto finitoview
Componenti e controlli
Familiarize yourself with the main parts and controls of your ETA Falco Smart robot vacuum cleaner.
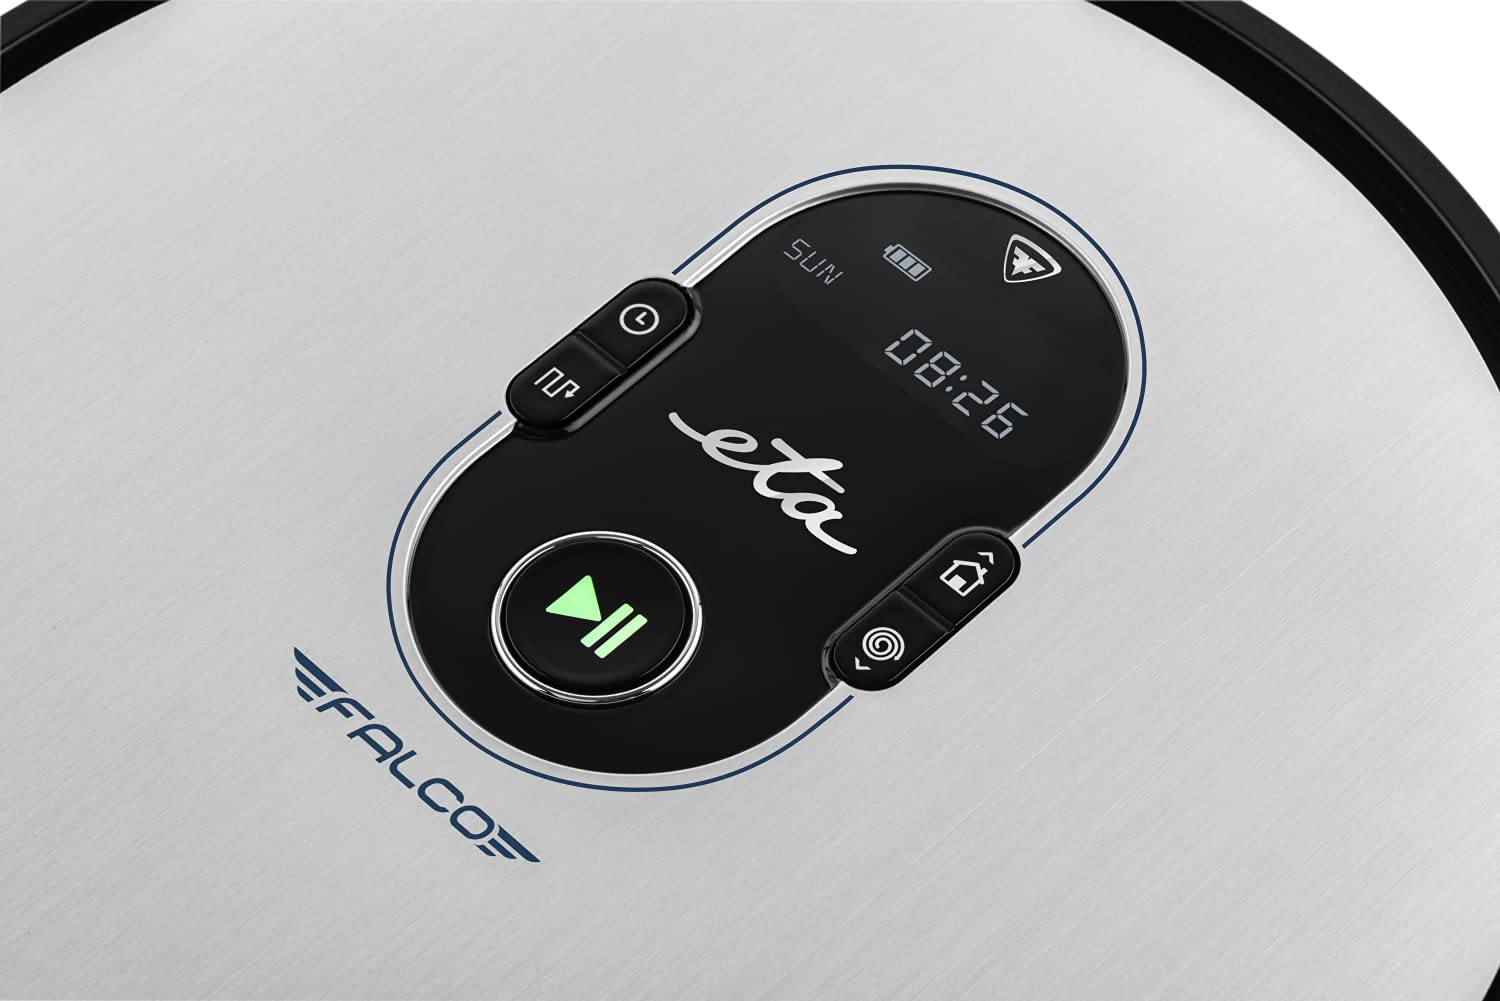
Immagine 2.1: Top panel controls. This image shows the main control panel on the top of the robot, including buttons for power, scheduling, and return to charging station, along with a digital display.

Immagine 2.2: Parte inferiore view. This image displays the bottom of the robot, highlighting the main brush, two side brushes, and the mop attachment.

Immagine 2.3: Underside diagram. This diagram labels the key components on the robot's underside, including the side brushes, main brush, and mop attachment.
3. Contenuto della confezione
Dopo aver disimballato, assicurarsi che siano presenti tutti i seguenti elementi:
- ETA Falco Smart Robot Vacuum Cleaner
- Stazione di ricarica
- Adattatore di ricarica
- Telecomando
- 2x Spare Side Brushes
- Special Rotary and Lamella Brush
- 2x Cleaning Cloths (Mop Pads)
- Filtro HEPA di ricambio
- Mop Attachment with 300 ml Water Tank
- Muro virtuale
4. Impostazione
4.1 Carica iniziale
- Posizionare la stazione di ricarica contro una parete in un'area aperta, assicurandosi che non vi siano ostacoli entro 1 metro ai lati e 2 metri davanti.
- Connect the charging adapter to the charging station and plug it into a power outlet.
- Place the robot vacuum cleaner on the charging station. Ensure the charging contacts align. The robot will begin charging automatically. A full charge takes approximately 5 hours.
4.2 Installazione delle spazzole laterali
Attach the side brushes to the designated posts on the underside of the robot by pressing them down until they click into place. Ensure the 'L' and 'R' markings on the brushes match the corresponding markings on the robot.
4.3 Connecting to the ETA SMART App
The ETA SMART app enhances the functionality of your robot. Download the app from your smartphone's app store. Follow the in-app instructions to connect your robot to your home Wi-Fi network and pair it with the app.
4.4 Setting up the Virtual Wall
The virtual wall creates an invisible barrier to restrict the robot's access to certain areas. Place the virtual wall device on the floor where you want to create a boundary. Ensure the infrared beam is directed towards the area you wish to block. The robot will detect this beam and avoid crossing it.

Immagine 4.1: Robot with charging station and virtual wall. This image shows the robot positioned near its charging station, with a virtual wall device placed nearby to illustrate its function.
5. Istruzioni per l'uso
5.1 modalità di pulizia
The ETA Falco Smart offers four distinct cleaning modes:
- INTELIGENTE: General cleaning mode for optimal coverage.
- CLASSICO: Standard cleaning pattern.
- BORDO: Pulisce lungo le pareti e i bordi dei mobili.
- INDIVIDUARE: Concentrated cleaning in a specific area.
You can select these modes via the ETA SMART app or the remote control.
5.2 Programmazione della pulizia
Use the ETA SMART app to set a cleaning schedule for your robot. You can program specific times and days for the robot to automatically start cleaning.
5.3 Controllo manuale
You can manually control the robot's movement and functions using the remote control or the ETA SMART app. The app also allows you to monitor cleaning activity, battery charge, and view cleaning routes.

Immagine 5.1: ETA Smart App features. This image displays the ETA Smart App interface on a smartphone, highlighting features such as remote control, cleaning history, activity monitoring, battery status, cleaning modes (SMART, CLASSIC, EDGE, SPOT), cleaning schedule, mopping intensity control, and suction power adjustment.
5.4 Funzione di lavaggio
- Fill the 300 ml water tank with clean water. Do not use detergents or cleaning solutions that are not approved for robot vacuums.
- Attach a clean mop pad to the mop attachment.
- Slide the mop attachment into the designated slot on the underside of the robot.
- Avvia un ciclo di pulizia. Il robot aspirerà e laverà contemporaneamente.
6. Manutenzione
Una manutenzione regolare garantisce prestazioni ottimali e prolunga la durata del tuo robot aspirapolvere.
6.1 Pulizia del contenitore della polvere e del filtro
- Premere il pulsante di rilascio del contenitore della polvere e rimuovere il contenitore della polvere.
- Open the dust bin and empty its contents into a trash can.
- Remove the HEPA filter and primary filter. Tap them gently to remove dust. If washable, rinse under running water and allow to air dry completely before reinserting.
- Wipe the inside of the dust bin with a dry cloth.
- Reassemble the filters and dust bin, then reinsert into the robot.
6.2 Pulizia della spazzola principale
- Capovolgi il robot.
- Rimuovere il coperchio della spazzola principale premendo le linguette di rilascio.
- Sollevare la spazzola principale.
- Utilizzare lo strumento di pulizia (se fornito) o le forbici per rimuovere peli e detriti aggrovigliati attorno alla spazzola.
- Pulire il vano spazzole.
- Reinserire la spazzola principale e fissare il coperchio.
6.3 Pulizia delle spazzole laterali
Periodically check the side brushes for tangled hair or debris. If necessary, remove them by gently pulling upwards and clean them. Replace worn or damaged brushes with the spare ones provided.
6.4 Pulizia del panno e del serbatoio dell'acqua
After each mopping session, remove the mop pad and wash it thoroughly. Empty any remaining water from the water tank and rinse it. Allow both to air dry completely before storing or reusing.
6.5 Pulizia dei sensori
Wipe the anti-drop sensors, bumper sensors, and charging contacts on the robot and charging station with a clean, dry cloth to ensure proper function.
7. Risoluzione Dei Problemi
Se il tuo robot aspirapolvere riscontra un problema, fai riferimento ai seguenti problemi comuni e alle relative soluzioni:
| Problema | Possibile causa | Soluzione |
|---|---|---|
| Il robot non si accende | Batteria scarica; interruttore di alimentazione spento | Caricare il robot; assicurarsi che l'interruttore di alimentazione sia su ON |
| Robot non in carica | Contatti di ricarica sporchi; Stazione di ricarica scollegata | Pulisci i contatti di ricarica; assicurati che la stazione di ricarica sia collegata |
| Scarse prestazioni di pulizia | Contenitore della polvere pieno; Spazzole aggrovigliate; Filtro intasato | Svuotare il contenitore della polvere; Pulire le spazzole; Pulire/sostituire il filtro |
| Il robot si blocca spesso | Ostacoli sul pavimento; Sensori sporchi | Clear floor of cables/small items; Clean sensors |
| Virtual wall not working | Virtual wall batteries low; Incorrect placement | Replace batteries; Adjust virtual wall position |
Se il problema persiste dopo aver provato queste soluzioni, contattare l'assistenza clienti.
8. Specifiche
Technical specifications for the ETA Falco Smart Robot Vacuum Cleaner (Model ETA251590000):
| Caratteristica | Dettaglio |
|---|---|
| Produttore | Arrivo previsto |
| Dimensioni del prodotto (L x P x A) | Dimensioni: 32.5 x 33.5 x 7.5 cm |
| Peso | 250 grammi |
| Numero modello articolo | ETA251590000 (T2261) |
| Colore del modello | Blu |
| Materiale | Plastica |
| Tipo di alimentazione | Alimentato a batteria |
| Voltage | 3 Volts (14.4V Li-ion battery, 2400 mAh) |
| Numero di articoli nel pacchetto | 1 |
| Caratteristiche speciali | Pet brush compatibility, Smart App control, Floating brush system, HEPA filter, Virtual wall |
| Componenti inclusi | Battery, Filter, Charging station, Adapter, Remote control, Side brushes, Rotary brush, Cleaning cloths, Mop attachment, Virtual wall |
| Composizione della batteria | Agli ioni di litio |
| Durata della batteria | Fino a 120 minuti |
| Tempo di ricarica | Circa 5 ore |
| Raccomandazione di superficie | Laminato |
| Tipo di controllore | Controllo dell'app |
| Disponibilità dei pezzi di ricambio | Informazioni non disponibili sui pezzi di ricambio |
9. Garanzia e supporto
For warranty information, product support, or to inquire about spare parts, please refer to the warranty card included with your purchase or visit the official ETA websito. Conservare la prova d'acquisto per eventuali reclami in garanzia.
Ask a question about this manual
Ask about setup, troubleshooting, compatibility, parts, safety, or missing instructions. Manuals+ will review the question and use this page’s manual context to help answer it.