
1. Introduzione
This manual provides essential information for the safe and efficient operation, maintenance, and troubleshooting of your Profile GE Automatic Espresso Machine + Milk Frother. Please read these instructions thoroughly before first use and retain for future reference.

Image 1.1: The Profile GE Automatic Espresso Machine with a prepared espresso and a latte.
2. Informazioni sulla sicurezza
Quando si utilizzano apparecchi elettrici, seguire sempre le precauzioni di sicurezza di base per ridurre il rischio di incendi, scosse elettriche e lesioni alle persone.
- Ensure the appliance is connected to a grounded outlet.
- Non immergere la macchina, il cavo o la spina in acqua o altri liquidi.
- Scollegare dalla presa quando non in uso e prima di pulirlo.
- Non utilizzare alcun apparecchio con cavo o spina danneggiati.
- Tenere mani e cavi lontani dalle superfici calde.
- Utilizzare solo gli accessori consigliati dal produttore.
3. Prodotto finitoview
Il professionistafile GE Automatic Espresso Machine is designed for convenience and quality, featuring an integrated grinder, milk frother, and smart connectivity.
3.1 Componenti
- Pannello di controllo: Touch-sensitive buttons for various drink selections and functions.
- Tramoggia dei fagioli: Stores whole coffee beans for grinding.
- Riserva d'acqua: Serbatoio rimovibile per l'approvvigionamento idrico.
- Beccuccio del caffè: Eroga il caffè preparato.
- Lancia vapore: Per montare il latte.
- vassoio antigoccia: Raccoglie i liquidi in eccesso.
- Contenitore per fondi: Raccoglie i fondi di caffè usati.

Image 3.1: The top control panel with buttons for Espresso, Americano, My Brew, Steam, and Hot Water.

Image 3.2: The integrated bean hopper with whole coffee beans and grind size adjustment knob.

Image 3.3: The removable water reservoir being lifted from the machine.
4. Impostazione
4.1 Disimballaggio e posizionamento iniziale
- Rimuovere con cautela tutto il materiale di imballaggio.
- Place the machine on a stable, level surface away from heat sources and direct sunlight.
- Garantire uno spazio adeguato attorno alla macchina per la ventilazione e l'accesso ai componenti.
4.2 Pulizia iniziale
Before first use, clean all removable parts with warm water and mild detergent. Rinse thoroughly and dry. Wipe the exterior of the machine with a damp stoffa.
4.3 Riempimento del serbatoio dell'acqua
- Remove the water reservoir from the machine (refer to Image 3.3).
- Fill with fresh, cold drinking water up to the MAX line.
- Replace the reservoir securely into the machine.
4.4 Aggiunta di chicchi di caffè
- Open the lid of the bean hopper (refer to Image 3.2).
- Pour whole coffee beans into the hopper. Do not overfill.
- Chiudere bene il coperchio.
4.5 Accensione e risciacquo iniziale
- Collegare il cavo di alimentazione a una presa elettrica dotata di messa a terra.
- Press the power button on the control panel. The machine will perform an initial rinse cycle.
- Posizionare un contenitore sotto l'erogatore del caffè per raccogliere l'acqua di risciacquo.
4.6 SmartHQ App Connection
For enhanced customization and software updates, connect your espresso machine to the SmartHQ app.
- Scarica l'app SmartHQ dall'app store del tuo dispositivo.
- Follow the in-app instructions to pair your espresso machine.
- Customize drink preferences, volume, and strength through the app.

Image 4.1: Using the SmartHQ app to control and customize the espresso machine.
5. Istruzioni per l'uso
5.1 Erogazione del caffè
The machine offers Espresso, Americano, Lungo, and Hot Water options. The 'My Cup' setting is pre-set to Ristretto and can be adjusted via the SmartHQ app.
- Ensure the water reservoir is filled and the bean hopper contains coffee beans.
- Metti una tazza sotto l'erogatore del caffè.
- Select your desired drink (Espresso, Americano, Lungo, My Cup) from the control panel.
- La macchina macinerà automaticamente i chicchi, preparerà il caffè e lo erogherà.

Image 5.1: The espresso machine dispensing a fresh shot of espresso.
5.2 Regolazione della macinatura
The integrated conical burr grinder allows for 5 levels of grind size adjustment, from coarsest to finest, to optimize flavor extraction.
- Locate the grind size adjustment knob inside the bean hopper (refer to Image 3.2).
- Turn the knob to select your desired grind setting. Finer grinds are suitable for espresso, while coarser grinds are better for longer coffee types.
5.3 Using the Steam Frother
The steam frother creates various milk textures for cappuccinos, lattes, and more.
- Fill the included stainless steel frothing pitcher with cold milk.
- Posizionare la lancia vapore nel latte.
- Premere il pulsante "Vapore" sul pannello di controllo.
- Move the pitcher to achieve desired foam texture.
- Once finished, press the 'Steam' button again to stop.
- Immediately clean the steam wand after each use to prevent milk residue buildup.
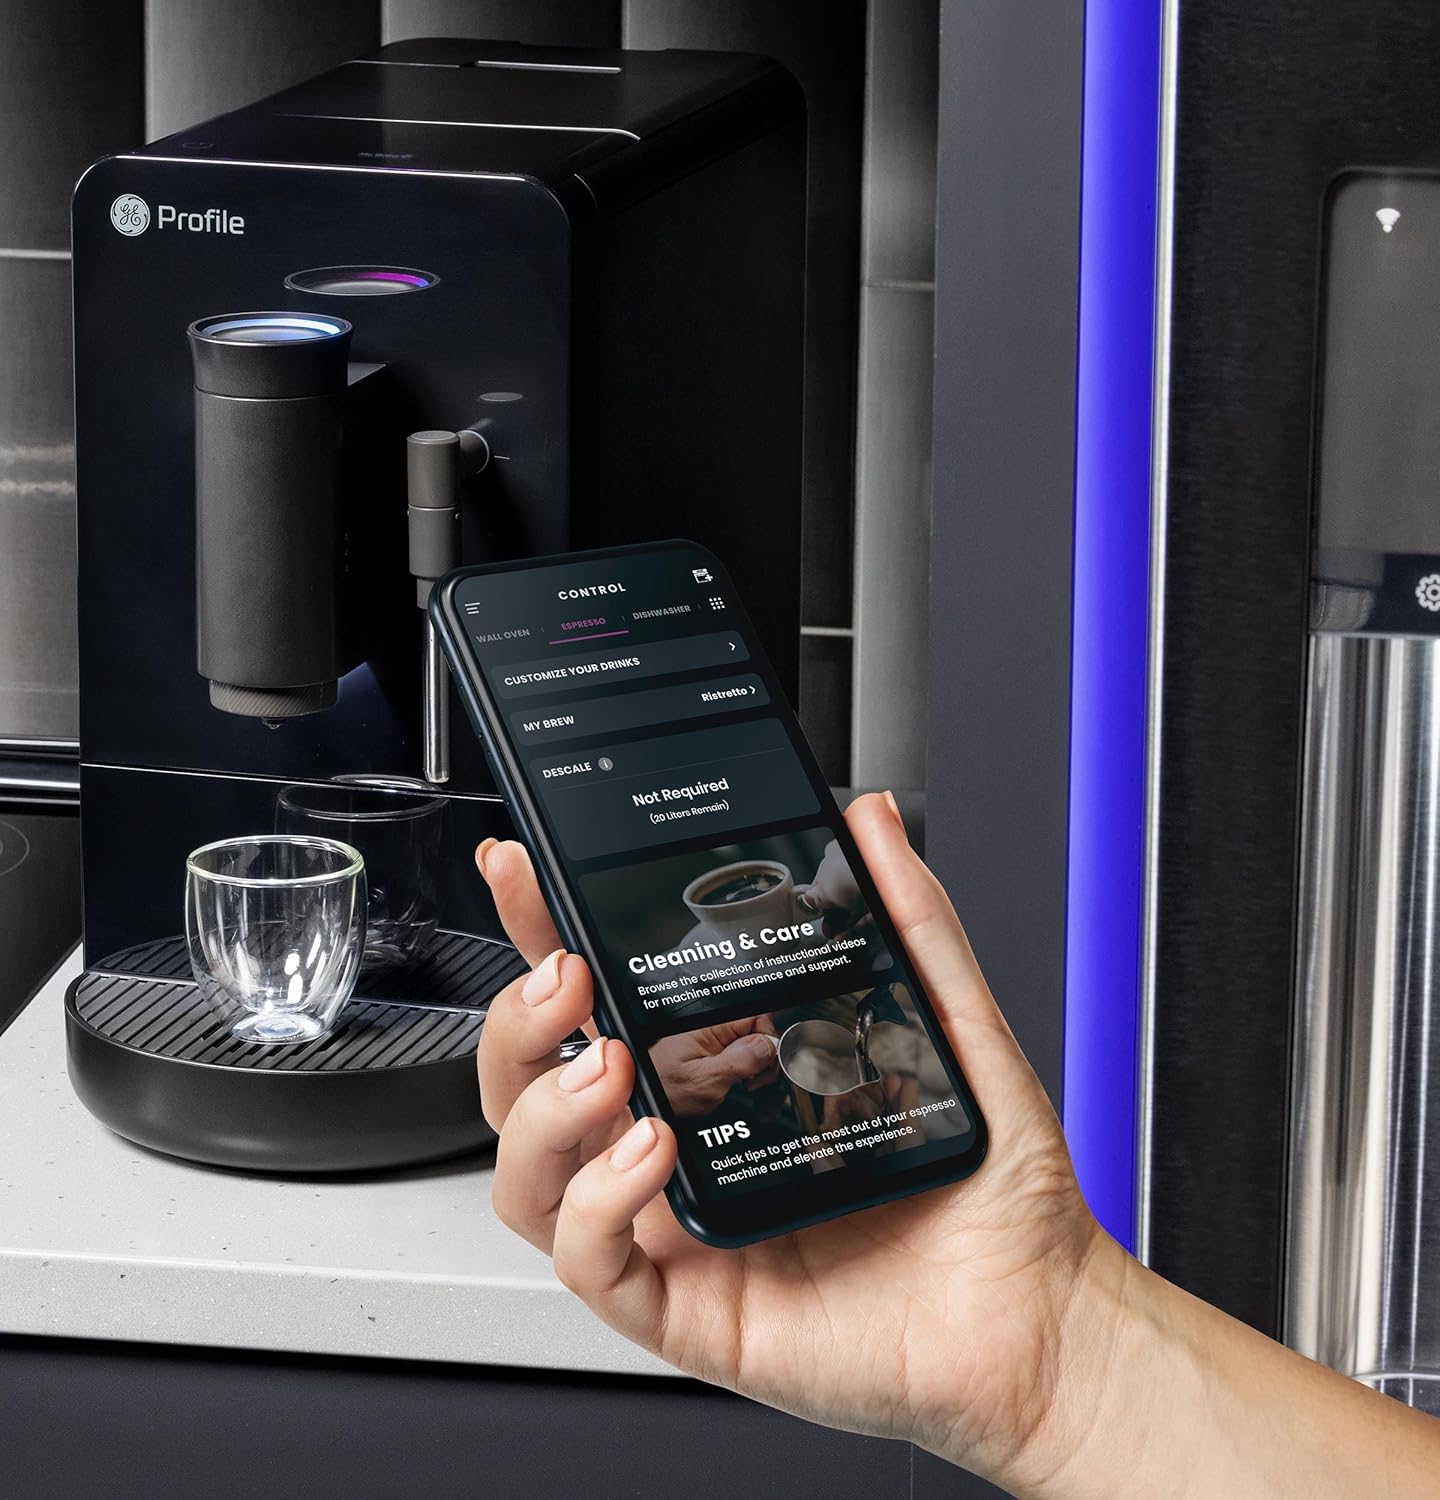
Image 5.2: A hand using the steam wand to froth milk in a stainless steel pitcher.
6. Manutenzione
Una pulizia e una manutenzione regolari garantiscono prestazioni ottimali e longevità della macchina per l'espresso.
6.1 Pulizia giornaliera
- Lancia vapore: Dopo ogni utilizzo, pulire la lancia vapore con un panno umido.amp cloth. Purge steam briefly to clear any milk residue from the nozzle.
- Vassoio raccogligocce e contenitore per fondi: Svuotare e risciacquare quotidianamente. La macchina indicherà quando è necessario svuotare il contenitore dei fondi.
- Riserva d'acqua: Risciacquare ogni giorno e riempire con acqua fresca.
6.2 Pulizia settimanale
- Unità di infusione: The brew unit is typically removable for rinsing under running water. Refer to the included cleaning kit instructions for detailed steps.
- Tramoggia dei fagioli: Periodically clean out any oil residue or old beans.
6.3 Decalcificazione
The machine will prompt you when descaling is required. Use a descaling solution specifically designed for espresso machines and follow the instructions provided with the descaling agent or in the SmartHQ app.
7. Risoluzione Dei Problemi
Questa sezione affronta i problemi più comuni che potresti riscontrare con la tua macchina per l'espresso.
| Problema | Possibile causa | Soluzione |
|---|---|---|
| No coffee dispensed / "Add Beans" message | Bean hopper empty or beans not feeding correctly. | Refill bean hopper. Gently stir beans to ensure they feed into the grinder. |
| Il caffè è troppo leggero o annacquato | Grind size too coarse, insufficient coffee dose, or descaling needed. | Adjust grind size to a finer setting. Check SmartHQ app for strength settings. Perform descaling if prompted. |
| Il latte non schiuma correttamente | Steam wand clogged, milk type unsuitable, or insufficient steam pressure. | Clean steam wand thoroughly. Use fresh, cold milk. Ensure machine is heated to steam temperature. |
| La macchina non si accende | Non collegato, alimentazione spentatage, or circuit breaker tripped. | Check power connection. Verify power outlet functionality. Reset circuit breaker if necessary. |
| SmartHQ app connectivity issues | Incorrect Wi-Fi password, network interference, or app bug. | Verify Wi-Fi credentials. Ensure machine is within Wi-Fi range. Restart app and machine. Check for app updates. |
8. Specifiche
- Marca: Professionistafile
- Nome modello: GEProfile Automatic Espresso Machine + Frother
- Numero modello articolo: P7CEBBS6RBB
- Colore: Nero
- Dimensioni del prodotto: 7"P x 16"L x 12.5"A
- Peso dell'articolo: 16 libbre
- Voltage: 120V
- Modalità operativa: Completamente automatico
- Caratteristiche speciali: Built-In Bean Hopper, Built-In Conical Burr Grinder & Adjustable Grind Size, Programmable My Brew Setting, Steam Frother & Frothing Pitcher, WiFi Connected
- Componenti inclusi: Cleaning Kit, Coffee Bean Container, Espresso Machine, Steam Wand, Milk Pitcher, Water Tank
- Tipo di input del caffè: Fagioli interi
- Input dell'interfaccia umana: Schermo tattile

Immagine 8.1: Dimensioni del prodotto della macchina per caffè espresso.
9. Garanzia e supporto
This product is covered by a manufacturer's warranty. For specific warranty details, registration, or technical support, please refer to the warranty card included with your product or visit the official GE Profile website. You may also contact customer service through the SmartHQ app for assistance.