
1. Finitaview
This manual provides detailed instructions for the Waveshare 7-inch Resistive Touch Screen LCD, featuring a 1024x600 hardware resolution and HDMI interface. It is designed for use with Raspberry Pi (all versions) and can also function as a PC monitor (Windows 11/10/8.1/8/7 compatible). The display supports backlight control for power efficiency and includes drivers for Raspbian, Ubuntu, Kali, and Retropie systems.

Immagine: The Waveshare 7-inch HDMI LCD connected to a Raspberry Pi, showcasing its display capabilities with the Raspberry Pi OS desktop.
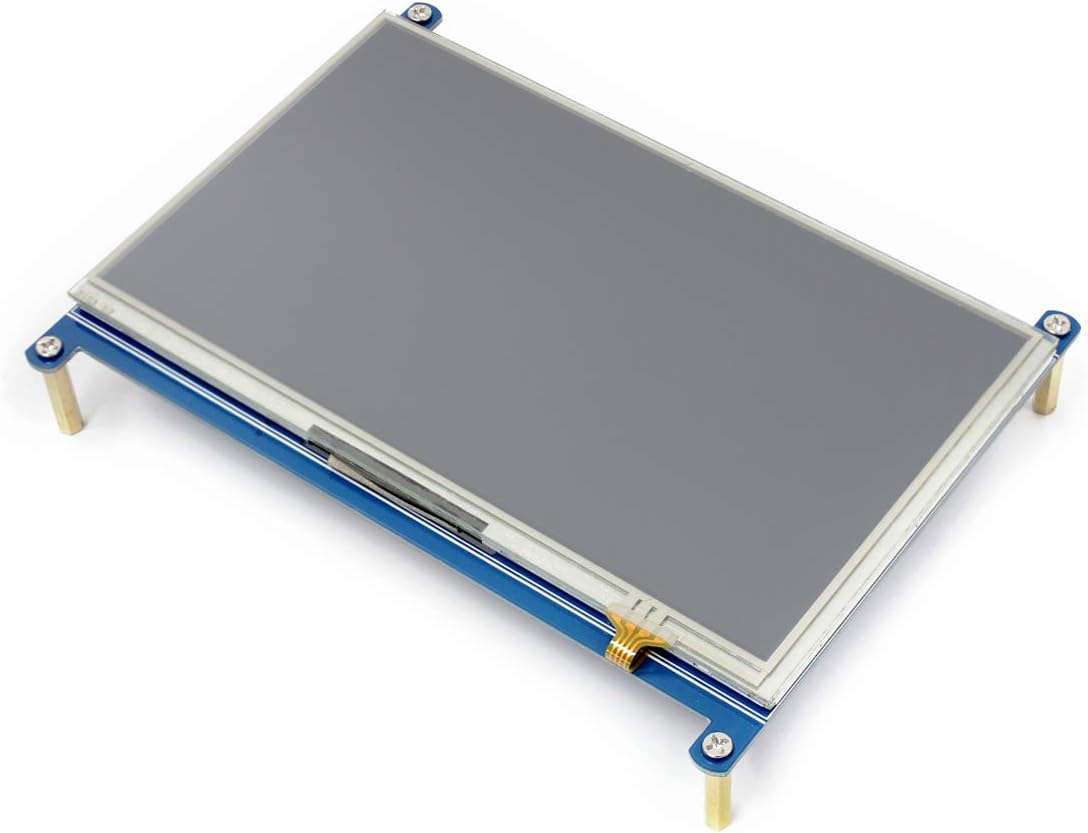
Immagine: Un angolo view of the 7-inch HDMI LCD, highlighting its compact design and screen surface.
Caratteristiche principali:
- 7-inch display with 1024x600 hardware resolution.
- Resistive touch control for interactive use.
- HDMI interface for display, compatible with Raspberry Pi and PCs.
- IPS panel for wide 170-degree viewangoli di inclinazione.
- Supports various Raspberry Pi versions (Raspberry Pi 1B and Zero require an additional HDMI cable).
- PC compatibility with Windows 11/10/8.1/8/7 (touch function not supported on PC without specific drivers).
- Drivers provided for Raspbian, Ubuntu, Kali, and Retropie operating systems.
- Backlight control for power saving.
2. Contenuto della confezione
Verifica che tutti gli articoli elencati di seguito siano inclusi nel tuo pacchetto:
- 7-inch HDMI LCD x1
- HDMI to Micro HDMI Connector x1
- HDMI Connector x1
- Stilo x1
- RPi Screws Pack (4pcs) x1
- Quick Start Sheet x1
3. Impostazione
3.1 Connessione al Raspberry Pi
This display is designed for direct connection to Raspberry Pi boards. Ensure your Raspberry Pi is powered off before connecting.

Immagine: Collegamento examples for Raspberry Pi 4 and Raspberry Pi 3B+ with the 7-inch HDMI LCD. This diagram illustrates how to connect the display to different Raspberry Pi models, including power and HDMI connections.
- Connect the HDMI port of the display to the HDMI port of your Raspberry Pi using the provided HDMI connector or HDMI to Micro HDMI connector, depending on your Raspberry Pi model.
- Connect the power input of the display to a 5V/3A power source. For some Raspberry Pi models, the display can be powered directly from the Raspberry Pi's GPIO pins or USB port.
- For touch functionality, connect the touch port (SPI) of the display to the corresponding GPIO pins on your Raspberry Pi.
- Secure the display to your Raspberry Pi using the provided RPi screws pack if desired.
- Install the necessary drivers for your operating system (e.g., Raspbian, Ubuntu, Kali, Retropie) to enable touch functionality and optimal display performance. Refer to the official Waveshare documentation for specific driver installation instructions.
Nota: Raspberry Pi 1B and Raspberry Pi Zero require an additional HDMI cable, which is not included in the standard package.
3.2 Collegamento al PC
The display can be used as a secondary monitor for a PC. Touch functionality is generally not supported when connected to a PC without specific driver installation.

Immagine: The 7-inch HDMI LCD connected to a PC, showing a Windows desktop environment. This demonstrates the display's capability to function as an external monitor for a computer.
- Connect the HDMI port of the display to the HDMI output of your PC using an HDMI cable (purchased separately).
- Connect the display to a 5V/3A power source.
- Your PC should automatically detect the display. You may need to adjust display settings in your operating system (e.g., resolution, orientation) for optimal viewing.
Nota: An additional HDMI cable is required for PC connection and is not included.
4. Istruzioni per l'uso
4.1 Accensione/Spegnimento
To power on the display, ensure it is connected to a stable 5V/3A power source. The display will automatically power on when power is supplied. To power off, disconnect the power source.
4.2 Funzionalità touch
The 7-inch HDMI LCD features resistive touch control. This function is primarily supported when connected to a Raspberry Pi with the appropriate drivers installed.

Immagine: A hand using the included stylus to interact with the touch screen. This illustrates the resistive touch control feature of the display.
- Use the provided stylus or a blunt object to interact with the screen. Avoid using sharp objects that could damage the resistive layer.
- Ensure touch drivers are correctly installed on your Raspberry Pi for touch input to be recognized by the operating system.
- Calibration may be required after driver installation for accurate touch response. Follow the instructions provided with the driver package.
4.3 Controllo della retroilluminazione
The display supports backlight control to adjust brightness and save power. Specific control methods depend on the operating system and driver configuration. Refer to the Waveshare documentation for detailed instructions on adjusting backlight settings for your specific setup.
4.4 Menù OSD
The display features an On-Screen Display (OSD) menu for adjusting various display parameters such as brightness, contrast, and color settings. The OSD menu is controlled by physical buttons located on the back of the display.

Immagine: Posteriore view of the display's circuit board, highlighting the "Menu", "Up/Left", "Down/Right", and "Return" buttons used to navigate and control the On-Screen Display (OSD) menu.
- Premere il tasto Menu pulsante per aprire il menu OSD.
- Utilizzare il In alto a sinistra E Giù/Destra pulsanti per navigare tra le opzioni del menu.
- Premere il tasto Menu button again to select an option or confirm a setting.
- Premere il tasto Ritorno button to go back to the previous menu or exit the OSD.
5. Manutenzione
- Pulizia: Use a soft, dry, lint-free cloth to clean the screen surface. For stubborn marks, lightly dampPulisci il panno con acqua o una soluzione detergente adatta allo schermo. Evita prodotti chimici aggressivi o materiali abrasivi.
- Magazzinaggio: Quando non lo si utilizza, conservare il display in un luogo fresco e asciutto, lontano dalla luce solare diretta e da temperature estreme.
- Gestione: Handle the display by its edges. Avoid applying excessive pressure to the screen surface.
- Energia: Scollegare sempre l'alimentazione elettrica prima di effettuare operazioni di pulizia o manutenzione.
6. Risoluzione Dei Problemi
- Nessuna visualizzazione:
- Ensure the display is correctly connected to a 5V/3A power source.
- Verify the HDMI cable is securely connected to both the display and the source device (Raspberry Pi/PC).
- Check if the source device is powered on and outputting a video signal.
- If using with Raspberry Pi, ensure the
config.txtfile is correctly configured for the display resolution.
- Touch Not Working:
- Ensure the touch interface (SPI) is correctly connected to your Raspberry Pi's GPIO pins.
- Verify that the correct touch drivers are installed for your operating system on the Raspberry Pi.
- Perform touch calibration if available in your driver software.
- Note that touch functionality is generally not supported when connected to a PC without specific driver installation.
- Screen Flickering or Unstable Image:
- Check the power supply; an insufficient power supply can cause instability. Use a stable 5V/3A adapter.
- Ensure the HDMI cable is not damaged and is properly seated.
- Try a different HDMI cable if possible.
- Incorrect Colors or Resolution:
- Adjust display settings via the OSD menu.
- Adjust resolution settings on your source device (Raspberry Pi/PC) to match the display's native resolution of 1024x600.
- For Raspberry Pi, check
config.txtsettings related to HDMI mode and resolution.
7. Specifiche

Immagine: An infographic summarizing the key specifications of the display, including size, resolution, display port, panel type, viewing angle, touch type, touch port, and OSD menu features.
| Caratteristica | Specificazione |
|---|---|
| Marca | Condivisione delle onde |
| Modello | 7inch HDMI LCD |
| Dimensioni dello schermo | 7 pollici |
| Risoluzione hardware | 1024x600 pixel |
| Tipo di pannello di visualizzazione | Schermo LCD IPS |
| Viewangolo di ing | 170 gradi |
| Tipo di tocco | Resistivo |
| Interfaccia del display | Cavo HDMI |
| Interfaccia touch | SPI |
| Frequenza di aggiornamento | Frequenza 60 Hz |
| Potenza in ingresso | 5V/3A (via Micro USB or GPIO) |
| Peso del prodotto | 0.26 kg |
| Menu OSD | Supported (Brightness/Contrast control) |

Immagine: A technical drawing illustrating the physical dimensions of the 7-inch HDMI LCD in millimeters, including mounting hole positions and overall size.
8. Supporto
For further technical support, driver downloads, or additional documentation, please visit the official Waveshare website. You can also contact Waveshare customer service for assistance with product-related inquiries.
Ufficiale Websito: www.waveshare.com
Please have your product model number (7inch HDMI LCD) and purchase details ready when contacting support.