
1. Introduzione
Thank you for choosing the DELLA Umbra Series 9000 BTU WiFi Mini Split AC with Heat Pump. This manual provides essential information for the safe and efficient operation, installation, and maintenance of your unit. Please read this manual thoroughly before installation and use, and retain it for future reference.
Informazioni importanti sulla sicurezza
This appliance is designed for professional installation only. Attempting DIY installation without proper qualifications may result in injury, property damage, or voiding the warranty. Always consult a qualified HVAC technician for installation and complex maintenance tasks.
- Assicurarsi che l'alimentazione corrisponda alle specifiche dell'unità.
- Non ostruire le prese d'aria o le uscite.
- Tenere bambini e animali domestici lontani dall'unità esterna.
- Prima di qualsiasi intervento di manutenzione o pulizia, spegnere l'alimentazione.
- Use only specified refrigerants (R32).
2. Prodotto finitoview
The DELLA Umbra Series Mini Split AC is an energy-efficient system designed for cooling and heating spaces up to 450 sq.ft. It features WiFi connectivity, Alexa compatibility, and a heat pump for year-round comfort.
Caratteristiche principali:
- Efficienza energetica: Valutazione SEER2 19 con tecnologia DC Inverter per un risparmio energetico fino al 30%.
- Funzioni intelligenti: 4D airflow (up-down, left-right), I Feel mode, 24-hour timer, sleep mode, eco energy-saving mode, multiple fan speeds, turbo function.
- Sensore intelligente: Remote control senses room temperature for optimal comfort and energy savings.
- Funzionamento silenzioso: Funziona a soli 42 dBa, in modo estremamente silenzioso.
- Ampia copertura: Cools and heats up to 450 sq.ft, operating in temperatures as low as 19°F.
- Refrigerante R32: Utilizza il refrigerante ecologico R32.
Diagramma dei componenti:

Figure 2.1: Main components included with the DELLA Umbra Series Mini Split AC.
Prodotto View:

Figure 2.2: DELLA Umbra Series 9000 BTU WiFi Mini Split AC.
3. Configurazione e installazione
Professional installation is mandatory for this system. This is not a DIY mini split AC. Line-set vacuuming is required during installation. Any alteration of line-set length requires adjusting freon levels. Please consult a qualified HVAC professional for proper installation to ensure safety and optimal performance.
Installazione completataview Video:
Video 3.1: General guidance on installing your DELLA Mini Split AC unit. This video is for informational purposes only; professional installation is required.
Fasi principali dell'installazione (riepilogo):
- Posizioni di marcatura: Use the provided template to mark the locations for the line set wall hole and the mini split bracket.
- Staffa di fissaggio: Fissare saldamente la staffa mini split alla parete utilizzando le viti in dotazione. Assicurarsi che la staffa sia correttamente livellata.
- Routing Lines: Route the line set, drain hose, and electrical wiring through the wall opening.
- Montaggio dell'unità interna: Montare saldamente l'unità interna mini split sulla staffa.
- Taping Lines: Tape the drain hose and line sets together for a neat and organized installation.
- Securing Electrical Wires: Use zip ties to secure the electrical wires around the taped line sets and drain hose.
- Positioning Outdoor Condenser: Posizionare l'unità condensatrice esterna nella posizione designata.
- Set di linee di collegamento: Connect the unit line set to the condenser line set and tighten down firmly. Use a digital torque wrench if available to ensure proper tightening according to specifications.
- Collegamenti elettrici: Connect the electrical wires (red, black, green ground) to their corresponding terminals on the condenser unit. Each wire is designated with a specific letter and number.
- Aspirazione del sistema: Connect a vacuum pump to the system via a gauge. Open the valves on the gauge and activate the vacuum. Monitor the micron reading closely and close the valves once it reaches 350 microns. Turn off the vacuum pump.
- Ripristino dell'alimentazione: Ripristinare l'alimentazione all'unità esterna.
- Initiating Cooling: Turn on the mini split unit and set it to the lowest cold setting. Allow a few minutes for the outdoor condenser fan to initiate.
- Valvole di apertura: Gradually open the high side (top) valve using a service wrench. Monitor the gauge as readings will decrease into the negative range. After the high side valve is open, promptly open the low side (bottom) valve. Monitor the gauge closely as the readings will increase, which is expected.
Your DELLA mini split unit installation is complete once these steps are followed and the unit is operating correctly.
Installazione preliminareview Video:
Video 3.2: Una breve pre-produzioneview of the DELLA Mini Split AC installation process, highlighting key steps.
4. Istruzioni per l'uso
Your DELLA Umbra Series Mini Split AC can be controlled via the included remote control, the Della+ mobile app, or voice commands through Alexa.
Telecomando:

Figure 4.1: DELLA Mini Split AC Remote Control.
Use the remote control to adjust temperature, select operating modes, set fan speed, and activate special functions like Sleep Mode or Turbo. Refer to the remote control's specific instructions for detailed button functions.
Della+ Mobile App:
The Della+ app allows you to control your unit remotely, set schedules, and utilize smart features like Geo-Location.
Video 4.2: Learn how to set up and customize Geo-Location using the Della+ App for smart AC controls.
Video 4.3: Una breve pre-produzioneview demonstrating the features and interface of the Della+ App.

Figure 4.2: Della+ App Interface.
- Scaricamento: Cercare "Della+" in your mobile app store.
- Abbinamento: Follow the in-app instructions to pair your device with the AC unit.
- Modalità: Select from Cool, Heat, Dry (dehumidify), Fan Only, or ECO mode.
- Velocità della ventola: Adjust fan speed from Quiet, Low, Mid, High, to Turbo.
- Flusso d'aria: Control vertical and horizontal oscillation for optimal air distribution.
- Pianificazione e timer: Set weekly schedules or countdown timers for automatic operation.
- Geolocalizzazione: Configure automatic AC control based on your location.
Controllo vocale (Alexa):
The unit seamlessly integrates with Amazon Alexa for convenient voice control. Ensure your Della+ app is linked to your Alexa account.

Figure 4.3: Voice Control Compatibility with Alexa.
5. Manutenzione
Regular maintenance ensures optimal performance and longevity of your DELLA Mini Split AC unit. Always disconnect power before performing any maintenance.
Pulizia del filtro:
The indoor unit features washable air filters. Clean them every two weeks or more frequently depending on usage and air quality.
- Aprire il pannello frontale dell'unità interna.
- Rimuovere i filtri dell'aria.
- Lavare i filtri con acqua tiepida e un detergente delicato.
- Risciacquare abbondantemente e lasciare asciugare completamente all'aria prima di reinserirli.
- Chiudere il pannello frontale.
Pulizia dell'unità interna:
Pulire la superficie dell'unità interna con un panno morbido e asciutto.amp cloth. Do not use harsh chemicals or abrasive cleaners. The unit also features PureClean tech to prevent dust buildup and defrost the indoor unit, contributing to cleaner air.
Figura 5.1: Interno view of the indoor unit highlighting PureClean technology.
Pulizia dell'unità esterna:
Periodically clean the outdoor unit's coils and fins to remove dirt, leaves, and debris. Use a soft brush or vacuum cleaner. Ensure the area around the outdoor unit is clear of obstructions for proper airflow.

Figure 5.2: Outdoor unit with gold-plated fins for corrosion prevention.
6. Risoluzione Dei Problemi
Prima di contattare l'assistenza clienti, si prega di riview i seguenti problemi comuni e le relative soluzioni:
| Problema | Possibile causa | Soluzione |
|---|---|---|
| L'unità non si avvia. | Nessuna corrente, interruttore automatico scattato, batterie del telecomando scariche. | Controllare l'alimentazione, ripristinare l'interruttore automatico, sostituire le batterie del telecomando. |
| Raffreddamento/riscaldamento insufficiente. | Filtri dell'aria sporchi, unità esterna bloccata, impostazione della modalità errata, refrigerante basso. | Clean air filters, clear obstructions from outdoor unit, select correct mode, contact professional for refrigerant check. |
| Rumore insolito proveniente dall'unità. | Parti allentate, ostruzione della ventola, rumori di funzionamento normali (ad esempio, flusso del refrigerante). | Check for loose parts or obstructions. If noise persists or is unusual, contact support. |
| Perdita d'acqua dall'unità interna. | Tubo di scarico bloccato, angolo di installazione non corretto. | Controllare e pulire il tubo di scarico. Se il problema persiste, potrebbe essere necessaria una nuova installazione da parte di un professionista. |
| Telecomando non funzionante. | Batteries dead, remote out of range, signal obstruction. | Replace batteries, ensure clear line of sight to indoor unit, operate within range. |
For issues not listed here or if solutions do not resolve the problem, please contact DELLA customer support.
7. Specifiche
| Caratteristica | Dettaglio |
|---|---|
| Numero di modello | 9K1VR-19S-JPB-I+O |
| Misurare | 9,000 BTU - 115V -- 19 SEER2 |
| Capacità di raffreddamento | 9000 BTU/ora |
| Capacità di riscaldamento | 10000 BTU/ora |
| Alimentazione elettrica | 115V~/60Hz/1PH |
| Potenza massima in ingresso | 1200 L |
| Volume del flusso d'aria | 560 m³/ora |
| Massimo. Dimensione fusibile | 20A |
| Livello sonoro | 42 decibel |
| Dimensioni del prodotto | 31.18 x 7.91 x 11.5 pollici |
| Peso dell'articolo | 58.6 libbre |
| Caratteristiche speciali | Alexa and WiFi Enabled, DeHumidifier, Fast Cooling and Heating, Remote Control |
| Tipo di refrigerante | R32 |

Figura 7.1: Dimensioni del prodotto.
8. Garanzia e supporto
DELLA is committed to providing high-quality products and excellent customer service.
Garanzia a vita limitata:
Your DELLA Umbra Series Mini Split AC comes with a limited lifetime warranty, offering peace of mind against manufacturing defects. This warranty is designed to cover the product for its expected lifespan under normal use and service. Please refer to the warranty card included with your product for full terms and conditions.

Figure 8.1: DELLA Lifetime Coverage.
Assistenza clienti:
Our dedicated customer support team is available to assist you with any questions or concerns regarding your DELLA product.
- Supporto telefonico: Disponibile dal lunedì al venerdì, dalle 6:00 alle 16:00 PST.
- Chat dal vivo: 24/7 support for immediate assistance.
Please have your model number (9K1VR-19S-JPB-I+O) and purchase information ready when contacting support.
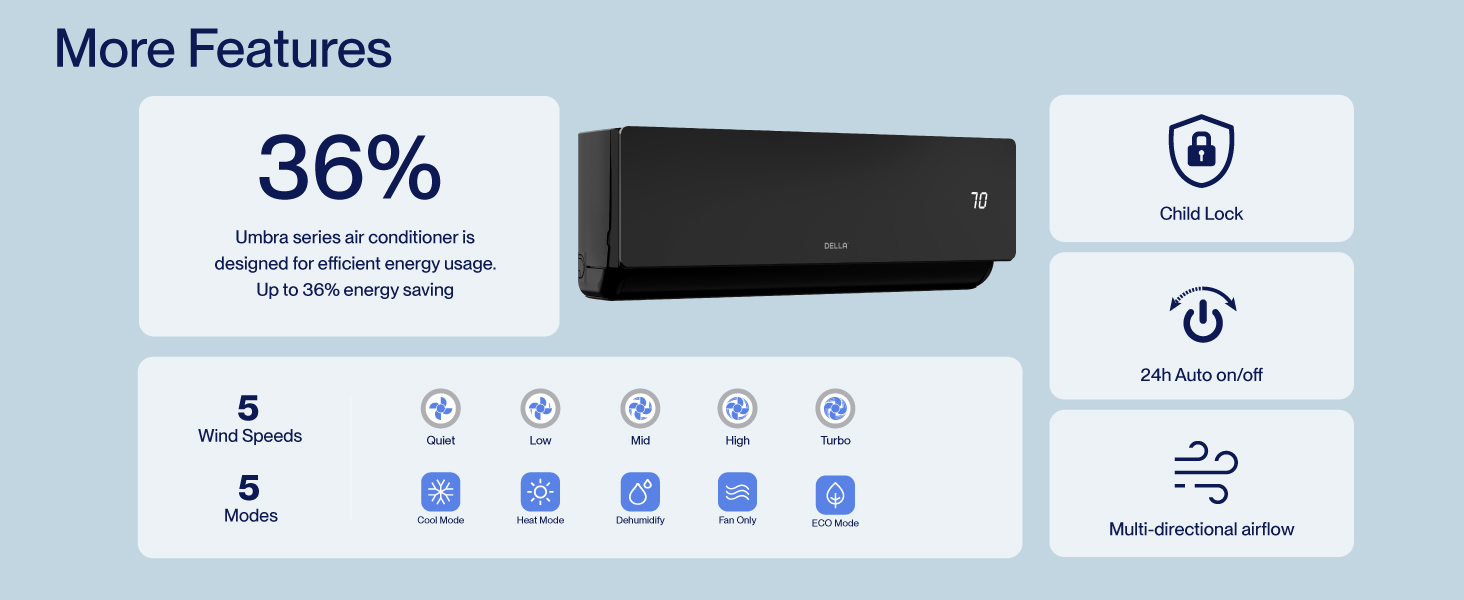
Figure 8.2: DELLA Customer Support Options.