Introduzione
This manual provides detailed instructions for the setup, operation, and maintenance of your Dcorn DMR-07 7-inch HDMI Digital Microscope. Designed for a wide range of applications, from coin inspection to circuit board repair, this microscope offers up to 1300X magnification and a 16MP camera for clear, detailed viewing. Please read this manual thoroughly before using the device to ensure proper functionality and longevity.
Contenuto della confezione
Verifica che tutti gli articoli elencati di seguito siano inclusi nel tuo pacchetto:
- 7-inch LCD Display Microscope
- Base metallica
- Stand in metallo
- 3 Guidebooks (e.g., A Guide to Coin Collection, How to Solder)
- Controllo remoto senza fili
- Cavo HDMI
- Scheda 32GB TF
- Barriera sottile
- Scatola regalo
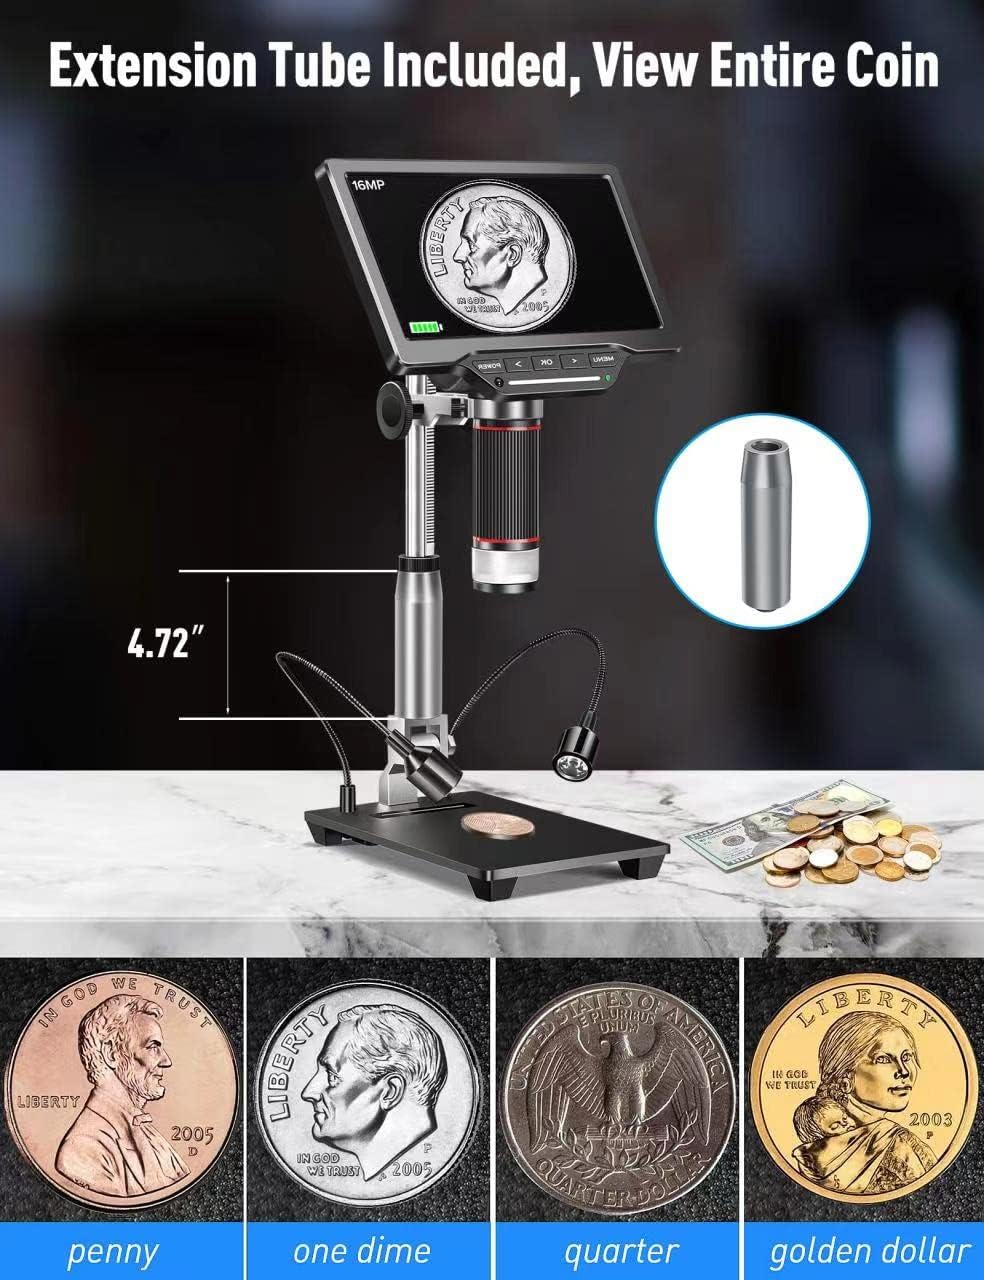
- Extension Tube (4.7 inches)
- Caricabatterie
- Manuale dell'utente (questo documento)

Impostare
1. Assembling the Stand and Microscope
- Attach the metal stand to the metal base. Secure it firmly using the provided knob.
- Mount the microscope unit onto the adjustable bracket on the metal stand. Ensure it is securely fastened.
- If extended working distance is required, insert the 4.7-inch extension tube between the microscope lens and the main body. This allows for a wider field of view, ideal for observing entire coins.
2. Connecting External LED Lights
The two external LED lights provide additional illumination for your specimens. Connect the Type-C end of the light cables to the USB output ports on the microscope base.
3. Accensione
Connect the power adapter to the microscope and a power outlet. Press the 'POWER' button on the microscope to turn it on. The 7-inch LCD display will illuminate.
4. Video: How to Install
1 video: A step-by-step guide demonstrating the physical assembly of the Dcorn DMR-07 Digital Microscope, including attaching the stand, microscope unit, and optional extension tube.
Istruzioni per l'uso
1. Base Viewing e messa a fuoco
- Place the specimen on the observation platform.
- Adjust the height of the microscope unit using the knob on the stand until the specimen appears on the screen.
- Rotate the focus wheel on the microscope body to achieve a clear and sharp image.

2. Regolazione delle luci LED
The microscope features built-in LEDs and two adjustable side lights. The side lights are controlled via touch-sensitive areas on the base.
- LED integrati: These provide primary illumination.
- Luci laterali: Touch the designated areas on the base to turn the side lights on/off and adjust their brightness. These are useful for reducing glare and enhancing contrast on reflective surfaces.
3. Video: 10 LEDs - Touch Control
2 video: Demonstration of the touch-controlled 10 LED lighting system on the Dcorn DMR-07 Digital Microscope.
4. Catturare foto e video
The microscope supports capturing still images and recording video footage directly to the included 32GB TF card.
- Use the 'OK' button on the microscope or the corresponding button on the wireless remote control to capture a photo or start/stop video recording.
- Navigate through the menu using the arrow buttons to select photo/video mode and adjust settings like resolution.


5. Connecting to PC and TV
The microscope offers HDMI and USB output for viewsu schermi più grandi.
- Uscita HDMI: Connect the provided HDMI cable from the microscope's HD port to an HDMI input on a TV or monitor. This provides a direct, high-quality display.
- Uscita USB: Connect the provided USB cable from the microscope's USB port to a computer. The microscope can function as a UVC (USB Video Class) device, allowing you to view the live feed using standard camera software on your computer (Windows/Mac compatible).

6. Video: How to Connect to a PC
3 video: A guide demonstrating how to connect the Dcorn DMR-07 Digital Microscope to a PC and view il feed dal vivo.
Manutenzione
- Pulizia della lente: Use the provided cleaning cloth or a soft, lint-free cloth to gently wipe the lens. For stubborn smudges, use a lens cleaning solution designed for optical devices.
- Pulizia dello schermo: Wipe the LCD screen with a soft, dry cloth. Avoid using abrasive cleaners or solvents.
- Cura generale: Keep the microscope in a clean, dry environment. Avoid exposing it to extreme temperatures, humidity, or direct sunlight. When not in use, store it in its original packaging or a protective case.
Risoluzione dei problemi
- Nessun potere: Ensure the power adapter is securely connected to both the microscope and a working power outlet. Check if the power button is pressed.
- Immagine sfocata: Adjust the focus wheel on the microscope body. Ensure the specimen is within the working distance of the lens. Clean the lens if necessary.
- No Image on External Display (HDMI/USB): Verify that the cables are correctly connected. For USB connection, ensure appropriate camera software is running on your computer and the microscope is selected as the input device.
- Luci non funzionanti: Check the connections of the external LED lights to the base. For touch-controlled lights, ensure you are touching the correct activation area.
- Impossibile acquisire foto/video: Ensure the 32GB TF card is properly inserted and has sufficient free space. Check the menu settings to confirm the correct mode is selected.
Specifiche
| Caratteristica | Specificazione |
|---|---|
| Modello | DMR-07 |
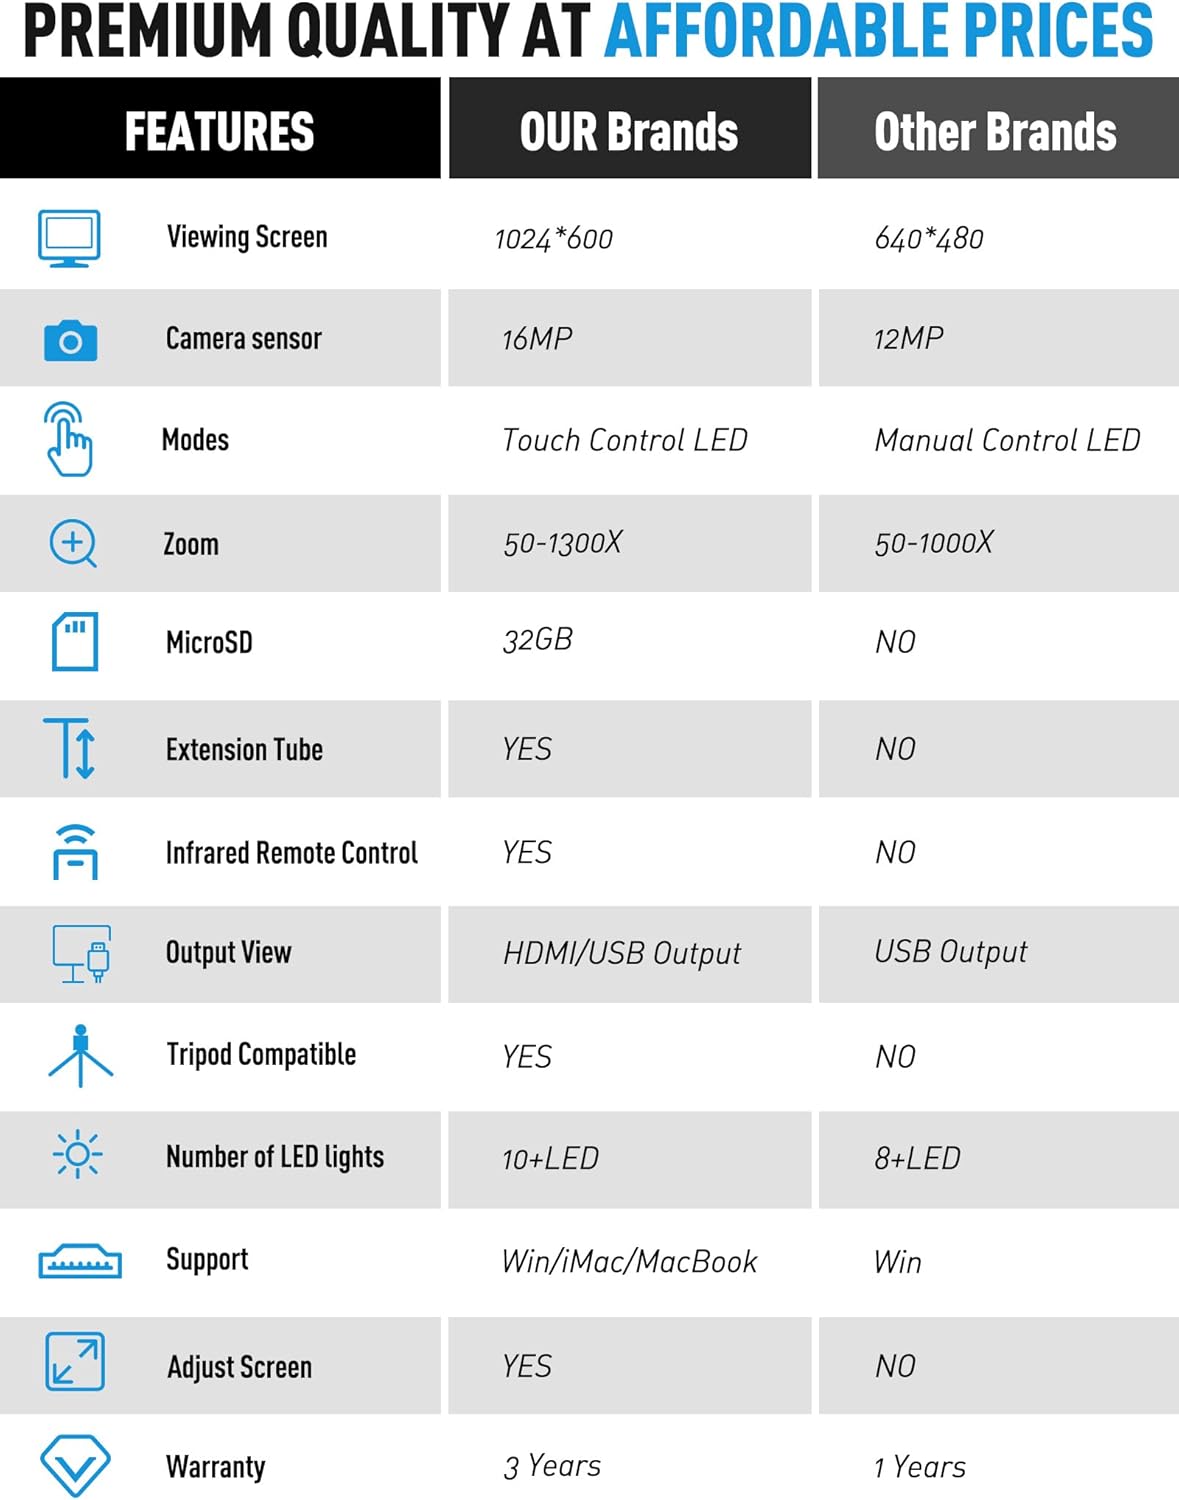
| Dimensioni dello schermo | LCD da 7 pollici |
| Sensore della fotocamera | 16MP |
| Ingrandimento | Fino a 1300X |
| Sorgente luminosa | LED (Built-in & Touch Control Side Lights) |
| Produzione | HDMI, USB |
| Magazzinaggio | MicroSD (32GB TF card included) |
| Tubo di prolunga | 4.7-inch included |
| Telecomando | Telecomando a infrarossi senza fili |
| Dispositivi compatibili | Computer portatile, computer personale, televisione |
| Supporto del sistema operativo | Finestre, Mac |
| Colore | Argento |
| Peso dell'articolo | 4.46 libbre |
| Dimensioni del pacco | 11.18 x 10.94 x 3.86 pollici |
Informazioni sulla garanzia
The Dcorn DMR-07 Digital Microscope comes with a Garanzia di 3 anno dalla data di acquisto. Questa garanzia copre i difetti di fabbricazione e garantisce che il prodotto soddisfi gli standard prestazionali specificati. Si prega di conservare la prova d'acquisto per eventuali reclami in garanzia.
Assistenza clienti
For any questions, technical assistance, or support regarding your Dcorn DMR-07 Digital Microscope, please contact our customer support team:
E-mail: support@dcornus.com