
xStrumento D1
xTool D1 10W Laser Engraver with Rotary Attachment Instruction Manual
Model: D1 | Brand: xTool
1. Introduzione
The xTool D1 is a versatile 10W laser engraver and cutter designed for high-accuracy projects on a wide range of materials. This manual provides essential information for setting up, operating, maintaining, and troubleshooting your device, ensuring optimal performance and safety.

Figure 1: The xTool D1 Laser Engraver with its rotary attachment and various engraved sampmeno.
2. Caratteristiche principali
- 10W Laser Output Power: The device features a 10W laser output, indicating its cutting and engraving capability. The machine's total power consumption is 60W.
- Taglio efficiente: Capable of cutting a 10mm wood board and a 5mm black acrylic in a single pass, producing smooth surfaces with minimal burn marks.
- Robusta costruzione interamente in metallo: Utilizes all-steel wheels, shafts, and an enclosed synchronous belt for enhanced stability, reduced noise, and extended lifespan compared to products with plastic components.
- Alta precisione: Equipped with a 0.08mm*0.06mm ultra-fine compression spot for detailed and vivid engraving results.
- Ampia compatibilità software: Supports both LightBurn and xTool Creative Space software.
- Molteplici opzioni di connettività: Data transfer is possible via Wi-Fi, USB cable, and TF card.
- Included Rotary Attachment: Comes with an RA2 Rotary for engraving cylindrical objects.

Figura 2: Oltreview of the xTool D1's capabilities and recognition.
3. Istruzioni per l'installazione
Follow these steps to assemble and prepare your xTool D1 for operation.
3.1 Unboxing e identificazione dei componenti
Carefully unbox all components and verify against the packing list. Ensure all parts are present and undamaged.

Figure 3: All components of the xTool D1 should be laid out and identified before assembly.
3.2 Montaggio
Assemble the frame and attach the laser module according to the detailed instructions provided in the quick start guide. Ensure all connections are secure.

Figure 4: The xTool D1 features neatly arranged wires for safety and ease of assembly.
3.3 Installazione del software
Download and install the xTool Creative Space software or LightBurn from the official xTool website. Follow the on-screen prompts for installation.

Figure 5: The xTool Creative Space software interface for design and control.
3.4 Initial Connection and Calibration
Connect the xTool D1 to your computer via USB or Wi-Fi. Perform initial calibration steps as guided by the software to ensure proper laser alignment and focus.

Figure 6: The LightBurn software interface, compatible with xTool D1.
Video 1: A detailed guide on unboxing, assembling, and getting started with the xTool D1 10W Laser Engraver and its rotary attachment.
4. Istruzioni per l'uso
4.1 Precauzioni di sicurezza
Always wear laser safety glasses when operating the xTool D1. Ensure proper ventilation to dissipate fumes.
4.2 Preparazione del progetto
Create or import your design into xTool Creative Space or LightBurn. Adjust settings such as power, speed, and number of passes based on your material and desired outcome.
4.3 Material Placement and Framing
Place your material securely on the working area. Use the software's framing function to preview the laser path and ensure your design is correctly positioned on the material.

Figure 7: The 10W dual laser module combines two laser beams into one spot for increased power and efficiency, with a focal point of 0.08mm*0.08mm.
4.4 Regolazione della messa a fuoco
The xTool D1 features an easy-to-adjust fixed focus laser. Follow the instructions to set the correct focal length for your material.
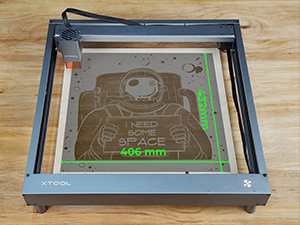
Figure 8: Adjusting the laser focus for optimal engraving and cutting.
4.5 Avvio del processo di incisione/taglio
Once your design is framed and focus is set, initiate the process from the software. Monitor the operation closely.

Figure 9: The xTool D1 offers a generous engraving area of 17 x 16 inches.
4.6 Using the Rotary Attachment (RA2)
For engraving cylindrical objects, attach the RA2 Rotary. Adjust the object's position and software settings for rotary engraving.
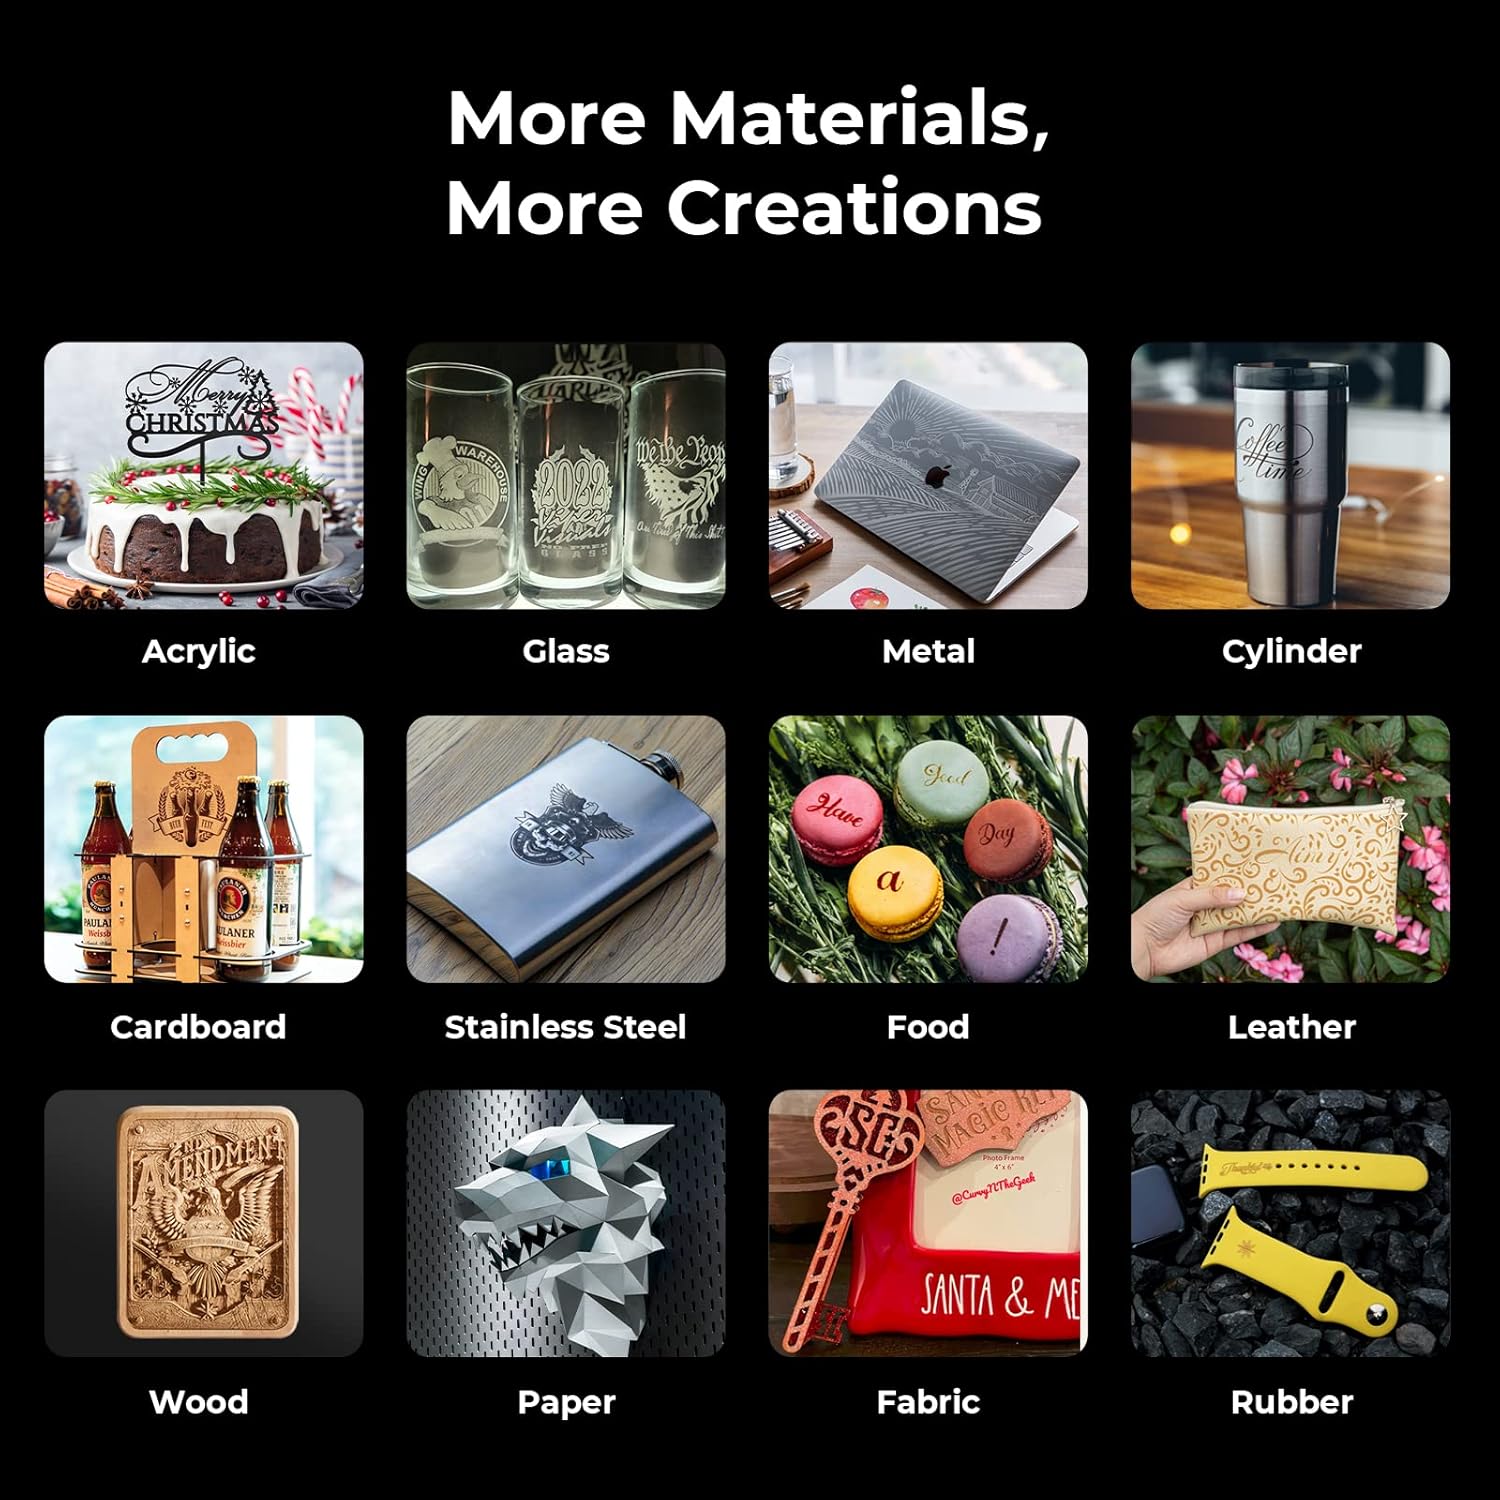
Figure 10: The xTool D1 with the RA2 Rotary attachment for 360-degree engraving on cylindrical items.
Video 2: Demonstration of the xTool D1 laser engraver in action, including cutting and engraving various materials.
5. Materials and Applications
The xTool D1 can engrave and cut a wide variety of materials, enabling diverse creative projects.

Figura 11: Esamples of materials compatible with the xTool D1, showcasing la sua versatilità.
5.1 Engraving Accuracy
The compressed spot technology ensures exquisite details in engraved designs.

Figura 12: Esample of high-detail engraving on wood, demonstrating the precision of the xTool D1.
6. Manutenzione
Regular maintenance ensures the longevity and optimal performance of your xTool D1.
- Pulisci la lente laser: Per mantenere la qualità dell'incisione, pulire periodicamente la lente laser con un panno morbido e privo di lanugine e una soluzione detergente per lenti.
- Inspect Belts and Wheels: Check the synchronous belts and all-steel wheels for any wear or debris. Ensure they move smoothly and are properly tensioned.
- Rimozione detriti: Regularly remove any dust, smoke residue, or material scraps from the working area and internal components.
- Aggiornamenti software: Keep your xTool Creative Space or LightBurn software updated to the latest version for new features and bug fixes.
7. Risoluzione Dei Problemi
This section addresses common issues you might encounter with your xTool D1.
- Nessuna uscita laser:
- Controllare che il cavo di alimentazione sia collegato saldamente.
- Assicurarsi che il modulo laser sia installato e collegato correttamente.
- Verify that the safety glasses are worn and the safety cover is in place (if applicable).
- Confirm software settings for laser power are not set to zero.
- Scarsa qualità di incisione/taglio:
- Adjust the laser focus correctly for the material thickness.
- Pulire la lente laser per individuare eventuali ostruzioni.
- Experiment with different power and speed settings for your specific material.
- Assicurarsi che il materiale sia piatto e posizionato saldamente.
- Problemi di connessione (Wi-Fi/USB):
- Restart both the xTool D1 and your computer.
- Check USB cable integrity or Wi-Fi network stability.
- Ensure software drivers are up to date.
- Rumori insoliti:
- Inspect belts and wheels for debris or misalignment.
- Ensure the machine is on a stable, level surface.
8. Specifiche
| Caratteristica | Dettaglio |
|---|---|
| Modello | D1 |
| Potenza di uscita laser | 10W |
| Potenza della macchina | 60W |
| Area di incisione | 17'' x 16'' (approx. 432mm x 406mm) |
| Dimensioni spot | 0.08mm*0.06mm |
| Connettività | Wi-Fi, cavo USB, scheda TF |
| Software compatibile | LightBurn, xTool Creative Space |
| Attacco rotante | RA2 Rotary (included) |
| Dimensioni del pacco | 27 x 13 x 8 pollici |
| Peso dell'articolo | 19.96 libbre |
| Produttore | MakeBlock Co., Ltd. |
| Primo disponibile | 15 aprile 2022 |
9. Garanzia e supporto
For warranty information, please refer to the documentation included with your product or visit the official xTool website. xTool offers comprehensive customer support through multiple channels:
- Supporto via e-mail: Per richieste dettagliate e assistenza tecnica.
- Chat dal vivo: Available on the xTool website for immediate questions.
- Supporto telefonico: Per comunicare direttamente con un membro del team di assistenza tecnica.
- Comunità online/gruppo Facebook: Connect with other users and xTool experts for tips, tricks, and community support.

Figure 13: Multi-channel support options provided by xTool.
Ask a question about this manual
Ask about setup, troubleshooting, compatibility, parts, safety, or missing instructions. Manuals+ will review the question and use this page’s manual context to help answer it.