
1. Introduzione
Thank you for choosing the Thinkbee Wireless Light Switch and Receiver Kit. This product offers a convenient and flexible solution for controlling your lighting without the need for complex wiring or wall demolition. Designed for ease of installation and reliable performance, this kit allows you to expand your lighting system or add remote control capabilities to existing setups. Please read this manual thoroughly before installation and operation to ensure proper use and safety.
2. Prodotto finitoview
2.1 Componenti
- Wireless Switch Panel: A self-powered, battery-operated switch that sends wireless signals to the receiver.
- Ricevitore: A compact unit that connects to your light fixture and power supply, receiving signals from the switch to control the light.
- Accessori: Includes stickers for mounting and wiring aids.
2.2 Caratteristiche principali
- Installazione semplice: No wiring to the switch panel, simply connect the receiver.
- IP66 impermeabile: Ensures safe use in damp ambienti.
- Lungo raggio: Effective distance up to 130ft indoors and 1969ft outdoors.
- Penetrazione del segnale: Strong signal can pass through walls.
- Multi-Matching: One receiver can be controlled by up to 8 switch panels.
- Ampio volumetage Compatibilità: Operates on AC 80V-275V.
- Ricevitore compatto: Designed to fit easily into standard electrical boxes (canopy, junction box, etc.).

Image: The Thinkbee Wireless Light Switch and its compact receiver unit.

Image: Illustration demonstrating the wireless signal's ability to pass through walls for extended range.

Image: The compact size of the receiver, designed to fit into various wiring boxes such as canopies or junction boxes.
3. Informazioni sulla sicurezza
- Prima di installare o effettuare la manutenzione del ricevitore, scollegare sempre l'alimentazione dall'interruttore automatico.
- Assicurarsi che tutti i collegamenti elettrici siano sicuri e conformi alle normative elettriche locali.
- The receiver requires both live and neutral wires for power. Incorrect wiring can damage the device or pose a safety hazard.
- Do not exceed the maximum load capacity of 1000W (LED) or 1800W (Resistive load).
- The wireless switch panel is IP66 waterproof, suitable for damp locations, but avoid submerging it in water.
- This product is designed for indoor and outdoor use within specified range limits.

Image: The IP66 waterproof rating allows for safe use in environments with water splashes, such as bathrooms.
4. Configurazione e installazione
4.1 Installazione del ricevitore
- Scollegare l'alimentazione: Turn off the power to the circuit at the main breaker before beginning any wiring.
- Identificare i fili: Locate the live (usually black or brown) and neutral (usually white or blue) wires from your power supply, and the load wires going to your light fixture.
- Collegare il ricevitore:
- Collegare il Input of Live Line (red wire) of the receiver to the live wire from your power supply.
- Collegare il Input of Neutral Line (blue wire) of the receiver to the neutral wire from your power supply.
- Collegare il Output of Live Line (brown wire) of the receiver to the live wire of your light fixture.
- Collegare il Output of Neutral Line (black wire) of the receiver to the neutral wire of your light fixture.
- Connessioni sicure: Use the provided wiring aids or appropriate wire connectors to ensure all connections are secure.
- Ricevitore di montaggio: Place the compact receiver inside the electrical box, canopy, or junction box, ensuring it does not obstruct other components.

Image: Detailed dimensions of the switch and receiver, along with a clear wiring diagram for the receiver.

Image: A visual comparison illustrating the simplified wiring of the Thinkbee Wireless Switch compared to traditional wired switches.
4.2 Pairing the Wireless Switch Panel with the Receiver
- Ripristina alimentazione: Once the receiver is wired and secured, restore power to the circuit at the main breaker.
- Entra in modalità di associazione: Press and hold the function button (pairing key) on the receiver for approximately 2 seconds. The indicator light on the receiver will blink red, indicating it is ready to pair. Release the button.
- Interruttore di coppia: Within a few seconds of the receiver being in pairing mode, press the wireless switch panel. The connected light will turn ON/OFF, confirming successful pairing.
- Test: Press the switch panel again to ensure it controls the light as expected.
Nota: One receiver can be paired with multiple switch panels (up to 8). To pair additional switches, repeat steps 2 and 3 for each new switch.
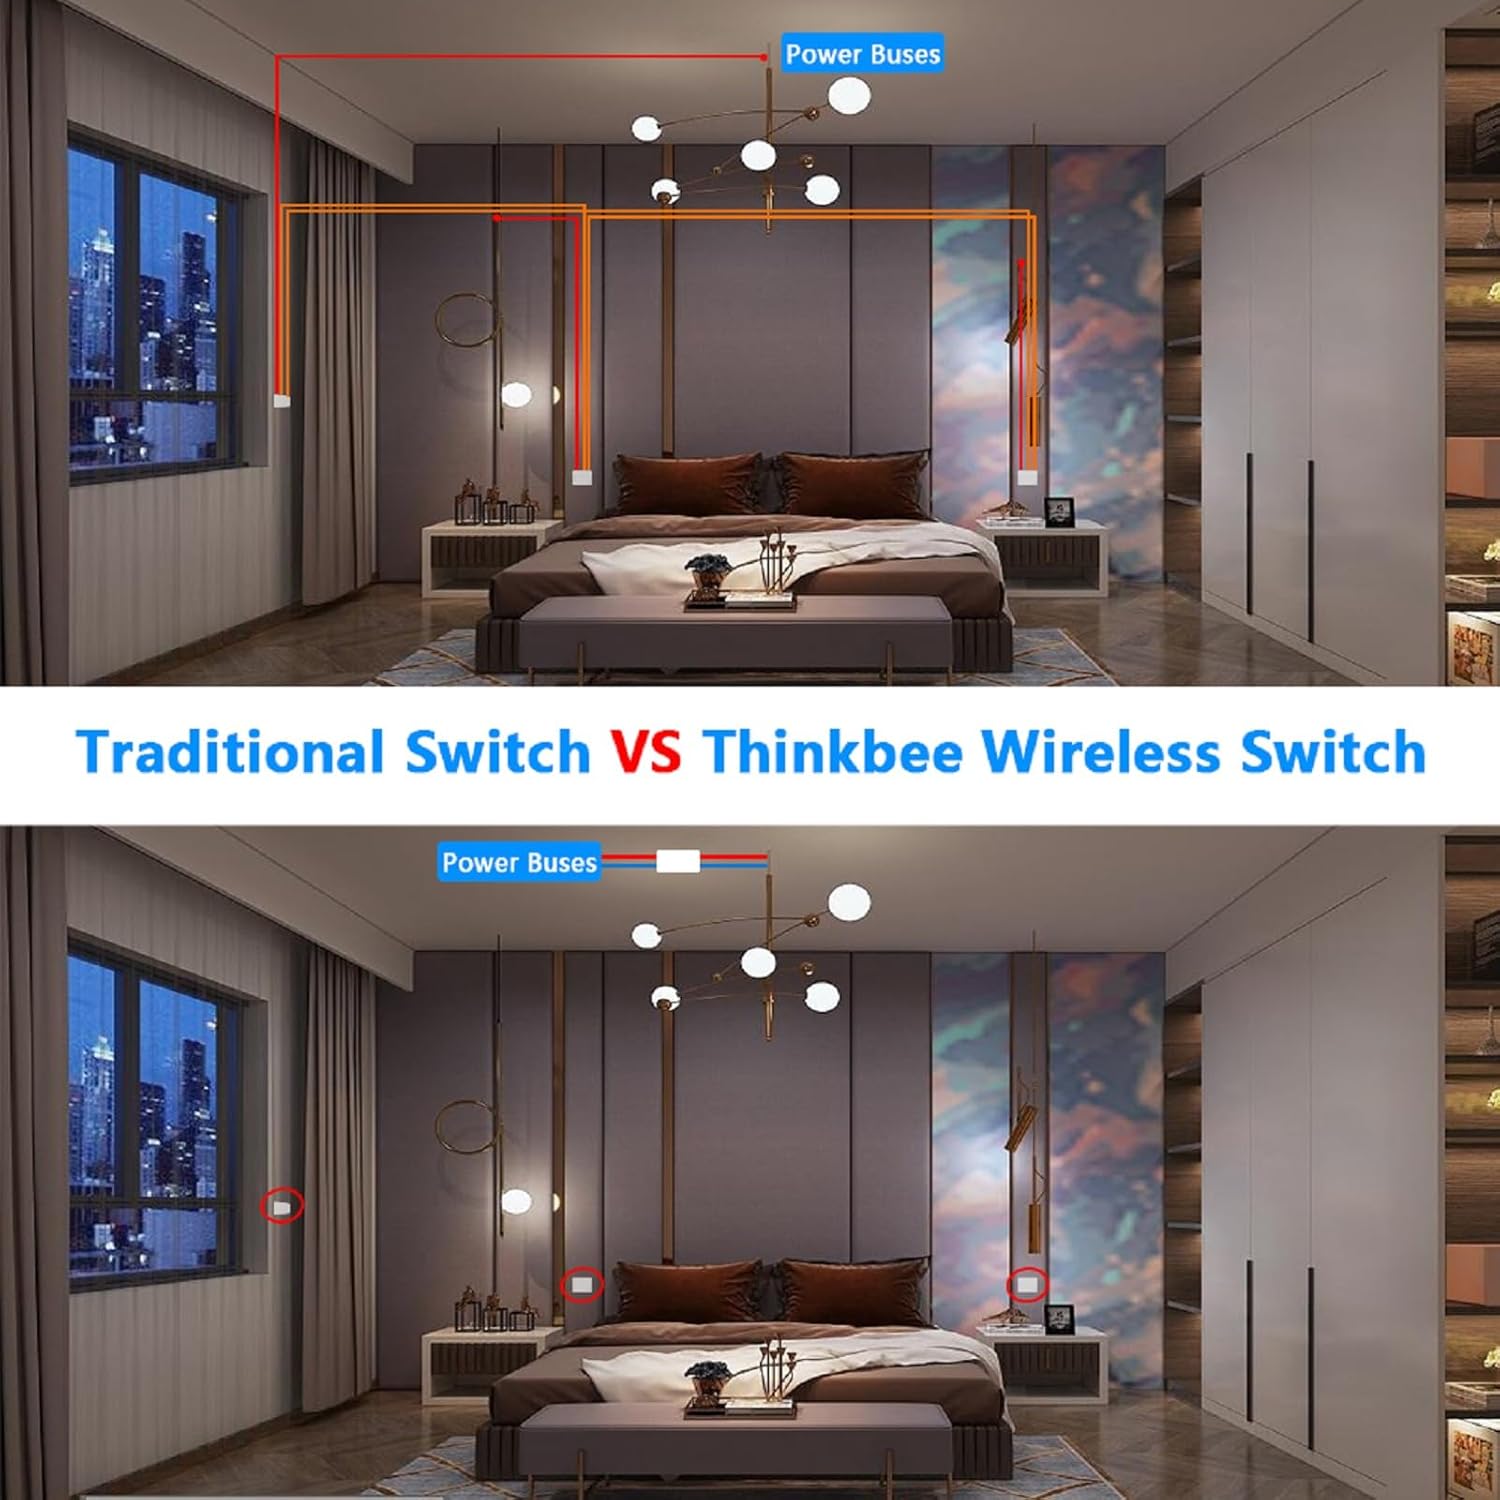
Image: Visual guide for the pairing process and examples of one switch controlling one lamp, or multiple switches controlling one lamp.
4.3 Mounting the Wireless Switch Panel
The wireless switch panel can be mounted in two ways:
- Montaggio adesivo: Use the provided double-sided adhesive stickers to attach the switch panel to any clean, flat surface.
- Uso portatile: The switch panel can also be used as a portable remote control, allowing you to carry it and control lights from different locations within range.

Immagine: Examples of the wireless switch being used as a portable remote and mounted on a wall.
5. Istruzioni per l'uso
Once installed and paired, operating the Thinkbee Wireless Light Switch is straightforward:
- Accendi / spegni: Simply press the switch panel to toggle the connected light fixture ON or OFF.
- Multicontrollo: If you have paired multiple switch panels to one receiver, any of the paired switches can control the light.
- Soft Night Light Effect: The switch panel features a soft night light effect, making it easy to locate in the dark and sleep-friendly.
6. Manutenzione
- Pulizia: Wipe the switch panel and receiver with a soft, dry cloth. Do not use abrasive cleaners or solvents.
- Battery Replacement (Wireless Switch Panel): The wireless switch panel is powered by a 3V CR2032 lithium battery. While designed for a long lifespan (approximately 10 years), if the switch becomes unresponsive, the battery may need replacement. Carefully pry open the switch unit to access and replace the battery.
- Receiver Longevity: The receiver is designed for a long operational life of approximately 400,000 cycles.
7. Risoluzione Dei Problemi
- La luce non si accende/spegne:
- Assicurarsi che il ricevitore sia cablato correttamente e riceva alimentazione.
- Verify that the switch panel is successfully paired with the receiver. Repeat the pairing process if necessary.
- Check the battery in the wireless switch panel. Replace if depleted.
- Ensure the light bulb or fixture is functional.
- Portata wireless ridotta:
- Ensure there are no major metal obstructions between the switch and receiver.
- Relocate the switch panel closer to the receiver to test if range is the issue.
- Interference from other wireless devices might affect performance.
- Receiver Indicator Light Not Blinking During Pairing:
- Verificare che il ricevitore sia acceso.
- Press and hold the pairing button firmly for the required 2 seconds.
8. Specifiche
Pannello interruttori wireless
- Grado di impermeabilità: Grado di protezione IP66
- Dimensioni: 8.6 x 8.6 x 1.1 cm (3.35 x 3.35 x 0.43 pollici)
- Temperatura di lavoro: da -40°C a +70°C
- Modello della batteria: 3V CR2032 (incluso)
- Switch Button Lifespan: 600,000 volte
Ricevitore
- Voltage: CA 80-275 V
- Carico misto: Approximately 1000W (LED)
- Carico resistivo: Circa 1800 W
- Dimensioni: 3.9 x 2.3 x 2.2 cm (1.54 x 0.91 x 0.87 pollici)
- Temperatura di lavoro: da -25°C a +65°C
- Receiver Lifespan: 400,000 volte
Common Attributes
- Fireproof Level: UL94-V0
- Frequenza di lavoro: 433.932 +/- 75 MHz
- Wireless Remote Control Distance: 400M (1969ft) outdoor, 100M (130ft) indoor (through walls)
- Valutazione attuale: 10 Amps
- Tipo di circuito: 3 vie
- Tipo di connettore: Senza fili
9. Garanzia e supporto
Thinkbee provides a Garanzia di 36 mesi for this product, ensuring peace of mind regarding its quality and performance. For any questions, technical assistance, or warranty claims, please contact Thinkbee customer service. You can also find helpful installation videos by searching "How to install Thinkbee Wireless Light Switch and Receiver Kit?" on YouTube for additional visual guidance.