Comgrow Ender-3S1 Plus
Creality Ender 3 S1 Plus 3D Printer User Manual
Model: Ender-3S1 Plus
Prodotto finitoview
The Creality Ender 3 S1 Plus is a high-precision 3D printer designed for both beginners and experienced users. It features a full-metal Sprite Direct Extruder, CR Touch auto-leveling, and a large build volume, ensuring stable and high-quality prints.

Figure 1: Creality Ender 3 S1 Plus 3D Printer.
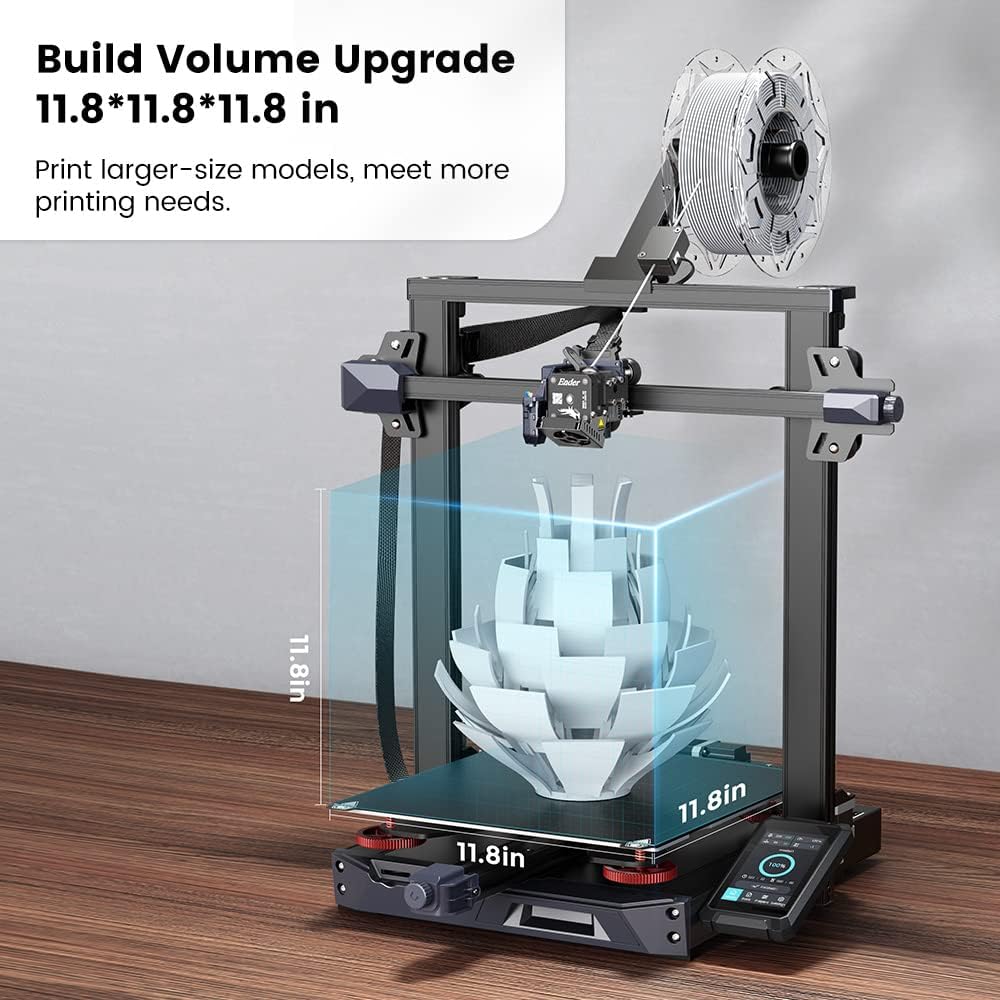
Figure 2: The Ender 3 S1 Plus offers an expanded build volume of 11.8 x 11.8 x 11.8 inches (300x300x300 mm), allowing for larger model prints.
Impostare
1. Disimballaggio e assemblaggio iniziale
The Ender 3 S1 Plus comes 96% pre-installed, making assembly quick and straightforward. Follow the steps below to set up your printer.

Figure 3: Quick assembly guide for the Ender 3 S1 Plus.
Video 1: Official unboxing and assembly guide for the Ender 3 S1 Plus 3D Printer. This video demonstrates the step-by-step process of setting up the printer from the box, including connecting components and preparing for first use.
2. Collegamento di alimentazione e volumetage Selezione
Before powering on, ensure the correct input voltage (230V/115V) is selected on the power supply unit to avoid damage to the machine. Plug in the power cord and turn on the switch.
3. Caricamento del filamento
The printer features a "Sprite" Dual-gear Direct Extruder for smooth filament feeding. Ensure the filament is properly trimmed and fed through the filament sensor and into the extruder.

Figure 4: The "Sprite" Dual-gear Direct Extruder ensures reliable filament feeding.
Istruzioni per l'uso
1. CR Touch Auto-leveling
The CR Touch auto-leveling system provides quick and precise bed leveling with 16-point automatic height compensation. This significantly simplifies the leveling process.

Figure 5: The CR Touch auto-leveling system maps the print bed for optimal first layer adhesion.
Video 2: Demonstration of the Ender-3 S1 Plus auto-leveling feature. This video shows how the CR Touch system automatically probes the print bed to ensure a perfectly level surface for printing.
2. Interfaccia touch screen
The 4.3-inch touch screen provides a user-friendly interface with support for 9 languages. It features automatic dimming for energy saving.

Figure 6: User-friendly 4.3-inch touch screen for easy control.
3. Avvio di una stampa
Insert your SD card with the prepared G-code file into the printer. Navigate through the touch screen menu to select your desired model and initiate the print. Ensure the print bed and nozzle are at the correct temperatures for your chosen filament type.
Manutenzione
1. Print Bed Maintenance
The magnetic build plate allows for easy removal of prints by simply flexing the plate. Regularly clean the print surface with isopropyl alcohol to ensure optimal adhesion for future prints.
2. Pulizia degli ugelli
Periodically clean the nozzle to prevent clogs and ensure consistent extrusion. Use the provided nozzle cleaner or a thin needle to clear any blockages while the nozzle is heated.
3. Z-axis Lubrication
For optimal performance, lubricate the Z-axis lead screws periodically with a small amount of machine grease to ensure smooth and precise vertical movement.
Risoluzione dei problemi
Problemi comuni e soluzioni:
- Scarsa adesione del primo strato: Ensure the print bed is clean and properly leveled using the CR Touch auto-leveling function. Adjust the Z-offset if necessary.
- Intasamento del filamento: Check for proper filament loading and ensure the nozzle temperature is appropriate for the filament type. Use the nozzle cleaner to remove any blockages.
- Problemi di qualità di stampa (ad esempio, stringing, spostamenti di livello): Verify filament quality, check print speed and retraction settings in your slicer software, and ensure all belts and screws are properly tightened.
- Temperature Errors: Ensure all thermistor and heater connections are secure. If issues persist, consult the detailed user guide for specific error codes.
For more detailed troubleshooting steps and advanced solutions, please refer to the official Guida per l'utente (PDF).
Specifiche
| Caratteristica | Dettaglio |
|---|---|
| Numero di modello | Ender-3S1 Plus |
| Dimensioni del prodotto | 11.81"D x 11.81"W x 11.81"H (300x300x300 mm build volume) |
| Peso dell'articolo | 29.8 libbre |
| Materiale | Metal, PLA |
| Colore | Nero, Grigio |
| Tipo di estrusore | Full-metal Sprite Direct Extruder |
| Autolivellamento | CR Touch (16-point automatic leveling) |
| Asse Z | Synchronized Dual Z-axis Screw |
| Display | Touchscreen da 4.3 pollici |
| Produttore | Crealità 3D |

Figure 7: Physical dimensions of the Ender 3 S1 Plus.

Figure 8: Synchronized Dual Z-axis for enhanced stability and precision.
Garanzia e supporto
This product is manufactured by Creality 3D and sold by Comgrow. For any technical assistance, warranty claims, or support inquiries, please contact Comgrow directly via Amazon message. Their professional technical staff are available to provide solutions for 3D printing issues.

Figure 9: Technical support is available for assistance.
Ask a question about this manual
Ask about setup, troubleshooting, compatibility, parts, safety, or missing instructions. Manuals+ will review the question and use this page’s manual context to help answer it.