
Crystorama 2244-BF
Manuale di istruzioni per il lampadario a lanterna forgiata nera a 4 luci Crystorama Libby Langdon Sylvan
Marca: Crystorama | Modello: 2244-B.F.
1. Introduzione
This manual provides detailed instructions for the safe installation, operation, and maintenance of your Crystorama Libby Langdon Sylvan 4 Light Black Forged Lantern Chandelier. Please read all instructions carefully before beginning installation and retain this manual for future reference. Proper installation by a qualified electrician is recommended.
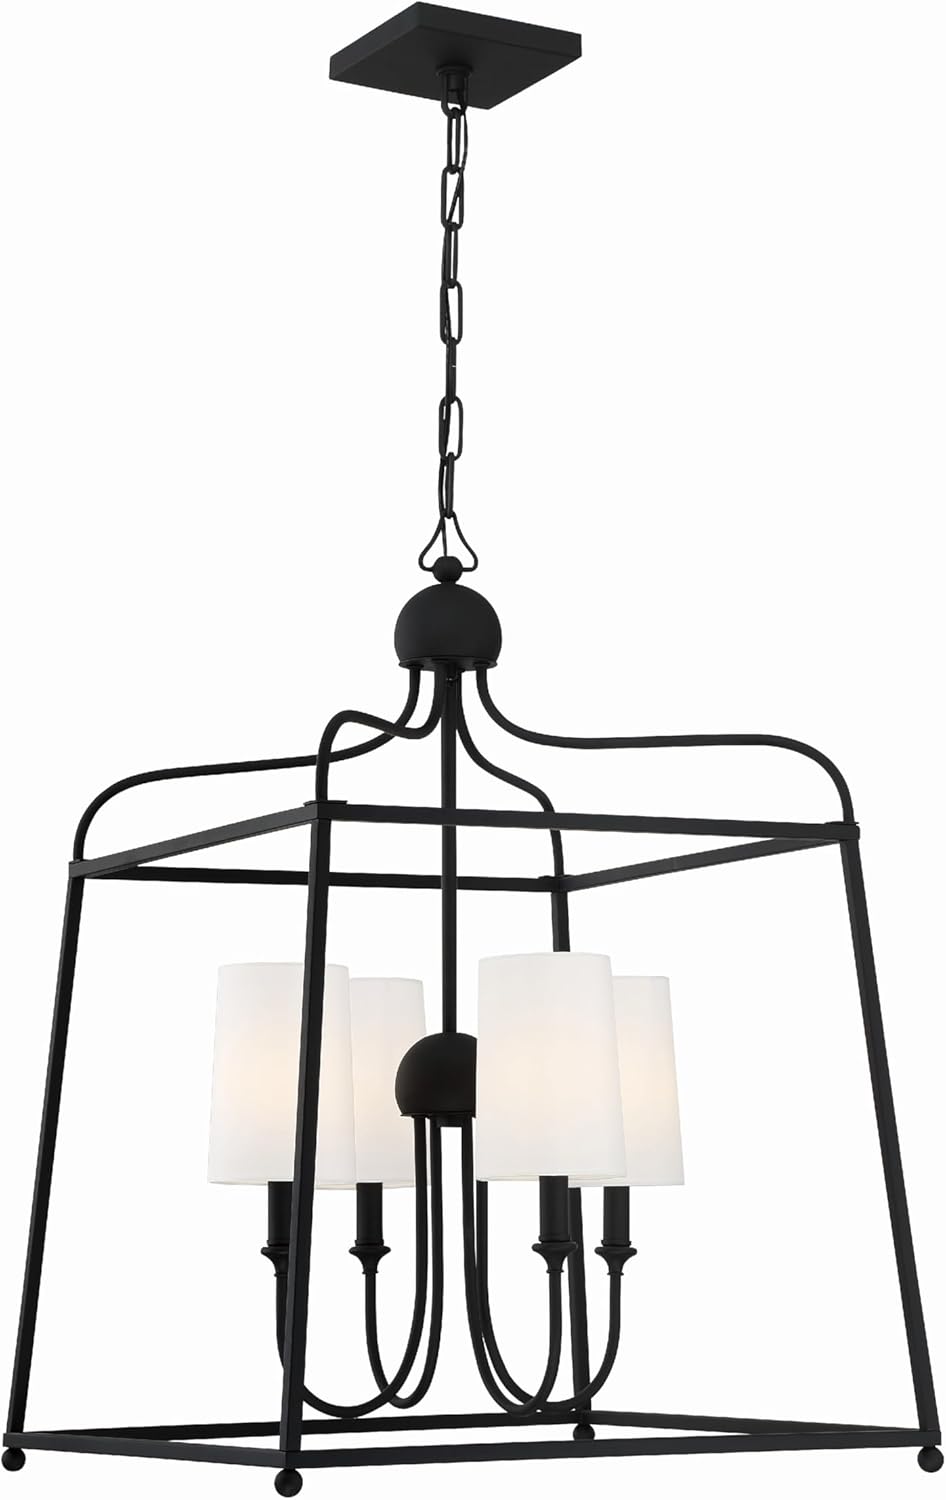
Immagine 1.1: anteriore view of the Crystorama Libby Langdon Sylvan 4 Light Black Forged Lantern Chandelier with shades.
2. Informazioni importanti sulla sicurezza
Per ridurre il rischio di incendi, scosse elettriche o lesioni personali, seguire sempre queste precauzioni di base:
- Scollegare l'alimentazione: Prima di iniziare l'installazione o di eseguire qualsiasi intervento di manutenzione, disattivare sempre l'alimentazione elettrica tramite il fusibile principale o la scatola dell'interruttore automatico.
- Elettricista qualificato: Installation should be performed by a qualified, licensed electrician.
- Messa a terra: Assicurarsi che l'apparecchio sia correttamente collegato a terra per evitare potenziali scosse elettriche.
- Cablaggio: Tutti i collegamenti elettrici devono essere effettuati in conformità con i codici elettrici locali e nazionali.
- Lampadina Wattage: Non superare il limite massimo di wattage specified for the bulbs. This fixture is designed for E12 base bulbs, up to 60 watts each.
- Gestione: Handle the fixture and glass components with care to prevent breakage or injury.
- Elencato UL: Questo prodotto è certificato UL, il che ne garantisce la conformità a specifici standard di sicurezza.
3. Specifiche del prodotto
| Caratteristica | Specificazione |
|---|---|
| Marca | Cristalloma |
| Nome del modello | 2244-B.F. |
| Colore | Forgiato nero |
| Materiale | Alloy Steel (Frame), Glass (Shade) |
| Modulo lampada | Lampadario |
| Tipologia di camera | Living Room (General Purpose) |
| Dimensioni del prodotto | 21.5 cm L x 21.5 cm P x 29.75 cm A |
| Peso dell'articolo | 6 libbre |
| Uso interno/esterno | Al chiuso |
| Fonte di alimentazione | Cablato |
| Tipo di installazione | Montaggio semi-a filo |
| Tipo di sorgente luminosa | LED Compatible (Bulbs not included) |
| Numero di sorgenti luminose | 4 |
| Voltage | 120 Volt |
| Cosatage (Max per bulb) | 60 Watt |
| Base della lampadina | E12 |
| Assemblaggio richiesto | SÌ |
| Specifica Met | UL |
| Codice UPC | 633779048180 |

Image 3.1: Dimensional drawing of the chandelier, showing 21.5" width, 29.75" height, and 72" chain length.
4. Contenuto della confezione
Carefully unpack your new chandelier and lay out all parts on a clean, soft surface. Ensure all components are present before discarding packaging materials.
- Chandelier Frame (Black Forged)
- 4 Glass Shades (White Enclosed)
- Mounting Hardware Kit (Canopy, Mounting Plate, Screws, Wire Nuts)
- Chain and Wiring (Pre-attached or separate for assembly)
- Manuale di istruzioni
Nota: Bulbs are not included with this fixture. Four (4) E12 base bulbs, up to 60 watts each, are required.

Immagine 4.1: Primo piano view of the four E12 bulb sockets and white enclosed glass shades.
5. Configurazione e installazione
This chandelier is designed for semi-flush mount installation. Professional installation by a licensed electrician is strongly recommended.
Strumenti e materiali necessari (non inclusi):
- Cacciavite con testa Phillips
- Cacciavite a testa piatta
- Spellafili
- Pinze
- Nastro elettrico
- Occhiali di sicurezza
- Scala
- E12 Base Bulbs (4, max 60W each)
Fasi di installazione:
- Spegnimento dell'alimentazione: Locate the circuit breaker that supplies power to the installation location and turn it off. Verify power is off using a voltagetester.
- Preparazione del montaggio: Fissare la piastra di montaggio alla scatola di derivazione nel soffitto utilizzando le viti fornite. Assicurarsi che sia fissata saldamente.
- Regolare la lunghezza della catena (se applicabile): If your fixture includes a chain, determine the desired hanging height and adjust the chain length by removing links as needed. Feed the electrical wires through the chain and canopy.
- Effettuare i collegamenti elettrici: Connect the fixture's wires to the house wiring.
- Connect the bare copper (ground) wire from the fixture to the green or bare copper ground wire from the junction box.
- Connect the black (hot) wire from the fixture to the black (hot) wire from the junction box.
- Connect the white (neutral) wire from the fixture to the white (neutral) wire from the junction box.
- Tettoia sicura: Spingere con cautela la calotta verso il soffitto, coprendo la scatola di giunzione, e fissarla con le viti o i dadi forniti.
- Installa le lampadine: Screw four (4) E12 base bulbs (not included) into the sockets. Do not exceed 60 watts per bulb.
- Fissare le tende: Carefully place the white enclosed glass shades over each bulb socket.
- Ripristina alimentazione: Riattivare la corrente tramite l'interruttore automatico.

Immagine 5.1: Angolata view of the chandelier, showcasing its black forged frame and white shades.
6. Istruzioni per l'uso
Once installed, your Crystorama Libby Langdon Sylvan Chandelier operates via a standard wall switch connected to the fixture's electrical circuit. Simply toggle the wall switch to turn the chandelier on or off.
This fixture is compatible with dimmable E12 LED bulbs if connected to a compatible dimmer switch (sold separately).
7. Cura e manutenzione
Regular cleaning and proper care will help maintain the appearance and functionality of your chandelier.
Pulizia:
- Scollegare sempre l'alimentazione: Before cleaning, ensure the power supply to the fixture is turned off at the circuit breaker.
- Telaio: Wipe the black forged metal frame with a soft, dry, or slightly damp cloth. Avoid abrasive cleaners, solvents, or polishes, as these can damage the finish.
- Paralumi in vetro: The white enclosed glass shades can be gently wiped with a soft, damp cloth. For stubborn marks, a mild glass cleaner can be used sparingly on the cloth, not directly on the glass. Ensure shades are completely dry before restoring power.
Sostituzione della lampadina:
- Spegnimento dell'alimentazione: Always turn off the power at the circuit breaker before replacing bulbs.
- Consenti raffreddamento: Lasciare raffreddare completamente le lampadine prima di toccarle.
- Sostituire: Unscrew the old bulb and screw in a new E12 base bulb. Ensure the replacement bulb does not exceed 60 watts.
8. Risoluzione Dei Problemi
If you experience issues with your chandelier, consult the following common problems and solutions:
| Problema | Possibile causa | Soluzione |
|---|---|---|
| La luce non si accende | Nessuna alimentazione all'apparecchio Collegamento del filo allentato Lampadina difettosa | Controllare l'interruttore automatico e l'interruttore a parete Verify all wire connections are secure (with power off) Sostituire la lampadina con una nuova |
| La luce tremola | Lampadina allentata Incorrect bulb type for dimmer Collegamento del filo allentato | Stringere la lampadina Ensure dimmable bulbs are used with a compatible dimmer Check wire connections (with power off) |
| Rumore di ronzio | Interruttore dimmer incompatibile Componenti sciolti | Replace dimmer with an LED-compatible model Assicurarsi che tutte le parti siano fissate saldamente |
If the issue persists after attempting these solutions, please contact Crystorama customer support or a qualified electrician.
9. Garanzia e supporto
This Crystorama Libby Langdon Sylvan Chandelier is covered by a manufacturer's warranty. For specific warranty details, claims, or technical support, please refer to the warranty card included with your purchase or visit the official Crystorama websito.
For additional assistance, you may contact Crystorama customer service directly.
Ask a question about this manual
Ask about setup, troubleshooting, compatibility, parts, safety, or missing instructions. Manuals+ will review the question and use this page’s manual context to help answer it.