
1. Introduzione
The Ricoh M 320 is a high-productivity, low-maintenance multifunction device designed for printing, copying, and scanning in workspaces with limited space. This system offers easy monitoring and management of print history, device settings, and network protocols. Featuring a 5 GHz Wi-Fi interface, it ensures a stable wireless connection by reducing bottlenecks. Its compact design makes it suitable for various office environments. Setup and operation are designed to be straightforward. The integrated scan and copy functions facilitate easy digitization and sharing of documents. The all-in-one toner cartridge is high-capacity and simple to replace. Full support is provided for Windows, Mac, and Linux operating systems, with both 2.4 GHz and 5 GHz WLAN capabilities.
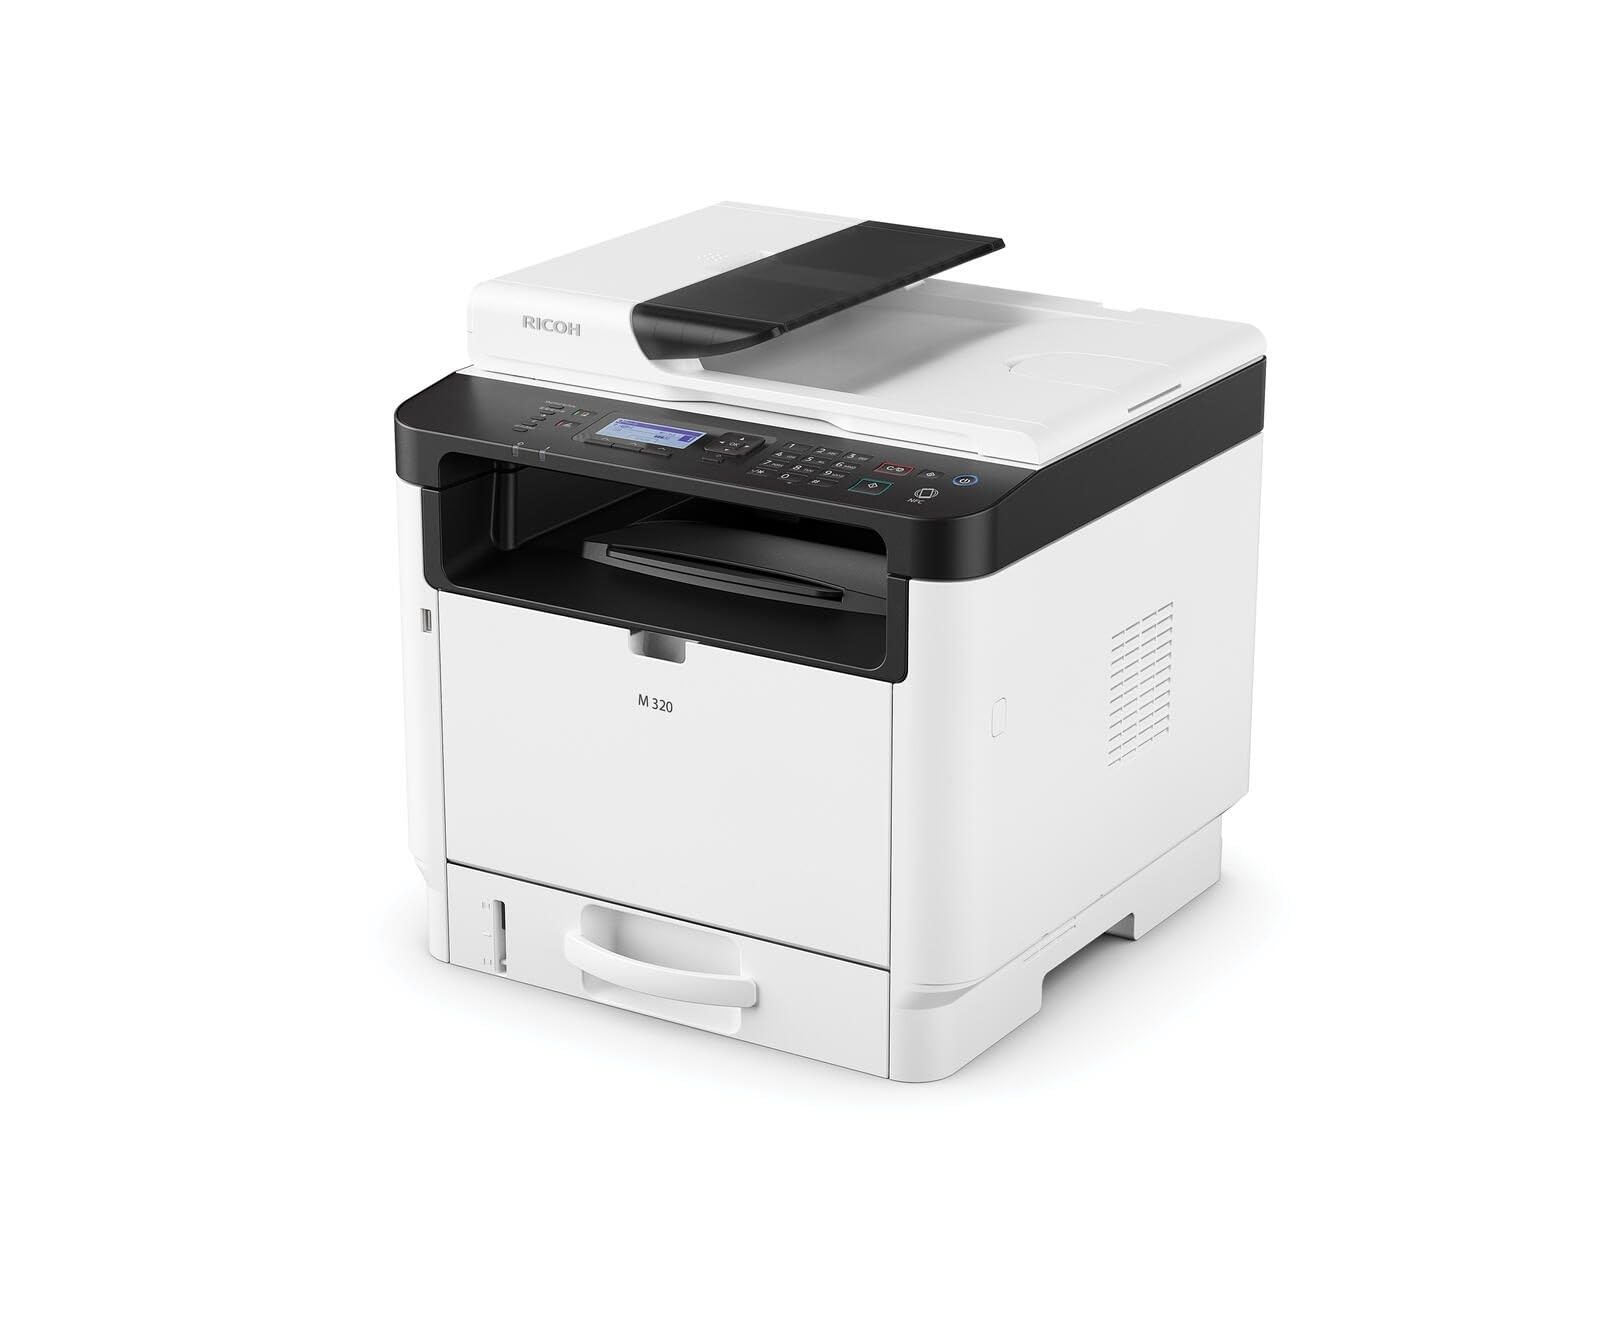
Figure 1: Ricoh M 320 Multifunction System. This image displays the compact design of the Ricoh M 320, highlighting its main components including the paper tray and control panel.
1.1 Cosa c'è nella scatola
Verificare che tutti gli articoli siano presenti nel pacco:
- Ricoh M 320 Multifunction System
- Cavo di alimentazione
- Cartuccia toner iniziale
- Guida all'installazione
- Software CD (may vary by region)
2. Impostazione
2.1 Disimballaggio e posizionamento
- Rimuovere la stampante dalla confezione.
- Rimuovere tutti i nastri protettivi e i materiali di imballaggio dall'esterno e dall'interno della stampante.
- Posizionare la stampante su una superficie stabile e piana, con adeguata ventilazione. Assicurarsi che vi sia spazio sufficiente attorno alla stampante per il funzionamento e la manutenzione.
2.2 Collegamento di alimentazione
- Collegare il cavo di alimentazione all'ingresso di alimentazione della stampante.
- Collegare l'altra estremità del cavo di alimentazione a una presa elettrica dotata di messa a terra.
- Premere il pulsante di alimentazione per accendere la stampante.
2.3 Installazione della cartuccia del toner
- Aprire il coperchio anteriore della stampante.
- Carefully remove the new toner cartridge from its packaging and gently shake it horizontally several times to distribute the toner evenly.
- Inserire la cartuccia del toner nella stampante finché non scatta in posizione.
- Chiudere il coperchio anteriore.
2.4 Caricamento carta
- Estrarre il vassoio della carta.
- Adjust the paper guides to match the size of the paper you are loading (up to A4).
- Caricare la risma di carta nel vassoio, assicurandosi che sia piatta e che non superi la linea di riempimento massimo.
- Spingere delicatamente il vassoio della carta nella stampante.
2.5 Connessione di rete
The Ricoh M 320 supports both Ethernet and Wi-Fi connectivity.
Connessione Ethernet:
- Collegare un cavo Ethernet dal router di rete o passare alla porta Ethernet sul retro della stampante.
- The printer will automatically attempt to obtain an IP address.
Wi-Fi Connection (2.4 GHz / 5 GHz):
- On the printer's 4-line LCD display, navigate to the Network Settings menu.
- Select "WLAN Setup" or "Wi-Fi Setup".
- Scegli la tua rete Wi-Fi dall'elenco delle reti disponibili.
- Enter the Wi-Fi password (WPA/WPA2 key) using the control panel.
- Confirm the settings. The printer will connect to the network.
2.6 Installazione di driver e software
To use all functions of the Ricoh M 320, install the necessary drivers and software on your computer.
- Windows/Mac/Linux: Insert the provided software CD into your computer's CD/DVD drive and follow the on-screen instructions. Alternatively, download the latest drivers and utilities from the official Ricoh support websito.
- Dispositivi mobili (iOS/Android): Download the Ricoh Smart Device Connector app from your device's app store to enable mobile printing and scanning. The printer supports AirPrint and Mopria.
3. Utilizzo della stampante
3.1 Stampa dei documenti
- Apri il documento che desideri stampare sul tuo computer o dispositivo mobile.
- Selezionare "Stampa" dal menu dell'applicazione (ad esempio, File > Stampa).
- Choose "Ricoh M 320" as your printer.
- Adjust print settings such as number of copies, paper size, and duplex printing (automatic duplex is supported).
- Fare clic su "Stampa".
The printer offers high-quality black and white printing at 1200 x 1200 dpi. Maximum print speed for black and white is 13 pages per minute, and for color is 4.5 pages per minute.
3.2 Copia dei documenti
- Place the document face-down on the scanner glass or face-up in the Automatic Document Feeder (ADF). The ADF supports up to 35 sheets.
- Sul pannello di controllo della stampante, selezionare "Copia".
- Use the navigation buttons to adjust settings such as number of copies (up to 35 per run), copy quality, and zoom.
- Premere il pulsante "Start" per iniziare la copia.
3.3 Scansione di documenti
Documents can be scanned to a computer or mobile device.
- Posizionare il documento sul vetro dello scanner o nell'ADF.
- On your computer, open the scanning software (e.g., Ricoh Scan Utility) or use the "Scan" function from the Ricoh Smart Device Connector app on your mobile device.
- Select "Ricoh M 320" as the scanner.
- Choose scan settings such as resolution (up to 1200 x 1200 dpi), color mode, and destination folder.
- Avviare la scansione.
3.4 Mobile Printing and Scanning
The Ricoh M 320 supports mobile printing and scanning via AirPrint, Mopria, and the Ricoh Smart Device Connector app.
- AirPrint (iOS): Ensure your iOS device is connected to the same Wi-Fi network as the printer. Open the document or photo, tap the share icon, and select "Print". Choose the Ricoh M 320.
- Mopria (Android): Ensure your Android device has the Mopria Print Service installed and is connected to the same Wi-Fi network. Open the document or photo, tap the menu icon, and select "Print". Choose the Ricoh M 320.
- Ricoh Smart Device Connector App: Use the dedicated app for advanced mobile printing, scanning, and device management features.
4. Manutenzione
4.1 Sostituzione della cartuccia del toner
When the toner level is low, a message will appear on the printer's display. Use only genuine Ricoh standard laser toner cartridges.
- Assicurarsi che la stampante sia accesa.
- Aprire il coperchio anteriore della stampante.
- Carefully pull out the used toner cartridge.
- Estrarre la nuova cartuccia del toner dalla confezione e agitarla delicatamente in senso orizzontale più volte.
- Inserire la nuova cartuccia del toner nella stampante finché non scatta in posizione.
- Close the front cover. The printer will calibrate the new cartridge.
4.2 Pulizia della stampante
Una pulizia regolare aiuta a mantenere la qualità di stampa e prolunga la durata della stampante.
- Esterno: Pulire le superfici esterne con un panno morbido, damppanno privo di lanugine. Non utilizzare detergenti abrasivi o solventi.
- Vetro dello scanner: Gently clean the scanner glass with a soft, lint-free cloth moistened with glass cleaner. Ensure no residue remains.
- Interno: Periodically open the front cover and gently remove any paper dust or toner residue with a dry, lint-free cloth. Avoid touching the drum unit.
5. Risoluzione Dei Problemi
This section addresses common issues you might encounter with your Ricoh M 320.
5.1 Problemi comuni e soluzioni
- La stampante non risponde:
- Verificare che la stampante sia accesa e collegata alla presa di corrente.
- Verify network connectivity (Ethernet cable or Wi-Fi signal).
- Riavviare la stampante e il computer/dispositivo mobile.
- Assicurarsi che sia installato e selezionato il driver della stampante corretto.
- Inceppamenti della carta:
- Spegnere la stampante e scollegarla.
- Aprire tutti i coperchi e rimuovere con cautela la carta inceppata, tirandola nella direzione del percorso della carta.
- Assicurarsi che la carta sia caricata correttamente e che non sia piegata o danneggiata.
- Close all covers and restart the printer.
- Scarsa qualità di stampa:
- Controllare il livello della cartuccia del toner e sostituirla se è basso.
- Assicuratevi di utilizzare cartucce di toner Ricoh originali.
- Clean the interior of the printer, especially around the drum unit (refer to maintenance section).
- Regola le impostazioni della qualità di stampa nel driver della stampante.
- Scanner non funzionante:
- Ensure the printer is connected to the network and recognized by your computer/mobile device.
- Restart the scanning application and the printer.
- Verify that the scanner glass and ADF are clean.
- Problemi di connessione Wi-Fi:
- Assicurarsi che la password Wi-Fi sia stata inserita correttamente.
- Check if the printer is within range of your Wi-Fi router.
- Restart your Wi-Fi router and the printer.
- Try connecting to the 2.4 GHz band if experiencing issues with 5 GHz, or vice-versa.
For more detailed troubleshooting, refer to the comprehensive user manual available on the Ricoh support websito.
6. Specifiche
| Caratteristica | Specificazione |
|---|---|
| Nome del modello | M 320 (9P01749) |
| Funzioni | Print, Copy, Scan (3-in-1 Multifunction) |
| Tecnologia di stampa | Laser |
| Output di stampa | Color (Note: Primarily a mono laser printer, color output refers to specific elements or capabilities) |
| Risoluzione di stampa massima (B&N) | 1200 x 1200 dpi |
| Risoluzione massima di stampa (colore) | 1200 x 1200 dpi |
| Velocità di stampa massima (B&N) | 13 pagine al minuto |
| Velocità massima di stampa (colore) | 4.5 pagine al minuto |
| Tempo di uscita della prima pagina | 4.62 secondi |
| Stampa fronte-retro | Automatico |
| Tipo di scanner | Alimentatore automatico di documenti (ADF) |
| Capacità dell'ADF | 35 fogli |
| Risoluzione scanner | 1200 x 1200 dpi |
| Max Copies per Run | 35 |
| Connettività | Ethernet, Wi-Fi (2.4 GHz / 5 GHz) |
| Supporto per la stampa mobile | AirPrint, Mopria, Ricoh Smart Device Connector App |
| Sistemi operativi compatibili | Windows, Mac, Linux, iOS, Android |
| Dimensioni massime della carta | A4 |
| Capacità del foglio di input | 35 fogli |
| Capacità di uscita del foglio | 35 fogli |
| Tipo di visualizzazione | LCD a 4 righe |
| Cartuccia compatibile | Ricoh standard laser toner cartridges |
| Peso dell'articolo | 21 chilogrammi |
7. Garanzia e supporto
7.1 Garanzia limitata
The Ricoh M 320 Multifunction System comes with a limited warranty. Please refer to the warranty documentation included with your product or visit the official Ricoh webPer termini e condizioni dettagliati, inclusi il periodo di copertura e le procedure di assistenza, consultare il sito. Conservare la prova d'acquisto per eventuali reclami in garanzia.
7.2 Assistenza clienti
For technical assistance, product inquiries, or service requests, please contact Ricoh customer support.
- Supporto online: Visita il supporto ufficiale Ricoh websito per FAQ, download di driver e manuali digitali.
- Supporto telefonico: Contact numbers for your region can be found on the Ricoh websito.
When contacting support, please have your product model (M 320) and serial number ready.